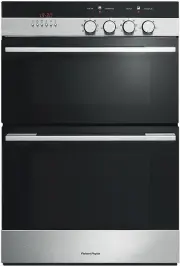
Fisher & Paykel OB24SD11PLX1 - Manuals
Fisher & Paykel OB24SD11PLX1 Oven – User Manual in PDF format online.
Manuals:
User Manual Fisher & Paykel OB24SD11PLX1


Summary
3 CONTENTS Safety and warnings 4 First use 9 Menu 11Quick start functions 12 Extra functions 13 Setting a function 14 Conditioning the oven 16 Wi-Fi connection and remote mode 17 Cooking options 19 Temperature sensor (some models only) 21 Sabbath Mode 23 Oven shelves 25 Care and cleaning 26 Side rac...
4 SAFETY AND WARNINGS WARNING! Electric Shock Hazard Failure to follow this advice may result in electrical shock or death. • Turn the oven off at the wall before replacing the oven lamp. • Before carrying out any work on the electrical section of the appliance, it must be disconnected from the main...
5 SAFETY AND WARNINGS WARNING! Cut Hazard Failure to use caution could result in injury. • Take care: some edges are sharp. WARNING! Hot Surface Hazard Failure to follow this advice could result in burns and scalds. • To avoid burns and scalds, keep children away from this appliance. • Surfaces of t...
Fisher & Paykel Ovens Manuals
-
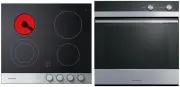 Fisher & Paykel CE604CBX1OB60SC5CEX1
User Manual
Fisher & Paykel CE604CBX1OB60SC5CEX1
User Manual
-
 Fisher & Paykel CG604CWCX1OB60SC5CEX
User Manual
Fisher & Paykel CG604CWCX1OB60SC5CEX
User Manual
-
Fisher & Paykel OB24SD16PLX1
User Manual
-
 Fisher & Paykel OB24SDPTDX2
User Manual
Fisher & Paykel OB24SDPTDX2
User Manual
-
 Fisher & Paykel OB30DDPTDX2
User Manual
Fisher & Paykel OB30DDPTDX2
User Manual
-
 Fisher & Paykel OB30DPPTX1
User Manual
Fisher & Paykel OB30DPPTX1
User Manual
-
 Fisher & Paykel OB30SCEPX3N
User Manual
Fisher & Paykel OB30SCEPX3N
User Manual
-
 Fisher & Paykel OB30SD14PLX1
User Manual
Fisher & Paykel OB30SD14PLX1
User Manual
-
 Fisher & Paykel OB30SD17PLX1
User Manual
Fisher & Paykel OB30SD17PLX1
User Manual
-
Fisher & Paykel OB30SDPTB1
User Manual
-
Fisher & Paykel OB30SDPTDB1
User Manual
-
Fisher & Paykel OB30SDPTDX2
User Manual
-
Fisher & Paykel OB30SPPTX1
User Manual
-
 Fisher & Paykel OB60B77CEW3
User Manual
Fisher & Paykel OB60B77CEW3
User Manual
-
 Fisher & Paykel OB60B77CEX3
User Manual
Fisher & Paykel OB60B77CEX3
User Manual
-
 Fisher & Paykel OB60B77DEX3
User Manual
Fisher & Paykel OB60B77DEX3
User Manual
-
 Fisher & Paykel OB60DDEX4
User Manual
Fisher & Paykel OB60DDEX4
User Manual
-
 Fisher & Paykel OB60NC9DEX1
User Manual
Fisher & Paykel OB60NC9DEX1
User Manual
-
 Fisher & Paykel OB60SC5CEW1
User Manual
Fisher & Paykel OB60SC5CEW1
User Manual
-
 Fisher & Paykel OB60SC5CEX1
User Manual
Fisher & Paykel OB60SC5CEX1
User Manual