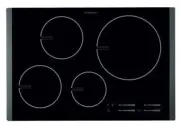
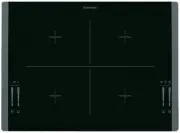
Electrolux EIV6444 - Manuals
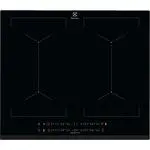
User Manual Electrolux EIV6444


Summary
WE’RE THINKING OF YOU Thank you for purchasing an Electrolux appliance. You’ve chosen a product that brings with it decades of professional experience and innovation. Ingenious and stylish, it has been designed with you in mind. So whenever you use it, you can be safe in the knowledge that you’ll ge...
for any injuries or damage that are the result of incorrect installation or usage. Always keep the instructions in a safe and accessible location for future reference. 1.1 Children and vulnerable people safety • This appliance can be used by children aged from 8 years and above and persons with redu...
• WARNING: The appliance must not be supplied through an external switching device, such as a timer, or connected to a circuit that is regularly switched on and off by a utility. • CAUTION: The cooking process has to be supervised. A short term cooking process has to be supervised continuously. • WA...
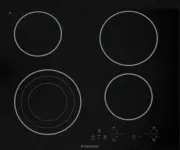
Electrolux Hobs Manuals
-
 Electrolux CIL61443C
User Manual
Electrolux CIL61443C
User Manual
-
 Electrolux EHC 320 X
User Manual
Electrolux EHC 320 X
User Manual
-
 Electrolux EHD 6671 P
User Manual
Electrolux EHD 6671 P
User Manual
-
 Electrolux EHD80170P
User Manual
Electrolux EHD80170P
User Manual
-
 Electrolux EHD90230P
User Manual
Electrolux EHD90230P
User Manual
-
 Electrolux EHE 631 X
User Manual
Electrolux EHE 631 X
User Manual
-
 Electrolux EHET66CS
User Manual
Electrolux EHET66CS
User Manual
-
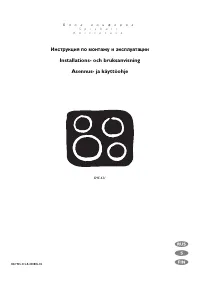
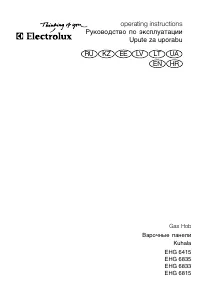 Electrolux EHG 6415
User Manual
Electrolux EHG 6415
User Manual
-
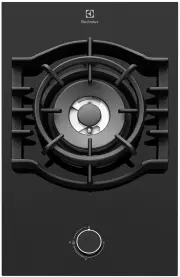
Electrolux EHG 6815 X
User Manual
-
Electrolux EHG 6833
User Manual
-
Electrolux EHG 6835 W
User Manual
-
 Electrolux EHG313BA
User Manual
Electrolux EHG313BA
User Manual
-
 Electrolux EHG643BA
User Manual
Electrolux EHG643BA
User Manual
-
 Electrolux EHG643SA
User Manual
Electrolux EHG643SA
User Manual
-
 Electrolux EHG645SA
User Manual
Electrolux EHG645SA
User Manual
-
 Electrolux EHG755SA
User Manual
Electrolux EHG755SA
User Manual
-
 Electrolux EHG953SA
User Manual
Electrolux EHG953SA
User Manual
-
 Electrolux EHG955SA
User Manual
Electrolux EHG955SA
User Manual
-
 Electrolux EHI645BA
User Manual
Electrolux EHI645BA
User Manual
-
 Electrolux EHI645BB
User Manual
Electrolux EHI645BB
User Manual