Page 2 - CHER CLIENT
CHÈRE CLIENTE, CHER CLIENT FR Découvrir les produits De Dietrich, c’est éprouver des émotions uniques. L’attrait est immédiat dès le premier regard. La qualité du design s’illustre par l’esthétique intemporelle et les finitions soignées rendant chaque objet élégant et raffiné en parfaite harmonie le...
Page 3 - TABLE DES MATIERES
2 TABLE DES MATIERES Sécurité et précautions importantes ................................................3 Installation ..........................................................................................6 Déballage .................................................................................
Page 4 - SÉCURITÉ ET PRÉCAUTIONS IMPORTANTES
3 SÉCURITÉ ET PRÉCAUTIONS IMPORTANTES Cette notice est également disponible sur le site internet de la marque.Merci de prendre connaissance de ces conseils avant d'installer et d'utiliser votreappareil. Ils ont été rédigés pour votre sécurité et celle d'autrui. Conservez cettenotice d'utilisation av...
Page 7 - INSTALLATION; BRANCHEMENT ELECTRIQUE
6 • 1 INSTALLATION 1.1 DEBALLAGE Enlevez tous les éléments de protection.Vérifiez et respectez les caractéristiquesde l’appareil figurant sur la plaquesignalétique (1.1.1) . Veuillez noter dans les cadres ci-dessous les références de service et detype norme figurant sur cette plaquepour un usage fut...
Page 8 - UTILISATION
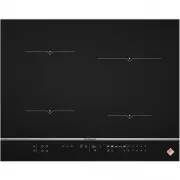
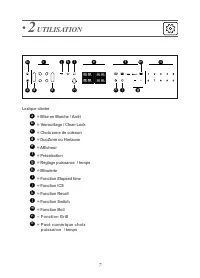
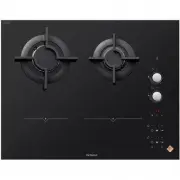
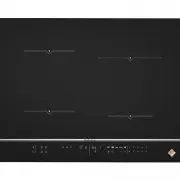
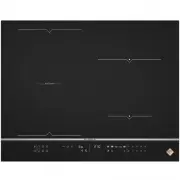
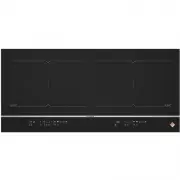
k a b c d e g h f i j l m o n d • 2 UTILISATION Lexique clavier = Mise en Marche / Arrêt = Verrouillage / Clean Lock = Choix zone de cuisson = DuoZone ou Horizone = Afficheur = Préselection = Réglage puissance / temps = Minuterie = Fonction Elapsed time = Fonction ICS = Fonction Recall = Fonction Sw...
Page 9 - GESTION DE PUISSANCE; CHOIX DU RECIPIENT
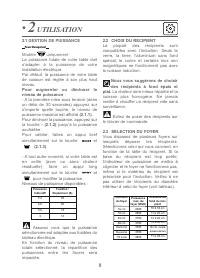
8 • 2 UTILISATION 2.1 GESTION DE PUISSANCE Modéle uniquement La puissance totale de votre table doits’adapter à la puissance de votreinstallation électrique.Par défaut, la puissance de votre tablede cuisson est réglée à son plus hautniveau. Pour augmenter ou diminuer leniveau de puissance : - A la p...
Page 10 - REGLAGE DE LA PUISSANCE; Arrêt d’une zone / table
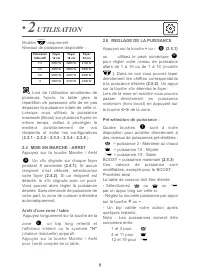
2.5 REGLAGE DE LA PUISSANCE Appuyez sur la touche + ou - (2.5.1) ou utilisez le pavé numériquepour régler votre niveau de puissanceallant de 1 à 19 ou de 1 à 14 ( modéle ) . Dans ce cas vous pouvez taper directement les chiffres correspondantsà la puissance désirée (2.5.2) . Un appui sur la touche «...
Page 11 - REGLAGE DE LA MINUTERIE; Minuteur indépendant
Pour le modèle les niveaux de puissance pré-établis sont les suivants : = puissance 2 - Maintenir au chaud = puissance 8 - Mijoter= puissance 14 - Saisir 2.6 HORIZONE / DUOZONE / La sélection de la zone libre se fait par la touche (2.6.1) . Le réglage de la puissance et de la minuterie se faitcomme ...
Page 13 - NOTA
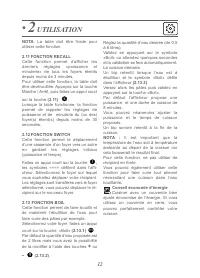
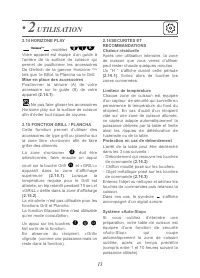
12 • 2 UTILISATION NOTA : La table doit être froide pour utiliser cette fonction. 2.11 FONCTION RECALL Cette fonction permet d’afficher lesderniers réglages «puissance etminuterie» de tous les foyers éteintsdepuis moins de 3 minutes.Pour utiliser cette fonction, la table doitêtre dévérouillée. Appuy...
Page 14 - Mise en place des accessoires; Limiteur de température
• 2 UTILISATION 2.14 HORIZONE PLAY modèles Votre appareil est équipé d’un guide àl’arrière de la surface de cuisson quipermet de positionner les accessoiresDe Dietrich de la gamme Horizone Play tels que le Billot, la Plancha ou le Grill. Mise en place des accessoires : Positionner la rainure (A) de ...
Page 16 - ENTRETIEN; Remarque importante
15 • 3 ENTRETIEN Pour des salissures légères, utilisez uneéponge sanitaire. Bien détremper lazone à nettoyer avec de l’eau chaude,puis essuyez. Pour une accumulation de salissuresrecuites, des débordements sucrés, duplastique fondu, utilisez une épongesanitaire et/ou un racloir spécial verre.Bien dé...
Page 17 - ANOMALIES; La table ne fonctionne pas
16 • 4 ANOMALIES A la mise en serviceVous constatez qu’un affichagelumineux apparaît. C’est normal. il disparaîtra au bout de 30 secondes. Votre installation disjoncte ou un seulcôté fonctionne. Le branchement de votre table est défectueux. Vérifiez saconformité (voir chapitre branchement). La table...
Page 18 - ENVIRONNEMENT; RESPECT DE L’ENVIRONNEMENT
17 • 5 ENVIRONNEMENT RESPECT DE L’ENVIRONNEMENT Les matériaux d'emballage de cetappareil sont recyclables. Participez àleur recyclage et contribuez ainsi à laprotection de l'environnement en lesdéposant dans les conteneursmunicipaux prévus à cet effet. Votre appareil contientégalement de nombreuxmat...
Page 19 - SERVICE CONSOMMATEURS; INTERVENTIONS FRANCE
18 • 6 SERVICE CONSOMMATEURS INTERVENTIONS FRANCE Les éventuelles interventions sur votre appareil doivent être effectuées par unprofessionnel qualifié dépositaire de lamarque. Lors de votre appel, afin de faciliterla prise en charge de votre demande,munissez-vous des références complètesde votre ap...
Page 20 - DEAR CUSTOMER
DEAR CUSTOMER EN Discovering De Dietrich products means experiencing unique emotions. The attraction is immediate from the moment you set eyes on the product. The sheer quality of the design shines through, thanks to the timeless style and outstanding finishes which make each component an elegant an...
Page 21 - CONTENTS
20 CONTENTS Safety and important precautions ..................................................21 Installation ........................................................................................24 Unpacking ...........................................................................................
Page 22 - IMPORTANT SAFETY ADVICE AND PRECAUTIONS
21 These instructions are also available on the brand’s web site.Please read this advice carefully before installing and using your appliance. Theseinstructions are intended to protect your safety and the safety of others. Keep thismanual with the appliance. If you sell or give the appliance to some...
Page 25 - BUILDING INTO A BASE UNIT; ELECTRICAL CONNECTIONS
24 • 1 INSTALLATION 1.1 UNPACKING Remove all the protective packingpieces. Check and respect theappliance’s characteristics that appearon the nameplate (1.1.1) . Note the service and standardreferences shown on this plate in theboxes below for future reference. 1. 2 BUILDING INTO A BASE UNIT Check t...
Page 26 - USE
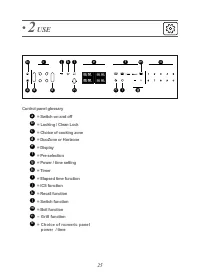
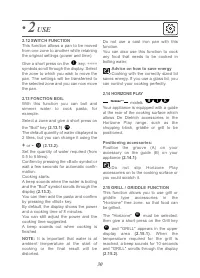
k a b c d e g h f i j l m o n d • 2 USE Control panel glossary = Switch on and off = Locking / Clean Lock = Choice of cooking zone = DuoZone or Horizone = Display = Pre-selection = Power / time setting = Timer = Elapsed time function = ICS function = Recall function = Switch function = Boil function...
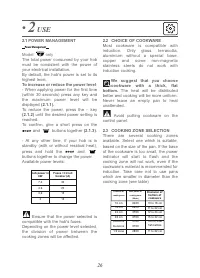
Page 27 - POWER MANAGEMENT; To increase or reduce the power level; CHOICE OF COOKWARE
26 • 2 USE 2.1 POWER MANAGEMENT Model only The total power consumed by your hobmust be consistent with the power ofyour electrical installation.By default, the hob’s power is set to itshighest level. To increase or reduce the power level : - When applying power for the first time(within 30 seconds) ...
Page 28 - SETTING THE POWER; Switching off a zone on the hob
• 2 USE 27 2.5 SETTING THE POWER Press the + or – key (2.5.1) or use numeric keypad to adjust your power level between 1 and 19 or 1 and 14 (model ) . In this case you can enter the number corresponding thedesired power setting directly (2.5.2) . Pressing the «0» key switches the hoboff.When switchi...
Page 29 - SETTING THE TIMER; Independent timer
28 • 2 USE 2.6 HORIZONE / DUOZONE / The free zone is selected with touchkey (2.6.1) . The power and timer are adjusted as for a normal cooking zone.To switch the zone off, press and hold key , a long beep sounds and the displays go off or the "H" symbolappears.Pressing the touchkey in front ...
Page 30 - Locking
• 2 USE 29 2.9 LOCKING THE CONTROLSChild safety lock Your hob has a child safety devicewhich locks the controls when the hobis not in use or during cooking (tomaintain the current settings). Forsafety reasons, only the stop key andthe zone selection keys are still activeand allow the hob or a cookin...
Page 31 - Advice on how to save energy; SWITCH FUNCTION
30 • 2 USE Do not use a cast iron pan with thisfunction.You can also use this function to cookany food that needs to be cooked inboiling water. Advice on how to save energy Cooking with the correctly sized lid saves energy. If you use a glass lid, youcan control your cooking perfectly. 2.14 HORIZONE...
Page 32 - Temperature limiter
• 2 USE 31 The timer cannot be used with the Grilland Griddle functions.The Elapsed time function can only beused in consultation mode. Pressing keys , , exits the function.In there is no pan in place, "Grill" flashes(like a power setting but you remainwithin the function). 2.16 SAFETY PRECA...
Page 33 - CARE; Important note; Care of the chopping block
• 3 CARE For light soiling, use a kitchen sponge.Use hot water to wet the area to becleaned and then wipe dry. For burnt on food deposits, sugaryspills, melted plastic, use a scouringsponge and/or a special glass cleaningscraper. Use hot water to wet the area tobe cleaned, use a special glass cleani...
Page 34 - PROBLEMS
33 • 4 PROBLEMS When using for the first timeYou notice that something appears inthe display. This is normal. It will disappear after 30 seconds. The circuit breaker trips/blows a fuseor only one side of the hob works. The hob has been wired incorrectly. Checkthe wiring (see connections section). Th...
Page 35 - ENVIRONMENT; CARE FOR THE ENVIRONMENT
34 • 5 ENVIRONMENT CARE FOR THE ENVIRONMENT This appliance’s packaging can berecycled. Recycle is and so contribute toprotecting the environment, by placing itin containers provided for the purpose bylocal authorities. Your appliance also contains lots of recyclable material. This logoindicates that...
Page 36 - CUSTOMER SERVICE
35 • 6 CUSTOMER SERVICE Any repairs made to your appliance must be carried out by a qualified professionalauthorised to work on the brand. Whenmaking contact, mention the complete re-ference of your appliance (model, type,serial number). This information appearson the manufacturer ’s nameplate atta-...
Page 38 - ÍNDICE
37 ÍNDICE Seguridad y precauciones importantes ........................................ 38 Instalación ........................................................................................41 Desembalaje ......................................................................................41Empotr...
Page 39 - SEGURIDAD Y PRECAUCIONES IMPORTANTES
38 SEGURIDAD Y PRECAUCIONES IMPORTANTES Puede descargar este manual en la página web de la marca.Por favor, lea estos consejos antes de instalar y utilizar su aparato. Han sidoredactados para su seguridad y la de los demás. Conserve este manual deutilización con su aparato. Si el aparato tuviera que...
Page 42 - INSTALACIÓN; CONEXIÓN ELÉCTRICA
41 • 1 INSTALACIÓN 1.1 DESEMBALAJE Retire todos los elementos deprotección. Compruebe y respete lascaracterísticas del aparato que figuranen la placa de características (1.1.1) . Consulte en los siguientes cuadros lasreferencias de servicio y de tipo denorma de la placa. 1. 2 EMPOTRAMIENTO EN ELMUEB...
Page 43 - UTILIZACIÓN; Teclado
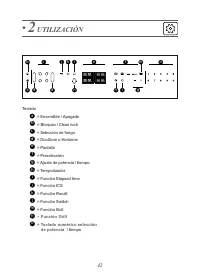
k a b c d e g h f i j l m o n d • 2 UTILIZACIÓN Teclado = Encendido / Apagado = Bloqueo / Clean lock = Selección de fuego = DuoZone u Horizone = Pantalla = Preselección = Ajuste de potencia / tiempo = Temporizador = Función Elapsed time = Función ICS = Función Recall = Función Switch = Función Boil ...
Page 44 - GESTIÓN DE POTENCIA; SELECCIÓN DEL RECIPIENTE
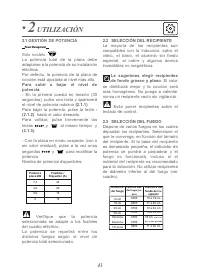
43 • 2 UTILIZACIÓN 2.1 GESTIÓN DE POTENCIA Solo modelo La potencia total de la placa debeadaptarse a la potencia de su instalacióneléctrica.Por defecto, la potencia de la placa decocción está ajustada al nivel más alto. Para subir o bajar el nivel depotencia : - En la primera puesta en tensión (30se...
Page 45 - Preselección de potencias:; AJUSTE DE LA POTENCIA
• 2 UTILIZACIÓN 44 Pulse la tecla + o - (2.5.1) o en el teclado numérico para regular su nivel de potencia de 1 a 19 o de 1 a 14 ( modelo ) . Entonces se pueden introducir las cifras correspondientes ala potencia deseada (2.5.2) . Al pulsar la tecla «0» se apaga el fuego.Durante el encendido puede p...
Page 46 - AJUSTE DEL TEMPORIZADOR; Minutero independiente
• 2 UTILIZACIÓN 45 2.6 HORIZONE / DUOZONE / Para seleccionar la zona libre, pulse la tecla (2.6.1) . Se puede ajustar la potencia y el temporizador con lasteclas como para un fuego normal.Para apagar la zona, pulse unos segundos la tecla . Sonará un bip largo y se apagarán los visualizadoreso aparec...
Page 48 - Consejo de ahorro de energía; Colocación de los accesorios
47 • 2 UTILIZACIÓN Con la placa en marcha, la funciónpermite recordar los ajustes de potenciay de temporizador del (o de los) fuego(s)apagado(s) desde hace menos de 30segundos. 2.12 FUNCIÓN SWITCH Esta función permite desplazar unacacerola de un fuego a otromanteniendo los ajustes iniciales(potencia...
Page 49 - Limitador de temperatura
• 2 UTILIZACIÓN 48 visualización superior (2.15.1) . Una vez alcanzada la temperatura requerida parael grill, suena un bip durante 10segundos y desfila «GRILL» por la zonade visualización (2.15.2) . El temporizador no funciona con el grillni con la plancha.La función Elapsed time solo estáaccesible ...
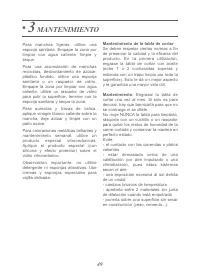
Page 50 - MANTENIMIENTO; Mantenimiento de la tabla de cortar
• 3 MANTENIMIENTO Para manchas ligeras, utilice unaesponja sanitaria. Empape la zona porlimpiar con agua caliente, limpie yseque. Para una acumulación de manchasrecocidas, desbordamiento de azúcar,plástico fundido, utilice una esponjasanitaria o un raspador de vidrio.Empape la zona por limpiar con a...
Page 51 - ANOMALÍAS; Durante la puesta en servicio; Código fallo F0; y se emite una señal
50 • 4 ANOMALÍAS Durante la puesta en servicio Constata que se enciende un piloto. Esnormal. Desaparecerá al cabo de 30segundos.Su instalación se dispara o solofunciona un lado. La conexión de suplaca es defectuosa. Verifique suconformidad (Ver capítulo Conexión).La placa desprende cierto olor duran...
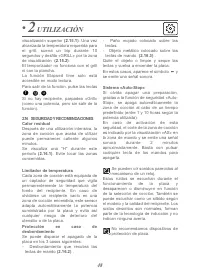
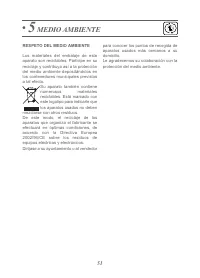
Page 52 - MEDIO AMBIENTE; RESPETO DEL MEDIO AMBIENTE
• 5 MEDIO AMBIENTE RESPETO DEL MEDIO AMBIENTE Los materiales del embalaje de esteaparato son reciclables. Participe en sureciclaje y contribuya así a la proteccióndel medio ambiente depositándolos enlos contenedores municipales previstosa tal efecto. Su aparato también contienenumerosos materialesre...
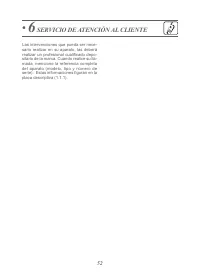
Page 53 - SERVICIO DE ATENCIÓN AL CLIENTE
• 6 SERVICIO DE ATENCIÓN AL CLIENTE Las intervenciones que pueda ser nece- sario realizar en su aparato, las deberárealizar un profesional cualificado depo-sitario de la marca. Cuando realice su lla-mada, mencione la referencia completadel aparato (modelo, tipo y número deserie). Estas informaciones...
Page 54 - CARO CLIENTE
CARA CLIENTE, CARO CLIENTE PT Descobrir os produtos De Dietrich, é experimentar emoções únicas. A atração é imediata deste o primeiro olhar. A qualidade do design é ilustrada pela estética intemporal e pelos acabamentos cuidados que tornam cada objeto elegante e refinado, em perfeita harmonia uns co...
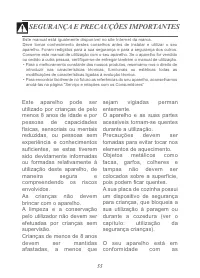
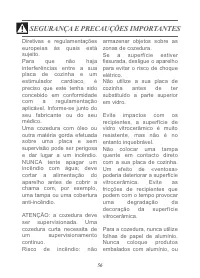
Page 56 - SEGURANÇA E PRECAUÇÕES IMPORTANTES
55 SEGURANÇA E PRECAUÇÕES IMPORTANTES Este manual está igualmente disponível no site Internet da marca.Deve tomar conhecimento destes conselhos antes de instalar e utilizar o seuaparelho. Foram redigidos para a sua segurança e para a segurança dos outros.Conserve este manual de utilização com o seu ...
Page 59 - INSTALAÇÃO; REMOÇÃO DA EMBALAGEM; LIGAÇÃO ELÉTRICA
58 • 1 INSTALAÇÃO 1.1 REMOÇÃO DA EMBALAGEM Retire todas as peças de proteção.Verifique e respeite as características doaparelho que figuram na placainformativa (1.1.1) . Queira anotar nos quadros abaixo asreferências de serviço e tipo de normaque figuram nesta placa, para umafutura utilização. 1. 2 ...
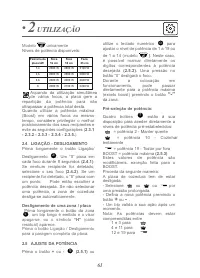
Page 60 - UTILIZAÇÃO
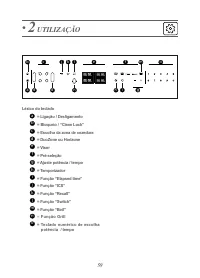
k a b c d e g h f i j l m o n d • 2 UTILIZAÇÃO Léxico do teclado = Ligação / Desligamento = Bloqueio / “Clean Lock” = Escolha da zona de cozedura = DuoZone ou Horizone = Visor = Pré-seleção = Ajuste potência / tempo = Temporizador = Função “Elapsed time” = Função “ICS” = Função “Recall” = Função “Sw...
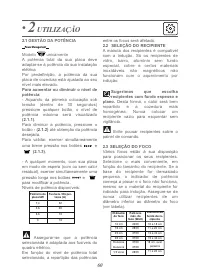
Page 61 - GESTÃO DA POTÊNCIA; SELEÇÃO DO RECIPIENTE
60 • 2 UTILIZAÇÃO 2.1 GESTÃO DA POTÊNCIA Modelo unicamente A potência total da sua placa deveadaptar-se à potência da sua instalaçãoelétrica.Por predefinição, a potência da suaplaca de cozedura está ajustada ao seunível mais elevado. Para aumentar ou diminuir o nível depotência : - Aquando da primei...
Page 62 - Desligamento de uma zona / placa; AJUSTE DA POTÊNCIA
utilize o teclado numérico para ajustar o nível de potência de 1 a 19 ou de 1 a 14 ( modelo ) . Neste caso, é possível marcar diretamente osdígitos correspondentes à potênciadesejada (2.5.2) . Uma pressão no botão “0” desligará o foco.Durante a colocação emfuncionamento, pode passardiretamente para ...
Page 63 - AJUSTE DO TEMPORIZADOR; Temporizador independente
• 2 UTILIZAÇÃO 62 Para o modelo os níveis de potência pré-estabelecidos são osseguintes: = potência 2 - Manter quente = potência 8 - Cozinhar lentamente = potência 14 - Tostar por fora 2.6 HORIZONE / DUOZONE / A seleção da zona livre faz-se utilizando o botão (2.6.1) . O ajuste da potência e do temp...
Page 64 - Bloqueio
• 2 UTILIZAÇÃO 63 aquecimento que deseja obter. Aapresentação do tempo decorrido ficafixa durante 3 segundos e depois aapresentação do tempo restanteaparece. É emitido um som paraconfirmar a sua escolha.Esta função existe com ou sem afunção do temporizador.Observação: se for apresentado umtempo no t...
Page 66 - Instalação dos acessórios
• 2 UTILIZAÇÃO 65 Instalação dos acessórios : Posicionar a ranhura (A) do seuacessório sobre a guia (B) do seuaparelho ( (2.14.1) . Não faça deslizar os acessórios Horizone Play sobre a superfície deaquecimento a fim de evitar oaparecimento de riscas. 2.15 FUNÇÃO GRILL / PLANCHA Esta função permite ...
Page 68 - MANUTENÇÃO; Nota importante; Manutenção da Tábua de corte
67 • 3 MANUTENÇÃO Para sujidade ligeira, utilize umesfregão. Demolhar convenientementecom água quente a zona a lavar edepois limpar. Para uma acumulação de sujidadesrecozidas, derrames com açúcar,plástico derretido, utilize uma esponjasanitária ou um raspador especial paravidro. Deve molhar bem a zo...
Page 69 - ANOMALIAS
68 • 4 ANOMALIAS Durante a colocação em serviçoConstata que aparece uma indicaçãoluminosa. Isto é normal. Desaparecerá depois de 30 segundos. A sua instalação dispara ou funcionaapenas um lado da placa. A ligação da sua placa está defeituosa. Verifique asua conformidade (ver capítulo sobre aligação ...
Page 70 - MEIO AMBIENTE; RESPEITO PELO MEIO AMBIENTE
69 • 5 MEIO AMBIENTE RESPEITO PELO MEIO AMBIENTE Os materiais da embalagem desteaparelho são recicláveis. Participe nasua reciclagem contribuindo para aproteção do meio ambiente, eliminando-os nos contentores municipais previstospara o efeito. O seu aparelho tambémcontém vários materiaisrecicláveis....
Page 71 - SERVIÇO DE APOIO AO CLIENTE
70 • 6 SERVIÇO DE APOIO AO CLIENTE As eventuais intervenções no seu apa- relho devem ser efetuadas por um profis-sional qualificado que trabalhe para amarca. Durante o seu telefonema, in-dique a referência completa do seu apa-relho (modelo, tipo, número de série).Estas informações figuram na placa i...
Page 72 - SZANOWNI
SZANOWNI KLIENCI, PL Poznanie produktów De Dietrich to przeżycie jedyne w swoim rodzaju. Wrażenie uroku jest natychmiastowe od pierwszego spojrzenia. Jakość wzornictwa wyróżnia się poprzez ponadczasową estetykę i staranne wykończenie powodujące, że wszystkie przedmioty są eleganckie i wyrafinowane i...
Page 73 - SPIS TREŚCI
72 SPIS TREŚCI Ważne wskazówki bezpieczeństwa i środki ostrożności..............73 Instalacja ..........................................................................................76 Rozpakowanie ..................................................................................76Zabudowa ..........
Page 77 - INSTALACJA; ZABUDOWA W M E B L U; PODŁĄCZENIA ELEKTRYCZNE
76 • 1 INSTALACJA 1.1 ROZPAKOWANIE Wyjąć wszystkie elementyzabezpieczające. Sprawdzićprawidłowość parametrów urządzeniazamieszczonych na tabliczce danychznamionowych (1.1.1) . Zapisać w poniższej ramce figurujący natej tabliczce numer serwisowy i typnormy do wykorzystania w przyszłości. 1. 2 ZABUDOW...
Page 78 - UŻYTKOWANIE
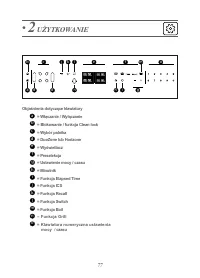
k a b c d e g h f i j l m o n d • 2 UŻYTKOWANIE Objaśnienia dotyczące klawiatury = Włączanie / Wyłączanie = Blokowanie / funkcja Clean lock = Wybór palnika = DuoZone lub Horizone = Wyświetlacz = Preselekcja = Ustawienie mocy / czasu = Minutnik = Funkcja Elapsed Time = Funkcja ICS = Funkcja Recall = ...
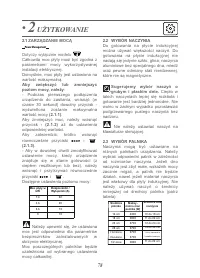
Page 79 - ZARZĄDZANIE MOCĄ; WYBÓR NACZYNIA
78 • 2 UŻYTKOWANIE 2.1 ZARZĄDZANIE MOCĄ Dotyczy wyłącznie modelu Całkowita moc płyty musi być zgodna zparametrami mocy wykorzystywanejinstalacji elektrycznej.Domyślnie, moc płyty jest ustawiona nawartość maksymalną. Aby zwiększyć lub zmniejszyćpoziom mocy, należy : - Podczas pierwszego podłączeniaur...
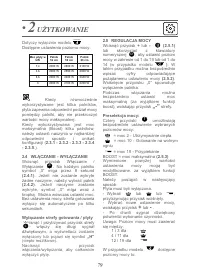
Page 80 - REGULACJA MOCY; Wyłączanie strefy gotowania / płyty
2.5 REGULACJA MOCY Wcisnąć przycisk + lub - (2.5.1) lub skorzystać z klawiaturynumerycznej , aby ustawić poziom mocy w zakresie od 1 do 19 lub od 1 do14 ( w przypadku modelu ) . W takim przypadku można bezpośredniowpisać cyfry odpowiadającepożądanemu ustawieniu mocy (2.5.2) . Wciśnięcie przycisku „0...
Page 81 - REGULACJA MINUTNIKA; Niezależny minutnik
• 2 UŻYTKOWANIE 80 = moc 2 - Utrzymywanie ciepła = moc 8 - Gotowanie na wolnym ogniu = moc 14 - Przypiekanie 2.6 HORIZONE / DUOZONE / Wolna strefa gotowania może zostaćwybrana za pomocą przycisku (2.6.1) . Ustawienie mocy i minutnika jest przeprowadzane w taki samsposób, jak dla normalnego palnika.A...
Page 83 - UWAGA
• 2 UŻYTKOWANIE 82 optymalny palnik, a ustawienia sąautomatycznie przenoszone na tenpalnik ( 2.10.2 ). UWAGA : Aby możliwe było skorzystanie z tej funkcji, płyta musi być zimna. 2.11 FUNKCJA RECALL Funkcja umożliwia wyświetlenieostatnich ustawień „mocy i minutnika”dla wszystkich palników zgaszonych ...
Page 84 - Funkcja HORIZONE PLAY; Ustawianie akcesoriów; Ogranicznik temperatury
• 2 UŻYTKOWANIE 83 2.14 Funkcja HORIZONE PLAY modele Urządzenie jest wyposażone wznajdującą się z tyłu powierzchnigrzewczej prowadnicę umożliwiającąprawidłowe ustawienie akcesoriów firmyDe Dietrich należących do gamyHorizone Play , takich jak deska do krojenia, plancha lub grill. Ustawianie akcesori...
Page 86 - KONSERWACJA; Ważna uwaga
85 • 3 KONSERWACJA Niewielkie zabrudzenia mogą byćusuwane przy użyciu gąbki kuchennej.Zwilżyć ciepłą wodą strefę, która ma byćwyczyszczona, a następnie wytrzeć. W przypadku uporczywych,zastygniętych zabrudzeń, a takżepozostałości cukru lub roztopionegoplastiku, należy usunąć je używającgąbki kuchenn...
Page 87 - BŁĘDY
86 • 4 BŁĘDY Podczas podłączaniaNa wyświetlaczu pojawiają sięsymbole. Jest to normalne, znikną one po upływie 30 sekund. Instalacja wyłącza się automatycznielub działa tylko jedna strona. Płyta jest nieprawidłowo podłączona. Należysprawdzić prawidłowość podłączeń(patrz rozdział dotyczący wykonaniapo...
Page 88 - ŚRODOWISKO; OCHRONA ŚRODOWISKA
87 • 5 ŚRODOWISKO OCHRONA ŚRODOWISKA Materiały opakowaniowe tegourządzenia nadają się do recyklingu.Zachęcamy do ich recyklingu i doumieszczenia ich w przewidzianych wtym celu pojemnikach, a tym samym doprzyczynienia się w ten sposób do ochrony środowiska. Urządzenie zawiera równieżwiele materiałówp...
Page 89 - DZIAŁ OBSŁUGI KLIENTA
88 • 6 DZIAŁ OBSŁUGI KLIENTA Ewentualne interwencje przy urządzeniu powinny być wykonywane przez osobywykwalifikowane, autoryzowane przezmarkę. Aby ułatwić rozwiązanie problemu,podczas rozmowy z serwisem naprawczymnależy podać kompletne dane referencyjneposiadanego urządzenia (nazwa handlowa,numer s...


 De Dietrich DPE7929XF
User Manual
De Dietrich DPE7929XF
User Manual
 De Dietrich DPI7360X
User Manual
De Dietrich DPI7360X
User Manual
 De Dietrich DPI7540B
User Manual
De Dietrich DPI7540B
User Manual
 De Dietrich DPI7572G
User Manual
De Dietrich DPI7572G
User Manual
 De Dietrich DPI7572X
User Manual
De Dietrich DPI7572X
User Manual
 De Dietrich DPI7602BM
User Manual
De Dietrich DPI7602BM
User Manual
 De Dietrich DPI7670X
User Manual
De Dietrich DPI7670X
User Manual
 De Dietrich DPI7684X
User Manual
De Dietrich DPI7684X
User Manual
 De Dietrich DPI7768X
User Manual
De Dietrich DPI7768X
User Manual
 De Dietrich DPI7884W
User Manual
De Dietrich DPI7884W
User Manual
 De Dietrich DTG 1008 X
User Manual
De Dietrich DTG 1008 X
User Manual
 De Dietrich DTG 701 X
User Manual
De Dietrich DTG 701 X
User Manual
 De Dietrich DTI 1113 X
User Manual
De Dietrich DTI 1113 X
User Manual
 De Dietrich DTI 1167 XE
User Manual
De Dietrich DTI 1167 XE
User Manual
 De Dietrich DTI 1358 DG
User Manual
De Dietrich DTI 1358 DG
User Manual