Page 2 - CHER CLIENT
CHÈRE CLIENTE, CHER CLIENT FR Découvrir les produits De Dietrich, c’est éprouver des émotions uniques. L’attrait est immédiat dès le premier regard. La qualité du design s’illustre par l’esthétique intemporelle et les finitions soignées rendant chaque objet élégant et raffiné en parfaite harmonie le...
Page 3 - TABLE DES MATIERES
2 TABLE DES MATIERES Sécurité et précautions importantes ................................................3 Installation ..........................................................................................6 Déballage .................................................................................
Page 4 - SÉCURITÉ ET PRÉCAUTIONS IMPORTANTES
3 SÉCURITÉ ET PRÉCAUTIONS IMPORTANTES Cette notice est également disponible sur le site internet de la marque.Merci de prendre connaissance de ces conseils avant d'installer et d'utiliser votreappareil. Ils ont été rédigés pour votre sécurité et celle d'autrui. Conservez cettenotice d'utilisation av...
Page 7 - INSTALLATION; BRANCHEMENT ELECTRIQUE
6 • 1 INSTALLATION 1.1 DEBALLAGE Enlevez tous les éléments de protection.Vérifiez et respectez les caractéristiquesde l’appareil figurant sur la plaquesignalétique (1.1.1) . Veuillez noter dans les cadres ci-dessous les références de service et detype norme figurant sur cette plaquepour un usage fut...
Page 8 - UTILISATION; Lexique clavier
k a b c e g h f i m n d o • 2 UTILISATION Lexique clavier = Mise en Marche / Arrêt = Verrouillage / Clean Lock = Choix zone de cuisson = Horizone = Afficheur = Préselection = Réglage puissance / temps = Minuterie = Fonction Elapsed time = Fonction Recall = Fonction Boil = Fonction Grill = Fonction P...
Page 9 - Arrêt d’une zone / table; REGLAGE DE LA PUISSANCE; CHOIX DU RECIPIENT
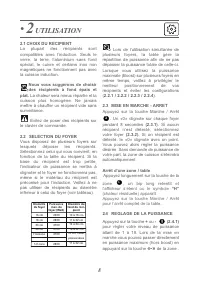
Lors de l’utilisation simultanée de plusieurs foyers, la table gère larépartition de puissance afin de ne pasdépasser la puissance totale de celle-ci.Lorsque vous utilisez la puissancemaximale (Boost) sur plusieurs foyers enmême temps, veillez à privilégier lemeilleur positionnement de vosrécipients...
Page 10 - REGLAGE DE LA MINUTERIE
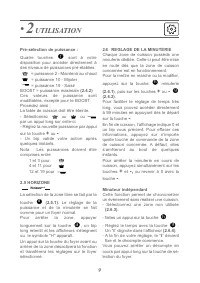
Pré-sélection de puissance : Quatre touches sont à votre disposition pour accéder directement àdes niveaux de puissances pré-établies : = puissance 2 - Maintenir au chaud = puissance 10 - Mijoter= puissance 19 - Saisir BOOST = puissance maximale (2.4.2) Ces valeurs de puissance sontmodifiables, exce...
Page 12 - Conseil économie d’énergie; Mise en place des accessoires
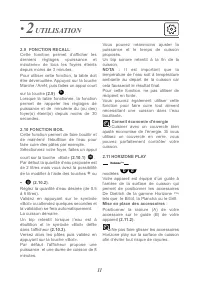
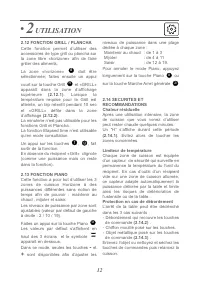
• 2 UTILISATION 2.9 FONCTION RECALL Cette fonction permet d’afficher lesderniers réglages «puissance etminuterie» de tous les foyers éteintsdepuis moins de 3 minutes.Pour utiliser cette fonction, la table doitêtre dévérouillée. Appuyez sur la toucheMarche / Arrêt, puis faites un appui court sur la t...
Page 15 - ENTRETIEN; Remarque importante
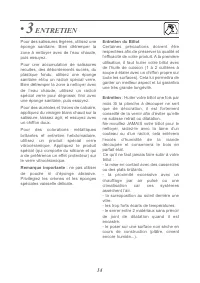
14 • 3 ENTRETIEN Pour des salissures légères, utilisez uneéponge sanitaire. Bien détremper lazone à nettoyer avec de l’eau chaude,puis essuyez. Pour une accumulation de salissuresrecuites, des débordements sucrés, duplastique fondu, utilisez une épongesanitaire et/ou un racloir spécial verre.Bien dé...
Page 16 - ANOMALIES; La table ne fonctionne pas
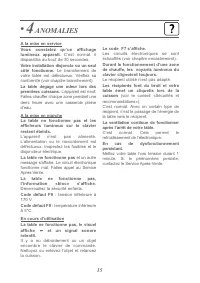
15 • 4 ANOMALIES A la mise en serviceVous constatez qu’un affichagelumineux apparaît. C’est normal. il disparaîtra au bout de 30 secondes. Votre installation disjoncte ou un seulcôté fonctionne. Le branchement de votre table est défectueux. Vérifiez saconformité (voir chapitre branchement). La table...
Page 17 - ENVIRONNEMENT; RESPECT DE L’ENVIRONNEMENT
16 • 5 ENVIRONNEMENT RESPECT DE L’ENVIRONNEMENT Les matériaux d'emballage de cetappareil sont recyclables. Participez àleur recyclage et contribuez ainsi à laprotection de l'environnement en lesdéposant dans les conteneursmunicipaux prévus à cet effet. Votre appareil contientégalement de nombreuxmat...
Page 18 - SERVICE CONSOMMATEURS; INTERVENTIONS FRANCE
17 • 6 SERVICE CONSOMMATEURS INTERVENTIONS FRANCE Les éventuelles interventions sur votre appareil doivent être effectuées par unprofessionnel qualifié dépositaire de lamarque. Lors de votre appel, afin de faciliterla prise en charge de votre demande,munissez-vous des références complètesde votre ap...
Page 19 - DEAR CUSTOMER
DEAR CUSTOMER EN Discovering De Dietrich products means experiencing unique emotions. The attraction is immediate from the moment you set eyes on the product. The sheer quality of the design shines through, thanks to the timeless style and outstanding finishes which make each component an elegant an...
Page 20 - CONTENTS
19 CONTENTS Safety and important precautions ..................................................20 Installation ........................................................................................23 Unpacking ...........................................................................................
Page 21 - IMPORTANT SAFETY ADVICE AND PRECAUTIONS
20 These instructions are also available on the brand’s web site.Please read this advice carefully before installing and using your appliance. Theseinstructions are intended to protect your safety and the safety of others. Keep thismanual with the appliance. If you sell or give the appliance to some...
Page 24 - BUILDING INTO A BASE UNIT; ELECTRICAL CONNECTIONS
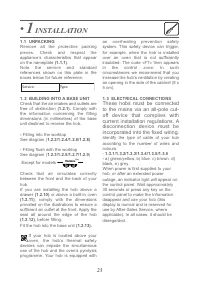
23 • 1 INSTALLATION 1.1 UNPACKING Remove all the protective packingpieces. Check and respect theappliance’s characteristics that appearon the nameplate (1.1.1) . Note the service and standardreferences shown on this plate in theboxes below for future reference. 1. 2 BUILDING INTO A BASE UNIT Check t...
Page 25 - USE; Control panel glossary
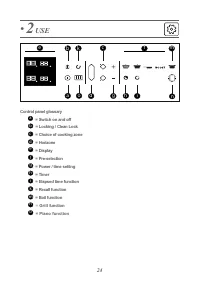
• 2 USE Control panel glossary = Switch on and off = Locking / Clean Lock = Choice of cooking zone = Horizone = Display = Pre-selection = Power / time setting = Timer = Elapsed time function = Recall function = Boil function = Grill function = Piano function a b c d e f g h i k m n o 24 k a b c e g ...
Page 26 - CHOICE OF COOKWARE; Switching off a zone on the hob
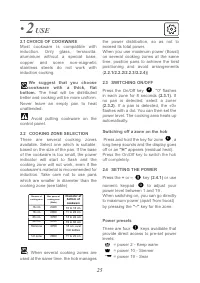
25 • 2 USE 2.1 CHOICE OF COOKWARE Most cookware is compatible withinduction. Only glass, terracotta,aluminium without a special base,copper and some non-magneticstainless steels do not work withinduction cooking. We suggest that you choosecookware with a thick, flat bottom. The heat will be distribu...
Page 27 - Independent timer
• 2 USE 26 timer.To make setting a very long time easier,you can go straight to 99 minutes bypressing the – touchkey. At the end of cooking, the displayindicates 0 and a warning beepsounds. To cancel this information,press any button for the particularcooking zone being used. Otherwise,they will swi...
Page 28 - Locking
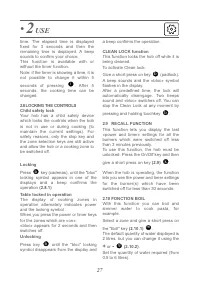
27 • 2 USE time. The elapsed time is displayedfixed for 3 seconds and then theremaining time is displayed. A beepsounds to confirm your choice.This function is available with orwithout the timer function.Note: if the timer is showing a time, it isnot possible to change it within 5 seconds of pressin...
Page 29 - Advice on how to save energy; PIANO FUNCTION
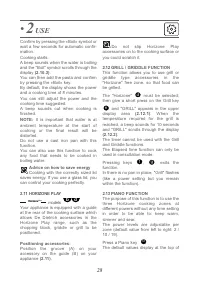
• 2 USE 28 Confirm by pressing the «Boil» symbol orwait a few seconds for automatic confir-mation.Cooking starts.A beep sounds when the water is boilingand the "Boil" symbol scrolls through thedisplay (2.10.3) . You can then add the pasta and confirmby pressing the «Boil» key.By default, the...
Page 30 - PRECAUTIONS
• 2 USE 29 the three screens and the symbol is displayed at the bottom.. In this mode, only the - and + keys are available to adjust the power levelswithin a dedicated range in each zone:Keep warm: 1 to 3Simmer: 4 to 11Sear: 12 to 19.To cancel Piano mode, give a long press on the Piano key or on the...
Page 31 - CARE; Important note; Care of the chopping block
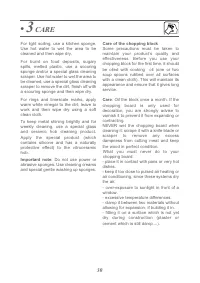
• 3 CARE For light soiling, use a kitchen sponge.Use hot water to wet the area to becleaned and then wipe dry. For burnt on food deposits, sugaryspills, melted plastic, use a scouringsponge and/or a special glass cleaningscraper. Use hot water to wet the area tobe cleaned, use a special glass cleani...
Page 32 - PROBLEMS
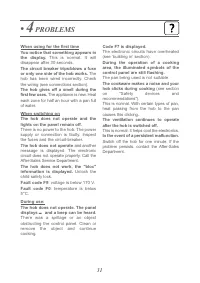
31 • 4 PROBLEMS When using for the first timeYou notice that something appears inthe display. This is normal. It will disappear after 30 seconds. The circuit breaker trips/blows a fuseor only one side of the hob works. The hob has been wired incorrectly. Checkthe wiring (see connections section). Th...
Page 33 - ENVIRONMENT; CARE FOR THE ENVIRONMENT
32 • 5 ENVIRONMENT CARE FOR THE ENVIRONMENT This appliance’s packaging can berecycled. Recycle is and so contribute toprotecting the environment, by placing itin containers provided for the purpose bylocal authorities. Your appliance also contains lots of recyclable material. This logoindicates that...
Page 34 - CUSTOMER SERVICE
33 • 6 CUSTOMER SERVICE Any repairs made to your appliance must be carried out by a qualified professionalauthorised to work on the brand. Whenmaking contact, mention the complete re-ference of your appliance (model, type,serial number). This information appearson the manufacturer ’s nameplate atta-...
Page 36 - ÍNDICE
35 ÍNDICE Seguridad y precauciones importantes ........................................ 36 Instalación ........................................................................................39 Desembalaje ......................................................................................39Empotr...
Page 37 - SEGURIDAD Y PRECAUCIONES IMPORTANTES
36 SEGURIDAD Y PRECAUCIONES IMPORTANTES Puede descargar este manual en la página web de la marca.Por favor, lea estos consejos antes de instalar y utilizar su aparato. Han sidoredactados para su seguridad y la de los demás. Conserve este manual deutilización con su aparato. Si el aparato tuviera que...
Page 40 - INSTALACIÓN; CONEXIÓN ELÉCTRICA
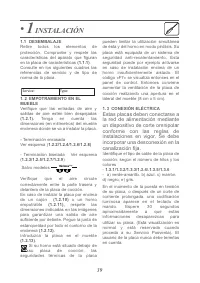
39 • 1 INSTALACIÓN 1.1 DESEMBALAJE Retire todos los elementos deprotección. Compruebe y respete lascaracterísticas del aparato que figuranen la placa de características (1.1.1) . Consulte en los siguientes cuadros lasreferencias de servicio y de tipo denorma de la placa. 1. 2 EMPOTRAMIENTO EN ELMUEB...
Page 41 - UTILIZACIÓN; Teclado
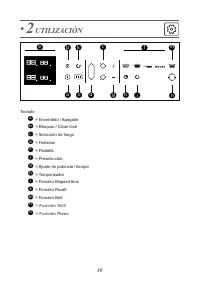
• 2 UTILIZACIÓN Teclado = Encendido / Apagado = Bloqueo / Clean lock = Selección de fuego = Horizone = Pantalla = Preselección = Ajuste de potencia / tiempo = Temporizador = Función Elapsed time = Función Recall = Función Boil = Función Grill = Función Piano a b c d e f g h i k m n o 40 k a b c e g ...
Page 42 - SELECCIÓN DEL RECIPIENTE; AJUSTE DE LA POTENCIA
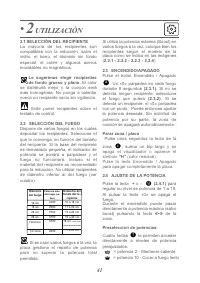
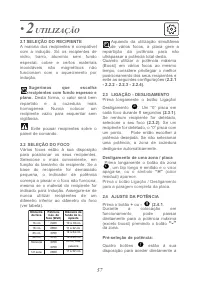
41 • 2 UTILIZACIÓN 2.1 SELECCIÓN DEL RECIPIENTE La mayoría de los recipientes soncompatibles con la inducción, salvo elvidrio, el barro, el aluminio sin fondoespecial, el cobre y algunos acerosinoxidables no magnéticos. Le sugerimos elegir recipientesde fondo grueso y plano. El calor se distribuirá ...
Page 43 - Minutero independiente
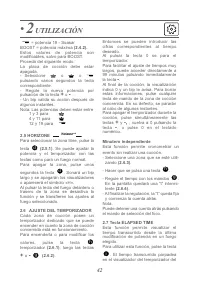
• 2 UTILIZACIÓN 42 Entonces se pueden introducir lascifras correspondientes al tiempodeseado.Al pulsar la tecla 0 se para eltemporizador.Para facilitar el ajuste de tiempos muylargos, puede acceder directamente a99 minutos pulsando inmediatamentela tecla - . Al final de la cocción, la visualizacióni...
Page 45 - Colocación de los accesorios; Consejo de ahorro de energía
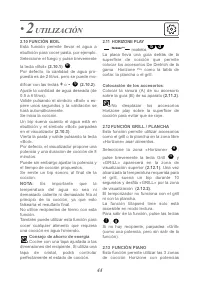
• 2 UTILIZACIÓN 44 2.11 HORIZONE PLAY modelos La placa lleva una guía detrás de lasuperficie de cocción que permitecolocar los accesorios De Dietrich de lagama Horizone Play como la tabla de cortar, la plancha o el grill. Colocación de los accesorios : Colocar la ranura (A) de su accesoriosobre la g...
Page 46 - Limitador de temperatura
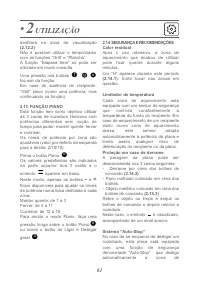
• 2 UTILIZACIÓN 45 distintas sin noción de tiempo para:mantener caliente, cocción a fuego lentoy cocción a fuego vivo.Se pueden ajustar los niveles depotencia por zona (valor por defecto deizquierda a derecha: 2 / 10 / 19). Pulse la tecla PianoLos valores por defecto se muestran enla parte superior ...
Page 47 - MANTENIMIENTO; Mantenimiento de la tabla de cortar
• 3 MANTENIMIENTO Para manchas ligeras, utilice unaesponja sanitaria. Empape la zona porlimpiar con agua caliente, limpie yseque. Para una acumulación de manchasrecocidas, desbordamiento de azúcar,plástico fundido, utilice una esponjasanitaria o un raspador de vidrio.Empape la zona por limpiar con a...
Page 48 - ANOMALÍAS; Durante la puesta en servicio; Código fallo F0; y se emite una señal
47 • 4 ANOMALÍAS Durante la puesta en servicio Constata que se enciende un piloto. Esnormal. Desaparecerá al cabo de 30segundos.Su instalación se dispara o solofunciona un lado. La conexión de suplaca es defectuosa. Verifique suconformidad (Ver capítulo Conexión).La placa desprende cierto olor duran...
Page 49 - MEDIO AMBIENTE; RESPETO DEL MEDIO AMBIENTE
• 5 MEDIO AMBIENTE RESPETO DEL MEDIO AMBIENTE Los materiales del embalaje de esteaparato son reciclables. Participe en sureciclaje y contribuya así a la proteccióndel medio ambiente depositándolos enlos contenedores municipales previstosa tal efecto. Su aparato también contienenumerosos materialesre...
Page 50 - SERVICIO DE ATENCIÓN AL CLIENTE
• 6 SERVICIO DE ATENCIÓN AL CLIENTE Las intervenciones que pueda ser nece- sario realizar en su aparato, las deberárealizar un profesional cualificado depo-sitario de la marca. Cuando realice su lla-mada, mencione la referencia completadel aparato (modelo, tipo y número deserie). Estas informaciones...
Page 51 - CARO CLIENTE
CARA CLIENTE, CARO CLIENTE PT Descobrir os produtos De Dietrich, é experimentar emoções únicas. A atração é imediata deste o primeiro olhar. A qualidade do design é ilustrada pela estética intemporal e pelos acabamentos cuidados que tornam cada objeto elegante e refinado, em perfeita harmonia uns co...
Page 53 - SEGURANÇA E PRECAUÇÕES IMPORTANTES
52 SEGURANÇA E PRECAUÇÕES IMPORTANTES Este manual está igualmente disponível no site Internet da marca.Deve tomar conhecimento destes conselhos antes de instalar e utilizar o seuaparelho. Foram redigidos para a sua segurança e para a segurança dos outros.Conserve este manual de utilização com o seu ...
Page 56 - INSTALAÇÃO; REMOÇÃO DA EMBALAGEM; LIGAÇÃO ELÉTRICA
• 1 INSTALAÇÃO 1.1 REMOÇÃO DA EMBALAGEM Retire todas as peças de proteção.Verifique e respeite as características doaparelho que figuram na placainformativa (1.1.1) . Queira anotar nos quadros abaixo asreferências de serviço e tipo de normaque figuram nesta placa, para umafutura utilização. 1. 2 ENC...
Page 57 - UTILIZAÇÃO; Léxico do teclado
• 2 UTILIZAÇÃO Léxico do teclado = Ligação / Desligamento = Bloqueio / “Clean Lock” = Escolha da zona de cozedura = DuoZone ou Horizone = Visor = Pré-seleção = Ajuste potência / tempo = Temporizador = Função “Elapsed time” = Função “Recall” = Função “Boil” = Função Grill = Função Piano a b c d e f g...
Page 58 - Desligamento de uma zona / placa; AJUSTE DA POTÊNCIA; SELEÇÃO DO RECIPIENTE
Aquando da utilização simultâneade vários focos, a placa gere a repartição da potência para nãoultrapassar a potência total desta.Quando utilizar a potência máxima(Boost) em vários focos ao mesmotempo, considere privilegiar o melhorposicionamento dos seus recipientes eevite as seguintes configuraçõe...
Page 59 - AJUSTE DO TEMPORIZADOR; Temporizador independente
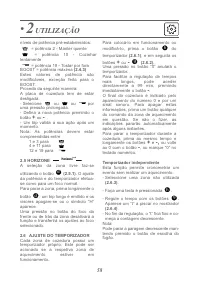
níveis de potência pré-estabelecidos: = potência 2 - Manter quente = potência 10 - Cozinhar lentamente = potência 19 - Tostar por fora BOOST = potência máxima (2.4.3) Estes valores de potência sãomodificáveis, exceção feita para oBOOST.Proceda da seguinte maneira:A placa de cozedura tem de estardesl...
Page 61 - Instalação dos acessórios
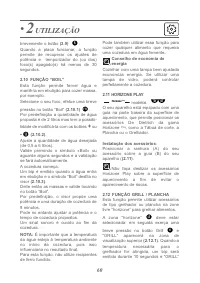
• 2 UTILIZAÇÃO 60 brevemente o botão (2.9) . Quando a placa funcionar, a funçãopermite de recuperar os ajustes depotência e temporizador do (ou dos)foco(s) apagado(s) há menos de 30segundos. 2.10 FUNÇÃO “BOIL” Esta função permite ferver água emantê-la em ebulição para cozer massa,por exemplo. Seleci...
Page 64 - MANUTENÇÃO; Nota importante; Manutenção da Tábua de corte
63 • 3 MANUTENÇÃO Para sujidade ligeira, utilize umesfregão. Demolhar convenientementecom água quente a zona a lavar edepois limpar. Para uma acumulação de sujidadesrecozidas, derrames com açúcar,plástico derretido, utilize uma esponjasanitária ou um raspador especial paravidro. Deve molhar bem a zo...
Page 65 - ANOMALIAS
64 • 4 ANOMALIAS Durante a colocação em serviçoConstata que aparece uma indicaçãoluminosa. Isto é normal. Desaparecerá depois de 30 segundos. A sua instalação dispara ou funcionaapenas um lado da placa. A ligação da sua placa está defeituosa. Verifique asua conformidade (ver capítulo sobre aligação ...
Page 66 - MEIO AMBIENTE; RESPEITO PELO MEIO AMBIENTE
65 • 5 MEIO AMBIENTE RESPEITO PELO MEIO AMBIENTE Os materiais da embalagem desteaparelho são recicláveis. Participe nasua reciclagem contribuindo para aproteção do meio ambiente, eliminando-os nos contentores municipais previstospara o efeito. O seu aparelho tambémcontém vários materiaisrecicláveis....
Page 67 - SERVIÇO DE APOIO AO CLIENTE
66 • 6 SERVIÇO DE APOIO AO CLIENTE As eventuais intervenções no seu apa- relho devem ser efetuadas por um profis-sional qualificado que trabalhe para amarca. Durante o seu telefonema, in-dique a referência completa do seu apa-relho (modelo, tipo, número de série).Estas informações figuram na placa i...
Page 68 - SZANOWNI
SZANOWNI KLIENCI, PL Poznanie produktów De Dietrich to przeżycie jedyne w swoim rodzaju. Wrażenie uroku jest natychmiastowe od pierwszego spojrzenia. Jakość wzornictwa wyróżnia się poprzez ponadczasową estetykę i staranne wykończenie powodujące, że wszystkie przedmioty są eleganckie i wyrafinowane i...
Page 69 - SPIS TREŚCI
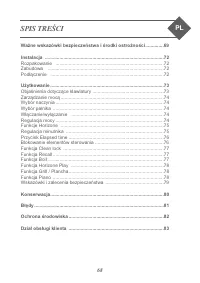
68 SPIS TREŚCI Ważne wskazówki bezpieczeństwa i środki ostrożności..............69 Instalacja ..........................................................................................72 Rozpakowanie ..................................................................................72Zabudowa ..........
Page 73 - INSTALACJA; ZABUDOWA W M E B L U; PODŁĄCZENIA ELEKTRYCZNE
72 • 1 INSTALACJA 1.1 ROZPAKOWANIE Wyjąć wszystkie elementyzabezpieczające. Sprawdzićprawidłowość parametrów urządzeniazamieszczonych na tabliczce danychznamionowych (1.1.1) . Zapisać w poniższej ramce figurujący natej tabliczce numer serwisowy i typnormy do wykorzystania w przyszłości. 1. 2 ZABUDOW...
Page 74 - UŻYTKOWANIE; Objaśnienia dotyczące klawiatury
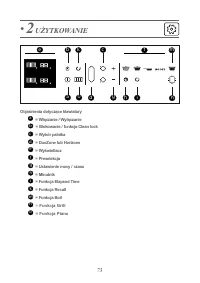
• 2 UŻYTKOWANIE Objaśnienia dotyczące klawiatury = Włączanie / Wyłączanie = Blokowanie / funkcja Clean lock = Wybór palnika = DuoZone lub Horizone = Wyświetlacz = Preselekcja = Ustawienie mocy / czasu = Minutnik = Funkcja Elapsed Time = Funkcja Recall = Funkcja Boil = Funkcja Grill = Funkcja Piano a...
Page 75 - Wyłączanie strefy gotowania / płyty; REGULACJA MOCY; WYBÓR NACZYNIA
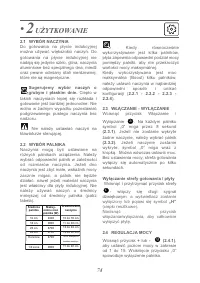
Kiedy równocześnie wykorzystywane jest kilka palników,płyta zapewnia odpowiedni podział mocypomiędzy palniki, aby nie przekroczyćwartości mocy maksymalnej.Kiedy wykorzystywana jest mocmaksymalna (Boost) kilku palników,należy ustawić naczynia w najbardziejodpowiedni sposób i unikaćkonfiguracji ( 2.2....
Page 76 - REGULACJA MINUTNIKA
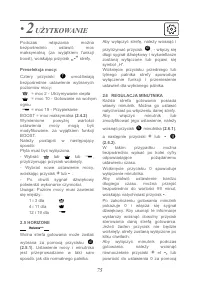
Podczas włączania możnabezpośrednio ustawić mocmaksymalną (za wyjątkiem funkcji boost), wciskając przycisk „-” strefy. Preselekcja mocy: Cztery przyciski umożliwiają bezpośrednie ustawienie wybranychpoziomów mocy: = moc 2 - Utrzymywanie ciepła = moc 10 - Gotowanie na wolnym ogniu = moc 19 - Przypiek...
Page 78 - Funkcja CLEAN LOCK
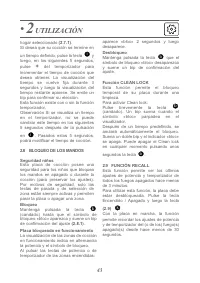
• 2 UŻYTKOWANIE 77 dźwiękowy potwierdzający wykonanieczynności. Funkcja CLEAN LOCK Funkcja ta pozwala na czasowezablokowanie płyty podczasczyszczenia.Aby aktywować Clean lock: Przycisnąć przez krótki czas przycisk (kłódka). Włączy się sygnał dźwiękowy i symbol „blok.” będzie migaćna wyświetlaczu.Po ...
Page 79 - Funkcja HORIZONE PLAY; Ustawianie akcesoriów
• 2 UŻYTKOWANIE 78 Porada dotycząca oszczędnościenergii Użycie pokrywki podczas gotowaniazapewnia oszczędność energii. Użyciepokrywki szklanej umożliwia doskonałekontrolowanie gotowania. 2.11 Funkcja HORIZONE PLAY modele Urządzenie jest wyposażone wznajdującą się z tyłu powierzchnigrzewczej prowadni...
Page 80 - Ogranicznik temperatury
• 2 UŻYTKOWANIE 79 2.14 WSKAZÓWKI I ZALECENIABEZPIECZEŃSTWACiepło resztkowe Strefa gotowania, która była używanaprzez dłuższy czas może pozostawaćgorąca przez kilka minut.Przez ten czas wyświetlany jest symbol„H” (2.14.1) . Należy unikać dotykania tych stref. Ogranicznik temperatury Każda strefa got...
Page 81 - KONSERWACJA; Ważna uwaga
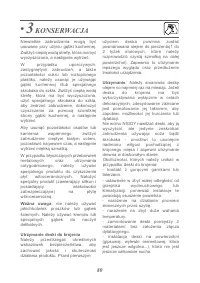
80 • 3 KONSERWACJA Niewielkie zabrudzenia mogą byćusuwane przy użyciu gąbki kuchennej.Zwilżyć ciepłą wodą strefę, która ma byćwyczyszczona, a następnie wytrzeć. W przypadku uporczywych,zastygniętych zabrudzeń, a takżepozostałości cukru lub roztopionegoplastiku, należy usunąć je używającgąbki kuchenn...
Page 82 - BŁĘDY
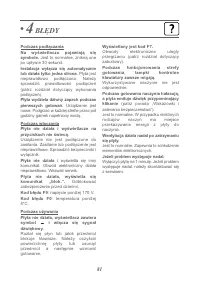
81 • 4 BŁĘDY Podczas podłączaniaNa wyświetlaczu pojawiają sięsymbole. Jest to normalne, znikną one po upływie 30 sekund. Instalacja wyłącza się automatycznielub działa tylko jedna strona. Płyta jest nieprawidłowo podłączona. Należysprawdzić prawidłowość podłączeń(patrz rozdział dotyczący wykonaniapo...
Page 83 - ŚRODOWISKO; OCHRONA ŚRODOWISKA
82 • 5 ŚRODOWISKO OCHRONA ŚRODOWISKA Materiały opakowaniowe tegourządzenia nadają się do recyklingu.Zachęcamy do ich recyklingu i doumieszczenia ich w przewidzianych wtym celu pojemnikach, a tym samym doprzyczynienia się w ten sposób do ochrony środowiska. Urządzenie zawiera równieżwiele materiałówp...
Page 84 - DZIAŁ OBSŁUGI KLIENTA
83 • 6 DZIAŁ OBSŁUGI KLIENTA Ewentualne interwencje przy urządzeniu powinny być wykonywane przez osobywykwalifikowane, autoryzowane przezmarkę. Aby ułatwić rozwiązanie problemu,podczas rozmowy z serwisem naprawczymnależy podać kompletne dane referencyjneposiadanego urządzenia (nazwa handlowa,numer s...
Page 86 - INDHOLDSFORTEGNELSE
85 INDHOLDSFORTEGNELSE Vigtig om sikkerhed og forsigtighedsregler .................................. 86 Installation ........................................................................................89 Udpakning .....................................................................................
Page 87 - VIGTIG OM SIKKERHED OG FORSIGTIGHEDSREGLER
86 VIGTIG OM SIKKERHED OG FORSIGTIGHEDSREGLER Denne vejledning kan ligeledes downloades fra mærkets hjemmeside.Læs venligst disse anvisninger, før du installerer og bruger apparatet. Vi harudarbejdet dem for din egen og andres sikkerhed. Opbevar denne brugervejledningsammen med apparatet. Hvis appar...
Page 90 - INDB Y G N I N G I M Ø B E L; ELEKTRISK TILSLUTNING
89 • 1 INSTALLATION 1.1 UDPAKNING Tag alle de beskyttende elementer af.Kontrollér og overhold apparatetsegenskaber anført på typeskiltet (1.1.1) For fremtidig brug skal du notereservicereferencerne og standard-typerne, der vises på typeskiltet, irammerne nedenfor. 1. 2 INDB Y G N I N G I M Ø B E L K...
Page 91 - BRUG; Tastaturforklaring
k a b c e g h f i m n d o • 2 BRUG Tastaturforklaring = Tænd/sluk = Låsning/”Clean lock” = Valg af kogezone = Horizone = Display = Forvalg = Indstilling af styrke/tid = Minutur = Funktionen Forløbet tid = Funktionen Hent = Funktionen Kog = Funktionen Grill = Funktionen Piano o n m k i h g f e d c b ...
Page 92 - INDSTILLING AF STYRKE
Ved samtidig brug af flere kogezoner fordeler kogepladenautomatisk styrken således, atkogepladens samlede styrke ikkeoverskrides.Når du bruger maksimal styrke (Boost)på flere zoner samtidigt, skal du sørgefor, at gryden/panden har den bedsteplacering, og du skal undgåkonfigurationerne ( 2.2.1 / 2.2....
Page 93 - INDSTILLING AF MINUTUR
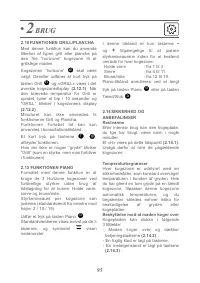
Forvalg af styrke: Der er fire taster hvormed du kan komme direkte til de forudindstilledestyrkeniveauer: = styrke 2 - Holde varm= styrke 10 - Simre= styrke 19 - Brune/riste BOOST = maksimal styrke (2.4.2) Du kan justere disse styrkeværdier,undtagen BOOST.Gå frem på følgende måde:Kogepladen skal vær...
Page 95 - FUNKTIONEN RECALL; Gode råd til energibesparelse; Montering af tilbehør
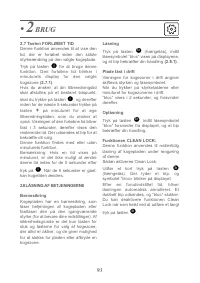
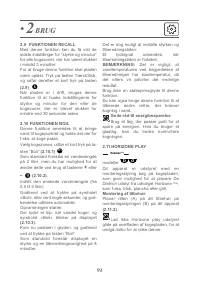
• 2 BRUG 2.9 FUNKTIONEN RECALL Med denne funktion kan du få vist desidste indstillinger for ”styrke og minutur”for alle kogezoner, der har været slukketi mindst 3 minutter.For at bruge denne funktion skal pladenvære oplåst. Tryk på tasten Tænd/Sluk,og udfør derefter et kort tryk på tasten (2.9) . Nå...
Page 96 - FUNKTIONEN PIANO
I denne tilstand er kun tasterne - og + tilgængelige til at justere styrkeniveauerne inden for et bestemtområde for hver kogezone: Holde varm : fra 1 til 3Simre : fra 4 til 11Brune/riste : fra 12 til 19. Piano-tilstand annulleres ved et langt tryk på tasten Piano eller på tasten Tænd/Sluk 2.14 SIKKE...
Page 98 - VEDLIGEHOLDELSE; Vigtig
97 • 3 VEDLIGEHOLDELSE For lettere tilsmudsning bruges enkøkkensvamp. Gennemblød områdetmed varmt vand, og aftør derefter. For større ansamlinger af fastbrændtemadrester, overkogt sukkerholdigt madog smeltet plast bruges enkøkkensvamp eller en specialspartel tilglas. Sæt området, der skal rengøres, ...
Page 99 - UNORMAL DRIFT
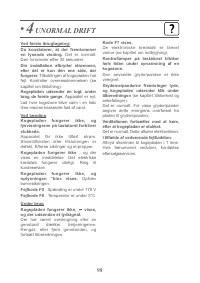
98 • 4 UNORMAL DRIFT Ved første ibrugtagning:Du konstaterer, at der fremkommeren lysende visning. Det er normalt. Den forsvinder efter 30 sekunder. Din installation afbryder strømmen,eller det er kun den ene side, derfungerer. Tilkoblingen af kogepladen har fejl. Kontroller overensstemmelsen (sekapi...
Page 100 - MILJØ; PAS PÅ MILJØET
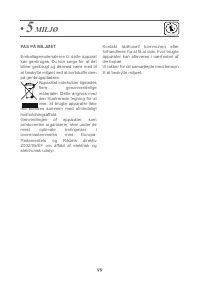
99 • 5 MILJØ PAS PÅ MILJØET Emballagematerialerne til dette apparatkan genbruges. Du kan sørge for, at detbliver genbrugt og dermed være med tilat beskytte miljøet ved at bortskaffe dempå genbrugspladsen. Apparatet indeholder ligeledesflere genanvendeligematerialer. Dette angives medden illustrerede...
Page 101 - KUNDESERVICE; REPARATIONER FRANKRIG
100 • 6 KUNDESERVICE REPARATIONER FRANKRIG Eventuelle indgreb på apparatet skal foretages af en kvalificeret tekniker, som erautoriseret af mærket. Når du ringer til os,skal du, for at vi bedre kan hjælpe dig, have alle oplysningerne om dit apparat klar (varenummer, servicereference,serienummer). Di...


 De Dietrich DPE7929XF
User Manual
De Dietrich DPE7929XF
User Manual
 De Dietrich DPI7540B
User Manual
De Dietrich DPI7540B
User Manual
 De Dietrich DPI7572G
User Manual
De Dietrich DPI7572G
User Manual
 De Dietrich DPI7572X
User Manual
De Dietrich DPI7572X
User Manual
 De Dietrich DPI7602BM
User Manual
De Dietrich DPI7602BM
User Manual
 De Dietrich DPI7670X
User Manual
De Dietrich DPI7670X
User Manual
 De Dietrich DPI7670XU
User Manual
De Dietrich DPI7670XU
User Manual
 De Dietrich DPI7684X
User Manual
De Dietrich DPI7684X
User Manual
 De Dietrich DPI7768X
User Manual
De Dietrich DPI7768X
User Manual
 De Dietrich DPI7884W
User Manual
De Dietrich DPI7884W
User Manual
 De Dietrich DTG 1008 X
User Manual
De Dietrich DTG 1008 X
User Manual
 De Dietrich DTG 701 X
User Manual
De Dietrich DTG 701 X
User Manual
 De Dietrich DTI 1113 X
User Manual
De Dietrich DTI 1113 X
User Manual
 De Dietrich DTI 1167 XE
User Manual
De Dietrich DTI 1167 XE
User Manual
 De Dietrich DTI 1358 DG
User Manual
De Dietrich DTI 1358 DG
User Manual