Danby DBC117A2BSSDD-6 - Manuals
Danby DBC117A2BSSDD-6 Wine Cooler – User Manual in PDF format online.
Manuals:
User Manual Danby DBC117A2BSSDD-6


Summary
1 Welcome Welcome to the Danby family. We are proud of our quality products and we believe in dependable service. We suggest that you read this owner’s manual before plugging in your new appliance as it contains important operation information, safety information, troubleshooting and maintenance tip...
2 SAFETY REQUIREMENTS DANGER: Risk of fi re or explosion. Flammable refrigerant used. Do not puncture refrigerant tubing. • Do not use mechanical devices to defrost refrigerator. • Ensure that servicing is done by factory authorized service personnel, to minimize product damage or safety issues. • Co...
3 INSTALLATION INSTRUCTIONS LOCATION • Two people should be used when moving the appliance. • Remove interior and exterior packaging prior to installation. Wipe the outside of the appliance with a soft, dry cloth and the inside with a lukewarm wet cloth. • Place the appliance on a fl oor that is stro...
Danby Wine Coolers Manuals
-
 Danby DBC026A1BSSDB
User Manual
Danby DBC026A1BSSDB
User Manual
-
 Danby DBC045L1SS
User Manual
Danby DBC045L1SS
User Manual
-
 Danby DWC040A3BSSDD
User Manual
Danby DWC040A3BSSDD
User Manual
-
 Danby DWC047D1BSSPR
User Manual
Danby DWC047D1BSSPR
User Manual
-
 Danby DWC114BLSDD
User Manual
Danby DWC114BLSDD
User Manual
-
Danby DWC114BLSDD
Manual
-
 Danby DWC350BLP
User Manual
Danby DWC350BLP
User Manual
-
 Danby DWC94L1B
User Manual
Danby DWC94L1B
User Manual
-
 Danby SBC051D1BSS
User Manual
Danby SBC051D1BSS
User Manual
-
 Danby SPRBC056D1SS
User Manual
Danby SPRBC056D1SS
User Manual
-
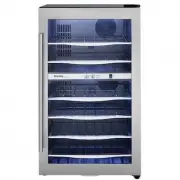
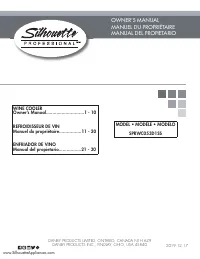 Danby SPRWC053D1SS
User Manual
Danby SPRWC053D1SS
User Manual
-
 Danby SPRWC140D1SS
User Manual
Danby SPRWC140D1SS
User Manual
-
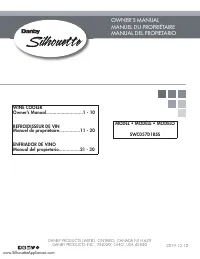 Danby SWC057D1BSS
User Manual
Danby SWC057D1BSS
User Manual