Daikin RKN24KEVJU- Manuals
Daikin RKN24KEVJU– Installation Manual in PDF format online.
Manuals:
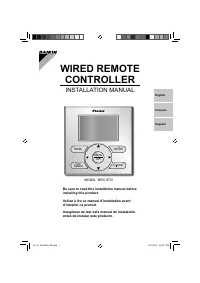
Installation Manual Daikin RKN24KEVJU


Summary
1 English Safety Precautions Read these Safety Precautions carefully to ensure correct installation. • This manual classi fi es the precautions into DANGER, WARNING and CAUTION. • Be sure to follow all the precautions below: they are all important for ensuring safety. DANGER ...... Indicates an im...
2 English Safety Precautions WARNING After connecting all wires be sure to shape the cables so that they do not put undue stress on the electrical • covers, panels or terminals. Install covers over the wires. Incomplete cover installation may cause terminal overheating, electrical shock, fi re or ...
3 English Precautions for Selecting the Location Choose a place solid enough to bear the weight and vibration of the unit, where the operation noise will not be ampli fi ed. 1) Choose a location where the hot air discharged from the unit or the operation noise will not cause a nuisance to the neig...
Daikin Manuals
-
 Daikin 3MXS68G2V1B
Installation Manual
Daikin 3MXS68G2V1B
Installation Manual
-
 Daikin 4MXS68F2V1B
User Manual
Daikin 4MXS68F2V1B
User Manual
-
 Daikin Altherma HT
Installation Manual
Daikin Altherma HT
Installation Manual
-
 Daikin ARC433B46
User Manual
Daikin ARC433B46
User Manual
-
 Daikin ARC433B47
User Manual
Daikin ARC433B47
User Manual
-
 Daikin Altherma LT
User Manual
Daikin Altherma LT
User Manual
-
 Daikin ATXD60CV4
User Manual
Daikin ATXD60CV4
User Manual
-
 Daikin BRC1E52A
User Manual
Daikin BRC1E52A
User Manual
-
 Daikin BRC1E52A7
Installation Manual
Daikin BRC1E52A7
Installation Manual
-
 Daikin BRC1E51A7
User Manual
Daikin BRC1E51A7
User Manual
-
 Daikin BRC1E61
User Manual
Daikin BRC1E61
User Manual
-
 Daikin BRC1E72
Installation Manual
Daikin BRC1E72
Installation Manual
-
 Daikin BRC230Z4
User Manual
Daikin BRC230Z4
User Manual
-
 Daikin BRC24Z8
User Manual
Daikin BRC24Z8
User Manual
-
 Daikin DCM601A72
Installation Manual
Daikin DCM601A72
Installation Manual
-
 Daikin DCS302C71
Installation Manual
Daikin DCS302C71
Installation Manual
-
 Daikin EBLQ036BA6VJU1
Installation Manual
Daikin EBLQ036BA6VJU1
Installation Manual
-
 Daikin EGSQH10S18AA9W
User Manual
Daikin EGSQH10S18AA9W
User Manual
-
 Daikin EHYKOMB33AA
User Manual
Daikin EHYKOMB33AA
User Manual
-
 Daikin EKHBH016AB
Installation Manual
Daikin EKHBH016AB
Installation Manual