Brio CLPOURO420SCV2 - Manuals

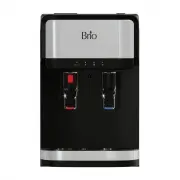
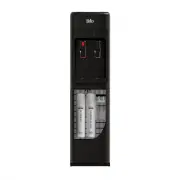
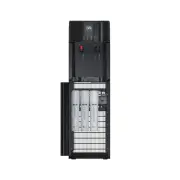
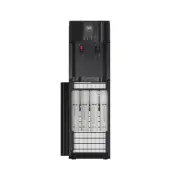
User Manual Brio CLPOURO420SCV2


Summary
SAFETY PRECAUTIONS • Plug in the dispenser in the way described in this manual.• In accordance with these instructions, the dispenser must be properly located and installed before use • Use only water. Do not use coffee, tea or other beverages.• Dispenser must be unplugged before cleaning, sanitizin...
1) Turn off the cold water supply to the sink. 2) Turn on the kitchen faucet to release pressure and allow water to drain from the line. 3) Disconnect the cold water line from the threaded stem on the bottom of the kitchen faucet. Attach threaded ends of supplied brass tee to the cold water supply l...
INSTALL RO DRAIN CONNECTOR WARNING CAUTION Be sure that all electrical appliances and outlets are turned off at the circuit breaker before working in the cabinet area. Please wear safety glasses to protect eyes when drilling. 1. Identify drain outlet location. 2. Remove protective cover from back of...
Brio Water Dispensers Manuals
-
 Brio CL520CV
User Manual
Brio CL520CV
User Manual
-
 Brio CLBL320BSCP
User Manual
Brio CLBL320BSCP
User Manual
-
 Brio CLBL320SCP
User Manual
Brio CLBL320SCP
User Manual
-
 Brio CLBL320WSCP
User Manual
Brio CLBL320WSCP
User Manual
-
 Brio CLBL420V2
User Manual
Brio CLBL420V2
User Manual
-
 Brio CLBL520SC
User Manual
Brio CLBL520SC
User Manual
-
 Brio CLBL520SCBLK
User Manual
Brio CLBL520SCBLK
User Manual
-
 Brio CLBL720SC
User Manual
Brio CLBL720SC
User Manual
-
 Brio CLBL720SCBLK
User Manual
Brio CLBL720SCBLK
User Manual
-
 Brio CLBL720SCX
User Manual
Brio CLBL720SCX
User Manual
-
 Brio CLCTPOU320UVF3P
User Manual
Brio CLCTPOU320UVF3P
User Manual
-
 Brio CLCTPOU620UVF2
User Manual
Brio CLCTPOU620UVF2
User Manual
-
 Brio CLCTPOU720UVF3
User Manual
Brio CLCTPOU720UVF3
User Manual
-
 Brio CLCTTL520
User Manual
Brio CLCTTL520
User Manual
-
 Brio CLNLPOU520SCF2B
User Manual
Brio CLNLPOU520SCF2B
User Manual
-
 Brio CLPOU320BSLUV2P
User Manual
Brio CLPOU320BSLUV2P
User Manual
-
 Brio CLPOU320BUVF3P
User Manual
Brio CLPOU320BUVF3P
User Manual
-
 Brio CLPOU320BUVF4P
User Manual
Brio CLPOU320BUVF4P
User Manual
-
 Brio CLPOU320SLUVF2P
User Manual
Brio CLPOU320SLUVF2P
User Manual
-
 Brio CLPOU320UVF3P
User Manual
Brio CLPOU320UVF3P
User Manual