Page 2 - READ ALL; Contents; COMMERCIAL
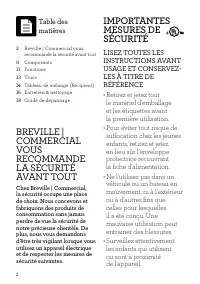
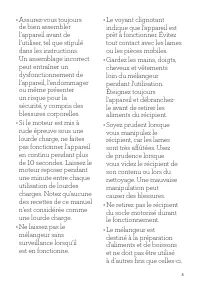
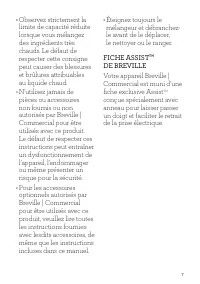
2 IMPORTANT SAFEGUARDS READ ALL INSTRUCTIONS BEFORE USE AND SAVE FOR FUTURE REFENCE • Remove and discard all packaging materials and stickers before first use. • To avoid choking hazard for young children, remove and safely dispose the protective cover fitted on the power plug. • Do not use it in mo...
Page 7 - SAVE THESE INSTRUCTIONS
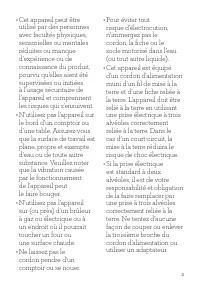
7 SHORT CORD INSTRUCTIONS Your Breville | Commercial appliance is fitted with a short power supply cord to reduce personal injury or property damage resulting from pulling, tripping or becoming entangled with a longer cord. If an extension cord is used, (1) the marked electrical rating of the cord s...
Page 8 - Rating Information; Components
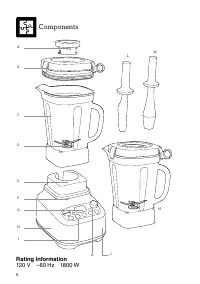
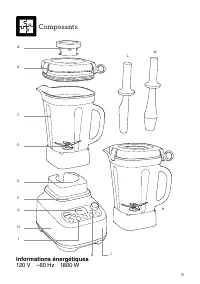
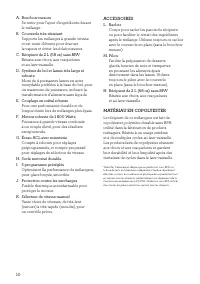
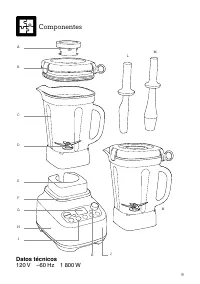
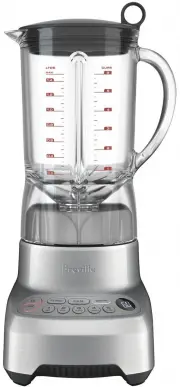
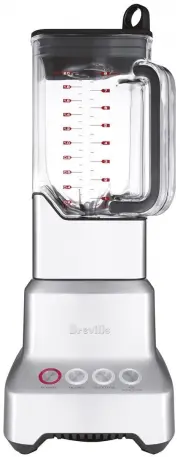
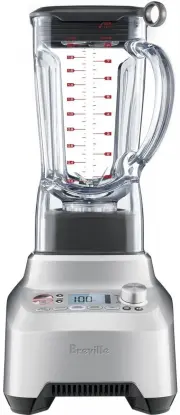
8 Rating Information Components A B C D E F H K J L N M I G 120 V ~60 Hz 1800 W
Page 10 - Functions; GETTING STARTED
10 Functions GETTING STARTED Ready mode Press ON | OFF button to power the unit to READY mode. Sleep After 2 minutes of inactivity, LCD powers off, and the ON | OFF button flashes red.After 5 minutes of inactivity, the blender turns power OFF. Press the ON | OFF button to reactivate the blender. VES...
Page 12 - Tips
12 Tips • The inner measuring cap can be removed to add oils/liquids or other ingredients during blending. Extreme care must be taken as depending on the mixture volume and speeds of operation, splashes can eject from the lid. We do not recommend removing the inner measuring cap when blending hot li...
Page 13 - DRY MILLING
13 Blending Chart (Jug) FOOD PREPARATION & USAGE QUANTITY FUNCTIONS TIME Grains & seeds Mill into flour. Use in bread, pizza doughs, cakes, muffins and flour batters. 1 L –3 L cups 250–600g MILL speed 30–60 secs Dried beans, grains & corn e.g. wheat, garbanzo beans, corn kernels Mill int...
Page 15 - WARNING
15 Care & Cleaning Vessels and lids In order to keep your jug clean and avoid food drying on the blades, vessels and lids, follow the below steps as soon as possible after use: • Rinse most of the ingredients off the vessels and lids. 68-ounce jug • Add 4 cups (around 1L) of warm water and press...
Page 17 - Troubleshooting
17 Troubleshooting Motor doesn’t start or blade doesn’t rotate • Check the blender jug and lid are securely in place. • Check that the power plug is properly inserted into the power outlet. • Check the ON | OFF button and selected function button is illuminated. Food is unevenly chopped • Use the ta...
Page 18 - Notes
Page 19 - the; Super Q; Manuel d’instructions – CBL920
FR-CA MANUEL D'INSTRUCTIONS the Super Q ™ Pro Manuel d’instructions – CBL920
Page 20 - LISEZ TOUTES LES
2 IMPORTANTES MESURES DE SÉCURITÉ LISEZ TOUTES LES INSTRUCTIONS AVANT USAGE ET CONSERVEZ- LES À TITRE DE RÉFÉRENCE • Retirez et jetez tout le matériel d’emballage et les étiquettes avant la première utilisation. • Pour éviter tout risque de suffocation chez les jeunes enfants, retirez et jetez en li...
Page 26 - CONSERVEZ CES INSTRUCTIONS
8 CORDON D’ALIMENTATION COURT Votre appareil Breville est muni d’un cordon d’alimentation relativement court et très sécuritaire qui réduit le risque de blessures corporelles ou dommages pouvant être causés par le fait de tirer, trébucher ou s’enchevêtrer dans un cordon plus long. Si vous utilisez u...
Page 27 - Composants; Informations énergétiques
9 Composants A B C D E F H K J L N M I G 120 V ~60 Hz 1800 W Informations énergétiques
Page 29 - Fonctions; DÉMARRAGE
11 Fonctions DÉMARRAGE Mode « Prêt » Appuyez sur MARCHE | ARRÊT pour mettre l’appareil en mode « Prêt ». Mode « Veille » Après 2 minutes d’inactivité, l’écran ACL s’éteint et la touche MARCHE | ARRÊT clignote en rouge.Après 5 minutes d’inactivité, le mélangeur s’éteint. Appuyez sur MARCHE | ARRÊT po...
Page 31 - Trucs
13 Trucs • Le bouchon-mesure se retire pour ajouter des liquides/huiles ou autres ingrédients durant le mélange . Soyez extrêmement prudent, car le volume (selon le cas) et la vitesse de fonctionnement peuvent faire éclabousser le mélange par le couvercle. Nous ne recommandons pas de retirer le bouc...
Page 33 - MOUTURE À SEC
15 MOUTURE À SEC Veuillez noter que moudre des ingrédients durs comme les épices, les noix, le sucre, le café, les grains, etc. égratignera et causera de l’opacité sur les parois internes du récipient.Ce résultat découlant de la mouture de tels ingrédients est purement esthétique et n’affectera aucu...
Page 34 - AVERTISSEMENT
16 Entretien & nettoyage Récipients et couvercles Dans le but de garder votre mélangeur propre et d’éviter que les aliments ne sèchent sur les lames, récipients ou couvercles, suivez la procédure ci-dessous dès que possible après utilisation : • Rincez les récipients et les couvercles pour enlev...
Page 39 - Libro de instrucciones – CBL920
ES-MX MANUAL DE INSTRUCCIONES the Super Q ™ Pro Libro de instrucciones – CBL920
Page 40 - ANTES DE USAR ESTE; Contenido
2 CONSIDERACIONES IMPORTANTES ANTES DE USAR ESTE EQUIPO, LEA TODAS LAS INSTRUCCIONES Y GUÁRDELAS PARA FUTURAS CONSULTAS • Retire y deseche todos los materiales de empaque y adhesivos antes del primer uso. • Para evitar el peligro de asfixia en niños pequeños, retire y deseche de forma segura la cubi...
Page 46 - GUARDE ESTAS INSTRUCCIONES
8 INSTRUCCIONES DEL CABLE DE ALIMENTACIÓN CORTO Su equipo Breville | Commercial está equipado con un cable de alimentación corto para disminuir el riesgo de lesiones a personas o daños a la propiedad que pudieran suceder si alguien lo tira, se tropieza con él o si se enreda con otro cable más largo....
Page 47 - Datos técnicos; Componentes
9 N Datos técnicos Componentes A B C D E F H K J L M I G 120 V ~60 Hz 1 800 W
Page 49 - Funciones; PRIMEROS PASOS
11 Funciones PRIMEROS PASOS Modo Ready (Listo) Presione el botón ON | OFF (Encendido | Apagado) para encender el equipo en el modo READY (Listo). Modo inactivo Después de 2 minutos de inactividad, la pantalla LCD se apaga y el botón ON | OFF (Encendido | Apagado) parpadea de color rojo.Después de 5 ...
Page 50 - OPERACIÓN MANUAL; ADVERTENCIA; NOTA
12 OPERACIÓN MANUAL Selector de control de velocidad Gire el selector de control de velocidad en el sentido de las manecillas del reloj para seleccionar una de las 12 configuraciones de velocidad, desde revolver a velocidad lenta a pulverizar a velocidad muy rápida.Para detener la mezcla, gire el se...
Page 51 - Consejos
13 Consejos • El vaso medidor interno se puede quitar para agregar aceites, líquidos u otros ingredientes durante el proceso de mezcla. Se debe tener mucho cuidado, ya que, dependiendo del volumen de la mezcla y las velocidades de operación, se pueden provocar salpicaduras desde la tapa. No recomend...
Page 54 - PULVERIZADO EN SECO
16 PULVERIZADO EN SECO Tenga en cuenta que al moler ingredientes duros como especias, frutos secos, azúcar, café, granos, etc., las superficies internas de la jarra se pueden rayar y enturbiar. Esta es solamente una consecuencia estética de moler este tipo de ingredientes, y no afecta el rendimiento...
Page 57 - Solución de problemas
19 Solución de problemas El motor no arranca o la cuchilla no gira • Verifique que la jarra y la tapa de la licuadora estén en su lugar. • Compruebe que el enchufe esté bien insertado en el tomacorriente. • Verifique que el botón ON | OFF (Encendido | Apagado) esté iluminado. El equipo corta la comi...
Page 58 - Notas