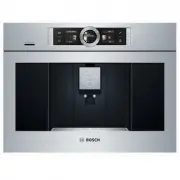
Page 2 - Комплект поставки
ru Pycckий 2 en English 24 1 4 2 3 5 6 7 E-Nr. ……… FD… … TES556M1RU TES559M1RU Комплект поставки (см. стр. 3) Included in delivery (see page 25) TES556M1RU_559M1RU.indb 2 04.06.2013 14:30:10
Page 6 - Содержание; фильтр; Указания по технике
2 Robert Bosch Hausgeräte GmbH ru Содержание Комплект поставки ..................................... 3 Обзор ........................................................... 4 Элементы управления ............................... 4 − Сетевой выключатель O / I ...................... 4 − Кнопка d ..............
Page 8 - Обзор
4 Robert Bosch Hausgeräte GmbH ru Обзор (См. рисунки A, B, C, D и Е в начале инструкции) 1 Емкость для кофейных зерен 2 Крышка, сохраняющая аромат 3 Поворотный регулятор степени помола 4 Выдвижной отсек для молотого кофе (молотый кофе / таблетка для очистки) 5 Блок заваривания ( рис. E ) a) Бл...
Page 9 - промыть машину; Переключатель; Сообщения на дисплее
5 TES55. | 05/2013 ru Регулятор «Крепость кофе» Данный регулятор (14) используется для установки уровня крепости кофе. От h до g очень слабыйслабыйнормальныйкрепкийDoubleShot крепкий +DoubleShot крепкий ++ Приготовление кофе этих уровней крепости осу- ществляется в два этапа. См. « aromaDouble Shot...
Page 10 - aromaDouble Shot; Общие сведения; жесткость; Начало работы с прибором
6 Robert Bosch Hausgeräte GmbH ru aromaDouble Shot Чем дольше готовится кофе, тем больше высвобождается горьких субстанций и неприятных ароматов. Это отрицательно сказывается на вкусе и делает кофе менее приятным для употребления. Для приготовления особенно крепкого кофе, модель TES556/TES559 осна...
Page 11 - Фильтр для воды; max; фильтра
7 TES55. | 05/2013 ru 6. Снять емкость для воды (17), промыть ее и заполнить свежей, холодной водой. Уровень заполнения не должен превышать отметку max (макс.). 7. Ровно установить емкость для воды (17) и, надавив на нее, вставить до упора. 8. Закрыть крышку емкости для воды (18). 9. Заполнить кофей...
Page 12 - включить фильтр; замените; Установки меню; start; выход; start
8 Robert Bosch Hausgeräte GmbH ru 5. С помощью верхнего регулятора (15) выберите включить фильтр . 6. Нажать кнопку start ( 10). 7. Поместите емкость объемом 0,5 л под выпускной трубкой (6a). 8. Нажать кнопку start ( 10). 9. Вода проходит через фильтр, промывая его. 10. После этого опорожнить емко...
Page 13 - Установка степени
9 TES55. | 05/2013 ru фильтр : В этом меню можно указать, будет ли использоваться фильтр для воды. Если фильтр для воды не используется, устано - вите значение фильтра нет или старый . Если фильтр для воды используется, установите значение включить фильтр . Новые фильтры для воды необходимо промыть ...
Page 14 - Приготовление; необходимо
10 Robert Bosch Hausgeräte GmbH ru Приготовление кофейных напитков из кофейных зерен Данная полностью автоматическая кофе- машина эспрессо производит помол свежего кофе отдельно для каждого заваривания. Прибор должен быть готов к работе. Для приготовления кофейного напитка с молоком сначала вставь...
Page 16 - Приготовление молочной; Уход и ежедневная; Опасность поражения током!
12 Robert Bosch Hausgeräte GmbH ru Приготовление молочной пены и теплого молока ¡ Опасность ожога! Насадка для приготовления молочной пены (6) сильно нагревается. Беритесь только за пластмассовую часть насадки для приготовления молочной пены (6). Совет: можно вначале готовить молоч- ную пену и зат...
Page 17 - очистить
13 TES55. | 05/2013 ru ● Не мойте в посудомоечной машине следующие детали: крышка отсека для хранения краткой инструкции (5c), заслонка поддона для капель (8а), выдвижной отсек для молотого кофе ( 4), блок заваривания (5a). ● Следующие детали можно мыть в посудомоечной машине: поддон для капель под...
Page 18 - Опасность ожога
14 Robert Bosch Hausgeräte GmbH ru 3. Очистите детали по отдельности при помощи раствора моющего средства и мягкой щетки. При необходимости погрузите детали в теплый раствор моющего средства. 4. Все детали промыть чистой водой и просушить. 5. Опять собрать насадку для приготов- ления молочной пены и...
Page 20 - Сервисные программы; требуется Calc‘n‘Cle an!
16 Robert Bosch Hausgeräte GmbH ru Сервисные программы Совет: См. также краткую инструкцию в отсеке для хранения (5c). В зависимости от использования, с определенными интервалами на дисплее будут появляться следующие сообщения: требуется удал. накипь! или требуется очистк а! или требуется Calc‘n‘Cle...
Page 21 - запуск очистки
17 TES55. | 05/2013 ru Сообщения на дисплее проведут по пунктам программы. очистите под донвставьте под дон ● Опорожните и установите поддон для капель (8). Важно: Если активирован фильтр для воды, на дисплее отобразится подсказка снять фильтр и повторно нажать кнопку start ( 10). Снимите фильтр, ...
Page 23 - идет Calc‘n‘Cle an; Защита от замерзания
19 TES55. | 05/2013 ru очис./запол. емк. д/водына жмите start ● Промыть емкость для воды (17) и заполнить ее водой до отметки max . ● Нажать кнопку start ( 10). идет Calc‘n‘Cle an Программа удаления накипи длится при - близительно 10 минут, после чего выпол - няется промывка. очистите под донвставь...
Page 24 - Утилизация
20 Robert Bosch Hausgeräte GmbH ru Утилизация Утилизируйте упаковку с использованием экологически безопасных методов. Данный прибор имеет отметку о соот - ветствии европейским нормам 2012/19/EG утилизации электрических и электронных приборов (waste electrical and electronic equipment – WEEE). Данные...
Page 25 - Самостоятельное устранение небольших проблем
21 TES55. | 05/2013 ru Проблема Причина Устранение Сообщение на дисплее досыпьте зерна! , хотя емкость для кофейных зерен (1) заполнена, или кофемолка не размалы- вает кофейные зерна. Зерна не проваливаются в кофемолку (слишком маслянистые зерна). Слегка постучать по емкости для кофейных зерен ( 1)....
Page 26 - Проблема
22 Robert Bosch Hausgeräte GmbH ru Проблема Причина Устранение Кофе слишком «кислый». Установлен слишком грубый помол, или кофе слишком грубого помола. Установить более тонкий помол или использовать кофе более тонкого помола. Неподходящий сорт кофе. Использовать кофе более темной обжарки. Кофе слишк...
Page 27 - Технические характеристики
23 TES55. | 05/2013 ru Проблема Причина Устранение Капли воды на внутрен - ней поверхности корпуса прибора при извлечении поддона для капель ( 8). Поддон для капель ( 8) извлечен слишком рано. Извлекайте поддон для капель ( 8) через несколько секунд после последнего приготовления напитка. Сообщение ...
Page 28 - Safety instructions; off
24 Robert Bosch Hausgeräte GmbH en Dear Coffee Connoisseur, Congratulations on purchasing this fully automatic espresso machine from Bosch . These instructions describe various models with different features. Please also note the enclosed quick refer - ence guide. It can be kept in the special stora...
Page 29 - Overview; Included in delivery
25 TES55. | 05/2013 en Overview (see overview images A, B, C, D and E at the beginning of this instruction manual) 1 Bean container 2 Aroma cover 3 Selector for grind setting 4 Drawer (ground coffee/cleaning tablet) 5 Brewing unit ( Fig. E ) a) Brewing unit b) Door c) Storage compartment for ...
Page 30 - Controls; Rinse machine
26 Robert Bosch Hausgeräte GmbH en Controls Power on/off switch O / I The power switch O / I (9) is used to switch the appliance on or to switch it off fully (power supply off). Important: Before switching off, run the cleaning programme or use the e off / j button (13) to switch off. d button P...
Page 31 - Rotary selector; Display messages; Before using for the; General; Water hardness
27 TES55. | 05/2013 en Rotary selector To dispense milk froth – for example for a latte macchiato or cappuccino – turn the j symbol to the front. To dispense warm milk, turn the i symbol to the front. To dispense hot water, set the rotary selector to the horizontal position. Display messages The d...
Page 32 - Shut off
28 Robert Bosch Hausgeräte GmbH en Switching on the appliance 1. Remove the protective i lm. 2. Place the fully automatic espresso machine on a l at, water-resistant sur- face that can take its weight. Make sure that the machine’s ventilation slots remain unobstructured. Important: Only use the appl...
Page 33 - Water i lter; Ac tivate filter; filter
29 TES55. | 05/2013 en Water i lter A water i lter can prevent scale buildup. Before a new water i lter is used, it must be rinsed. To do this, proceed as follows: 1. Press the water i lter i rmly into the water tank with the aid of the measuring spoon (19). 2. Fill the water tank (17) with water u...
Page 34 - Menu settings
30 Robert Bosch Hausgeräte GmbH en Menu settings You can adapt the appliance to your indi- vidual needs in the menu settings. 1. Hold the e off / j button (13) down for at least 3 seconds. 2. Press the e off / j button (13) repeated - ly until the required menu item appears in the display. 3. Select...
Page 35 - Preparation using; must be; Rinse milk; Preparation
31 TES55. | 05/2013 en Adjusting the grinding unit The rotary selector (3) adjusts the grind set - tings from coarse to ine. ¡ Warning! Adjust the grinding unit only while it is running! Otherwise the appliance may be damaged. Do not reach into the grinding unit. ● While the grinding unit is runnin...
Page 36 - Dispensing hot water
32 Robert Bosch Hausgeräte GmbH en Coffee is brewed and then poured into the cup(s). N.B.: With some settings the coffee is prepared in two stages (see “ aromaDouble Shot” on page 27). Wait until the procedure is fully completed. Press the start button (10) again to cut the brewing process short. P...
Page 37 - Maintenance and; Risk of electric shock!; Do not put the following items in the
33 TES55. | 05/2013 en Preparing milk froth and warm milk ¡ Risk of burns! The milk frother (6) gets very hot. Hold the milk frother (6) by the plastic part only. Tip: You can foam the milk i rst and then dispense coffee, or foam the milk separately and pour it onto the coffee. The appliance must ...
Page 38 - Do not; Cle an milk
34 Robert Bosch Hausgeräte GmbH en ● The following items are dishwasher- safe: drip tray for coffee outlet (8c), coffee grounds container (8b), grate for coffee outlet (8d), aroma cover (2) and measuring spoon (19). ● Wipe out the inside of the appliance (tray holders and drawer). Important: Drip t...
Page 39 - Cleaning the brewing unit
35 TES55. | 05/2013 en 3. Clean the individual parts with a deter- gent solution and a soft brush. If neces- sary, soak in a warm detergent solution. 4. Rinse all parts with clear water and dry them. 5. Reassemble all the parts and replace fully in the appliance. ¡ Risk of scalding! Use this applian...
Page 40 - Tips on energy saving; Service Programmes; Calc‘n‘Cle an required!
36 Robert Bosch Hausgeräte GmbH en Tips on energy saving ● The fully automatic espresso machine switches off automatically after one hour (factory setting). The default time of one hour can be shortened (see “Menu settings” Shut off on page 30). ● Switch off the fully automatic espresso machine when...
Page 43 - Frost protection; To avoid damage from low tempera; Accessories
39 TES55. | 05/2013 en Frost protection ¡ To avoid damage from low tempera - tures during transport and storage, the appliance must be completely emptied irst. Note: The appliance must be ready for use and the water tank (17) illed. 1. Place a large receptacle under outlet (6a). 2. Press the h / ...
Page 44 - Problem; Simple troubleshooting
40 Robert Bosch Hausgeräte GmbH en Problem Cause Solution Display shows Refill be ans! although the bean container (1) is full, or the grinding unit does not grind the beans. Beans are not falling into the grinding unit (beans too oily). Gently tap the bean container (1). Change the type of coffee i...
Page 45 - Cle an bre wing unit; If you are unable to solve the problem, please call the hotline.
41 TES55. | 05/2013 en Problem Cause Solution Coffee is too “acidic”. The grinding setting is too coarse or the pre-ground coffee is too coarse. Adjust the grinding unit to a iner setting or use iner pre- ground coffee. Unsuitable type of coffee. Use a darker roast. Coffee is too “bitter ”. The grin...
Page 46 - Insert bre wing unit
42 Robert Bosch Hausgeräte GmbH en Problem Cause Solution Water dripped onto the in - ner floor of the appliance when the drip tray (8) was removed. Drip tray (8) removed too early. Wait a few seconds after the last drink was dispensed before removing the drip tray (8). Display shows Insert bre wing...