Page 3 - Table of Contents
EN 3 www.bora.com Table of Contents 1 General information 4 1.1 Target group ........................................................ 4 1.2 Validity of the operating and installation instructions ......................................................... 4 1.3 Other applicable documents ................
Page 4 - General information; Directives
EN 4 General information www.bora.com 1 General information 1.1 Target group These operating and installation instructions apply for the following target groups: Target group Requirements User The appliance can be used by children aged 8 and above as well as people with reduced physical, sensory or ...
Page 5 - Presentation of information; Safety and warning information; WARNING SYMBOL AND SIGNAL
EN 5 General information www.bora.com 1.4 Presentation of information To make working with these instructions quick and easy, consistent formatting, numbering, symbols, safety instructions, terms and abbreviations are used throughout. Handling instructions are market with an arrow. X X Always carry ...
Page 6 - Safety; General safety instructions
EN 6 Safety www.bora.com 2 Safety 2.1 General safety instructions INFO The appliance complies with the stipulated safety requirements. The user is responsible for appliance cleaning and maintenance as well as its safe use. Improper use can lead to personal injury and damage to property. Q Q The oper...
Page 7 - Safety instructions – operation
EN 7 Safety www.bora.com X X For cleaning, only use non-abrasive detergents to avoid scratching or wearing the surface. X X Make sure the base of the cookware and the cooking zone are clean and dry. X X Always lift the cookware (do not pull) to avoid scratching or wearing the surface. 2.2 Safety ins...
Page 9 - Safety instructions – installation
EN 9 Safety www.bora.com CAUTION! Escaping hot liquids! Unattended pans can boil over allowing hot liquids to escape. X X Always keep an eye on pans while cooking. X X Short cooking sessions must be constantly monitored. CAUTION! Damage from objects on the cooktop! Objects such as pan lids on the co...
Page 10 - Safety instructions –; Risk of electric shock!; Safety instructions – spare parts; Risk of injury and damage to
EN 10 Safety www.bora.com 2.4 Safety instructions – disassembly and disposal The device must only be disassembled by trained specialists who are familiar with and comply with the standard national regulations and supplementary regulations of the local utility companies. Work on electrical components...
Page 11 - Technical data; Device dimensions control knob
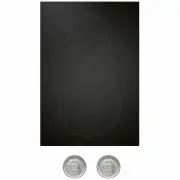
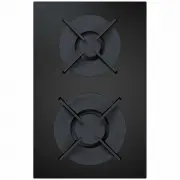
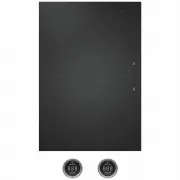
EN 11 Technical data www.bora.com 3 Technical data Parameter Value Supply voltage 220 - 240 V Frequency 50/60 Hz Power consumption 3.7 kW Fuse protection 1 x 16 A Dimensions (width x depth x height) 370 x 540 x 52 mm Weight (incl. accessories/ packaging) 8.0 kg Cooktop Value Power levels 1 - 9, P He...
Page 12 - Device description; Operating principle
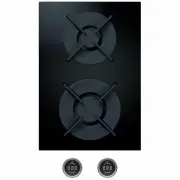
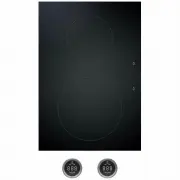
EN 12 Device description www.bora.com 4 Device description Observe all safety and warning information during operation (see the Safety section). The cooktop has the following features: Q Q Automatic heat up function Q Q Safety shut-down Q Q Electronic power control (9 levels) Q Q Power setting Q Q C...
Page 13 - Knob operation; ßp; Functional principle
EN 13 Device description www.bora.com 4.3.1 Power levels The high power output of induction cooktops results in the very quick heating up of cookware. A slight adjustment is needed in comparison to conventional cooking systems when selecting the power level in order to avoid burning food. Activity P...
Page 14 - Noises
EN 14 Device description www.bora.com X X Pay attention to the cookware bottom. The base of the cookware should not show any sign of curvature. Due to incorrect temperature monitoring of the hob caused by the air gap between the cookware and the temperature sensor underneath the hob, overheating may...
Page 16 - Installation; Checking the scope of delivery; Assembly instructions
EN 16 Installation www.bora.com 5 Installation X X Observe all safety and warning information (see the Safety section). X X Follow the enclosed manufacturer’s information. INFO The cooktop must not be installed above cooling devices, dishwashers, stoves, baking ovens, washing machines or driers. INF...
Page 18 - Installing the cooktop; Installing the control knob behind the
EN 18 Installation www.bora.com 5.5 Installing the cooktop INFO Clearance of one millimetre should be planned between the built-in appliances. INFO A clearance of two millimetres should be planned around the built-in appliances. INFO A mounting rail should ideally be installed between adjacent cookt...
Page 19 - Bore hole examples
EN 19 Installation www.bora.com ≥70 90 90 90 90 90 196 196 196 196 370 370 370 110 1 1 1 1 110 Ø50 ±0,5 Fig. 5.11 Bore holes for 3 cooktops and 2 extractors [1] Bore holes for socket (2x external) [2] Bore holes for control knobs (8x) [3] Cooktop (3x) [4] Cooktop extractor (2x) [5] Worktop [6] Floor...
Page 20 - Connecting the cooking zones; Installation rotated by 180°
EN 20 Installation www.bora.com INFO If the device is installed rotated by 180°, the connections for the control knob and the automatic extraction system are at the back. INFO I f the cooktop is installed rotated by 180°, the cooking zone indicator is automatically shown as rotated by 180°. INFO The...
Page 22 - Connecting the automatic extraction system; PE
EN 22 Installation www.bora.com Connecting the cooking zones when the cooktop is installed rotated by 180° 5 4 3 2 1 7 6 Fig. 5.20 Connecting the cooking zones with 180° installation [1] Cooktop [2] Rear cooking zone (zone 1) [3] Front cooking zone (zone 2) [4] Control knob for the rear cooking zone...
Page 23 - Configuration menu; Setting the volume of the acoustic signal
EN 23 Installation www.bora.com 5.6 Configuration menu Once installation is complete, you can configure certain basic settings for your cooktop, which you can also change again at any time. 5.6.1 Opening the configuration menu X X Turn the control knob to the 11 o’clock position. t appears on the co...
Page 24 - Availability of the pause function; Handover to user
EN 24 Installation www.bora.com Availability of the pause function If you have confirmed menu item C 9 , you can permanently deactivate the pause function. Setting Pause function available/deactivated C 9 0 Pause function activated Factory default C 9 1 Pause function deactivated C 9 2 Pause functio...
Page 25 - Operation; General operating instructions; Operating the cooktop; Adjusting the power level; Switching the power setting off early
EN 25 Operation www.bora.com 6 Operation X X Observe all safety and warning information during operation (see the Safety section). INFO The cooktop may only be operated when the stainless steel grease filter of the cooktop extractor is installed (see operating instructions for cooktop extractor). IN...
Page 28 - Deactivate pause function
EN 28 Operation www.bora.com Deactivate pause function X X Press the touch surface of the control knob for 1 second. Q Q A signal tone is heard and the previously set power level is displayed. Q Q The cooking session continues. 6.2.9 Switching off the cooking zone INFO When H is displayed, the cooki...
Page 29 - Cleaning and; Looking after the cooktop
EN 29 Cleaning and maintenance www.bora.com 7 Cleaning and maintenance X X Observe all safety and warning information (see the Safety section). X X Follow the enclosed manufacturer’s information. X X When conducting scheduled cleaning and other maintenance, make sure that the cooktop and cooktop ext...
Page 30 - Cleaning the control knobs; Cleaning the touch surface and the
EN 30 Cleaning and maintenance www.bora.com 7.4 Cleaning the control knobs 1 2 3 Fig. 7.1 Pull out the knob ring [1] Knob casing [2] Touch surface [3] knob ring 7.4.1 Cleaning the knob ring The knob ring can only be cleaned by hand. X X Remove the knob ring from the knob housing. X X Use a cleaner a...
Page 31 - Troubleshooting
EN 31 Troubleshooting www.bora.com 8 Troubleshooting Observe all safety and warning information (see the Safety section). Operating situation Cause Remedy The cooktop cannot be switched on. Knob ring missing Place the knob ring on the control knob. The fuse or automatic circuit breaker of the electr...
Page 32 - disassembly and; Disposal of transport packaging; Disposal of old appliance
EN 32 Decommissioning, disassembly and disposal www.bora.com 9 Decommissioning, disassembly and disposal X X Observe all safety and warning information (see the Safety section). X X Follow the enclosed manufacturer’s information. 9.1 Decommissioning Decommissioning is understood as final shutdown an...
Page 33 - 0 Warranty, technical; Replacement parts
EN 33 Warranty, technical service, spare parts www.bora.com 10 Warranty, technical service, spare parts X X Observe all safety and warning information (see the Safety section). 10.1 Warranty The warranty period is 2 years. 10.2 Service BORA Service: see back page of operation and installation instru...