Page 2 - Contents
2 Contents Safety Information .............................................................................................................................. 3 The advantages of microwaves ......................................................................................................... 8 Desc...
Page 4 - Safety Information
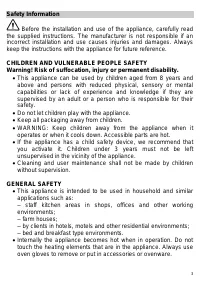
4 Safety Information WARNING: Do not heat liquids and other foods in sealed containers. They are liable to explode. Only use utensils that are suitable for use in microwave ovens. When heating food in plastic or paper containers, keep an eye on the appliance due to the possibility of ignition. ...
Page 7 - EN
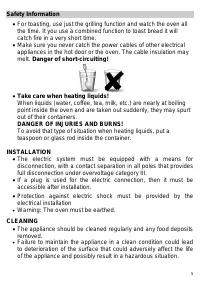
7 EN Safety Information For carrying out oven programming tests put a glass of water inside the oven. The water will absorb the microwaves and the oven will not be damaged. Do not cover or obstruct the ventilation openings. Use only dishes suitable for microwaves. Before using dishes and conta...
Page 8 - The advantages of microwaves; How a microwave oven works
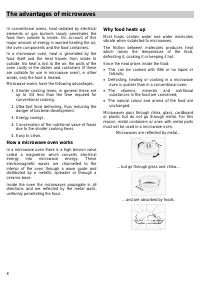
8 The advantages of microwaves In conventional ovens, heat radiated by electrical elements or gas burners slowly penetrates the food from outside to inside. On account of this major amount of energy is wasted heating the air, the oven components and the food containers. In a microwave oven, heat is ...
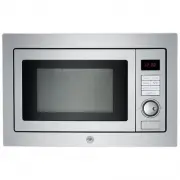
Page 9 - Description of your oven
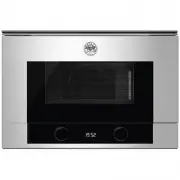
9 Description of your oven 1. Catches 4. Ceramic base 2. Door window glass 5. Control panel 3. Drop-down grill 6. Rack 7. Browning Plate 1. Function selection knob 5. Clock key 2. Start/Stop key 6. Door Open key 3. OK key 7. Rotating Knob 4. Display
Page 10 - Description of Functions
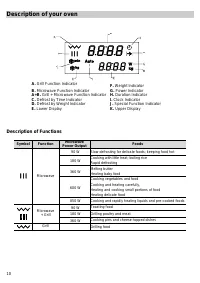
10 Description of your oven A. Grill Function Indicator F. Weight Indicator B. Microwave Function Indicator G. Power Indicator A+B. Grill + Microwave Function Indicator H. Duration Indicator C. Defrost by Time Indicator I. Clock Indicator D. Defrost by Weight Indicator J. Special Function Indicator ...
Page 11 - Basic settings; Setting the clock
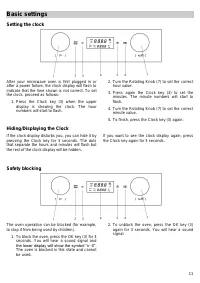
11 Basic settings Setting the clock After your microwave oven is first plugged in or after a power failure, the clock display will flash to indicate that the time shown is not correct. To set the clock, proceed as follows: 1. Press the Clock key (3) when the upper display is showing the clock. The h...
Page 12 - Basic Functions; Microwaves; Grill
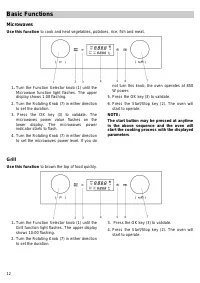
12 Basic Functions Microwaves Use this function to cook and heat vegetables, potatoes, rice, fish and meat. 1 . Turn the Function Selector knob (1) until the Microwave function light flashes. The upper display shows 1:00 flashing. 2. Turn the Rotating Knob (7) in either direction to set the duration...
Page 15 - Special functions; Special Function: Heating food
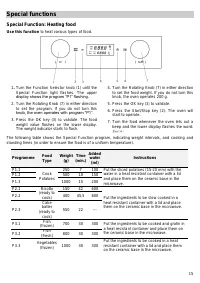
15 Special functions Special Function: Heating food Use this function to heat various types of food. 1 . Turn the Function Selector knob (1) until the Special Function light flashes. The upper display shows the program “P1” flashing. 2. Turn the Rotating Knob (7) in either direction to set the progr...
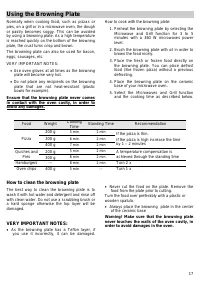
Page 17 - Using the Browning Plate; How to clean the browning plate
17 Using the Browning Plate Normally when cooking food, such as pizzas or pies, on a grill or in a microwave oven, the dough or pastry becomes soggy. This can be avoided by using a browning plate. As a high temperature is reached quickly on the bottom of the browning plate, the crust turns crisp and...
Page 18 - Interrupting a cooking cycle; Altering parameters; Cancelling a cooking cycle; End of a cooking cycle
18 When the oven is working... Interrupting a cooking cycle You can stop the cooking process at any time by pressing the Start/Stop key once or by opening the oven door. In both cases: Microwave emission is stopped immediately. The grill is de-activated but is still very hot. Danger of burning! ...
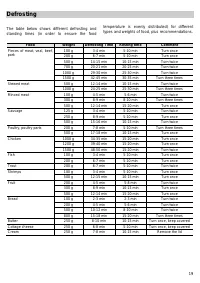
Page 19 - Defrosting
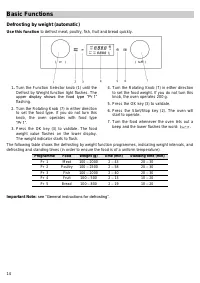
19 Defrosting The table below shows different defrosting and standing times (in order to ensure the food temperature is evenly distributed) for different types and weights of food, plus recommendations. Food Weight Defrosting Time Resting time Comment Pieces of meat, veal, beef, pork 100 g 3-4 min 5...
Page 20 - General instructions for defrosting
20 Defrosting General instructions for defrosting 1. When defrosting, use only dishes that are appropriate for microwaves (china, glass, suitable plastic). 2. The defrost function by weight and the tables refer to the defrosting of raw food. 3. The defrosting time depends on the quantity and thickne...
Page 21 - Cooking with a microwave oven
21 Cooking with a microwave oven Warning! Read the section “Microwave Safety” before cooking with your microwave. Follow these recommendations when cooking with your microwave: Before heating or cooking foods with peel or skin (e.g. apples, tomatoes, potatoes, sausages) prick them so that they do ...
Page 22 - Tables and suggestions
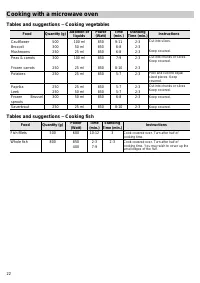
22 Cooking with a microwave oven Tables and suggestions – Cooking vegetables Food Quantity (g) Addition of liquids Power (Watt) Time (min.) Standing Time (min.) Instructions Cauliflower Broccoli Mushrooms 500 300 250 100 ml 50 ml 25 ml 850 850 850 9-11 6-8 6-8 2-3 2-3 2-3 Cut into slices. Keep cover...
Page 23 - Cooking with the grill
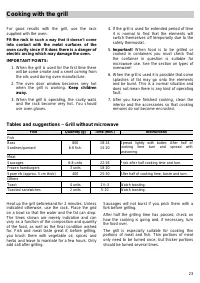
23 Cooking with the grill For good results with the grill, use the rack supplied with the oven. Fit the rack in s uch a way that it doesn’t come into contact with the metal surfaces of the oven cavity since if it does there is a danger of electric arcing which may damage the oven. IMPORTANT POINTS: ...
Page 24 - Cooking with the Grill
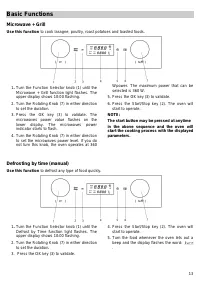
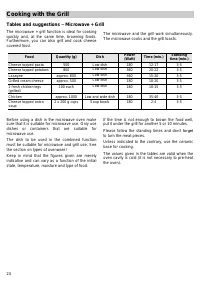
24 Cooking with the Grill Tables and suggestions – Microwave + Grill The microwave + grill function is ideal for cooking quickly and, at the same time, browning foods. Furthermore, you can also grill and cook cheese covered food. The microwave and the grill work simultaneously. The microwave cooks a...
Page 25 - What kind of ovenware can be used?; Microwave function; Grill function; Lids
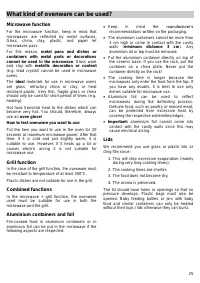
25 What kind of ovenware can be used? Microwave function For the microwave function, keep in mind that microwaves are reflected by metal surfaces. Glass, china, clay, plastic, and paper let microwaves pass. For this reason, metal pans and dishes or containers with metal parts or decorations cannot b...
Page 26 - Table of Ovenware
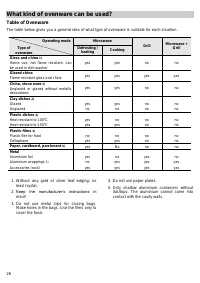
26 What kind of ovenware can be used? Table of Ovenware The table below gives you a general idea of what type of ovenware is suitable for each situation. Operating mode Type of ovenware Microwave Grill Microwave + Grill Defrosting / heating Cooking Glass and china 1) Home use, not flame resistant, c...
Page 27 - Oven Cleaning and Maintenance; Front surface; Oven interior
27 Oven Cleaning and Maintenance Cleaning is the only maintenance normally required. Warning! Your microwave oven should be cleaned regularly, with all food remains being removed. If the microwave is not kept clean its surfaces may deteriorate, reducing the oven’s working life and possibly resulting...
Page 28 - Oven ceiling; Accessories
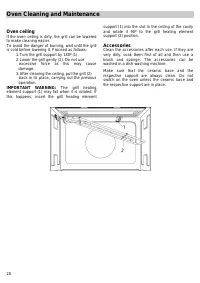
28 Oven Cleaning and Maintenance Oven ceiling If the oven ceiling is dirty, the grill can be lowered to make cleaning easier. To avoid the danger of burning, wait until the grill is cold before lowering it. Proceed as follows: 1. Turn the grill support by 180º (1) 2. Lower the grill gently (2). Do n...
Page 29 - What should I do if the oven doesn’t work?; Substitution of light bulb
29 What should I do if the oven doesn’t work? WARNING! Any type of repair must only be done by a specialised technician. Any repair done by a person not authorised by the manufacturer is dangerous. You do not need to contact Technical Assistance to resolve the following questions: The display is n...
Page 30 - Technical characteristics; Specifications; Environmental protection
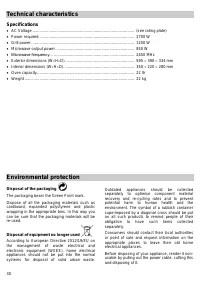
30 Technical characteristics Specifications AC Voltage .......................................................................................... (see rating plate) Power required .................................................................................... 2700 W Grill power. ............
Page 31 - Installation instructions; Before installation; follow the instructions supplied separately.
31 Installation instructions Before installation Check that the input voltage indicated on the characteristics plate is the same as the voltage of the power outlet you are going to use. The rating plate is located on the front part of the cavity and it is only visible after opening the door. Open th...
Page 32 - Installation
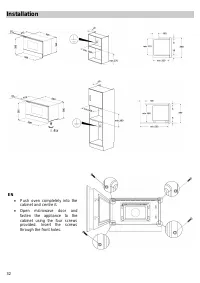
32 Installation EN Push oven completely into the cabinet and centre it. Open microwave door and fasten the appliance to the cabinet using the four screws provided. Insert the screws through the front holes.