Page 3 - СОДЕРЖАНИЕ
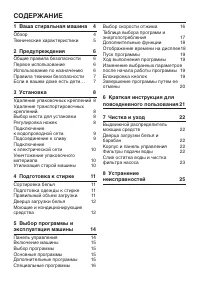
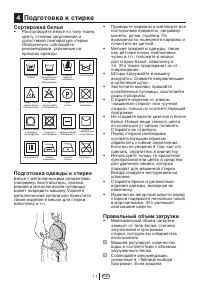
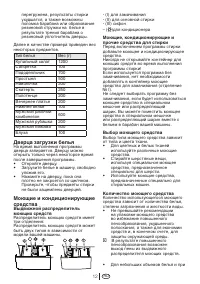
СОДЕРЖАНИЕ 1Вашастиральнаямашина 4 Обзор 4 Техническиехарактеристики 5 2Предупреждения 6 Общиеправилабезопасности 6 Первоеиспользование 6 Использованиепоназначению 6 Правилатехникибезопасности 7 Есливвашемдомеестьдети… 7 3Установка 8 Удалениеупаковочныхкреплений 8У...
Page 4 - Обзор; Вашастиральнаямашина
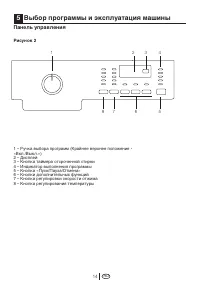
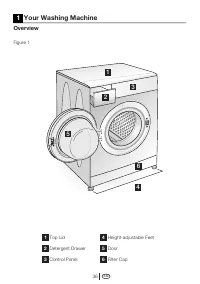
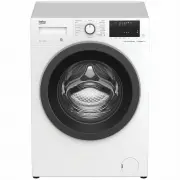
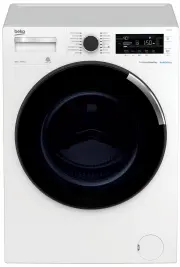
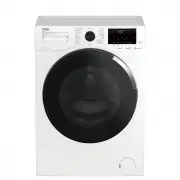
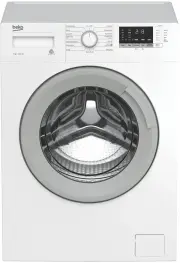
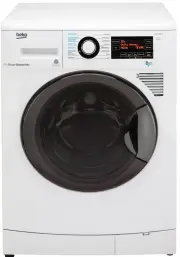
RU 4 Верхняякрышка Выдвижнойраспределитель моющихсредств Панельуправления Ножки,регулируемыепо высоте Дверцазагрузкибелья Крышкафильтра 1 2 3 4 5 6 Обзор 1 Вашастиральнаямашина Рисунок1 1 2 3 4 5 6
Page 5 - Техническиехарактеристики
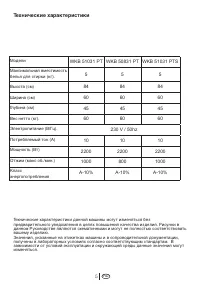
RU 5 Техническиехарактеристики Техническиехарактеристикиданноймашинымогутизменятьсябез предварительногоуведомлениявцеляхповышениякачестваизделия.Рисункив данномРуководствеявляютсясхематичнымиимогутнеполностьюсоответствовать вашемуизделию. Значения,указанныенаэтикетках...
Page 6 - Предупреждения
RU 6 Просимпрочитатьследующую информацию.Впротивномслучае имеетсяопасностьполучениятравм илинанесенияматериальногоущерба. Крометого,обязательстваогарантиии ответственностиутратятсилу. Общиеправилабезопасности • Неустанавливайтемашинунапол, покрытыйковром.Впротивном...
Page 8 - Установка
RU 8 Удалениеупаковочных креплений Дляудаленияупаковочныхкреплений наклонитемашину.Снимите упаковочныекрепления,потянувза ленту. Удалениетранспортировочных креплений. C Передэксплуатацией машинынеобходимо снятьпредохранительные транспортировочныеболты.В противномслучаемаш...
Page 11 - Подготовкакстирке
RU 11 Сортировкабелья • Рассортируйтебельепотипуткани, цвету,степенизагрязненияи допустимойтемпературестирки Обязательнособлюдайте рекомендации,указанныена ярлыкаходежды. Подготовкаодеждыкстирке Бельесметаллическимиэлементами (например,бюстгальтеры,пряжки ремнейимета...
Page 14 - Панельуправления; Выборпрограммыиэксплуатациямашины
RU 14 � � � � � � � � 1–Ручкавыборапрограмм(Крайнееверхнееположение- «Вкл./Выкл.») 2–Дисплей 3–Кнопкатаймераотсроченнойстирки 4–Индикаторвыполненияпрограммы 5–Кнопка«Пуск/Пауза/Отмена» 6–Кнопкидополнительныхфункций 7–Кнопкарегулировкискоростиотжима 8–Кнопкарегулиро...
Page 16 - Специальныепрограммы; Выборскоростиотжима
RU 16 стиркиможноувеличитьвремя программыдляизделийизхлопка. C Прииспользованиипрограммы экономнойстиркиизделийизхлопка потреблениеэнергиибудетменьшимпо сравнениюсдругимипрограммамидля стиркиизделийизхлопка. •Мини Этапрограммаиспользуетсядля быстройстирки(30ми...
Page 17 - Таблицавыборапрограммиэнергопотребления
RU 17 Таблицавыборапрограммиэнергопотребления •Имеетсявозможностьвыбора *Выборосуществляетсяавтоматически,отменитьнельзя. **Программаопределенияэнергопотребления(EN60456) Расходводыиэлектроэнергии,атакжедлительностьпрограммымогутотличаться отзначений,указанныхвтаблице,...
Page 22 - Чисткаиуход
RU 22 Выдвижнойраспределитель моющихсредств Удаляйтеостаткипорошкав распределителе.Дляэтого: 1. Нажмитенаточку,указанную пунктиром,насифоневотделении длякондиционера,ипотяните насебя,покаконтейнернебудет извлеченизмашины. C Есливотсекедлякондиционера начинаетсоби...
Page 25 - Устранениенеисправностей
RU 25 Неисправность Возможнаяпричина Объяснение/Рекомендация Невозможно включитьили выбратьпрограмму. Машинапереключилась врежимсамозащиты из-занеисправности коммунальной инфраструктуры (например,напряжение сети,давлениеводыи т.п.). Выполнитесброс,нажавкнопку«Пуск/Пауза/ От...
Page 34 - Explanation of symbols
Please read this manual first! Dear Customer,We hope that your product which has been manufactured in modern facilities and passed through a strict quality control procedure will give you the best results.Therefore, we advise you to read through this manual carefully before using your product and ke...
Page 35 - TABLE OF CONTENTS
TABLE OF CONTENTS 1 Your Washing Machine 36 Overview 3 6 Specifications 37 2 Warnings 38 General Safety 38 First Use 38 Intended use 38 Safety instructions 39 If there are children in your house... 39 3 Installation 40 Removing packaging reinforcement 40 Opening the transportation locks 4 0 Appropri...
Page 36 - Overview; Your Washing Machine
EN 36 Top Lid Detergent Drawer Control Panel Height-adjustable Feet Door Filter Cap 1 2 3 4 5 6 Overview 1 Your Washing Machine Figure 1 1 2 3 4 5 6
Page 37 - Specifications
EN 37 Specifications Specifications of this appliance may change without notice to improve the quality of the product. Figures in this manual are schematic and may not match your product exactly. Values stated on the machine labels or in the documentation accompanying it are obtained in laboratory i...
Page 38 - Warnings
EN 38 Please read the following information. Otherwise, there may be the risk of personal injury or material damage. Moreover, any warranty and reliability commitment will become void. General Safety • Never place your machine on a carpet covered floor. Otherwise, lack of airflow from below of your ...
Page 39 - Safety instructions
EN 39 any other instructions given by companies that produce detergents for your machine. Safety instructions • This appliance must be connected to an earthed outlet protected by a fuse of suitable capacity. • The supply and draining hoses must always be securely fastened and remain in an undamaged ...
Page 40 - Adjusting the feet; Installation
EN 40 Removing packaging reinforcement Tilt the machine to remove the packaging reinforcement. Remove the packaging reinforcement by pulling the ribbon. Opening the transportation locks C Transportation safety bolts must be removed before operating the washing machine! Otherwise, the machine will be...
Page 41 - Connecting to the drain
EN 41 3. Important: Tighten all lock nuts up again. Connecting to the water supply. Important: • The water supply pressure required to run the machine must be 1-10 bar (0,1 – 1,0 MPa). Attach a pressure-reducing valve if the water pressure is higher. • Connect the special hoses supplied with the mac...
Page 43 - Correct load capacity; Initial preparations for washing
EN 43 Sorting the laundry • Sort the laundry according to type of fabric, color, and degree of soiling and permissible water temperature. Always follow the advice on the garment labels. Preparing clothes for washing Laundry items with metal attachments such as, bras, belt buckles and metal buttons w...
Page 44 - Detergent drawer
EN 44 Following weights are given as examples. Laundry type Weight (gr.) Bathrobe 1200 Napkin 100 Duvet cover 700 Bed Sheet 500 Pillowcase 200 Tablecloth 250 Towel 200 Evening gown 200 Underclothing 100 Men’s overalls 600 Men’s shirt 200 Men’s pyjamas 500 Blouse 100 Loading door The door is locked d...
Page 46 - Control panel; Selecting a program and operating your machine
EN 46 1 - Program selection knob (Uppermost position On/Off) 2 - Display3 - Time delaying button 4 - Program follow-up indicator 5 - Start/Pause button 6 - Auxiliary function keys7 - Spin speed adjustment button8 - Temperature adjustment button Control panel Figure 2 5 Selecting a program and operat...
Page 48 - Special programs; • Rinse; Spin speed selection
EN 48 • Mini This program is used to quickly wash (30 minutes) a small amount of lightly soiled cotton garments. • Baby Increased hygiene is provided by a longer heating period and an additional rinse cycle. It is recommended for baby clothes and clothes worn by allergic people. • Hand Wash You can ...
Page 49 - Program selection and consumption table
EN 49 Program selection and consumption table • : Selectable * : Automatically selected, not cancellable. **: Energy Label programme (EN 60456) Water and power consumption and program duration may differ from the table shown, subject to changes in water pressure, water hardness and temperature, ambi...
Page 50 - Auxiliary functions; Auxiliary Function Selection Buttons; Auxiliary function selection; Quick wash; Time display; Time delay
EN 50 Auxiliary functions Auxiliary Function Selection Buttons Select the required auxiliary functions before starting the program. C Some combinations cannot be selected together. (Ex.: Pre-wash and Quick Wash. Warning signal on the selected auxiliary function will light up. Auxiliary function sele...
Page 51 - Starting the Program; Selecting or canceling an auxiliary
EN 51 steps of three hours for the remainder (1, 2, 3, 6, 9, …24). C Do not use liquid detergent when you set time delay! There is the risk of staining of the clothes. 1. Open the loading door, place the laundry inside and fill detergent drawer.2. Set the washing program, spin speed and, if required...
Page 52 - Door lock
EN 52 opening the door. “Ready” lamp goes off it he front door is not allowed to open for safety reasons. Door lock The loading door can not be opened yet due to safety reasons while the “Ready” lamp is flashing. The loading door can be opened once the “Ready” lamp starts lighting up continuously. C...
Page 53 - Quick instructions for daily use
EN 53 Preparation 1. Turn the tap on completely. Check if the hoses are connected tightly. 2. Place the laundry in the machine. 3. Add detergent and softener. Starting 1. Press the “On/Off” button. 2. Select the programme and the temperature. 3. If required: – select any auxiliary function,– adjust ...
Page 54 - Cleaning and care
EN 54 Detergent drawer Remove any powder residue buildup in the drawer. To do this: 1. Press the dotted point on the siphon in the softener compartment and pull towards you until the compartment is removed from the machine. C If more than a normal amount of water and softener mixture starts to gathe...
Page 57 - Troubleshooting
EN 57 Problem Cause Explanation / Suggestion Program cannot be started or selected. Machine may have switched to self protection mode due to an infrastructure problem (such as line voltage, water pressure, etc.). Reset your machine by pressing “Start/Pause/ Cancel” button for 3 seconds. (see, Cancel...
Page 64 - ГАРАНТИЯ2ГОДА; Гарантийныйталон
........................................................................... � � ........................................................................... � � ........................................................................... � � ДействуеттольконатерриторииРФ/\/аlidforRussianFede...