Asko W6864 - Manuals
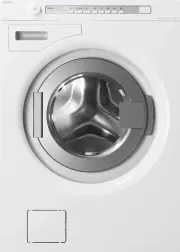
User Manual Asko W6864


Summary
Before using your machine for the first time 4 Transport protection 4 Packing material 4 Washer door 4 Language selection 4 Checking water hardness 4 Safety instructions 5 General 5 Installation 5 Overflow guard function 5 Transport/Winter storage 5 Recycling 5 Child safety 6 Keep an eye on children...
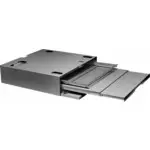
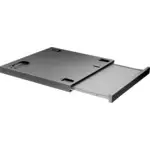
Technical information 23 Information for test institute 23 Energy labelling 23 Technical data 25 Transport protection 26 Installation 27 Positioning the washing machine 27 Adjusting the feet 27 Connection to water supply 27 Drainage connection 28 Electrical installation 28 Service 29 Before contacti...
4 Transport protection Remove any transport protection devices before installing the machine. See the "Transport protection" chapter. Packing material Please sort waste materials in accordance with local guidelines. Washer door • The machine cannot be started when the door is open. • To open...
Asko Washing Machines Manuals
-
 Asko HDB1153T
User Manual
Asko HDB1153T
User Manual
-
 Asko HSS1053T
User Manual
Asko HSS1053T
User Manual
-
 Asko W2084C.W
User Manual
Asko W2084C.W
User Manual
-
 Asko W4086C.W
User Manual
Asko W4086C.W
User Manual
-
 Asko W4086PW
User Manual
Asko W4086PW
User Manual
-
 Asko W6098P.W
Manual
Asko W6098P.W
Manual
-
 Asko W6564
User Manual
Asko W6564
User Manual
-
 Asko W6884ECO
User Manual
Asko W6884ECO
User Manual
-
 Asko W2086C.W/3
Manual
Asko W2086C.W/3
Manual
-
 Asko W4096R.W/2
Manual
Asko W4096R.W/2
Manual
-
 Asko W2084.W/3
Manual
Asko W2084.W/3
Manual
-
 Asko W2114C.W
Manual
Asko W2114C.W
Manual
-
 Asko W4086C.T/3
Manual
Asko W4086C.T/3
Manual
-
 Asko W4114C.W/2
Manual
Asko W4114C.W/2
Manual
-
 Asko W4086C.W/3
Manual
Asko W4086C.W/3
Manual
-
 Asko W4096P.W/3
Manual
Asko W4096P.W/3
Manual
-
 Asko W4096R.W/3
Manual
Asko W4096R.W/3
Manual
-
 Asko W4114C.W/3
Manual
Asko W4114C.W/3
Manual
-
 Asko WMC6863P.W/1
Manual
Asko WMC6863P.W/1
Manual
-
 Asko W4086C.T/2
Manual
Asko W4086C.T/2
Manual