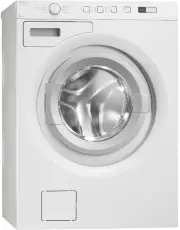
Page 2 - Contents
4 Before using your machine forthe first time 4 Transport protection 4 Packing material 4 Washer door 4 Checking water hardness 5 Safety instructions 5 General 5 Installation 5 Overflow guard function 5 Transport/Winter storage 5 Recycling 6 Child safety 6 Keep an eye on children! 7 Description of t...
Page 4 - Checking water hardness; Before using your machine for the first time
Transport protection Remove any transport protection devices beforeinstalling the machine. See the "Transportprotection" chapter. Packing material Sort waste materials in accordance with localguidelines. Washer door • The washer door will not open until the machine is connected to the electr...
Page 5 - Safety instructions
General • Read the operating instructions and keep them in a safe place. • Installation should be carried out by qualified ASKO technicians. • The machine should only be used for washing items as described in these instructions. It isnot intended for dry cleaning. • Use only detergent intended for m...
Page 6 - Keep an eye on children!; Child safety
Keep an eye on children! • Always close the door and start the programme immediately once you have added detergent. • The appliance is not intended for use by young children or infirm persons without supervision. • Young children should be supervised to ensure that they do not play with the applianc...
Page 8 - Advice and tips before washing
Here are some tips that may help you beforewashing. Sorting your laundry Sort items according to:• how soiled they are• colour• material Clothing 1. Do up zips and close Velcro straps so that they don’t harm fabrics. 2. New coloured items may contain excess dye and should therefore be washed separat...
Page 11 - Turn on the main power switch; Washing
1 Sort your laundry. See the "Advice and Tips before washing"section. Place underwired bras in a laundry net. Empty pockets. Coins, nails and the like cancause damage to the machine and fabrics. Seethe "Advice and Tips" section before washing. 2 Turn on the main power switch 3 Open t...
Page 12 - Select the program
5 Select the program Temperature Spin Delayed Start Super rinse Door opening Selector Main power switch Display Start/Stop Super Wash High water level You select a program by turning the program selector. An LED lights up beside the selected programand the estimated program time is shown in the disp...
Page 15 - Select options
6 Select options You can select options to adjust the wash program to suit your own specific requirements. Theavailable options depend on the selected program. If the option is available for the selected program, the symbols lights up when you press the button. The machine will remember the options ...
Page 17 - Once the program has finished
7 Close the washer door andpress the Start/Stop button Time remaining The time remaining is shown in hours andminutes. Once a program is selected, theestimated program time is displayed. This maydiffer from time to time depending on thetemperature of the water entering the machineand the size of the...
Page 18 - You can change the following settings:; Door opening; Settings
You can change the following settings: Automatic door opening. Extra rinses. Door opening If you choose Automatic door opening the Washer door will open once the program has finished.1. Turn off the machine using the main power switch.2. Press the Super Rinse button and then the main power switch.3....
Page 19 - Cleaning the outside of the machine; Care and cleaning
Cleaning the trap and the drainagepump The washing machine has a trap where coins,hairpins and the like can collect. To clean the trapand the drainage pump, do as follows:1. Make sure the machine is empty of water and switched off at the mains. 2. Open the door. 3. Unhook the drainage hose from the ...
Page 21 - Rinse holes under the agitator; If you have hard water
Rinse holes under the agitator If you suspect that objects such as nails or paperclips may have fallen into the wash drum, youshould check the space under the agitator. Suchobjects can rust and cause spots on clothing.Nails and other sharp objects can cause holes infabrics. Do as follows: 1. Insert ...
Page 22 - The washer door will not open; The machine will not start; Troubleshooting
The washer door will not open 1. Check that the main power switch is on.2. Is there power? Check your home’s fuses (circuit breakers). The washer door cannot beopened with the Door opening button (with thekey symbol) if power is off. If nothing else works, the washer door canbe opened as follows: Ca...
Page 23 - Error messages
Error messages If an error occurs during the program a messageis shown on the display. To exit the message aftertaking measures, turn the machine off and thenback on. The error messages that may be shown in thedisplay are: F10 Overfilling1. Shut off the water tap.2. See "Drainage error". F11...
Page 24 - Technical information
Technical data 850mm Height: 595mm Width: 585mm Depth: 73kg Weight: 60l Cylinder volume: 7kg Max. washing capacity: 400-1600 Spin speed (rpm): See type plate. Rated power: See type plate. Heater output: 0,1-1 MPa 1-10 kp/cm 2 10-100 N/cm 2 Water pressure: Stainless steel Wash drum and liquid compart...
Page 26 - Transport protection
Before the machine is used, the three transportscrews should be removed as shown below. 1. Loosen and remove the screws. 2. The enclosed plastic bag contains three plastic plugs to fit in the empty screw holes. Note! If the machine is to be moved and transported,the transport screws must be refitted...
Page 27 - Connection to water supply
Positioning the washing machine The washing machine can be installed as a built-inor freestanding unit. Position the machine so thatthe electrical plug is easily accessible. A. Built-in The washing machine can be installed under acounter top with a working height of 850–900 mm.Leave a 5 mm space aro...
Page 28 - Drainage connection; Electrical installation
Drainage connection The machine is supplied with a drainage hoseattached, which must be connected to a drain.See the examples below. The height must be600–900 mm above floor level. The lower position (600 mm) is always preferable.Ensure that the drainage hose has no kinks. 600-900mm The machine can ...
Page 30 - Your notes
Page 32 - Quick guide
1 Washing 1. Empty pockets and refasten zips.2. Read the item’s laundry label.3. Sorting laundry. Note! Place underwired bras in a laundry net. 2 Load the laundry 1. Press the main power switch.2. If the washer door is closed, press the Door opening button (key symbol) andthe door will open. 3. Load...