Page 2 - TABLE OF CONTENTS
2 Safety precautions 3 Dryer description 7 Before using the appliance for the fi rst time 8 Installation and connection 10 Advices before drying 20 Drying process, step by step (1 – 7) 22 Settings 31 Cleaning and maintenance 34 Errors – what to do? 42 Servicing 46 Technical information 47 Program ta...
Page 3 - GENERAL; Please do not use the tumble dryer if you have not read and; fl; SAFETY PRECAUTIONS
3 GENERAL Please read the instruction manual and save it for future reference. • Please do not use the tumble dryer if you have not read and understood these instructions or use fi rst. • Failure to observe the instructions for use or inappropriate use of the tumble dryer may result in damage to the...
Page 5 - WARNING! The back of the dryer may get very hot during; CHILD SAFETY; Activate the child lock.
5 SAFETY • Only use the dryer to dry laundry that was washed with water. Do not dry any laundry that was washed or cleaned with fl ammable cleaners or substances (such as gasoline, trichloroethylene etc.) as this may result in an explosion. • If you have cleaned your clothes with industrial cleaners...
Page 6 - the dryer or perform any maintenance tasks without supervision.; SAVE THESE INSTRUCTIONS FOR FUTURE REFERENCE!
6 • Do not let children younger than three years to come near the dryer, unless they are under constant supervision. • The dryer is made in compliance with all relevant safety standards. This dryer may be used by children aged 8 years and above and by persons with reduced physical, sensory or mental...
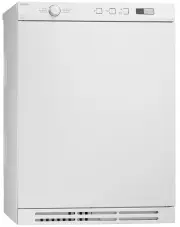
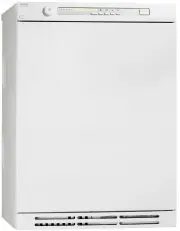
Page 7 - DRYER DESCRIPTION
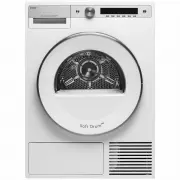
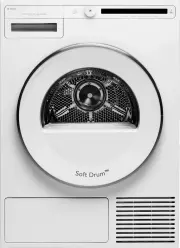
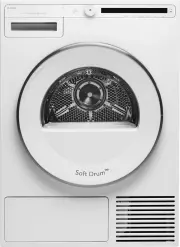
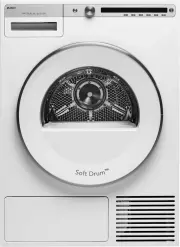
7 1. Main switch (ON/OFF) 2. Program selector knob 3. Display unit 4. Program selector buttons 5. Button (start/pause) 6. Rating plate with information about the dryer (on the inside of the drying machine door) 7. QR and AUID code (on the inside of the drying machine door) 8. Dryer door 9. Door net ...
Page 8 - BEFORE USING THE APPLIANCE FOR THE FIRST TIME
8 PACKAGING Remove all packaging. Please sor t the materials in compliance with local recommendations (see chapter "DISPOSAL"). CLEANING Disconnect the dr yer from the power mains and open the door towards you. Before using the dr yer for the fi rst time, clean the dr yer drum using a soft d...
Page 10 - INSTALLATION AND CONNECTION; DRYER PLACEMENT; Free -standing appliance
10 INSTALLATION AND CONNECTION After installation, wait for 24 hours without moving the appliance before using it for the fi rst time. If the dr yer has to be laid down on one of the sides during transpor t or ser vicing, place it with its left side, viewing from the appliance front, downwards. 90° ...
Page 13 - CHANGING THE DOOR OPENING DIRECTION
13 CHANGING THE DOOR OPENING DIRECTION To change the direction of door opening, proceed as follows. 1 Open the door fully. 2 Undo the screws and remove the door. 3 Use a screwdriver to remove the door lock cover and undo the screw on the door lock. 4 Push the door lock upwards and remove it. Move it...
Page 15 - Ventilation Requirements of ASKO laundry
15 BUILT-IN ASKO dr yers can be installed beneath a cabinet or worktop with a minimum height of 864 mm. There must be a gap of about 12 mm all around the machine and a minimum gap of 25 mm between the rear edge of the machine top panel and the back wall. The opening width must be at least 622 mm. Th...
Page 16 - DRAINING THE CONDENSATE
16 DRAINING THE CONDENSATE The moisture from the laundr y is extracted in the condenser unit and accumulated in the condensate tank. Condensate tank has to be emptied regularly (see chapter "CLEANING AND MAINTENANCE"). To simpli fi ed and avoid emptying and interruption of the dr ying cycle ...
Page 17 - CONNECTING TO THE POWER MAINS; Connection upon delivery
17 CONNECTING TO THE POWER MAINS After installation, the dr yer should stand still for two hours before it is connected to the power mains. Connect the appliance to an ear thed power outlet. After installation, the wall outlet should be freely accessible. The outlet should be fi tted with an ear th ...
Page 19 - Laundry care plinth; *AVAILABILITY DEPENDING ON MARKET; DENOMINATION
19 Laundry care plinth Thanks to the stainless steel plinth, your appliance will be raised by 30 cm, which makes loading and unloading of laundr y easier. *AVAILABILITY DEPENDING ON MARKET DENOMINATION ART. No. IRONING BOARD HI1153 White 576552 IRONING BOARD HI1153 Stainless steel 732756 IRONING BOA...
Page 20 - ADVICES BEFORE DRYING; LAUNDRY SYMBOLS
20 This chapter includes several advices on how to prepare the laundr y from dr ying. LAUNDRY SORTING Sor t the laundr y according to: • type, • fabric thickness. For the most even dr ying, make sure the laundr y is made of a similar material. CLOTHING 1. Close the buttons, zips, and hook-and-loop f...
Page 21 - Never tumble dry the following:
21 MATERIALS (FABRICS) SUITABLE FOR DRYING IN A TUMBLE DRYER Material is suitable for tumble dr ying. Clothes dried in a tumble dr yer will be softer and lighter than air-dried clothes. The dr yer does not cause any considerable wear of the fabric. The lint collected in the lint fi lter consists of ...
Page 22 - Turning on / Turning off; Press the; OPEN THE DRYER DOOR AND INSERT THE LAUNDRY.; Open the dr yer door towards you.
22 DRYING PROCESS, STEP BY STEP (1 – 7) STEP 1: SORT THE FABRICS See chapter "ADVICES BEFORE DRYING" STEP 2: TURN ON THE MAIN SWITCH. Turning on / Turning off Press the on/off button. STEP 3: OPEN THE DRYER DOOR AND INSERT THE LAUNDRY. Open the dr yer door towards you. 1 2 3 Place the laundr...
Page 23 - CHOOSE THE DRYING PROGRAM.
23 STEP 4: CHOOSE THE DRYING PROGRAM. Choose the program by rotating the program selector knob in either direction. Con fi rm the program selection by pressing the button under the program. Select the program based on the type and remaining moisture of the laundr y you wish to dr y. Anticipated prog...
Page 25 - CHOOSING THE PROGRAM SETTINGS; Start; Load
25 STEP 5: CHOOSING THE PROGRAM SETTINGS Using the program settings, the dr ying programs can be fur ther adjusted to your wishes. Some program settings may not be available for your selected program. Selected program settings will remain stored after the end of the dr ying cycle and may be changed ...
Page 27 - Favourite programs; Changing a favourite program
27 Favourite programs /Add to fav? Wash dried Add to fav Start new Good ECO performance Auto extra 6 After the end of the dr ying program, you can use the button 6 to store the program, including all extra settings, as your favourite program. (Empty) (Empty) (Empty) (Empty) (Empty) (Empty) Save Prog...
Page 28 - CLOSE THE DOOR AND START THE DRYING PROCESS.; Remaining time; Pausing, stopping or changing the program; Pause
28 STEP 6: CLOSE THE DOOR AND START THE DRYING PROCESS. Close the dr yer door and press the Start /Pause button. Star t (pressed brie fl y – star t /resume) Pause (pressed brie fl y – dr ying temporarily suspended) Cancel (press and hold the button for 3 seconds) 00:26 Starting Auto extra Dr ying pr...
Page 30 - END OF PROGRAM
30 STEP 7: END OF PROGRAM 00:00 Drying finished Auto extra After the end of the dr ying program, the display will indicate that the dr ying has been fi nished ("Dr ying Finished"). Anti crease Drying finished Auto extra If you have selected the "anti-crease" option, the dr yer will c...
Page 31 - SETTINGS; CHILD LOCK
31 SETTINGS Program Program Quick pro Time program Airing Settings Sports wear Settings Conditioning 6 In the main menu, use the program selector knob to select Settings. Con fi rm the selection by pressing the button 6. Then, use the program selector knob to scroll the list of settings that can be ...
Page 32 - SET LANGUAGE; SOUNDS SETTINGS; DISPLAY SETTINGS
32 SET LANGUAGE Set language to: GB English You can choose between 24 languages. Press the button . Use the program selector knob to scroll the list of languages. Con fi rm selection with button under chosen language. Use the button to return to Settings. SOUNDS SETTINGS Sound volume You may choose ...
Page 33 - CUSTOMIZE FAVORITES AND PROGRAMS; CONDENSED WATER; RESET DEFAULT; SOUNDS
33 CUSTOMIZE FAVORITES AND PROGRAMS The main menu includes the entire set of programs that you can choose using the program selector knob. This setting allows only displaying the selected program in the main menu. Auto iron Auto jeans Auto synth Auto extra Auto Auto normal Use the program selector k...
Page 34 - CLEANING AND MAINTENANCE; CLEANING THE DOOR NET FILTER IN THE DOOR; Clean the door net filter after each drying cycle.
34 CLEANING AND MAINTENANCE Before cleaning, make sure to switch o ff the appliance and disconnect it from the power mains (unplug the power cord from the outlet). CLEANING THE DOOR NET FILTER IN THE DOOR 1 Open the fi lter housing. 2 Pull out the net fi lter. 3 Gently scrape the fi lter to remove th...
Page 35 - EMPTYING THE CONDENSATE TANK
35 EMPTYING THE CONDENSATE TANK After each dr ying cycle, empty the condensate tank. If the condensate tank is over fl owing the dr ying program will be paused automatically. A warning will appear on the display unit that the condensate tank has to be emptied. (Disregard this warning if you fed the ...
Page 36 - CLEANING THE HEAT PUMP FILTER
36 CLEANING THE HEAT PUMP FILTER Do not touch the inner metal par ts of the heat exchanger with bare hands. Danger of injur y on sharp par ts. Use appropriate protection gloves when cleaning the heat exchanger. Incorrect cleaning of the metal fi ns of the heat exchanger can permanently damage the tu...
Page 38 - CLEANING THE STEAM GENERATOR TANK FILTER
38 CLEANING THE STEAM GENERATOR TANK FILTER Each time you empty the condensate tank, clean the steam generator tank fi lter as well. The fi lter is located in the tank housing (visible when the condensate tank is removed). 1 Remove the condensate tank. 2 Remove the fi lter from the slot in the conde...
Page 39 - EMPTYING THE STEAM GENERATOR TANK
39 EMPTYING THE STEAM GENERATOR TANK Before transpor ting a dr yer that has been previously used, the steam generator tank must also be emptied. Otherwise, water from the tank may spill into the dr yer interior. 1 Move the dr yer approximately 40 cm away from the wall and tilt it backwards. 2 The st...
Page 40 - entire
40 ADDITIONAL INFORMATION REGARDING CLEANING If you have inadver tently removed the entire net fi lter housing in the dr yer door, reinstall it in the same position. Opening on the lower side of the door should occasionally be cleaned with a vacuum cleaner. If necessar y, clean the fi lter housing a...
Page 41 - CLEANING THE APPLIANCE EXTERIOR; (please obser ve the
41 CLEANING THE APPLIANCE EXTERIOR Clean the appliance exterior and the display unit using a soft damp cotton cloth and water. Do not use solvents or abrasive cleaners that could damage the appliance (please obser ve the recommendations and warnings provided by the manufacturers of the cleaning agen...
Page 44 - FAILURE DISPLAY
44 FAILURE DISPLAY In case of a failure while a program is in progress, the relevant Error X is indicated on the display unit. Error Error 3 Info 5 Press and hold the INFO button to display the error description. Switch o ff the dr yer and turn it back on. Errors indicated on the display unit (depend...
Page 46 - SERVICING; BEFORE CALLING A SERVICE TECHNICIAN
46 SERVICING BEFORE CALLING A SERVICE TECHNICIAN See the chapters "TROUBLESHOOTING and "CLEANING AND MAINTENANCE" and see if you can resolve the problem yourself. When you contact a ser vice centre, please state the model (1), type (2), and serial number (3) of your dr yer. Model, type, ...
Page 47 - TECHNICAL INFORMATION
47 TECHNICAL INFORMATION Information sheet pursuant to the Commission Regulation (EU) No. 392/2012 Model TD75.23XX Max. drying capacity 8 kg (See rating plate) Energy efficiency class A+++ Annual energy consumption 176,80 (kWh/year) 1) Power consumption Automatic normal drying with maximum load (E d...
Page 49 - PROGRAM TABLE; Program
49 PROGRAM TABLE The table indicates the power consumption and time values for dr ying of a test batch of laundr y with various loads and after spinning at various rates, consistently with the EN61121. The following requirements apply to the consumption values speci fi ed below. Inlet air temperatur...
Page 50 - Conditioning
50 Program Amount Spinning speed (rpm) Powe r consu m ption, appro ximately (k W h ) * Pr ogr am dur ation, appr o ximately (h:min)* Conditioning 1000 0,30 0:40 Quick Pro 1400 0,50 0:59 Full load Partial load Small load * Due to deviations in terms of type and amount of laundry, spinning, power supp...
Page 51 - Disposal / recycling of packaging; and electronic equipment processing.; DISPOSAL
51 Disposal / recycling of packaging Our product packaging is made of environmentally friendly materials that can be recycled, disposed of, or destroyed without any hazard to the environment. To this end, packaging materials are labelled appropriately. The symbol on the product or its packaging indi...
Page 52 - NOTES
Page 55 - QUICK GUIDE; START; We reserve the right to modi
55 QUICK GUIDE 3. 2. 4. 6. 5. 7. 1. SORT THE FABRICS Sort the fabric by type and by how heavily soiled the laundry is. Observe the drying symbols on the laundry labels. Close the zippers, hook-and-loop fasteners and buttons. SWITCH ON THE MAIN ON/OFF SWITCH ( ON/OFF ) OPEN THE DRYER DOOR AND INSERT ...
Page 56 - SPHP GP
Gorenje, Par tizanska 12, 3320 Velenje, Slovenija www.asko.com TD75.23 SPHP GP en (08-21)