Avalon A3-F - User Manual
Avalon A3-F Water Dispenser – User Manual, read for free online in PDF format. We hope this helps you resolve any issues you may have. If you have further questions, please contact us through the contact form.


Table of Contents:
- Page 3 – Avalon Water Coolers; Follow our social media accounts and stay up to
- Page 4 – Use and Care Guide
- Page 5 – Contents
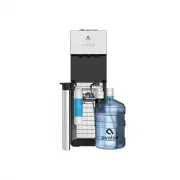
- Page 7 – Meet Your Avalon Product
- Page 9 – Part Names
- Page 11 – Indicator Lights
- Page 12 – Tech Specs
- Page 14 – G e t t i n g Sta r te d
- Page 15 – Unpacking Your Avalon Water Cooler
- Page 16 – Installing the Filters
- Page 17 – Installing the Water Bottle
- Page 19 – Installing and Removing the Drip Tray
- Page 20 – Powering the Dispenser
- Page 21 – Activate Heating and Cooling
- Page 22 – Us e r G u i d e a n d Ma i n te n a n c e
- Page 24 – Dispensing Water
- Page 25 – Refilling the Bottle
- Page 27 – Replacing the Filters
- Page 29 – C l e a n i n g
- Page 37 – Tro u b l e s h o ot i n g
- Page 40 – S a fe t y
- Page 41 – Safety
A few s i m p l e s te p s to e n s u re
p e r fe c t wa te r, eve r y t i m e .
"Loading the manual" means you need to wait until the file loads and becomes available for online reading. Some manuals are very large, and the time they take to appear depends on your internet speed.
Summary
www.avalonh2o.com We’re Here to Help Let’s Connect Call Us: 1.800.256.0695 Email Us: [email protected] [email protected] Live Chat: Monday-Thursday: 9 a.m.-5:30 p.m. Friday: 9 a.m.-4:30 p.m. @avalon_h2o Avalon Water Coolers Avalonh2o Follow our social media accounts and stay up to date on the latest...
Use and Care Guide MODEL: A3F Registration Please visit the website below to register your new water cooler within the first 30 days of purchase. Registration within the first 30 days will activate your one year warranty. www.avalonh2o.com/register-my-avalon-cooler Please keep your model number, ord...
Contents About Your Water Cooler Meet Your Avalon Product Part Names Indicator Lights Tech Specs BioGuard Getting Started Unpacking Install Filters Install Water Bottle Install/Remove Drip Tray Powering the Dispenser Activate Heating and Cooling User Guide and Maintenance Flushing the Filters Dispen...