Asko W8844XLECO - User Manual
Asko W8844XLECO Washing Machine – User Manual, read for free online in PDF format. We hope this helps you resolve any issues you may have. If you have further questions, please contact us through the contact form.


Table of Contents:
- Page 2 – CONTENTS; WARNING: Read the instructions before using the machine.
- Page 3 – SAFETY INSTRUCTIONS; GENERAL; CHILD SAFETY; Activate child safety catch (for detergent
- Page 5 – ADVICE AND TIPS BEFORE WASHING
- Page 6 – SAVE TIME AND ENERGY; HIGH WATER LEVEL; DYEING FABRICS
- Page 7 – USING YOUR WASHING MACHINE; ADD DETERGENT AND FABRIC; Powder detergent; Fabric softener
- Page 8 – PROGRAM SELECTION
- Page 9 – SELECTING OPTIONS; Temperature; Delayed start
- Page 10 – DURING THE PROGRAMME; Time remaining
- Page 11 – SETTINGS; HOW TO CHOOSE THE SETTINGS; MAKING A SELECTION; Language
- Page 12 – CARE AND CLEANING
- Page 13 – IF YOU HAVE HARD WATER
- Page 14 – TROUBLESHOOTING; WARNING; The door may only be opened
- Page 15 – ERROR MESSAGES; Close the Door; Water inlet fault; Wash motor fault
- Page 16 – INFORMATION FOR TEST INSTITUTE; TECHNICAL INFORMATION
- Page 18 – TECHNICAL DATA
- Page 19 – INSTALLATION; POSITIONING THE WASHING MACHINE; CONNECTION TO WATER SUPPLY
- Page 20 – ELECTRICAL INSTALLATION; Connection on delivery
- Page 21 – BEFORE CONTACTING THE SERVICE DIVISION; BEFORE CONTACTING THE SERVICE
- Page 22 – PROGRAMME CHART
- Page 23 – YOUR NOTES
- Page 24 – QUICK GUIDE
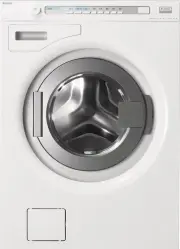
Operating Instructions
Washing Machine
W8844 XL ECO
Dear Customer,
Thank you for choosing this quality product from ASKO.
We hope it will meet your expectations and fulfil your needs for many years
to come. Scandinavian design combines clean lines, everyday functionality
and high quality. These are key characteristics of all our products and the
reason they are greatly appreciated throughout the world.
To get the most out of your new machine, we recommend that you read the
operating instructions before using the machine. The operating instructions
also include information on how you can help protect the environment.
"Loading the manual" means you need to wait until the file loads and becomes available for online reading. Some manuals are very large, and the time they take to appear depends on your internet speed.
Summary
2 Original instruction CONTENTS SAFETY INSTRUCTIONS 3 Child safety 3 Installation 4 Overflow guard function 4 Transport/winter storage 4 Packing material 4 Recycling 4 ADVICE AND TIPS BEFORE WASHING 5 Laundry label symbols 5 Sorting your laundry 5 Clothing 5Coloured cotton 5 Unbleached linen 5 Wool ...
3 SAFETY INSTRUCTIONS GENERAL • Read the operating instructions and keep them in a safe place. • Installation should be carried out by qualified ASKO technicians. • The machine should only be used for washing items as described in these instructions. It is not intended for dry cleaning. • Use only d...
5 ADVICE AND TIPS BEFORE WASHING LAUNDRY LABEL SYMBOLS Examples of washing instructions and recommended programmes. Always follow the washing instructions for each garment. Laundry labels Material Program Cotton, linen, white and light-coloured items. Everyday wash 60 °C to 95 °C Cotton, linen, cott...