Page 2 - INSTRUCTIONS FOR USE
Page 4 - Instructions for use; Oven
Instructions for use Oven D e a r c u s t o m e r, T h a n k y o u f o r c h o o s i n g t h i s q u a l i t y p ro d u c t f ro mASKO. We h o p e i t w i l l m e e t a l l o f y o u r e x p e c t a t i o n s a n d f u l lf i l l y o u r n e e d s f o r m a n y y e a r s t o c o m e . T h e S c a n ...
Page 5 - R e c o m m e n d a t i o n s
2 Please read these instructions before installing and using your oven. The oven has been designed for domestic use only for cooking food. No asbestos has been used in its construction. Using for the first time Before you use your oven for the first time, leave it empty and, with the door closed, tu...
Page 6 - C o n t e n t s
3 C o n t e n t s Recommendations 2 Using for the first time 2 Normal use 2 Contents 3 Your oven, how it works 4 Oven features 4 Introduction to the programmer 5 Accessories 6 Anti-tip safety shelf 6 Multi-purpose baking tray (reserved for pastries) 6 Multi-purpose baking tray (dripping pan) 6 45 mm...
Page 7 - Oven features; Y o u r o v e n , h o w i t w o r k s
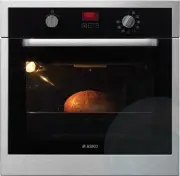
4 Oven features 1 Programmer 2 Temperature selector switch 3 Function selector switch 4 Light 5 Wire shelf supports Y o u r o v e n , h o w i t w o r k s 3 5 1 2 4
Page 8 - Introduction to the programmer
Introduction to the programmer 1 Time and cooking time display 2 ECO cooking indicator 3 Timer display 4 Cooking end time indicator 5 Cooking time indicator 6 Time setting buttons 7 Selection button (cooking time and time) 8. Temperature display 5 Y o u r o v e n , h o w i t w o r k s 1 3 2 7 5 4 6 ...
Page 9 - A c c e s s o r i e s; Anti-tip safety shelf
6 A c c e s s o r i e s Anti-tip safety shelf Food can either be placed on the shelf in a dish or cake tin for cooking or browning. This should be used for grilled meat (which should be placed directly on it). Multi-purpose baking tray (reserved for pastries) This tray has a raised edge and can be u...
Page 10 - Child safety; 5 mm multi-purpose dish
Child safety Safety activation - Open the door. - Press the switch on the panel until the system is engaged and then close the door. Open with safety engaged - Press the lever and then open the door. Safety deactivation - Open the door and press the switch on the panel. 7 45 mm multi-purpose dish Fu...
Page 11 - Using the programmer; U s i n g y o u r a p p l i a n c e
8 Using the programmer How to set the time When plugged in The display flashes 12:00. Set the time by pressing the + or – buttons (holding your finger on the button allows you to scroll through the numbers rapidly). Example: 12H30 Press the “ ” button to confirm. The display stops flashing. To set t...
Page 12 - Immediate cooking
9 Immediate cooking The programmer should display only the time. It should not be flashing. Turn the function selector to the position of your choice. Example: position . Your oven recommends the optimal temperature for the chosen cooking mode. It is, however, possible to adjust the temperature by p...
Page 13 - Programmed cooking
10 U s i n g y o u r a p p l i a n c e Programmed cooking Cooking with immediate start and programmed duration Select the desired cooking mode and adjust the temperature. Press the “ ” button until the cooking time indicator starts to flash “ ”. The display flashes 0:00 to indicate that you can now ...
Page 15 - Using the timer function
12 U s i n g y o u r a p p l i a n c e Using the timer function Your oven’s programmer can be used as an independent timer that allows you to count down a time without operating the oven. In this case, the timer display has priority over the clock display. Press the “ ” button until the timer symbol...
Page 16 - O v e n c o o k i n g m o d e s
13 Circulating heat* (recommended temperature 180°C min. 35°C max. 235°C) • Cooking is by a heating element at the bottom of the oven and the oven fan. • Rapid temperature increase: Some dishes can be placed in the oven while it is still cold. • Recommended to retain moisture in white meat, fish, ve...
Page 18 - T h e C l e a n i n g f u n c t i o n; Cleaning the outer surfaces
15 T h e C l e a n i n g f u n c t i o n Cleaning the outer surfaces To clean both the electronic programmer window and the oven door, use a window washing product applied to a soft cloth. Do not use abrasive creams or scouring sponges. Cleaning the door Disassembling the door Warning Before removin...
Page 20 - T r o u b l e s h o o t i n g; What if...
17 T r o u b l e s h o o t i n g What if… IF YOU REALIZE THAT POSSIBLE CAUSES WHAT SHOULD YOU DO? The oven isn't heating. • The oven isn't connected to the power supply. • The fuse has blown. • The temperature selected is too low. - Connect to power supply. - Change the fuse, checking that it is 16A...
Page 21 - Connecting up; I n s t a l l e r ' s i n f o r m a t i o n
18 Connecting up As a specialist, you alone are competent to install and connect up ASKO appliances. Our guarantee therefore applies only and exclusively to appliances which have been installed and connected up by you in accordance with the provisions of current regulations. Failure to meet this req...
Page 22 - Housing
19 I n s t a l l e r ' s i n f o r m a t i o n Housing NB The oven may be housed either under a work surface or built into a column that is open* or closed with a suitable opening. Your oven works at its best and produces excellent results when cooking and cleaning itself, if its air circulation is ...
Page 23 - Changing the light bulb; G e n e r a l m a i n t e n a n c e
20 Leave the oven to cool down before cleaning it manually. In general, don't use any type of scouring powder or metal-backed sponge, or any sharp objects for cleaning. Changing the light bulb • The bulb is located in the top of the oven. Unscrew the protective shade (see diagram). Pull the bulb out...