Page 3 - CONTENTS; BEFORE USING YOUR MACHINE
EN CONTENTS • Correct use • General warnings • Safety warnings - Burn risk - Electrocution risk - Flooding risk - Explosion risk - Fire risk - Fall and injury risk - Child safety • Disposing of packaging and your old machine responsibly • General Appearance • Technical specifications • Removing the ...
Page 5 - MAINTENANCE AND CLEANING OF YOUR MACHINE
EN • Start/Pause button 71 - Starting the a programme 71 - Pausing a programme / adding laundry 74 - Cancelling a programme 74 - Finishing programme 75 - Child lock 76 • Programme table 78 - Cotton 78 - Cotton Eco 78 - Eco 20° 79 - Synthetics 80 - Delicates 81 - Wools / Silk 81 - Duvet 82 - Extras 8...
Page 7 - Do not let your pets near the machine.
5 • Read this user’s manual. • Your machine is designed to be used in domes- tic environments. Using it for commercial purpo-ses shall cause your warranty to be void. • Do not let your pets near the machine. • Please check the packaging of your machine befo- re installation, and the outer surface of...
Page 8 - You must remove the transportation safety; General warnings
6 • You must remove the transportation safety screws before your machine’s first use. The mac-hine will malfunction if it is operated with the transport safety screws still in place and this will void your warranty. • Your machine warranty does not cover damage caused by external factors (floods, fi...
Page 9 - It is advised that the first washing operation is; close the water inlet tap if you will not use your mac-
7 • It is advised that the first washing operation is conducted by putting 1/2 scale detergent in com-partment number 2 of the detergent drawer and run the machine without any clothes in on the “DRUM CLEANING” program. (Please see prog-ram table page 85) • As detergent or softener exposed to air for...
Page 11 - Safety warnings
9 You must read these warnings. Ignoring these warnings may put you or your loved ones at risk of fatal injuries. • Do not touch the discharge hose or the water disc- harged during the discharging process as the appli-ance may reach high temperatures when running. • Open the door of the machine all ...
Page 14 - Explosion risk!; As there is a drying function on your machine,; Fire risk!; Unwashed dry laundry must not be dried in your
12 Explosion risk! • As there is a drying function on your machine, make sure that materials like stain removing chemi-cals or washing gas that you might have applied on your laundry earlier are properly rinsed and purged. There might be a risk of explosion when you run your machine with the drying ...
Page 15 - Laundry; must not be dried in the machine; under
13 • Laundry must not be dried in the machine under the conditions specified below due to the risk of fire:- If laundry is not washed.- If oil stains and other stains on the laundry (food oils, balms and cosmetic remains, kitchen swab etc.) are not cleaned enough.- Laundry cleaned with industrial ch...
Page 16 - - Never use products that contain solvent material; Fire and Explosion; Fall and injury risk!; • Do not climb on your machine. The upper table of
14 - Never use products that contain solvent material (like washing gas) in your machine.- Remove all the objects in the pockets of your la-undry (needles, paperclips, lighters, matches etc.) when loading your machine. Fire and Explosion risk may occur. Fall and injury risk! • Do not climb on your m...
Page 18 - DISPOSING OF PACKAGING AND YOUR OLD; PACKAGING AND THE ENVIRONMENT
16 Removal of packaging materials Packaging materials protect your machine from the damage that might occur during transportation. Please recycle you packaging materials.Recycled material provides both raw material savings and decre-ases waste production Removal of old machine Old electrical devices...
Page 19 - SAVINGS & EFFICIENCY INFORMATION; • The amount of laundry you put in your washing machine should
17 SAVINGS & EFFICIENCY INFORMATION Some important information to get more efficiency out of your machine: • The amount of laundry you put in your washing machine should not exceed the maximum amount indicated. By avoiding overloa-ding, your machine shall run more efficiently. • Not using pre-wa...
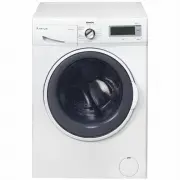
Page 20 - OVERVIEW OF YOUR DEVICE; General Appearance
18 OVERVIEW OF YOUR DEVICE 2-Detergent drawer3-Programme button4-High-resolutionLCD display 1-Upper tray General Appearance 7-Pump filtercover 6-Door 5-Touch buttons
Page 23 - Removing transportation safety screws; SETTING UP THE MACHINE
21 Removing transportation safety screws Before operating your machine, you must remove the transport safety screws on the backside of the machi-ne. Have your machine installed only by an authorized service company. SETTING UP THE MACHINE The transport safety screws should be loosened by rotating th...
Page 24 - You must remove the trans
22 Transport screws should then be removed by pulling them out. The removed transport safety screws should be stored to be used again in case the machine needs to be trans-ported again, e.g. if moving house. NOTE: You must remove the trans - portation screws from your machine before first use. Fault...
Page 25 - You can adjust the balance of
23 Placing the machine and adjusting the adjustable foot Do not install your machine on a carpet or such ground that will block ventilation from the base. To ensure silent and vibration-free operation of your machine, it should be deployed on a non-sliding and firm ground. You can adjust the balance...
Page 27 - Electrical connection; • The mains cord of your machine is equipped
25 Electrical connection • Your washer-dryer is adjusted for 220-240V and 50Hz. • The mains cord of your machine is equipped with a specific grounded plug. • The mains plug should always be inserted to a grounded receptacle of 10 amperes. The fuse current value of the power line connected to this pl...
Page 28 - Water inlet connection
26 • Operate your machine with cold water only. • Use only the new water inlet hoses given with your machine or purchased through authorized dealers. • 1 gasket is included in the hose packaging to prevent water leaks in connections. Fit this gasket to the end of new water inlet hose on the side of ...
Page 29 - Water draining connection; • Connect the water drain hose to a
27 Water draining connection • Connect the water drain hose to a waste water drain hole or a special apparatus connected to the outlet el-bow of the sink placed at a maximum height of 80 cm. • Never attempt to extend the water discharge hose by jointing.• Do not put your machine’s water discharge ho...
Page 30 - CONTROL PANEL
28 2- Pr og ram knob: Y ou ma y select t he pr og ramme y ou wish t o use via t he pr og ram knob. Y ou ma y se t t he pr og ram selection op - er ation b y r ot ating t he pr og ramme knob in bo th dir ections. Ensur e that t he pr og ramme knob is e xactl y on t he pr og ramme y ou w ant t o selec...
Page 31 - Detergent drawer general view; apparatus. You can use your
29 Detergent drawer general view When you want to wash yourlaundry with liquid detergent,you can use the liquid detergent apparatus. You can use your liquid detergent in all programswithout pre-wash. For this, plugthe liquid detergent apparatusto second compartment of thedetergent drawer (present in...
Page 32 - Detergent drawer compartments; Main wash detergent compartment:
30 Detergent drawer compartments Main wash detergent compartment: In this compartment, only materialslike detergent (liquid or powder) or anti-lime. You can find the liquid detergent apparatus foryour liquid detergent inside yourmachine during the first set up.(*) Softener, starching, detergentcompa...
Page 33 - Programme Knob
31 You can select the programme you want to wash your laundry in with the programme knob. You may set the programme selecti - on operation by rotating the programme knob in both directions. Ensure that the programme button is exactly on the programme you want to select. • You can see page (78) progr...
Page 34 - To make the first settings of your washer-dryer:; Language selection setting; • The first thing that will be displayed on the main screen is the; Adjusting machine settings
32 To make the first settings of your washer-dryer: • Plug in your machine. • Open the water tap.• Turn the programme knob. Language selection setting • The first thing that will be displayed on the main screen is the language selection setting. • Go to the language you wish the use with the symbol ...
Page 35 - Deutsch
33 • Go to the language you wish the use with the symbol but- tons. • Approve your language selection with the symbol button. • When you want to change your language selection again, you can make the language selection by going into the language selection page and using the symbol buttons. Deutsch 9...
Page 38 - Eco Time Setting; Your mains electricity must be connected to a counter with
36 Eco Time Setting (Economic time interval) • The electrical energy consumption cost changes during the day according to the time intervals set by electricity providers. You can learn these intervals from electricity providers and set your eco time running hours, and have your machine run between t...
Page 40 - Current time setting; • We advise that you set the correct time at the point of installati
38 Current time setting • We advise that you set the correct time at the point of installati - on. • Your machine will ask your approval for setting the current time. Go to the setting menu by touching the symbol button. symbol button allows you to exit without setting. Note: You must set the curren...
Page 42 - Sound Adjustment; • You can make the sound adjustment of your appliance by pres
40 Sound Adjustment • You can make the sound adjustment of your appliance by pres - sing the symbol buttons. symbol denotes that the warning sounds of your appliance is on. symbol denotes that the warning sounds of your applian- ce are off. 9 kg. 6kg. 9 kg. 6kg.
Page 43 - Screen brightness setting; • You can adjust the screen brightness of your appliance by touc; Screen contrast setting; • You can adjust the screen contrast your appliance by touching
41 Screen brightness setting • You can adjust the screen brightness of your appliance by touc - hing the symbols. • Adjust the screen contract of your appliance by touching the symbol button. Screen contrast setting • You can adjust the screen contrast your appliance by touching the symbol buttons. ...
Page 44 - Revert to factory settings; • Touch the symbol.; • You can return to the main screen by touching the
42 Revert to factory settings If you want to revert your appliance to the factory default settings: • Touch the symbol. • You will be asked on screen if you want to reset to Factory Settings. • Touch the symbol to approve the selection.• If you want to cancel the selection touch the symbol. • You ca...
Page 45 - WASHING OPERATION; Sorting laundry; Any malfunctions occurring due to
43 WASHING OPERATION • Open the tap. • Plug in your machine. Sorting laundry Your laundry has product labels on them that specify their appropriate washing conditions. Wash or dry yourlaundry according to the specifications on the product label. • Sort your laundry according to their type (cotton, s...
Page 46 - Explanation of washing symbols
44 S tur dy Mat er ial Delicat es f abr ic Maximum w ashing t em per atur e is 95°C M ax im um w as hi ng w at er te m pe ra tu re 6 0° C Maximum w ashing w at er t em per atur e 40°C Maximum w ashing w at er t em per atur e 30°C Hand w ashing Dr y cleaning onl y Can be bleac hed in cold w at er Do ...
Page 47 - Placing laundry into the machine; • Open the loading door of; You must select a programme before loading; The maximum load capacity of your machine may chan-
45 Placing laundry into the machine • Open the loading door of your machine. • Place your laundry into the machine by spreading them well. Fold objects like quilts and blankets that you will load into the machine as shown below. • Check inside the drum of your machine. There might be laundry left in...
Page 50 - Choice of detergent and placing into the machine
48 The amount of detergent you will put in your machine will depend on the following criteria: • Your detergent utilization will be based on the degree of contami - nation of your laundries. • Do not prewash your less stained laundries and put the correct amount of detergent in the 2nd compartment o...
Page 52 - Program selection; • Select the washing programme you desire by the programme
50 Program selection • Select the washing programme you desire by the programme knob. • The programme name and features will be shown on the scre - en. • You can make the temperature adjustment ( , 20°, 30°, 40°, 60°, 90°) by touching the symbol button. • You can make the spinning adjustment ( , 400...
Page 53 - • You can select the drying setting you wish to use by touching; Cupboard dry; • Recommended for laundry that you will put in the cupboard
51 If you want your laundry dried at the end of was- hing • You can select the drying setting you wish to use by touching the symbol button. Cupboard dry • Recommended for laundry that you will put in the cupboard directly. • If you want to select the cupboard dry feature, touch the symbol button un...
Page 54 - Hanger dry; button until you see the
52 Hanger dry • Recommended for laundry that requires hanger drying.• If you want to select the hanger dry feature, touch the symbol button until you see the symbol on the screen. Note: If the symbol does not appear on the screen when you want to select the hanger dry feature, it means that the was-...
Page 55 - Iron dry; symbol
53 Iron dry • Recommended for laundry that you will iron before use.• If you want to select the iron dry feature, touch the symbol button until you see the symbol on the screen. Note: If the symbol does not appear on the screen when you want to select the iron dry feature, it means that the washing ...
Page 56 - Drying with duration; If you want to use a time-set drying programme; Duration Drying Programs; Amount of laundry to dry
54 Drying with duration If you want to use a time-set drying programme; • Touch the symbol on the screen.• Drying selections will be displayed on your machine screen as 30, 60 and 120 minutes. Note: If one of the symbols are not displayed on the screen when you wish to select the duration drying fea...
Page 57 - Additional Functions; • Press the button of an additional function you would like to se
55 Additional Functions Before starting the programme, you can optionally select an addi-tional function. • Press the button of an additional function you would like to se - lect.Additional functions may not be available due to the programme you selected or the amount of laundry you put in your mach...
Page 58 - Pre-wash additional function; You can give your heavily soiled laundry a pre-wash before the
56 Pre-wash additional function You can give your heavily soiled laundry a pre-wash before the main wash using this function. When using this function, you sho-uld put detergent in the front washing compartment of the deter-gent drawer. • Touch the symbol button to activate the pre-wash additio - na...
Page 59 - Extra rinse function; One additional rinse is made at the end of washing.
57 Extra rinse function You can add an additional rinse or rinses to your laundry by using this function. Your machine offers you 3 rinsing options for this additional feature. : One additional rinse is made at the end of washing. : Two additional rinses are made at the end of washing. : Three addit...
Page 60 - Anti-allergic additional function; • Touch the symbol button until you see the
58 Anti-allergic additional function You can add this additional rinse operation to your laundry by using this function. Your machine will carry out all rinsing steps with hot water (it is recommended for laundry worn on delicates skin, baby clothes, underwear) • Touch the symbol button until you se...
Page 61 - Easy ironing additional function; • You can make your laundry be less wrinkled at the end of the
59 Easy ironing additional function • You can make your laundry be less wrinkled at the end of the wash by using this additional function. • Touch the symbol button to activate the easy ironing addi - tional function. Note: If the symbol is not displayed on the screen when you want to select the eas...
Page 62 - • You must make the Eco Time setting from the settings section
60 Economic time interval additional function • You must make the Eco Time setting from the settings section for this function to work efficiently (see page 36). • If you want to activate the Eco Time function touch the button of symbol. • You will see symbol is activated on the screen. 9 kg. 6kg.
Page 65 - By using this function, you can delay your machine starting the
63 Delay Time / Finish time adjustment additional function • By using this function, you can delay your machine starting the washing operation by 10 minutes up to 23 hours 50 minutes or you can set the wash to finish at a certain time. • To activate this additional function, touch the symbol. • The ...
Page 72 - • This would allow you to store a new memory programme.
70 • This would allow you to store a new memory programme. 9 kg. 6kg.
Page 73 - Starting the programme; • You can start the programme you have selected by touching the
71 Start/Pause button Starting the programme • You can start the programme you have selected by touching the Start/Pause button • When you turn your machine on, the programme you have selected will be active on the screen. The screens below are an example of what is displayed on screen during washin...
Page 76 - - Your machine will perform the necessary discharge operation
74 Pausing a programme / Adding laundry • You can pause or restart the programme you have selected with the button. You can use this function when you want to add laundry to your machine. • If symbol is displayed on the screen, you can open the door of your machine and add laundry. • If symbol is di...
Page 77 - • See Page 78 for the Program Table; Finishing a programme; Your machine will stop by itself as soon as the programme you; If you are not satisfied with the drying level of your laundry,; Your machine has a cooling stage that cools down your
75 • See Page 78 for the Program Table Finishing a programme Your machine will stop by itself as soon as the programme you have selected finishes. - You can open the machine’s door and remove the laundry. - Leave the door of your machine open after removing the laundry so that the machine can dry ou...
Page 78 - Child Lock; Your machine has a child lock so that the programme flow is not; Keylock activated
76 Child Lock Your machine has a child lock so that the programme flow is not affected if the function buttons are pressed or the programme knob is turned while the machine is washing or drying. Child lock engages after both of the buttons next to the symbol are pressed for more than 3 seconds. The ...
Page 79 - To unlock press for 3s; Keylock deactivated
77 The following text will be displayed if any buttons are pressed while the child lock is engaged. If the child lock is engaged while any programme is running and the programme knob is switched to the CANCEL position and another programme is selected, the programme previously selec- ted continues f...
Page 81 - Program Table
79 (*) Programme factory default settings. (**) When you want to select more than one additional function, the additional functions you wish to select may not comply with each other. Do not dry towels, cotton and linens, and synthetic and sythetic mix clothes together. For drying select the most app...
Page 82 - Easy Care
80 (*) Programme factory default settings. (**) When you want to select more than one additional function, the additional functions you wish to select may not comply with each other. (***) These are sub-programmes. Refer to page 90 for programme selection. Do not dry towels, cotton and linens, and s...
Page 83 - Delicate
81 (*) Programme factory default settings. (**) When you want to select more than one additional function, the additional functions you wish to select may not comply with each other. (***) These are sub-programmes. Refer to page 92 for programme selection. Do not dry towels, cotton and linens, and s...
Page 84 - Duvet
82 (*) Programme factory default settings. (**) When you want to select more than one additional function, the additional functions you wish to select may not comply with each other. Do not dry towels, cotton and linens, and synthetic and sythetic mix clothes together. For drying select the most app...
Page 85 - efr; Synt; Extras
83 (*) Programme factory default settings. (**) When you want to select more than one additional function, the additional functions you wish to select may not comply with each other. Do not dry towels, cotton and linens, and synthetic and sythetic mix clothes together. For drying select the most app...
Page 88 - Allergy Safe
86 (*) Programme factory default settings. (**) When you want to select more than one additional function, the additional functions you wish to select may not comply with each other. Do not dry towels, cotton and linens, and synthetic and sythetic mix clothes together. For drying select the most app...
Page 89 - Super rapid 12 min; Rapid
87 (*) Programme factory default settings. (**) When you want to select more than one additional function, the additional functions you wish to select may not comply with each other. Do not dry towels, cotton and linens, and synthetic and sythetic mix clothes together. For drying select the most app...
Page 90 - Cotton Dry; Gentle Dry
88 (*) Programme factory default settings. (**) When you want to select more than one additional function, the additional functions you wish to select may not comply with each other. (***) These are sub-programmes. Refer to page 94 for programme selection. Do not dry towels, cotton and linens, and s...
Page 93 - Synthetics
91 Selecting sub-programmes (Synthetics) When you select the Synthetics prog-ramme from the programme knob, you will see two sub-program options.1-Synthetics 2-Curtain • You can make sub-programme selecti - ons by touching the symbol buttons. Keylock deactivated 9 kg. 6kg. 9 kg. 6kg. Synthetics Curt...
Page 97 - When you select the; extras; programme from the programme knob, you
95 Selecting sub-programmes (Extras) When you select the extras programme from the programme knob, you will see 6 sub-program options.1- Refresh2- Rinse3- Spin4- Drain5- Drum clean6- Synthetics Wash & Dry • You can make the sub-programme selections by touching the symbol buttons. 9 kg. 6kg. 9 kg...
Page 100 - Unplug your machine before starting the
98 MAINTENANCE AND CLEANING OF YOUR MACHINE Notice ! Unplug your machine before starting the maintenance and cleaning of your ma-chine. Turn off the water inlet before starting the maintenance and cleaning of your machine. Notice ! Your machine’s parts might be damaged if cleaners with solvent agent...
Page 101 - Water inlet filters; • Disconnect the ends of the water inlet hose from the tap and the
99 Water inlet filters Filters are in place to prevent foreign substances entering the machine and can be found both on the faucet side of the inlet hose and on the ends of water valves along the water inlet hose of your machine. If your machine cannot intake a sufficient amo-unt of water despite th...
Page 102 - Detergent drawer maintenance and cleaning; • Your detergents may form residue in the detergent drawer and; • Do not wash your detergent drawer in a dishwasher.
100 Detergent drawer maintenance and cleaning • Your detergents may form residue in the detergent drawer and detergent drawer slot. Remove the detergent drawer in regular intervals to clean the formed residue. In order to remove the detergent drawer from its place:* Pull the detergent drawing all th...
Page 103 - Use a non-chloride cleaning agent to clean these rust stains and; Body Cleaning
101 Siphon cover Remove the detergent drawer from its place (see page 99). Remove the siphon plug as shown in the picture and clean the softener residues thoroughly. Replace the cleaned siphon plug. Check whether the it completely fits. Drum Cleaning Do not leave metal parts like needle, paper clip,...
Page 104 - Pump filter maintenance and cleaning; • You may use the washing powder spade
102 Pump filter maintenance and cleaning This machine contains a filter system that prevents threads left over from your laundry and other small materials from entering the pump during the discharge operation after a completed wash cycle. This is to protect and prolong the life of the pump. It is re...
Page 106 - Troubleshooting; FAULT
104 Troubleshooting All repairing operations required for your machine should be carried out by an authorised service company. If your machine requires a repair or if you cannot solve an issue with the information provided below, then you should: • Unplug the machine. • Close the water tap. • Contac...
Page 110 - CANCEL position, reselect
108 The load detection system on the screen does not work while loading the machine. symbol is displayed On screen and machine does not run. Laundry remains damp after the drying operation. Appropriate drying programme is not selected. The maximum load capacity for the selected programme might be ex...
Page 111 - Your machine is equipped with systems which are capable of; ERROR CODE; The door of your machine is left open.; Check the door
109 Automatic fault warnings and what needs to be done Your machine is equipped with systems which are capable of both taking necessary precautions and warning you in case of any breakdown by means of continuous self-checking during washing operations. ERROR CODE POSSIBLE FAULT WHAT TO DO The door o...
Page 112 - CANCEL position. You can select a
110 (*) See page 98. ERROR CODE POSSIBLE FAULT WHAT TO DO Water cut-off or low mains water pressure. - Water tap may be closed. Check. - Mains water may be cut-off. Check. - If so, switch the programme knob to CANCEL position. You can select a programme and run your machine after the mains water is ...
Page 114 - Your machine has excessive amount of
112 ERROR CODE POSSIBLE FAULT WHAT TO DO Your machine has excessive amount of water. Your machine will drain water by itself. Pursuant to draining operation, turn off your machine and unplug it. Turn off your faucet and contact the nearest authorised service company.
Page 116 - Warranty Card
Warranty Card Worldwide Appliances Pty Limited A.B.N. 45868077422O ffi ce: 48-50 Moore Street, Leichhardt N.S.W 2040 Post:Locked Bag 3000, Annandale, N.S.W 2038 P: 1300 694 583WARRANTY REGISTRATION Your ongoing satisfaction with your artusi product is important to us. We ask that you complete the en...
Page 117 - continued
4 Please complete and send to ARTUSI at: REPLY PAID 83617 LEICHHARDT NSW 2040 Last Name: First Name: Address: State: Postcode: Email: Home Phone: Mobile: Purchase Date: / / (Please attach proof of purchase to validate warranty) MODEL NUMBER SERIAL NUMBER (if you cannot locate the serial number pleas...