Whirlpool WTW4957PW - User Manual

Whirlpool WTW4957PW Washing Machine – User Manual, read for free online in PDF format. We hope this helps you resolve any issues you may have. If you have further questions, please contact us through the contact form.


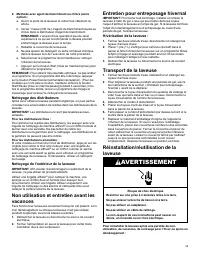
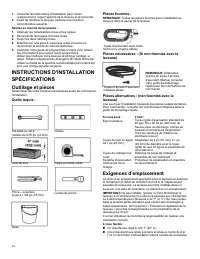
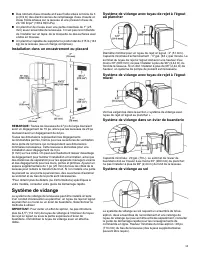
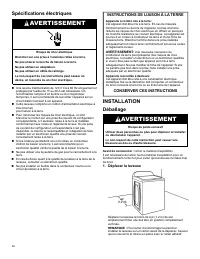
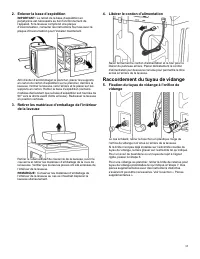
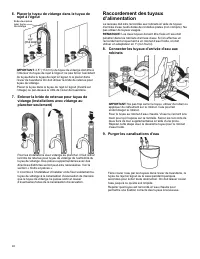
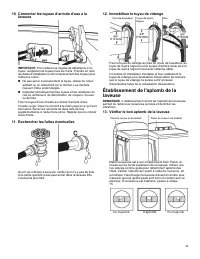
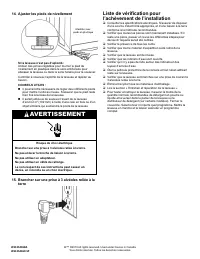
Table of Contents:
- Page 2 – WASHER SAFETY; Your safety and the safety of others are very important.; DANGER; IMPORTANT SAFETY INSTRUCTIONS; SAVE THESE INSTRUCTIONS
- Page 4 – Cleaning the outside of the washer; Nonuse and Vacation Care
- Page 5 – Tools and Parts; Recessed area or closet installation
- Page 6 – Drain System; Floor standpipe drain system; Laundry tub drain System; Electrical Requirements
- Page 7 – GROUNDING INSTRUCTIONS; INSTALLATION; Unpacking; Remove shipping base
- Page 8 – Connect Drain Hose; Attach drain hose to drain port; Place drain hose in standpipe; Connect Inlet Hoses; Connect inlet hoses to water faucets
- Page 9 – Connect inlet hoses to washer; Secure drain hose; Level Washer; Check levelness of washer
- Page 10 – Adjust leveling feet; Complete Installation Checklist
- Page 11 – SÉCURITÉ DE LA LAVEUSE; Votre sécurité et celle des autres est très importante.; D ANGER; A VERTISSEMENT; IMPORTANTES INSTRUCTIONS DE SÉCURITÉ
- Page 12 – Tuyaux d’arrivée d’eau
- Page 13 – VERTISSEMENT
- Page 14 – Outillage et pièces; Pièces nécessaires : (Si non fournies avec la; Exigences d’emplacement
- Page 15 – Installation dans un encastrement ou placard; Système de vidange; Système de vidange dans un évier de buanderie
- Page 16 – Spécifications électriques; INSTRUCTIONS DE LIAISON À LA TERRE; Déballage; Déplacer la laveuse
- Page 17 – Raccordement du tuyau de vidange
- Page 19 – Établissement de l'aplomb de la; Vérifier le bon aplomb de la laveuse
- Page 20 – Ajuster les pieds de nivellement; Brancher sur une prise à 3 alvéoles reliée à la; Liste de vérification pour
W11354658A
TOP LOAD WASHER OWNER’S MANUAL
MANUEL DE L’UTILISATEUR DE LA LAVEUSE À
CHARGEMENT PAR LE DESSUS
Table of Contents
......................................................... 2
............................... 3
............................................... 3
...................................................... 3
................................. 4
........................................... 4
................................... 4
Reinstalling/Using Washer Again
. .......................................... 5
.......................................................... 5
.................................................. 5
....................................... 5
..................................................... 6
...................................... 6
............................................................... 7
......................................................... 7
........................................... 8
........................................... 8
..................................................... 9
Complete Installation Checklist
Sécuritéde la laveuse
............................................ 11
Entretienet réparation de la laveuse
..................... 12
Tuyaux d’arrivée d’eau
...................................... 12
Entretien de la laveuse
..................................... 12
Non utilisation et entretien avant les
vacances
......................................................... 13
Entretien pour entreposage hivernal
.................. 13
Transport de la laveuse
..................................... 13
Réinstallation/réutilisation de la laveuse
............. 13
Instructions d'installation
......................................... 14
Spécifications
........................................................ 14
Outillage et pièces
............................................ 14
Exigences d’emplacement
................................ 14
Système de vidange
......................................... 15
Spécifications électriques
................................. 16
Installation
............................................................. 16
Déballage
........................................................ 16
Raccordement du tuyau de vidange
................... 17
Raccordement des tuyaux d’alimentation
........... 18
Établissement de l'aplomb de la laveuse
............ 19
Liste de vérification pour l’achèvement de
l’installation
...................................................... 20
Table des matières
W11354659-SP
"Loading the manual" means you need to wait until the file loads and becomes available for online reading. Some manuals are very large, and the time they take to appear depends on your internet speed.
Was this manual helpful?
About this manual
- Brand
- Whirlpool
- Model
- WTW4957PW
- Document type
- User Manual
- Category
- Washing Machine
- Language(s)
- English, French
- Pages
- 20
- File size
- 3.9 MB
- Format
Other Manuals for Whirlpool WTW4957PW
Summary
2 WASHER SAFETY Your safety and the safety of others are very important. We have provided many important safety messages in this manual and on your appliance. Always read and obey all safetymessages. This is the safety alert symbol. This symbol alerts you to potential hazards that can kill or hurt y...
4 For non-removable dispensers: To remove residue from the dispensers, wipe them with anaffresh ® Machine Cleaning Wipe or a damp cloth and towel dry. Do not attempt to remove the dispensers or trim for cleaning. Thedispensers and trim are not removable. For removable dispensers: If your model has a...
5 INSTALLATION INSTRUCTIONS REQUIREMENTS Tools and Parts Gather required tools and parts before starting installation. Tools Needed: Adjustable or open end wrench 9/16″ (14 mm) Level Wood block Ruler or measuring tape Adjustable pliers that open to 1 3/4″ (45 mm) Flashlight Bucket Parts Supplied: NO...
Ask a question
Related manuals
Popular Whirlpool Washing Machines
More Whirlpool Washing Machines models
 Whirlpool WTW2000HW User Manual
 Whirlpool WTW4816FW User Manual
 Whirlpool WTW4950HW User Manual
 Whirlpool WTW4955HW User Manual
 Whirlpool WTW5010LW User Manual
 Whirlpool WTW5015LW User Manual
 Whirlpool WTW5057LW User Manual
 Whirlpool WTW5100HC User Manual
 Whirlpool WTW5100HW User Manual
 Whirlpool WTW5105HC User Manual
 Whirlpool WTW5105HW User Manual
 Whirlpool WTW6120HW User Manual