Whirlpool WDT730HAMZ - Manual
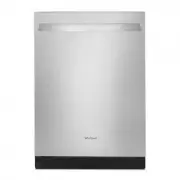
A repair manual for dishwasher racks covers methods to safely remove and reinstall upper or lower racks across multiple model variations, including Style A, B, and C configurations. The guide highlights key components like glide rails, retention clips, and track stops while emphasizing proper alignment and locking mechanisms to prevent damage. It also addresses similar procedures for washing machine tubs (canastas), detailing installation adjustments based on the tub’s level.


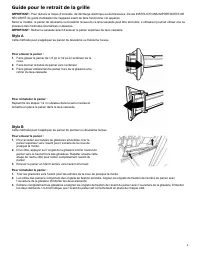
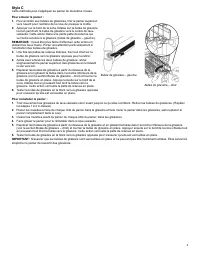


Table of Contents:
- Page 1 – Dishwasher Rack Removal Guide
- Page 2 – Second-Level Dishwasher Rack Track Stop Procedures
- Page 3 – Dishwasher Rack Removal and Reinstallation Methods
- Page 4 – Upper Dishwasher Rack Removal for Style C Models
- Page 5 – Washing Machine Laundry Tub Removal
- Page 6 – Second-Level Dishwasher Basket Removal for Style C Models
1
Rack Removal Guide
IMPORTANT:
To reduce the risk of fire, electric shock, or injury to persons, read the IMPORTANT SAFETY INSTRUCTIONS, located in
your appliance's Owner's Manual, before operating this appliance.
Depending on your model, your dishwasher's second- or third-level rack may be removable. You may be able to use one or more of the
methods listed below.
IMPORTANT:
Remove dishes prior to removing the upper rack from the dishwasher.
Style A
This method may apply for second- and/or third-level rack(s).
To remove the rack:
1.
Roll the rack 1/3 to 1/2 of the way out of the tub.
2.
Rotate the rack stops outward.
3.
Roll the rack all the way out of the track and remove from the
dishwasher.
To replace the rack:
Reverse the above steps 1–3 to replace the rack into the
dishwasher.
Style B
This method may apply for first- and or second-level rack(s).
To remove the rack:
1.
To gain access to the removable tabs on the tracks/rails, pull
the upper rack forward about halfway out of the tub.
2.
On one side, press the tab on the track in and pull the front end
of the rack up and out of the track. Then repeat this step on the
other side to completely remove the front end of the rack.
3.
Remove the rack by pulling the back end out using a forward
and upward motion.
To replace the rack:
1.
Pull the tracks forward about halfway out of the tub.
2.
Along the sides of the racks are round attachment tabs. Align the rack’s back end attachment tabs with the cutout in the track. Push
down into place.
3.
Pull the tracks completely out, and align the rack’s front end attachment tabs with the cutout in the track. Push down into place. You
will hear a snap when the front end of the rack is secured into place on each side.
"Loading the manual" means you need to wait until the file loads and becomes available for online reading. Some manuals are very large, and the time they take to appear depends on your internet speed.
Was this manual helpful?
Helpful for 3 of 3 readers
About this manual
- Brand
- Whirlpool
- Model
- WDT730HAMZ
- Document type
- Manual
- Category
- Dishwasher
- Language(s)
- English, Spanish, French
- Pages
- 6
- File size
- 948.1 KB
- Format
Other Manuals for Whirlpool WDT730HAMZ
Summary
Methods and step-by-step instructions, including diagrams and safety warnings, for removing and replacing upper and lower dishwasher racks using Style A and Style B.
Numbered procedures and close-up diagrams detailing the removal and replacement of a second-level dishwasher rack, focusing on handling the track stops.
Step-by-step text instructions accompanied by diagrams for removing and reinstalling dishwasher racks using Style A and Style B methods.
Ask a question
Related manuals
Popular Whirlpool Dishwashers


More Whirlpool Dishwashers models
 Whirlpool WDT550SAPB Manual
 Whirlpool WDT550SAPZ Manual
 Whirlpool WDT705PAKZ User Manual
 Whirlpool WDT710PAHB User Manual
 Whirlpool WDT710PAHW User Manual
 Whirlpool WDT730PAHB User Manual
 Whirlpool WDT730PAHW User Manual
 Whirlpool WDT730PAHZ User Manual
 Whirlpool WDT740SALW Manual
 Whirlpool WDT750SAHZ User Manual
 Whirlpool WDT750SAKB Manual
 Whirlpool WDT750SAKV Manual