Whirlpool CSP2971HQ - Manual
Whirlpool CSP2971HQ Dryer – Manual, read for free online in PDF format. We hope this helps you resolve any issues you may have. If you have further questions, please contact us through the contact form.


Table of Contents:
- Page 2 – DRYER SAFETY
- Page 3 – FIRE OR EXPLOSION HAZARD
- Page 4 – IMPORTANT SAFETY INSTRUCTIONS
- Page 6 – DIMENSIONS/CLEARANCES; Front View, Recessed Opening
- Page 7 – LOCATION REQUIREMENTS; WARNING; Dryer installation clearances; Recessed Area Installation Instructions
- Page 8 – GAS DRYER ELECTRICAL REQUIREMENTS; Gas Dryer Grounding
- Page 9 – GAS REQUIREMENTS; Gas Supply
- Page 12 – DRYER VENTING REQUIREMENTS
- Page 13 – Vent Hoods; Turns
- Page 14 – If an Exhaust Hood Cannot be Used
- Page 15 – INSTALLING LEVELING LEGS; Screw in leveling legs
- Page 16 – LEVELING; GAS SUPPLY CONNECTION; Make Gas Connection
- Page 17 – Rigid Pipe Connection
- Page 18 – Power Supply Cord Connection; Connection Options; Power Cord; C B
- Page 19 – ELECTRIC DRYER ELECTRICAL CONNECTIONS
- Page 20 – Direct Wire Connection; Direct Wire
- Page 21 – Remove Terminal Block Cover; Insert conduit into strain relief and tighten clamp.
- Page 22 – Connecting 4-Wire Connection: Direct Wire
- Page 23 – Connecting 3-Wire Connection: Direct Wire; Use where local codes permit connecting cabinet-ground; Use for direct wire or power supply cord where local codes; Connecting Neutral Wire
- Page 24 – COMPLETE INSTALLATION
- Page 25 – Remove the Door Assembly
- Page 26 – MAINTENANCE INSTRUCTIONS; If dryer does not operate, check the following:; IF YOU NEED ASSISTANCE
- Page 27 – ELECTRONIC CONTROL SETUP INSTRUCTIONS; IMPORTANT; General User Information
- Page 28 – Control Setup Procedures
- Page 29 – OPTIONS 3.XX – 9.XX TO USE IF SPECIAL PRICING
- Page 31 – Turn access panel key back to original; DIAGNOSTIC GUIDE; CODE
INSTALLATION
INSTRUCTIONS
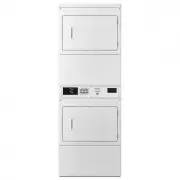
Commercial Stacked
Dryer Gas (120 V, 60 Hz)
or Electric
(120/240 V, 60 Hz)
www.whirlpoolcommerciallaundry.com
TABLE OF CONTENTS
W11255762A
W11255763A-SP
DRYER SAFETY ............................................................................ 2
TOOLS & PARTS ........................................................................... 5
DIMENSIONS/CLEARANCES ................................................... 6
LOCATION REQUIREMENTS .................................................... 7
GAS DRYER ELECTRICAL REQUIREMENTS ....................... 8
GAS REQUIREMENTS ............................................................... 9
ELECTRIC DRYER ELECTRICAL
REQUIREMENTS (U.S.A. ONLY) ............................................10
DRYER VENTING REQUIREMENTS ......................................12
INSTALLING LEVELING LEGS .................................................15
LEVELING ......................................................................................16
GAS SUPPLY CONNECTION ...................................................16
ELECTRIC DRYER ELECTRICAL
CONNECTIONS (FOR U.S.A. ONLY) .....................................18
COMPLETE INSTALLATION .....................................................24
REVERSING DRYER DOOR SWING (OPTIONAL) ............25
MAINTENANCE INSTRUCTIONS ...........................................26
IF YOU NEED ASSISTANCE ....................................................26
ELECTRONIC CONTROL SETUP INSTRUCTIONS ............27
WARRANTY ..................................................................................32
"Loading the manual" means you need to wait until the file loads and becomes available for online reading. Some manuals are very large, and the time they take to appear depends on your internet speed.
Other Manuals for Whirlpool CSP2971HQ
Summary
2 DRYER SAFETY ■ It is recommended that the owner post, in a prominent location, instructions for the customer’s use in the event the customer smells gas. This information should be obtained from your gas supplier. ■ Post the following warning in a prominent location.
3 DRYER SAFETY WARNING: FIRE OR EXPLOSION HAZARD Failure to follow safety warnings exactly could result in serious injury, death or property damage. – – Do not store or use gasoline or other flammable vapors and liquids in the vicinity of this or any other appliance. WHAT TO DO IF YOU SMELL GAS: – I...
4 DRYER SAFETY IMPORTANT SAFETY INSTRUCTIONS WARNING: To reduce the risk of fire, electric shock, or injury to persons when using the dryer, follow basic precautions, including the following: ■ Read all instructions before using the dryer. ■ This dryer is intended only for drying clothes and textile...