Page 2 - WARNING; WARNING; CAUTION; Conditions of use; CONTENTS; IMPORTANT INFORMATION THAT MAY
2 CONGRATULATIONS Please read the user manual carefully and store in a handy place for later reference. The symbols you will see in this booklet have these meanings: WARNING WARNING This symbol indicates information concerning your personal safety. WARNING CAUTION This symbol indicates information o...
Page 3 - IMPORTANT; ENVIRONMENT; IMPORTANT SAFETY INSTRUCTIONS
3 I MPORTANT SAFETY INSTRUCTIONS Please read the user manual carefully and store in a handy place for later reference. TIPS & INFORMATION IMPORTANT Important – check for any damages or marks. • If you find the oven is damaged or marked, you must report it within 7 days if you wish to claim for d...
Page 5 - INSTALLING YOUR APPLIANCE
5 IN STALLING YOUR APPLIANCE WARNING WARNING To avoid any potential hazard, you must follow our instructions when you install your appliance. Failure to install the appliance correctly could invalidate any warranty or liability claims and lead to prosecution. • This appliance must be installed by an...
Page 6 - Hard wiring detail; Cabinet construction for your appliance; Levelling oven
6 IN STALLING YOUR APPLIANCE • If a powerpoint is fitted it must be accessible with the appliance installed, as the plug must be accessible after installation. • This appliance must be mounted on a flat surface for the full width and depth of the product. • To avoid overheating, the appliance must n...
Page 7 - nderbench ovens; Flush fit
7 IN STALLING YOUR APPLIANCE U nderbench ovens Your underbench oven looks best when the control panel is directly under the benchtop. An upper infill panel may have to be added if the cooktop placed above the benchtop is too deep. Refer to cooktop installation instructions for required clearance bet...
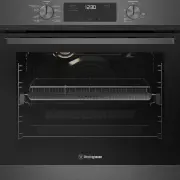
Page 8 - PRODUCT DESCRIPTION
PRODUCT DESCRIPTION WVE6516 PRODUCT DESCRIPTION Function selector Function indicator light Electronic Clock Oven/grill indicator light Oven/grill temperature selector
Page 9 - Preparing your appliance for the first time; Setting the time of day; Electronic clock; BEFORE FIRST USE
9 B EFORE FIRST USE Preparing your appliance for the first time • Please remove all internal boxes and bags from the oven before operation. • Please wipe out the oven interior prior to operation with warm soapy water and polish dry with a soft clean cloth. Do not close the oven door until the oven i...
Page 10 - Side racks; Shelves and trays; INSTALLING YOUR OVEN ACCESSORIES; Air Fry
10 IN STALLING YOUR OVEN ACCESSORIES Side racks • The side racks attach to each side of your oven. There is a left hand and right hand version (see image below for details). • Insert the rear peg into the rear access hole provided, ensuring that the peg is fully inserted. • Then locate the front peg...
Page 11 - Fitting grill dish and insert
INSTALLING YOUR OVEN ACCESSORIES (CONTINUED) Fitting grill dish and insert Your oven comes with a full width grill dish and a grill insert. The grill dish insert is designed with flexibility to adjust distance between the food and the grill element. Maximum grill power Grill dish insert brings the f...
Page 12 - USING YOUR OVEN
12 USING YOUR OVEN USING YOUR OVEN Air Fry Air fry enables advanced convection cooking function without having to turn the food, giving crispy great tasting results in a shorter time without all the oil. This is suitable for french fries, chicken wings, nuggets and similar products. Fan Forced Heat ...
Page 15 - Hints and tips; Baking; Oven shelves; Roasting meat
15 Safety Cut-out feature The oven automatically switches itself off if the temperature is not adjusted or the appliance is left operating after a period of time. The oven switches itself off after: • 12.5 hours when the temperature is set less than 120°C. • 8.5 hours when the temperature is set to ...
Page 16 - Roasting poultry and fish
16 USING YOUR OVEN 1 2 3 5 4 • Do not pierce the meat, as this will allow juices to escape. • When the meat is cooked, take the roast out of the oven, wrap in aluminium foil and leave to stand for about 10 minutes. This will help retain the juices when the meat is carved. The table shows temperature...
Page 17 - COOKING GUIDE; Choosing the best oven settings
17 COOKING GUIDE Choosing the best oven settings The following table is intended as a guide and experience may show some variation in cooking times necessary to meet individual requirements. It may be necessary to change some cooking times and temperatures from your previous oven. For best results w...
Page 18 - To set the AirFry function:; Note: Set the minute minder for the
AirFry c ooking The AirFry feature works best for single shelf baking. AirFry is suitable for French Fries, Chicken Wings, Chicken Nuggets and similar products, see settings in the following table. Important: • AirFry is designed for single shelf cooking. • Food should be arranged in a single layer ...
Page 19 - Grilling hints; Guide to better grilling; Fan grill; GRILLING GUIDE
19 GRILL ING GUIDE Grilling hints WARNING WARNING Always clean the grill/oven dish after every use. Excessive fat build up may cause a fire. As a method of cooking, grilling can be used to: • Enhance the flavours of vegetables, fish, poultry and meat. • Seal the surface of the food and retain the na...
Page 20 - DEALING WITH COOKING PROBLEMS
20 D EALING WITH COOKING PROBLEMS DEALING WITH COOKING PROBLEMS PROBL EM CAUS E S R EME D Y Uneven cooking • Incorrect shelf position • Select shelf suitable for cooking function. See cooking function tables in cooking guide • Oven tray too large • Experiment with other trays or dishes • Trays not c...
Page 21 - Get to know the oven with this ‘Simple Test Cake’; GETTING TO KNOW THE OVEN
21 G ETTING TO KNOW THE OVEN Get to know the oven with this ‘Simple Test Cake’ Although we strive for a perfect performing oven, it’s possible that there will be some variation in colour when baking. Therefore, we suggest this simple, easy and delicious to make Simple Test Cake, it can help you unde...
Page 22 - CARE AND CLEANING
22 WARNING WARNING Ensure the oven is electrically isolated before cleaning. This can be done by switching off the appliance via the powerpoint or isolating switch (if available), or the switchboard. Do not use steam cleaners, as this may cause moisture build up. WARNING CAUTION Do not use sharp met...
Page 23 - ARNING; Removing the side racks; Releasing the grill element
23 CAR E AND CL E ANING ARNING Removing the side racks 1. Grasp the middle wire at the front. 2. Pull firmly inwards while pushing back. Removing and replacing the oven back light and side light (where fitted) • Turn oven light glass anticlockwise to remove it for globe replacement. • To remove side...
Page 24 - Removing the oven door
24 CAR E AND CL E ANING Retaining clips models - The upper grill elements is secured with 2 clips which can be removed to help clean the oven cavity ceiling. To disengage the lcips, push the edge of the clips towards back of the oven as shown below. After cleaning raise the grill element and secure ...
Page 25 - Removing oven door top trim; Cleaning the door glass panels; Re-assembling the door glass panels
25 CAR E AND CL E ANING Removing oven door top trim • Take hold of the grid embossed sections of the door trim at each end and press inwards to release the clips. Remove the door trim by pulling it towards you. Removing the door glass panels WARNING CAUTION Rough handling, especially around the edge...
Page 26 - Re-assembling the top door trim
26 CAR E AND CL E ANING Re-assembling the top door trim • Take hold of the top door trim at each side and position it to the inside edge of the glass. • Push the trim down with its top edge over glass panel until the clip snaps in on each side of the trim. • Push the middle of the trim down to ensur...
Page 27 - Steam Assisted Cleaning function
27 CAR E AND CL E ANING Steam Assisted Cleaning function This function assists in the removal of food residue from inside the oven. This method is effective in removing light soiling only. It is not effective in removing stubborn baked-on stains. This function can only be used when the oven is cold....
Page 28 - Oven; TROUBLESHOOTING
2 8 TRO UBLESHOOTING Oven PROBL EM POSSIBL E CAUS E Oven or grill not working • Time of day not set.• Power not turned on.• Controls are incorrectly set.• Oven is in ‘Demo’ mode, refer to Using your oven section.• Household fuse has blown or power supply is off. NOTE: If the household fuse continues...
Page 29 - Warranty; Important Notice; AUSTRALIA; NEW ZEALAND
2 9 WARR ANTY This document sets out the terms and conditions of the product warranties for Westinghouse Appliances. It is an important document. Please keep it with your proof of purchase documents in a safe place for future reference should there be a manufacturing defect in your Appliance. This w...