Westinghouse WVE6314DD - User Manual
Westinghouse WVE6314DD Oven – User Manual, read for free online in PDF format. We hope this helps you resolve any issues you may have. If you have further questions, please contact us through the contact form.


Table of Contents:
- Page 2 – Conditions of use; CONTENTS; IMPORTANT INFORMATION THAT MAY; WARNING; WARNING; CAUTION
- Page 3 – IMPORTANT; ENVIRONMENT; IMPORTANT SAFETY INSTRUCTIONS
- Page 5 – INSTALLING YOUR APPLIANCE
- Page 6 – Cabinet construction for your appliance; Levelling oven
- Page 7 – Non-pyrolytic underbench ovens
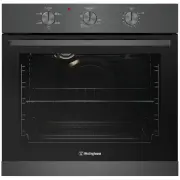
- Page 8 – PRODUCT DESCRIPTION
- Page 9 – Preparing your appliance for the first time; BEFORE FIRST USE; Side racks; Shelves and trays; INSTALLING YOUR OVEN
- Page 10 – USING YOUR OVEN; Understanding your oven functions
- Page 11 – Operating your oven temperature selector; Pre-heating your appliance; Condensation and steam
- Page 12 – Cooking with your timer; 20 minute “Auto off” timer; Hints and tips; Baking; Roasting meat
- Page 13 – Roasting poultry and fish
- Page 14 – COOKING GUIDE; Choosing the best oven settings
- Page 15 – Grilling hints; Guide to better grilling; Fan gril; GRILLING GUIDE
- Page 16 – DEALING WITH COOKING PROBLEMS
- Page 17 – Get to know the oven with this ‘Simple Test Cake’; GETTING TO KNOW THE OVEN; Enamel; Stainless steel; Glass; CARE AND CLEANING
- Page 18 – Oven; Grill; Cleaning your oven accessories
- Page 19 – Releasing the grill element; Cleaning the oven door; Removing the oven door
- Page 20 – Cleaning the door glass panels; Re-assembling the door glass panels
- Page 22 – Faults; Data Plate; TROUBLESHOOTING
- Page 27 – Warranty; Important Notice; AUSTRALIA; NEW ZEALAND
USER MANUAL
WVE6313, WVE6314
ELECTRIC BUILT-IN OVENS
Enjoy peace of mind.
Register your appliance today.
Stay updated on better living services, safety notices and
shop for accessories.
1. Open the camera app on your smartphone and
point at the QR code to scan
Product Registration QR code is located on the
front of your appliance or inside the door rim*.
2. Tap the notification or link to open the registration form
3. Complete your details and enjoy peace of mind
*Exact location of QR code may vary depending on oven model
"Loading the manual" means you need to wait until the file loads and becomes available for online reading. Some manuals are very large, and the time they take to appear depends on your internet speed.
Summary
2 CONGRATULATIONS Dear customer, Congratulations and thank you for choosing our oven. We are sure you will find it a pleasure to use. Before you use the oven, we recommend that you read through the relevant sections of this manual, which provides a description of your appliance and its functions. To...
ImPORTANT SAfeTy INSTRUCTIONS 3 Please read the user manual carefully and store in a handy place for later reference. TIPS & INFORMATION IMPORTANT Important – check for any damages or marks. • If you find the oven is damaged or marked, you must report it within 7 days if you wish to claim for da...
INSTALLING yOUR APPLIANCe 5 WARNING WARNING To avoid any potential hazard, you must follow our instructions when you install your appliance. Failure to install the appliance correctly could invalidate any warranty or liability claims and lead to prosecution. • This appliance must be installed by an ...