Page 3 - Table of Contents; Safety and Instructions
Table of Contents Safety and Instructions Installation and Setup Electrical Safety Warning Parts DescriptionOperation Open the Airflow Louver Control Panel Remote Control Combination Buttons App Control Replacing the Batteries Installation Tools Required Parts List Installing Your AC Installing the ...
Page 4 - Installation and Setup; damage the power cord.
Safety and Instructions 01 Installation and Setup Please read all instructions before use and save this user manual for futurereference. A digital version can be obtained from Customer Support. Your safetyand the safety of others are very important to us. We have provided many importantsafety messag...
Page 5 - Electrical Safety Warning; authorized technical service center in order to avoid all risk.; FCC ID Information
02 Electrical Safety Warning ● If the power cable is damaged, it must be replaced by the manufacturer or an authorized technical service center in order to avoid all risk. ● Do not damage, alter, excessively bend, twist, pull or heat the power cord.● Do not cover the power cord with a rug or carpeti...
Page 6 - LCDI Power Plug (Leakage Current Detection and Interruption); button you should notice a; RESET; RESET; button is pushed in for correct operation; TEST
03 However, there is no guarantee that interference will not occur in a particular installation. If this equipment does cause harmful interference to radio or television reception, which can be determined by turning the equipment off and on, the user is encouraged to try to correct the interference ...
Page 7 - Recommended Operating Environment; ● Avoid direct sunlight exposure.
04 Recommended Operating Environment ● The recommended operating temperature range for AC is 61°F-95°F (16°C-35°C),● The appliance is for indoor use only.● The appliance must be positioned so that the plug is easily accessible.● This air conditioner is intended for residential use, not for commercia...
Page 8 - Parts Description; Airflow Louver
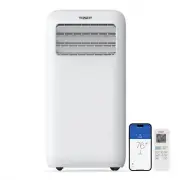
Parts Description 1 2 3 4 5 7 8 9 6 Control Panel Airflow Louver Wheels Filter Air Exhaust Outlet Exhaust Hose Rear Clip Power Cord Power Cord Hoop Remote Control 05 Mode Swing Sleep FAN Health On/O ff WiFi Fan OPER Timer 4 7 6 5 8 9 1 2 3
Page 9 - Operation; Open the Airflow Louver
Operation Open the Airflow Louver 06 Press the position on the the airflow louver marked with "PUSH" to open before turning on the unit.
Page 10 - Timer; indicator light off.; Sleep; ● Sleep indicator light is on when Sleep mode is set.; WiFi Indicator; Control Panel
WiFi Indicator Indicates whether or not the air conditioner is ready to connect WiFi. Timer/Sleep Button Timer : ● When the unit is running, press this button to schedule when the unit will power off by using the +/- button to adjust the length of time before powering off. ● When the unit is not run...
Page 12 - Remote Control; ON; Health button; Mode Button
09 Remote Control The max range of the remote control is 25 feet with no obstacles or interferencefrom other devices, such as wireless phones or fluorescent lamps. The air conditioner will emit a beep sound if the signal from the remote has beenreceived successfully. ON/OFF Button Press to power the...
Page 13 - Release the button once your desired temperature is reached.; Swing Button; Not available for this unit.; Fan Button; speeds are not available for this model.; Sleep Button
a. Auto mode: The air conditioner will adjust the fan speed automatically to maintain the set temperature. In this case, set temperature cannot be adjusted.b. Cool mode: Standard cooling mode. The set temperature and fan speed can both be adjusted.c. Dry mode: The unit will run on low speed for dehu...
Page 14 - Not applicable to this unit.; WiFi Button; to reset WiFi to factory settings.; Combination Buttons; Light Function; switch between Fahrenheit and Celsius displays.; Install App
Timer Button Press this button to activate the timer button. Use the +/- buttons to adjust the length of the timer before the unit powers off. The time setting range is 0.5-24hours, in 0.5-hour increments. Press the timer button a second time to confirmthe timer setting. If the characters on the dis...
Page 15 - Add device; Make sure the WiFi indicator is light on.
12 2. Open the "GREE+" App after installation. You can create a new account or log in with an existing account. Note: Please allow the app to use your location, network and Bluetooth. Add device After successful login, you are at the “My Home” screen. Make sure that your smartphone’s Wi-Fi a...
Page 16 - The available device icon will be displayed once discovered.
a. The available device icon will be displayed once discovered. (1) Tap the icon to enter the next step. Select your preferred Wi-Fi network (5GHz WiFi is not yet supported) , enter your WiFi password, then tap the “Next” button. 13 WIFI 1
Page 18 - If no device is found, please manually add your device.
15 b. If no device is found, please manually add your device. (1) Tap the device category icon and follow the instruction to reset your WiFi. For this model, Tap “Portable air conditioner” and then choose “Remote control (with WiFi button)”.
Page 19 - power plug. Tap “Next” to enter the next step.
16 (2) Tap “Add manually” and follow the instructions. Hold the remote control and direct it to the device. With the remote control powered off, press the “Mode” and “WiFi” buttons simultaneously for 3 seconds. Once you hear a beep sound, wait for 5 seconds and then remove the power plug. After 3 se...
Page 20 - connection is successful, return to the App.
17 (3) Select your preferred Wi-Fi network (5GHz WiFi is not yet supported), enter the password, then tap the “Search device” button. Tap “Next” to connect your mobile phone WiFi to the hotspot “GR-AC-XXXX”, the password is 12345678. When the connection is successful, return to the App. WIFI 1 WIFI ...
Page 22 - My Home; Scene; are the two default scenes.
19 My Home Scene ● This function allows you to activate all settings with one click. Home and Away are the two default scenes. ● Tap the scene button to edit your desired setting for the first use. Tap “Setting” to make your customizations then tap the “Save” button. The scene setting will be saved.
Page 23 - pop up a window to tell you the setting is done.
20 ● If you want to execute the preset modes , tap the scene button. The APP will pop up a window to tell you the setting is done.
Page 24 - My appliances
21 My appliances ● This screen shows the real time status of all your devices. Tap the appliance icon to start control. Tap the power button to turn on the air conditioner.
Page 25 - Functions; Other function icon
22 ● Long press the appliance icon to delete the appliance. Choose the unwanted device and tap “Delete” then confirm. Functions 1 2 3 4 5 7 6 On/off Other function icon Device Name Mode Set Temperature Fan Speed Other functions 1 4 3 5 6 7 2
Page 26 - * Heat mode is not available for this model.; Temperature setting
23 Change the device name Press the pencil icon to edit the device name, then tap the “Save” button when complete. Mode setting Slide the icon to choose mode: cool, dry,fan, heat, auto. * Heat mode is not available for this model. Temperature setting Slide the temperature display to adjust theset te...
Page 27 - Other functions
24 Other functions ● X-Fan: Not available for this unit.● Health: Not available for this unit.● Light: Turn the light on the conditioner on or off. ● Sleep: Only available on Cool mode. ● Timer: Add a schedule by tapping the “+” button. Set the on/off time of your choice and tap the “Save” button. T...
Page 28 - Device Management; Tap the user icon to enter device management.; Scene——Edit scene; function is applied. Tap the button again to cancel the setting.
25 Device Management NOTE: The button will turn blue and the icon will be shown at the top when the Tap the user icon to enter device management. Scene——Edit scene ● Tap the scene name to manage the setting. The current setting will be shown. Press “Execute” to activate the scene immediately. ● Pres...
Page 30 - Scene——Add scene; Tap “+” to add a new scene. Customize the name and settings then save.; Scene——Delete scene
27 Scene——Add scene Tap “+” to add a new scene. Customize the name and settings then save. Scene——Delete scene Tap “Delete” to delete a scene. You can tap the scene name to see detailed settings.Choose the unwanted scene and tap “Delete” then confirm. Two default scenes can not be deleted.
Page 31 - Replacing the Batteries; of the same make and model.; Installation; Tools Required
28 Home management You can invite family member to control all the devices in the Family. For more information, please refer to the instructions in the App. Amazon Alexa You can use Amazon Echo series speakers to control your device. For more information, please refer to the instructions in the App....
Page 32 - Others; Parts List; Accessory kit for window installation
F AN ON/OFF MODE SLEEP TIMER LOCK X-FAN SLEEP X-FAN SPEED T- ON T-OFF H AU OPER TO FAN DR COO Y L Remote Control Power Cord Hook x2pcs Others 09 Parts List Exhaust Hose Joint Rear Clip Insect Guard Screw x 4pcs Mounting Plate x 2pcs Accessory kit for window installation Window panel Extension panel ...
Page 33 - Installing Your AC
3. Slide the Exhaust Cover into the grooves of the Window Panel. If you do not want to install the Rain Guard, skip to Step 5 below. Installing Your AC Here are the detailed instructions for installing the window panel into sliding sash or hung windows. For certain windows, such as a casement window...
Page 34 - Side “A” should be at the top, as indicated in the diagram below.; Double-hung sash window
4. Optional: Install the Rain Guard over the Insect Guard to prevent rainwater from leaking into the exhaust hose.a. Insert the three projections on each Rain Guard into the holes in the Insect Guard. Side “A” should be at the top, as indicated in the diagram below. Insert the first groove 14 Hole P...
Page 35 - Adjustment panel
1 1 2 2 3 3 Window width Max 62inch / Min 9.1inch Window widthMax 62inchMin 9.1inch Window panel (cut if necessary) Adjustment panel Extension panel Exhaust cover 1 2 3 4 28.3inch 18.3inch 18.3inch 10inch 5inch 5inch 4.8inch 4.8inch You can slide the exhaust cover tocover the hole of the window pane...
Page 37 - air and insects from getting into the room.
6. Insert the window panel into the window sill and close the window securely against the Window panel. 7. Stuff Foam Seal A (non adhesive) between the glass and the window to prevent air and insects from getting into the room. 8. Optional: Attach a bracket to the window frame with a screw to preven...
Page 38 - Installing the Exhaust Hose; ) Twist the Joint and Rear clip clockwise onto the exhaust hose.
Installing the Exhaust Hose Please note that the exhaust hose is REQUIRED to use for this portable air conditioner. This TOSOT portable air conditioner (like all air conditioners) must produce heat as a byproduct of producing cool air. If you don’t connect the exhausthose your unit will exhaust this...
Page 39 - Removing Collected Water
Removing Collected Water TOSOT portable air conditioner comes with an auto-evaporation system. The unit automatically evaporates condensation. There is no need to empty the water except in humid conditions. It is recommended to use the bottom drainage port to drain water during Cool mode. When it is...
Page 40 - Cleaning and Maintenance; Precautions; Otherwise, it may damage the appearance of the air conditioner.; Installing the Power Cord Hooks
Cleaning and Maintenance Precautions ● Before cleaning the air conditioner, please turn off the unit and disconnect the power. Otherwise, it may cause an electric shock. ● Do not wash the air conditioner with water. Otherwise, it may cause an electric shock. ● Do not use volatile liquid (such as thi...
Page 42 - Maintenance Checklists; Offseason checklist; please refer to the “Removing Collected Water” part on page 36.; Postseason checklist; Troubleshooting; “ON” button might not be available; Issues
Maintenance Checklists Offseason checklist 1. Make sure there's no accumulated water in the chassis. For detailed instruction, please refer to the “Removing Collected Water” part on page 36. 2. The exhaust hose is disassembled.3. Pull out the plug and wrap the power cord.4. Clean the outer case and ...
Page 44 - Has the unit just been
Has the unit just been turned on or off? Changing temperature can cause the panel to shrink or expand, causing friction Abnormal sound during operation, such as a rapid “pop-pop” sound Issues Self check Possible solutions What is 3-Minute Compressor Protection? All TOSOT Air Conditioners have a 3-Mi...
Page 45 - Malfunction Codes; Error code
If you notice or experience any of the following conditions, please turn off the airconditioner, disconnect from power, discontinue use, and contact support immediately. ● The power cord is overheating or otherwise damaged ● Abnormal sound during operation● A strange odor is emitted from the unit● E...
Page 46 - Warranty & Customer Support; Warranty Information; Questions? We are here to help; Share your experience
Warranty & Customer Support Warranty Information 1. 1-Year warranty: TOSOT Portable Air Conditioner comes with a 1-year warranty from the date of purchase. This warranty covers manufacturing and material defects. Please visit https://tosotdirect.com/warranty for more details. 2. Additional 6-Mon...