Page 4 - Table of Contents
Table of Contents Safety and Instructions Installation and Setup Electrical Safety Warning Parts Description Operation Control Panel Remote Control Combination Buttons Replacing the Batteries Installation Tools Required Parts List Removing Collected Water Installing the Power Cord Hooks Installing i...
Page 5 - Safety and Instructions; Installation and Setup; damage the power cord.
Safety and Instructions 01 Installation and Setup Please read all instructions before use and save this user manual for futurereference. A digital version can be obtained from Customer Support. Your safety and the safety of others are very important to us. We have providedmany important safety messa...
Page 6 - Electrical Safety Warning; authorized technical service center in order to avoid all risk.
02 ● Only use the appliance in an upright position. Make sure the angle of inclination <10°. Always place the appliance on a stable, flat, level surface to prevent the air conditioner from overturning. Electrical Safety Warning ● If the power cable is damaged, it must be replaced by the manufactu...
Page 7 - LCDI (Leakage Current Detection and Interruption) plug; Always finish the test of LCDI plug before use:; ● Do not use the LCDI plug to turn the; RESET; ● The power supply must be replaced; TEST
03 ● Be sure that the air conditioner is properly grounded. To minimize shock and fire hazards, proper grounding is important. The power cord is equipped with a three- prong grounding plug for protection against shock hazards. ● Do not run the air conditioner without the white plastic shell in place...
Page 8 - Parts Description; Vertical Airflow Louver
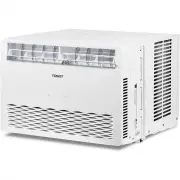
04 Parts Description 1 2 3 4 5 7 8 9 10 This picture is only for reference. Please refer to the actual productfor the appearance. 6 1 8 7 6 9 10 5 1 2 3 4 Remote controller Control Panel Vertical Airflow Louver Horizontal Airflow Louver Caster Wheels Air Intake Air Outlet Adapter Exhaust Hose Window...
Page 9 - Operation; Control Panel; Fan Button; Sleep Button
05 Operation Control Panel 1 12 3 45 6 3 4 5 6 2 ON/OFF Button +/- Button Fan Button Notes: ● After powering the air conditioner on, the air conditioner will emit a single beeping sound after powering on. After that, you can operate the air conditioner by using the control panel or remote. ● The air...
Page 10 - Press to power the air conditioner; ON; or; OFF; This button is not not valid under dry and fan model.; for Fan mode and Dry mode. When in sleep mode, the AC temperature will; Timer Button; AUTO
06 ON/OFF Button Press to power the air conditioner ON or OFF . +/- Button ● Pressing this button will allow you to change the temperature setting. Holding either button will increase or decrease automatically. It will take 3 seconds for the temperature settings to be confirmed by the machine. ● Aft...
Page 11 - Remote Control; MODE button
07 Remote Control 1 1 2 2 3 4 3 4 5 5 6 6 7 7 This is a universal remote control for a variety of models. If your model does nothave a function listed on the remote control, there will be no changes in theoperation of your unit. The max range of the remote control is 25 feet with noobstacles or inte...
Page 12 - indicator on the left side of the remote will be shown.
08 ON/OFF Button Press to power the air conditioner ON or OFF . Mode Button ● Press this button to cycle through the following modes. A corresponding logo indicator on the left side of the remote will be shown. ● a. Cool mode: standard cooling mode. The set temperature and fan speed can both be adju...
Page 13 - Combination Buttons; Light Function; signal to the air conditioner.; Change Between °F and °C
09 Combination Buttons Light Function Press and hold the “+” and “FAN” buttons simultaneously for 3 seconds to turn the lights on the air conditioner on or off. The default setting after being powered on isfor the lights to be on. Child lock Function Press the “+” and “-” buttons simultaneously to e...
Page 14 - Installation; Tools Required; The following tools will be needed before starting installation.
10 Installation Tools Required Replacing the Batteries 1. Press the back side of the remote control battery cover and slide out following the engraved arrow. 2. Replace with two new AAA(1.5V) batteries (not included) of the same make and model. Make sure the polarities (+ & -) are aligned correc...
Page 15 - Installing the drainage pipe
11 Parts List Removing Collected Water exhaust hose joint B joint A joint C adapter support window panel sponge B sponge A drain hose remote control wire hook screw window fastener protective grille drainage pipe pipe hoop rubber plug pipe clip bolt nut washer spring washer rain shield There are 2 w...
Page 17 - Installing the Power Cord Hooks; When using the continuous drainage option, make sure that the air; Wrap the power cord around the power cord hooks when not in use.
13 Installing the Power Cord Hooks 1. Assemble the 2 power cord hooks on the back of the unit as shown below. 2. Screw the drain hose adapter into the spout by twisting clockwise. 3. Insert the drainage hose into the drain connector. Note: When using the continuous drainage option, make sure that th...
Page 18 - Installing in Double-Hung Sash Windows
14 Installing in Double-Hung Sash Windows Note: If the width of your window is smaller than 20.5 inches, please remove the adjusting panel from the window panel and then cut the window panel to make thewidth of the window panel the same width as your window. 1. Assemble the rear clip by snapping the...
Page 21 - Installing in Sliding Sash Windows
17 Installing in Sliding Sash Windows 9. Cut Sponge A to the width of your window to seal the gap between the upper part of the inner window sash and the outer window sash. sponge A outer window inner window 10. To prevent the window from sliding vertically, fix the inner window in place by using th...
Page 25 - Installing Exhaust Hose; Rotate Joint A clockwise onto the end of the exhaust hose.
21 Installing Exhaust Hose 1. Rotate Joint A clockwise onto the end of the exhaust hose. exhaust hose clockwise Join A 2. Rotate the open end of the exhaust hose clockwise into Joint B+C on the assembled window panel. Join A clockwise Heat discharge pipe 3. Insert Joint A from the exhaust hose into ...
Page 26 - Cleaning and Maintenance; Cleaning the outer case; use abrasive or flammable solvents to clean the heater.
22 Tips: In order to improve the cooling efficiency of your air conditioner, the heatdischarge pipe should be as short and direct as possible. Our suggestedconfiguration is shown below. correct under 51 inches about 24 inches wrong Cleaning and Maintenance Cleaning the outer case Wipe with a soft cl...
Page 27 - the filter around to loosen.
23 Cleaning the exhaust hose Remove the exhaust hose from the air conditioner, clean with a soft cloth soaked in warm water. Let dry completely before reinstalling the exhaust hose. Cleaning the filter 1. Remove the filter Locate the filter and remove it from the air conditioner. You may need to mov...
Page 28 - Maintenance Checklists; Pre-Season Maintenance Checklist
24 Maintenance Checklists Pre-Season Maintenance Checklist ● Check the power cord for any cuts or exposed wiring● Check the ground prong is still on your power plug● Clean the air filter● Check whether the hose adapters and exhaust hose are installed tightly and free of damage Post-Season Maintenanc...
Page 29 - Troubleshooting; Is the unit in auto mode?; Issue
25 Troubleshooting Check whether the airoutlet or inlet is blocked Check if the evaporatoris defrosting Is the unit in auto mode? Your desired temperatureexceeds the AC range Check if the source of theodor is somewhere in theroom Has the unit just beenturned on or off? Has the unit just beenturned o...
Page 30 - Malfunction Codes; Chassis is full of water; Malfunction; be performed by qualified individuals.
26 Malfunction Codes If you experience any of the below malfunction codes, remove the unit from powerfor a few minutes. Plug the unit back in to determine if the malfunction code is stillpresent. Chassis is full of water Refrigerant lacking protection Ambient temperature sensormalfunction Evaporator...
Page 31 - Warranty & Customer Support; Warranty Information; Questions? We are here to help; Share your experience
27 Warranty & Customer Support Warranty Information 1. 1-Year warranty: TOSOT Portable Air Conditioner comes with a 1-year warranty from the date of purchase. This warranty covers manufacturing and material defects. Please visit https://tosotdirect.com/warranty for more terms&policy. 2. Addi...


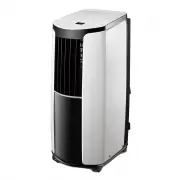
 Tosot GJC08BU-A6NRNJ2A
User Manual
Tosot GJC08BU-A6NRNJ2A
User Manual
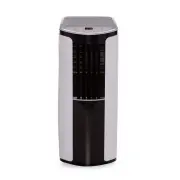
 Tosot GPC05AP-A3NNA1A
User Manual
Tosot GPC05AP-A3NNA1A
User Manual
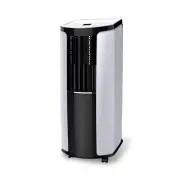
 Tosot GPC08AO-A3NNA1A
User Manual
Tosot GPC08AO-A3NNA1A
User Manual
 Tosot GPC08ASB-A6NNA1A
User Manual
Tosot GPC08ASB-A6NNA1A
User Manual
 Tosot TPAC10S-C116A1
User Manual
Tosot TPAC10S-C116A1
User Manual
 Tosot TPAC10S-C116A3B
User Manual
Tosot TPAC10S-C116A3B
User Manual
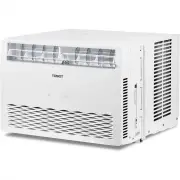
 Tosot TPAC14S-H116A3
User Manual
Tosot TPAC14S-H116A3
User Manual
 Tosot TST-WAC-CLT-12K
User Manual
Tosot TST-WAC-CLT-12K
User Manual
 Tosot TST-WAC-CLT-8K
User Manual
Tosot TST-WAC-CLT-8K
User Manual