Page 2 - Safety Precautions; Table of Contents; Troubleshooting Tips
Safety Precautions . ................................................................................................................... Safety Precautions Installation Instructions Operating Instructions Maintenance Table of Contents Control Panel Features..............................................
Page 3 - Page 3; WARNING; Page 3; This symbol indicates the possibility of
Safety Page 3 Safety Precautions Read Safety Precautions Before Operation and Installation To prevent death or injury to the user or other people and property damage, the following instructions must be followed. Incorrect operation due to ignoring of instructions may cause death, harm or damage....
Page 4 - Page 4; CAUTION
Safety Precautions Page 4 • • • • • In a thunderstorm, the power must be cut off to avoid damage to the machine due to lightning. Your air conditioner should be used in such a way that it is protected from moisture. e.g. condensation, splashed water, etc. Do not place or store your air condition...
Page 5 - Page 5; Sociable Remark; WARNING for Using R32/R290 Refrigerant
Safety Precautions Page 5 Note about Fluorinated Gasses(Not applicable to the unit using R290 Refrigerant) 1. Fluorinated greenhouse gases are contained in hermetically sealed equipment. For specific information on the type, the amount and the CO2 equivalent in tonnes of the fluorinated greenhou...
Page 6 - Page 6; mechanical damage from occurring.
Safety Precautions Page 6 Compliance with national gas regulations shall be observed. Keep ventilation openings clear of obstruction. The appliance shall be stored so as to prevent mechanical damage from occurring. A warning that the appliance shall be stored in a well-ventilated area where the ...
Page 7 - Page 7
Safety Precautions Page 7 precautions shall be complied with prior to conducting work on the system. 2)Work procedure Work shall be undertaken under a controlled procedure so as to minimise the risk of a flammable gas or vapour being present while the work is being performed. 6.Information on se...
Page 8 - Page 8
Safety Precautions Page 8 7)Ventilated area Ensure that the area is in the open or that it is adequately ventilated before breaking into the system or conducting any hot work. A degree of ventilation shall continue during the period that the work is carried out. The ventilation should safely dis...
Page 9 - Page 9
Safety Precautions Page 9 Do not apply any permanent inductive or capacitance loads to the circuit without ensuring that this will not exceed the permissible voltage and current permitted for the equipment in use. Intrinsically safe components are the only types that can be worked on while live ...
Page 10 - contains flammable refrigerant.
Safety Precautions Page 10 cylinders. (No more than 80 % volume liquid charge). i) Do not exceed the maximum working pressure of thecylinder, even temporarily. j) When the cylinders have been filled correctly and the process completed, make sure that the cylinders and the equipment are removed f...
Page 11 - Installation Instructions; Preparation
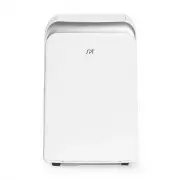
Page 11 Installation Instructions Installation Instructions Preparation NOTE:All the illustrations in the manual are for explanation purpose only. Your machine may be slightly different. The actual shape shall prevail. The unit can be controlled by the unit control panel alone or with the remote...
Page 12 - Choosing The Right Location; NOTE; Ambient Temperature Range For Unit Operating; Exhaust Hose Installation
Page 12 50cm 50cm 19.7inch 50cm 19.7inch 19.7inch Installation Instructions Choosing The Right Location Recommend Installation Your installation location should meet the following requirements: -Make sure that you install your unit on an even surface to minimize noise and vibration. -The unit mu...
Page 13 - Accessories; North America; amount of heat it can remove from a room. A higher
Page 13 Installation Instructions Accessories Tools Needed -Medium Philips screwdriver; -Tape measure or ruler; -Knife or scissors; -Saw (optional, to shorten window adaptor for narrow windows) North America Nam e of A cce ssories Qty. Shape Nam e of A cce ssories Qty. Shape 1 pc Window Slider A...
Page 14 - Window Installation Kit; Press the exhaust hose(or extended exhaust hose); Step One: Preparing the Exhaust Hose assembly
Page 14 Window Installation Kit Installation Instructions Press the exhaust hose(or extended exhaust hose) into the window slider adaptor(or wall exhaust adaptor) and unit adaptor, clamp automatically by elastic buckles of the adaptors. Step One: Preparing the Exhaust Hose assembly Unit adaptor ...
Page 16 - Insert the window slider assembly into the window opening.; Or; If desired, install the security bracket with 2 screws as shown.
Page 16 Installation Instructions Installation NOTE: Once the Exhaust Hose assembly and Adjustable Window Slider are prepared, choose from one of the following two installation methods. Or Foam seal B (Adhesive type-shorter) Foam seal A (Adhesive type) Type 1: Hung Window or Sliding Window Insta...
Page 17 - Type 2: Wall Installation(Select models only
Page 17 Installation Instructions NOTE: To ensure proper function, DO NOT overextend or bend the hose. Make sure that there is no obstacle around the air outlet of the exhaust hose (in the range of 19.69inch) in order to the exhaust system works properly. All the illustrations in this manual are...
Page 18 - Operating Instructions; Control Panel Features; are for explanation purpose only. The control panel of the unit you; Operation Instructions
Operating Instructions Control Panel Features MODE button Selects the appropriate operating mode. Each time you press the button, a mode is selected in a sequence that goes from COOL, FAN, DRY, HEAT(Select models only), and AUTO(Select models only). The mode indicator light illuminates under the dif...
Page 19 - Other features; on; operation
Other features DRY operation · Press the "MODE" button until the "DRY" indica- tor light comes on. · The fan speed or the temperature cannot be adjusted. The fan motor operates at LOW speed. NOTE:Keep windows and doors closed for the best dehumidifying effect. Do not put the duct to ...
Page 20 - WATER DRAINAGE
thermostat allowing for the precise temperature control at its location. To activate the Follow Me/Temp Sensing feature, point the remote control towards the unit and press the Follow Me/Temp Sensing button. The remote control will send this signal to the air conditioner until press the Follow Me/Te...
Page 22 - Problem; P1 Protection Code; E0 EEPROM error
Troubleshooting Tips Troubleshooting Tips Problem Possible Causes Solution Unit does not turn on when pressing ON/OFF button P1 Protection Code E0 EEPROM error Contact the manufacturer or its service agents or a similar qualified person for service. In COOL mode: room temperature is lower than the s...
Page 23 - REMOTE CONTROLLER; for future reference.
IMPORTANT NOTE: REMOTE CONTROLLER Thank you for purchasing our air conditioner. Please read this manual carefully before operating your new air conditioning unit. Make sure to save this manual for future reference.
Page 24 - NOT SURE WHAT A FUNCTION DOES?; Refer to the; How to Use Basic Functions; and; How to Use Advanced Functions; sections; SPECIAL NOTE; Remote Controller Specifications; Quick Start Guide; Battery Type; AAA Battery x 2; Environment
FIT BATTERIES POINT REMOTE TOWARD UNIT PRESS POWER BUTTON SELECT MODE SELECT TEMPERATURE SELECT FAN SPEED 1 6 2 5 4 My Mode Follo w M e LED Turb o Ionis er Sw ing Tim er Self Clea n Mode On/O ff Fan Slee p AUT O CO OL DR Y HEAT FAN HIGH ME D LOW SET TEM PER ATU RE AUTO LOW MED HIGH 3 AUTO COOL DRY H...
Page 25 - Inserting and Replacing Batteries; For optimum product performance:; BATTERY DISPOSAL; Handling the Remote Controller
TIPS FOR USING REMOTE CONTROL CAUTIONS FOR USING REMOTE CONTROL • The remote control must be used within 8meters of the unit.The unit will beep when remote signal is received.Curtains, other materials and direct sunlightcan interfere with the infrared signal receiver.Remove batteries if the remote w...
Page 26 - Buttons and Functions
Buttons and Functions Before you begin using your new air conditioner, make sure to familiarize yourself with its remote control. The following is a brief introduction to the remote control itself. For instructions on how to operate your air conditioner, refer to the How to Use Basic Functions secti...
Page 27 - Information are displayed when the remote controller is power up.; Remote Screen Indicators; Mode display
Information are displayed when the remote controller is power up. Note: All indicators shown in the figure are for the purpose of clear presentation. But during the actaul operation, only the relative function signs are shown on the display window. 27 Remote Screen Indicators Displayed when data tra...
Page 28 - AUTO Mode; the set temperature.; FAN Mode; ATTENTION
28 How to Use Basic Functions AUTO Mode COOL or HEAT Mode DRY Mode MODE ON/OFF MODE FAN SPEED ON/OFF Select AUTO mode Set your desired temperature NOTE: 1. In AUTO mode, the unit will automatically select the COOL, FAN, or HEAT function based on the set temperature. 2. In AUTO mode, fan speed can no...
Page 29 - Setting the TIMER; TIMER ON setting; to set the timer as above steps, the; xn
29 Setting the TIMER TIMER ON setting TIMER OFF setting TIMER ON & OFF setting(example) TIMER ON/OFF - Set the amount of time after which the unit will automatically turn on/off. Press TIMER ON button to initiate the ON time sequence. Press Temp. up or down button for for multiple times to set t...
Page 30 - SLEEP function
30 How to Use Advanced Functions SLEEP function SLEEP The SLEEP function is used to decrease energy use while you sleep (and don t need the same temperature settings to stay comfortable). This function can only be activated via remote control.The sleep function is not available in Fan or Dry mode.Pl...
Page 32 - SUNPENTOWN; Your Guarantee; SUNPENTOWN INTERNATIONAL INC.
SUNPENTOWN Your Guarantee If this product is found to be faulty as a result of faulty materials or workmanship within one year from date of purchase, it will be repaired free of charge. This guarantee is subject to the following terms: Sunpentown must be notified of the fault. Proof of purchase ...