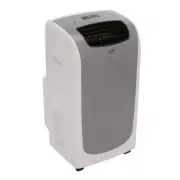
Page 2 - Safety Precautions; Table of Contents; Troubleshooting Tips
Safety Precautions . .................................................................................................................. Safety Precautions Installation Instructions Operating Instructions Maintenance Table of Contents Control Panel Features ..............................................
Page 3 - Read Safety Precautions Before Operation and Installation; Do not operate a unit that it has been dropped or damaged.; Page 3; WARNING; This symbol indicates the possibility of
Safety Precautions Safety Read Safety Precautions Before Operation and Installation To prevent death or injury to the user or other people and property damage, the following instructions must be followed. Incorrect operation due to ignoring of instructions may cause death, harm or damage. WARNING • ...
Page 4 - Page 4; CAUTION
Safety Precautions Page 4 • • • • • In a thunderstorm, the power must be cut off to avoid damage to the machine due to lightning. Your air conditioner should be used in such a way that it is protected from moisture. e.g. condensation, splashed water, etc. Do not place or store your air condition...
Page 5 - Page 5; Sociable Remark; WARNING for Using R32/R290 Refrigerant; select models only
Safety Precautions Page 5 Note about Fluorinated Gasses(Not applicable to the unit using R290 Refrigerant) 1. Fluorinated greenhouse gases are contained in hermetically sealed equipment. For specific information on the type, the amount and the CO2 equivalent in tonnes of the fluorinated greenhou...
Page 6 - Page 6; Compliance with national gas regulations shall be observed.
Safety Precautions Page 6 Compliance with national gas regulations shall be observed. Keep ventilation openings clear of obstruction. The appliance shall be stored so as to prevent mechanical damage from occurring. A warning that the appliance shall be stored in a well-ventilated area where the ...
Page 7 - Page 7
Safety Precautions Page 7 precautions shall be complied with prior to conducting work on the system. 2)Work procedure Work shall be undertaken under a controlled procedure so as to minimise the risk of a flammable gas or vapour being present while the work is being performed. 6.Information on se...
Page 8 - Page 8
Safety Precautions Page 8 7)Ventilated area Ensure that the area is in the open or that it is adequately ventilated before breaking into the system or conducting any hot work. A degree of ventilation shall continue during the period that the work is carried out. The ventilation should safely dis...
Page 9 - Page 9
Safety Precautions Page 9 Do not apply any permanent inductive or capacitance loads to the circuit without ensuring that this will not exceed the permissible voltage and current permitted for the equipment in use. Intrinsically safe components are the only types that can be worked on while live ...
Page 10 - contains flammable refrigerant.
Safety Precautions Page 10 cylinders. (No more than 80 % volume liquid charge). i) Do not exceed the maximum working pressure of thecylinder, even temporarily. j) When the cylinders have been filled correctly and the process completed, make sure that the cylinders and the equipment are removed f...
Page 11 - Installation Instructions; Preparation; and remote control are subject to change without prior notice.
Page 11 Installation Instructions recovery occurs. The recovery equipment shall be in good working order with a set of instructions concerning the equipment that is at hand and shall be suitable for the recovery of flammable refrigerants. In addition, a set of calibrated weighing scales shall be...
Page 12 - Ambient Temperature Range For Unit Operating; Exhaust Hose Installation; Energy Rating Information; NOTE; requirements of Department Of Energy in US)
Page 12 Installation Instructions MODE Temperature Range MODE Temperature Range Ambient Temperature Range For Unit Operating Cool 17-35°C (62-95°F) Dry Heat(pump heat mode) Heat(electrical heat mode) 13-35°C (55-95°F) 5-30°C (41-86°F)(select models only) Exhaust Hose Installation The exhaust hos...
Page 13 - Tools Needed; Accessories; North America; subpart B, appendix CC and applicable sampling plans.
1 pc(*) Air exhaust passage Page 13 Tools Needed -Medium Philips screwdriver; -Tape measure or ruler; -Knife or scissors; -Saw (On some models, to shorten window adaptor for narrow windows) Installation Instructions Accessories North America Nam e of A cce ssories Qty. MODEL A MODEL B Shape Nam ...
Page 14 - Window Installation Kit; Type window installation:; Press the exhaust hose(or extended exhaust hose); Step One: Preparing the Exhaust Hose assembly; Other Regions; Type wall installation:
1 pc(*) Air exhaust passage Window slider adaptor Exhaust hose assembly Exhaust hose Air exhaust passage Unit adaptor Exhaust hose assembly Exhaust hose Unit adaptor Air exhaust passage Page 14 Installation Instructions Window Installation Kit Unit adaptor Exhaust hose Exhaust hose assembly Wind...
Page 15 - or
Page 15 Installation Instructions Hook Hole Seat Lower groove adaptor Make sure the adaptor is inserted into the lower groove of the air outlet. Step Two: Install the Exhaust hose assembly to the unit Insert unit adaptor of the Exhaust hose assembly into the lower groove of the air outlet of the...
Page 16 - and frame as shown.; Or; Or; If desired, install the security bracket with 2 screws as shown.
Page 16 Installation Instructions Or Or Window slider A Window slider B (if required) Foam seal C (Non-adhesive type) Installation NOTE: Once the Exhaust Hose assembly and Adjustable Window Slider are prepared, choose from one of the following two installation methods. Type 1: Hung Window or Sli...
Page 18 - Operating Instructions; Control Panel Features; NOTE: The following control panels
Page 18 Operating Instructions Control Panel Features NOTE: The following control panels are for explanation purpose only. The control panel of the unit you purchased may be slightly different according to the models. Your machine may not contain some indicators or buttons. The actual shape shal...
Page 19 - Operation Instructions
Page 19 Operation Instructions Operating Instructions and the LED DISPLAY shows 'OF' for 3 seconds, press SWING and UP(+) buttons at the sametime to turn on Wireless function and the LED DISPLAY shows 'On' for 3 seconds.NOTE: When you restart the Wireless function, it may take a period of time t...
Page 20 - Other features; · Do not put the duct to window.
Page 20 Operating Instructions Other features Note: For some models, the fan speed can not be adjusted under HEAT mode. AUTO operation· When you set the air conditioner in AUTO mode, it will automatically select cooling, heating(select models only), or fan only operation depending on what temper...
Page 21 - Water drainage
Page 21 Operating Instructions WAIT 3 MINUTES BEFORE RESUMING OPERATIONAfter the unit has stopped, it can not be restarted operation in the first 3 minutes. This is to protect the unit. Operation will automatically start after 3 minutes. AIR FLOW DIRECTION ADJUSTMENTThe louver can be adjusted au...
Page 22 - Maintenance
Page 22 Maintenance lower filter A Safety Precautions Air Filter Cleaning Unit Cleaning Store the unit when not in use Maintenance · Always unplug the unit before cleaning or servicing. · DO NOT use flammable liquids or chemicals to clean the unit. · DO NOT wash the unit under running water. Doi...
Page 23 - Problem
Page 23 Troubleshooting Tips Troubleshooting Tips Problem Possible Causes Solution Unit does not turn on when pressing ON/OFF button P1 Protection Code In COOL mode: room temperature is lower than the set temperature Reset the temperature The Water Collection Tray is full. Turn off the unit, dra...
Page 26 - Remote Control Specifications; Battery Type; AAA Battery x 2; Environment
Remote Control Specifications O N / O F F T E M P SHORT CUT TIMER ON TIMER OFF MODE FAN SLEEP FOLLOW SWING LED ME Battery Type 8m AAA Battery x 2 Environment Signal Receiving Range -5°C~60°C(23°F~140°F) 26
Page 27 - Function Buttons
Before you begin using your new air conditioner, make sure to familiarize yourself with its remote control. The following is a brief introduction to the remote control itself. For instructions on how to operate your air conditioner, refer to the How to Use Basic Functions section of this manual. SHO...
Page 28 - Inserting and Replacing Batteries
NOT SURE WHAT A FUNCTION DOES? Refer to the How to Use Basic Functions and How to Use Advanced Functions sections of this manual for a detailed description ofhow to use your air conditioner. SPECIAL NOTE Button designs on your unit may differslightly from the example shown. If the unit does not have...
Page 29 - Remote LED Screen Indicators
MODE display Displays the current mode, including: AUTO COOL DRY HEAT FAN Transmission Indicator Lights up when remote sends signal to unit ON/OFF display Appears when the unit is turned on, and disappears when it is turned off TIMER ON display Displays when TIMER ON is set TIMER OFF display Display...
Page 30 - How To Use The Basic Functions
1 . P r e s s t h e M O D E b u t t o n t o s e l e c t C O O L m o d e . 2 . S e t y o u r d e s i r e d t e m p e r a t u r e u s i n g t h e Te m p o r Te m p b u t t o n . 3 . P r e s s t h e FA N b u t t o n t o s e l e c t t h e f a n s p e e d : A U TO , L O W, M E D , o r H I G H . 4 . P r e...
Page 31 - FAN operation
1 . P r e s s t h e M O D E b u t t o n t o s e l e c t D RY m o d e .2 . S e t y o u r d e s i r e d t e m p e r a t u r e u s i n g t h e Te m p o r Te m p b u t t o n . 3 . P r e s s t h e O N / O F F b u t t o n t o s t a r t t h e u n i t . , N O T E : FA N S P E E D c a n t b e c h a n g e d i...
Page 32 - M O D E; b u t t o n t o s e l e c t; H E AT; o r; Te m p; b u t t o n t o s e l e c t t h e
1 . P r e s s t h e M O D E b u t t o n t o s e l e c t H E AT m o d e . 2 . S e t y o u r d e s i r e d t e m p e r a t u r e u s i n g t h e Te m p o r Te m p b u t t o n . 3 . P r e s s t h e FA N b u t t o n t o s e l e c t t h e f a n s p e e d : A U TO , L O W, M E D , o r H I G H . 4 . P r e ...
Page 33 - Setting the TIMER function
2 . P r e s s t h e T I M E R O N b u t t o n r e p e a t e d l y t o s e t t h e t i m e w h e n y o u w a n t t h e u n i t t o t u r n o n .3 . Wa i t 2 s e c o n d s , t h e n t h e T I M E R O N f u n c t i o n w i l l b e a c t i v a t e d . T h e d i g i t a l d i s p l a y o n y o u r r e m ...
Page 34 - Ti m e r o n
N O T E : " 0 . 0 h " W h e n s e t t i n g t h e T I M E R O N o r T I M E R O F F f u n c t i o n s , u p t o 1 0 h o u r s , t h e t i m e w i l l i n c re a s e i n 3 0 m i n u t e i n c re m e n t s w i t h e a c h p re s s . A f t e r 1 0 h o u r s a n d u p t o 2 4 , i t w i l l i n c...
Page 35 - S e t t i n g b o t h T I M E R O N a n d T I M E R O F F a t t h e s a m e t i m e; t i c a l l y t u r n o ff a t 9 : 0 0 P M .; sec
S e t t i n g b o t h T I M E R O N a n d T I M E R O F F a t t h e s a m e t i m e K e e p i n m i n d t h a t t h e t i m e p e r i o d s y o u s e t f o r b o t h f u n c t i o n s r e f e r t o h o u r s a f t e r t h ec u r r e n t t i m e . F o r e x a m p l e , s a y t h a t t h e c u r re n ...
Page 36 - Yo u r r e m o t e d i s p l a y; Current; ON; hours later; Timer on; Timer off
E x a m p l e : S e t t i n g t h e u n i t t o t u r n o n a f t e r 6 h o u r s , o p e r a t e f o r 2 h o u r s , t h e n t u r n o ff ( s e e t h e f i g u r e b e l o w ) Yo u r r e m o t e d i s p l a y Timer is set To turn ON 6 hours from current time Timer is set to turn OFF 8 hours from cu...
Page 37 - SWING Function; How To Use The Advanced Functions; SLEEP Function
The FOLLOW ME function enables theremote control to measure the temper- ature at its current location. When using AUTO, COOL, or HEAT functions, measuring ambient temperature from the remote control (instead of from the indoor unit itself) will enable the air conditioner to optimize the temperature ...
Page 40 - SUNPENTOWN; Your Guarantee; SUNPENTOWN INTERNATIONAL INC.
SUNPENTOWN Your Guarantee If this product is found to be faulty as a result of faulty materials or workmanship within one year from date of purchase, it will be repaired free of charge. This guarantee is subject to the following terms: Sunpentown must be notified of the fault. Proof of purchase ...