Page 2 - “Conforms with the WEEE Regulations.”
2 Dear User, Our objective is to make this product provide you with the best output which is manufactured in our modern facilities in a careful working environment, in compliance with total quality concept. Therefore, we suggest you to read the user manual carefully before using the product and, kee...
Page 3 - Contens; Methods for protecting ceramic glass cooking surface
3 Contens Important warnings 4 Methods for protecting ceramic glass cooking surface 10 Electrical connection 12 Introduction of the appliance 13 Technical features 14 Installation of cooktop 15 Counter cutting sizes 18 Control panel 19 Usage of your cooktop 20 Maintenance and cleaning 21 Troubles an...
Page 5 - Cooking process shall always be supervised.; flammable materials on or in the appliance.
5 12. Children under 8 years of age should be kept away, if they cannot be monitored continuously. 13. Touching the heating elements should be avoided. 14. CAUTION: Cooking process shall be supervised. Cooking process shall always be supervised. 15. The appliance is not suitable for use with an exte...
Page 6 - and/or under influence of alcohol which may affect your
6 23. Do not use the product in states like medicated and/or under influence of alcohol which may affect your ability of judgement. 24. After each use, check if the unit is turned off. 25. Be careful when using alcohol in your foods. Alcohol will evaporate at high temperatures and may catch fire to ...
Page 7 - installation, by accessible plug or a switch in the fixed
7 33. Cable fixing point shall be protected.34. CAUTION: If the glass of the stove is broken, turn off any heating element immediately and disconnect the appliance from power source, do not touch the surface of the appliance and do not use the appliance. 35. User should not handle the cooker by hims...
Page 8 - or its service agent or an equally qualified personnel to
8 Electrical Safety1. Plug the appliance in a grounded socket protected by a fuse conforming to the values specified in the technical specifications chart. 2. Have an authorized electrician set grounding equipment. Our company shall not be responsible for the damages that shall be incurred due to us...
Page 9 - Make sure there is no liquid or humidity in the; integrated fuse installed on fixed power supply according; type ‘’Y’’; disconnection device shall be connected to fixed power
9 11. Make sure there is no liquid or humidity in the outlet where the product plug is installed. 12. An omnipolar switch capable to disconnect power supply is required for installation. Disconnection from power supply shall be provided with a switch or an integrated fuse installed on fixed power su...
Page 11 - required for the operation of this product as defined is
11 Intended Use 1. This product is designed for home use. Commercial use of the appliance is not permitted. 2. This appliance may only be used for cooking purposes. It shall not be used for other purposes like heating a room. 3. The manufacturer assumes no responsibility for any damage due to misuse...
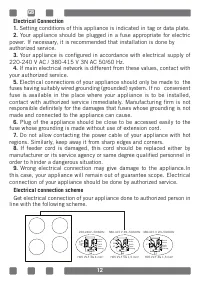
Page 12 - Electrical connection scheme
12 Electrical Connection1. Setting conditions of this appliance is indicated in tag or data plate. 2. Your appliance should be plugged in a fuse appropriate for electric power. If necessary, it is recommended that installation is done by authorized service. 3. Your appliance is configured in accorda...
Page 13 - INTRODUCTION OF THE APPLIANCE
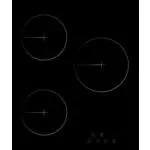
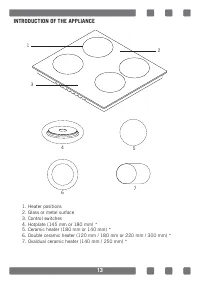
13 INTRODUCTION OF THE APPLIANCE 1. Heater positions2. Glass or metal surface3. Control switches4. Hotplate (145 mm or 180 mm) *5. Ceramic heater (180 mm or 140 mm) *6. Double ceramic heater (120 mm / 180 mm or 220 mm / 300 mm) *7. Ovaldual ceramic heater (140 mm / 250 mm) * 4 7 6 5 1 2 3
Page 14 - Technical features; given in the following table.; In order to increase the product quality, the technical
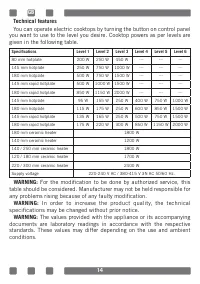
14 Technical features You can operate electric cooktops by turning the button on control panel you want to use to the level you desire. Cooktop powers as per levels are given in the following table. Specifications Level 1 Level 2 Level 3 Level 4 Level 5 Level 6 80 mm hotplate 200 W 250 W 450 W --- -...
Page 16 - Installation; Turn the cooktop down and place on smooth ground.; Installation Diagram
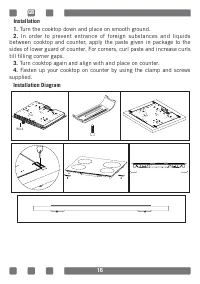
16 Installation 1. Turn the cooktop down and place on smooth ground. 2. In order to prevent entrance of foreign substances and liquids between cooktop and counter, apply the paste given in package to the sides of lower guard of counter. For corners, curl paste and increase curls till filling corner ...
Page 17 - When product is mounted on a drawer, if it is possible to touch lower; While mounting cooktop on a closet, as shown in the figure above, in; distance between wall and cooktop should be 50 mm.
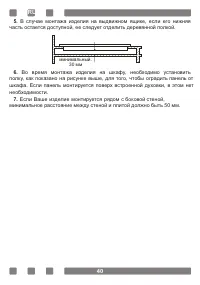
17 5. When product is mounted on a drawer, if it is possible to touch lower side of product, this section should be separated with a wooden shelf. 6. While mounting cooktop on a closet, as shown in the figure above, in order to separate between closet and cooktop, a shelf should be mounted. If it is...
Page 18 - Counter Cut-Off Dimensions; cooktop installation and adjusting counter cutting sizes.
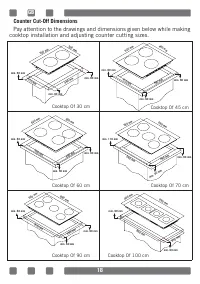
18 Counter Cut-Off Dimensions Pay attention to the drawings and dimensions given below while making cooktop installation and adjusting counter cutting sizes. Cooktop Of 30 cm 300 mm 520 mm 490 mm 270 mm min. 60 mm min. 60 mm min. 60 mm Cooktop Of 45 cm 520 mm 490 mm 440 mm 410 mm min. 60 mm min. 60 ...
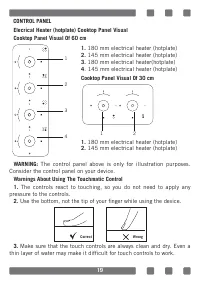
Page 19 - CONTROL PANEL; The control panel above is only for illustration purposes.; Use the bottom, not the tip of your finger while using the device.
19 CONTROL PANEL Elecrical Heater (hotplate) Cooktop Panel VisualCooktop Panel Visual Of 60 cm WARNING: The control panel above is only for illustration purposes. Consider the control panel on your device. Warnings About Using The Touchmatic Control1. The controls react to touching, so you do not ne...
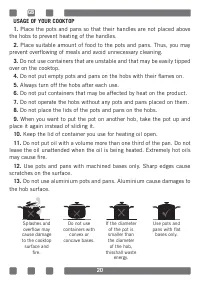
Page 20 - USAGE OF YOUR COOKTOP; prevent overflowing of meals and avoid unnecessary cleaning.
20 USAGE OF YOUR COOKTOP 1. Place the pots and pans so that their handles are not placed above the hobs to prevent heating of the handles. 2. Place suitable amount of food to the pots and pans. Thus, you may prevent overflowing of meals and avoid unnecessary cleaning. 3. Do not use containers that a...
Page 21 - MAINTENANCE AND CLEANING
21 MAINTENANCE AND CLEANING Before starting to maintenance or cleaning, firstly unplug the plug supplying electricity to cooktop and turn down gas valve. If cooktop is hot, wait for cooling down. 1. For the purpose that your cooktop has long and economic life, regular cleaning and maintenance should...
Page 24 - технике; УВАЖАЕМЫЙ ПОКУПАТЕЛЬ!; Благодарим Вас за то, что отдали предпочтение бытовой технике; ПРИМЕЧАНИЕ
технике Simfer. 24 RU УВАЖАЕМЫЙ ПОКУПАТЕЛЬ! Благодарим Вас за то, что отдали предпочтение бытовой технике Simfer. Simfer – это качество, надёжность, и внимательное отношение к потребностям покупателей. Надеемся, что Вам понравится продукция нашей компании, и в будущем Вы отдадите предпочтение Данное...
Page 25 - Содержание
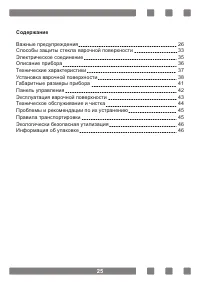
25 Содержание Важные предупреждения 26 Способы защиты стекла варочной поверхности 33 Электрическое соединение 35 Описание прибора 36 Технические характеристики 37 Установка варочной поверхности 38 Габаритные размеры прибора 41 Панель управлeния 42 Эксплуатация варочной поверхности 43 Техническое обс...
Page 26 - Поверхность должна использоваться в соответствии; правилами, указанными в инструкции по эксплуатации.; животным приближаться к прибору, когда он работает.; храните материалы на варочной поверхности.; использовать для других целей, таких как обогрев
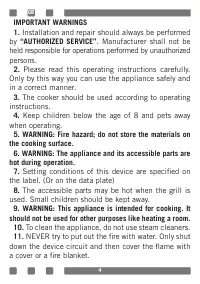
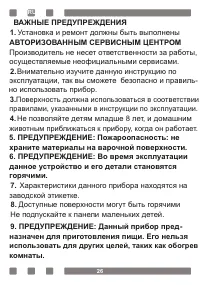
26 ВАЖНЫЕ ПРЕДУПРЕЖДЕНИЯ 1. Установка и ремонт должны быть выполнены АВТОРИЗОВАННЫМ СЕРВИСНЫМ ЦЕНТРОМ Производитель не несет ответственности за работы, осуществляемые неофициальными сервисами. 2. Внимательно изучите данную инструкцию по эксплуатации, так вы сможете безопасно и правиль- 3. Поверхност...
Page 29 - ВНИМАНИЕ! Если стекло варочной панели; Розетка для подключения должна располога-
29 28. Упаковочные материалы представляют опасность для детей. Храните упаковочные материалы в недоступном для детей месте. 29. Во время любых строительных работ дома поверхность должна быть отключена. После завершения работ повторное подключение поверх-ности должно выполняться специалистами автори-...
Page 30 - имеются трещины, следует отключать устройство; во избежание поражения электрическим током.; или наливания на него воды. Имеется риск поражения; Шнур питания не входит в комплект.
цированным электриком. 30 Электробезопасность1. Подключите устройство в заземленную розетку, защищенную предохранителем, соответствующим значениям, приведенным в таблице технических характеристик. 2. Заземление должно быть выполнено квалифи- Наша компания не несет ответственности за ущерб, который м...
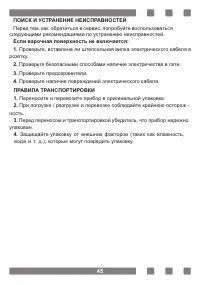
Page 31 - Если шнур питания (шнур со штепсельной вилкой); специалистом
31 6. Во время установки, обслуживания, очистки и ремонта отключайте устройство. 7. Убедитесь, что штепсельная вилка плотно вставлена в розетку, чтобы избежать образования искр. 8. Если шнур питания (шнур со штепсельной вилкой) поврежден, такой шнур должен быть заменен специалистом по техническому о...
Page 34 - Использование варочной поверхности; Поверхность предназначена для использования
34 Использование варочной поверхности 1. Поверхность предназначена для использования в бытовых условиях. Коммерческое использование не допускается. 2. Данный прибор можно использовать только для приготовления пищи. Его не следует использовать для других целей, таких как обогрев комнаты. 3. Производи...
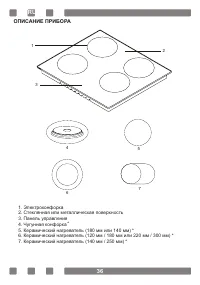
Page 36 - ОПИСАНИЕ ПРИБОРА
36 ОПИСАНИЕ ПРИБОРА 1. Электроконфорка2. Стеклянная или металлическая поверхность3. Панель управления4. Чугунная конфорка 5. Керамический нагреватель (180 мм или 140 мм) * 6. Керамический нагреватель (120 мм / 180 мм или 220 мм / 300 мм) *7. Керамический нагреватель (140 мм / 250 мм) * 4 7 6 5 1 2 3...
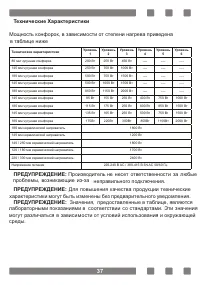
Page 37 - Технические Характеристики
37 Технические Характеристики Мощность конфорок, в зависимости от степени нагрева приведена в таблице ниже Технические характеристики Уровень 1 Уровень 2 Уровень 3 Уровень 4 Уровень 5 Уровень 6 80 мм чугунная конфорка 200 Вт 250 Вт 450 Вт ---- ---- ---- 145 мм чугунная конфорка 250 Вт 750 Вт 1000 Вт...
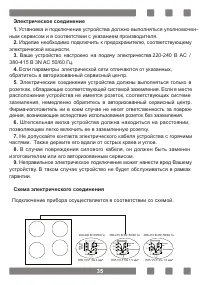
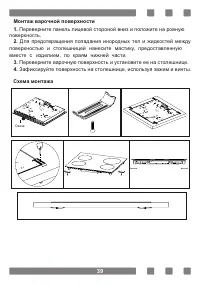
Page 39 - Монтаж варочной поверхности; Переверните панель лицевой стороной вниз и положите на ровную; Схема монтажа
39 Монтаж варочной поверхности 1. Переверните панель лицевой стороной вниз и положите на ровную 2. Для предотвращения попадания инородных тел и жидкостей между поверхностью и столешницей нанесите мастику, предоставленную вмест е с изделием, по краям нижней части. 3. Переверните варочную поверхность ...
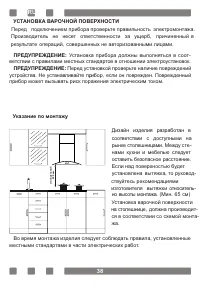
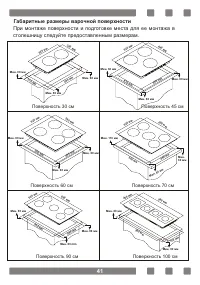
Page 41 - Габаритные размеры варочной поверхности; При монтаже поверхности и подготовке места для ее монтажа в
41 Габаритные размеры варочной поверхности При монтаже поверхности и подготовке места для ее монтажа в ст олешницу следуйте предоставленным размерам. Поверхность 30 cм 300 мм 520 мм 490 мм 270 мм Мин. 60 мм Мин. 60 мм Мин. 60 мм Поверхность 45 cм 520 мм 490 мм 440 мм 410 мм Мин. 60 мм Мин. 60 мм Мин...
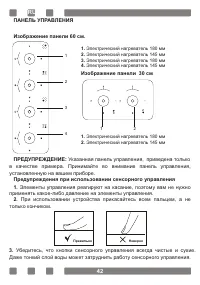
Page 42 - Указанная панель управления, приведена только; Предупреждения при использовании сенсорного управления; Элементы управления реагируют на касание, поэтому вам не нужно; Изображение панели 30 см
42 ПАНЕЛЬ УПРАBЛEHИЯ Изображение панели 60 см. ПРЕДУПРЕЖДЕНИЕ: Указанная панель управления, приведена только в качестве примера. Принимайте во внимание панель управления, установленную на вашем приборе. Предупреждения при использовании сенсорного управления 1. Элементы управления реагируют на касани...
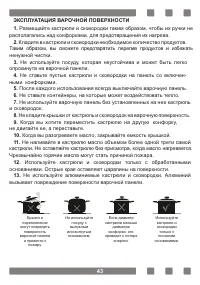
Page 43 - ЭКСПЛУАТАЦИЯ ВАРОЧНОЙ ПОВЕРХНОСТИ
43 ЭКСПЛУАТАЦИЯ ВАРОЧНОЙ ПОВЕРХНОСТИ 1. Размещайте кастрюли и сковородки таким образом, чтобы их ручки не располагались над конфорками, для предотвращения их нагрева. 2. Кладите в кастрюли и сковородки необходимое количество продуктов. Таким образом, вы сможете предотвратить перелив продуктов и избе...
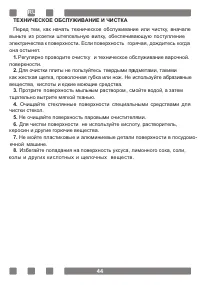
Page 44 - ТЕХНИЧЕСКОЕ ОБСЛУЖИВАНИЕ И ЧИСТКА
44 ТЕХНИЧЕСКОЕ ОБСЛУЖИВАНИЕ И ЧИСТКА Перед тем, как начать техническое обслуживание или чистку, вначале выньте из розетки штепсельную вилку, обеспечивающую поступление электричества к поверхности. . Если поверхность горячая, дождитесь когда 1. Регулярно проводите очистку и техническое обслуживание в...