Simfer H30I12B011 - User Manual
Simfer H30I12B011 Hob – User Manual, read for free online in PDF format. We hope this helps you resolve any issues you may have. If you have further questions, please contact us through the contact form.
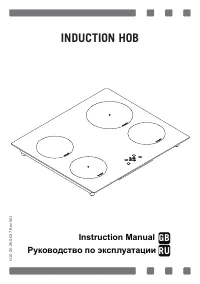
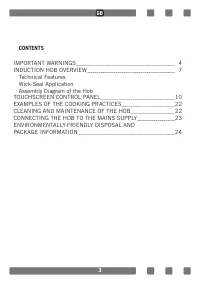
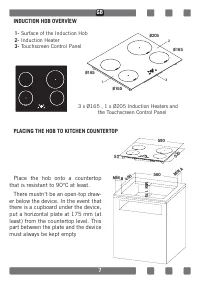
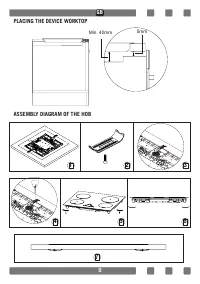
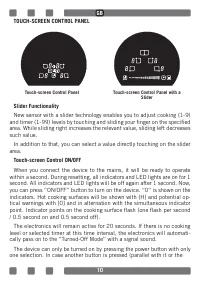

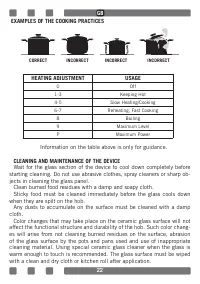
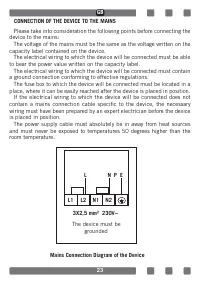
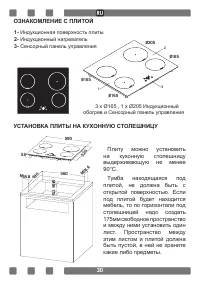
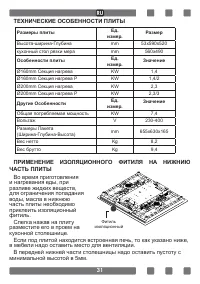
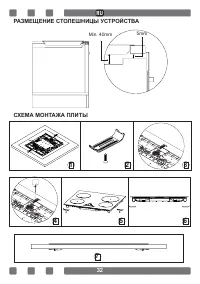

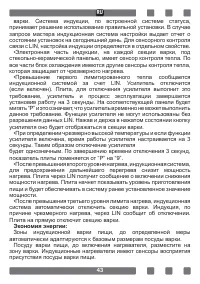
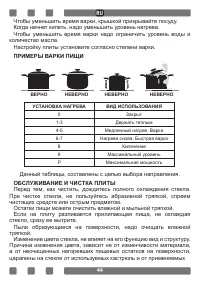
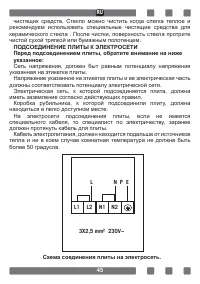
Table of Contents:
- Page 2 – “PLEASE READ THE INSTRUCTIONS BEFORE YOU INSTALL OR USE THİS DE; modern plant without harming the nature.; “Conforms with the WEEE Regulations”
- Page 3 – CONTENTS; IMPORTANT WARNINGS
- Page 4 – The setting conditions of this appliance is indicated
- Page 5 – may require additional ventilation. For example open; It must not be used for other purposes like room heating.
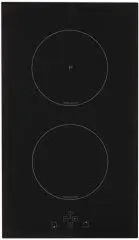
- Page 7 – INDUCTION HOB OVERVİEW; the Touchscreen Control Panel; PLACING THE HOB TO KITCHEN COUNTERTOP; Surface of the Induction Hob
- Page 8 – Hob Specifications
- Page 10 – When you connect the device to the mains, it will be ready to operate; Touch-screen Control Panel
- Page 14 – Idle Temperature
- Page 15 – Protection against Involuntary Activation; •In none of the cooking surfaces becomes activated within 20 sec; Reaction Time of Sensor Buttons
- Page 16 – •‘‘ON/OFF’’ between approximately 700 msec and 1,150 msec; Acoustic Feedback (Audible Warning Signal); unit will be fed back through an audible warning signal:; The timer function is of two types:; This function can only be activated
- Page 18 – Adjusting the Timer Value:; •Select the timer indicator (by touching the indicator zone)
- Page 20 – The functionality will become active after placement.; Overheating Protection; ponent to protect itself from overheating.
- Page 22 – INCORRECT; HEATING ADJUSTMENT
- Page 26 – СОДЕРЖАНИЕ
- Page 28 – енотолькодляготовки.Егонельзяиспользоватьд
- Page 30 – ОЗНАКОМЛЕНИЕ С ПЛИТОЙ; обогрев и Сенсорный панель управления; УСТАНОВКА ПЛИТЫ НА КУХОННУЮ СТОЛЕШНИЦУ; Индукционная поверхность плиты
- Page 33 – Сенсорный Панель
- Page 40 – Программирование таймера для секции варки:
- Page 41 – Настройка значения таймера:
Instruction Manual
INDUCTION HOB
GB
RU
Руководство по эксплуатации
H10-20-260-037 Rev 001
"Loading the manual" means you need to wait until the file loads and becomes available for online reading. Some manuals are very large, and the time they take to appear depends on your internet speed.
Summary
2 GB Dear Customer, Thank you very much for your preference for Simfer products. Our ob- jective is to ensure that you enjoy this product, manufactured environ-mentally-friendly with a total sense of quality in a precise working envi- ronment at our modern facilities, most efficiently. We recommend ...
3 GB CONTENTS IMPORTANT WARNINGS 4 INDUCTION HOB OVERVİEW 7 Technical FeaturesWick-Seal ApplicationAssembly Diagram of the Hob TOUCHSCREEN CONTROL PANEL 10 EXAMPLES OF THE COOKING PRACTICES 22 CLEANING AND MAINTENANCE OF THE HOB 22 CONNECTING THE HOB TO THE MAINS SUPPLY 23 ENVIRONMENTALLY-FRIENDLY D...
4 GB IMPORTANT WARNINGS1.WARNING:Before touching the connection terminals, all supply circuit should be disconnected. 2.WARNING:Any inadvertent cooking made with fats and oils can be dangerous and cause fire. 3.WARNING:Risk of fire; do not store the food materials on the cooking surface. 4.WARNING:I...