Ryobi ELL1750 - User Manual
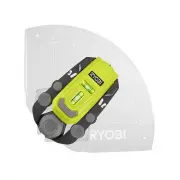
The Ryobi ELL1750 Multi Surface Laser Level is a handheld device designed for precise alignment tasks, covering essential topics like safety protocols, installation methods, and operational procedures. This manual emphasizes laser exposure precautions, battery management, and mounting techniques using accessories such as magnetic bases or suction cups. It also highlights maintenance requirements, including cleaning the lens and avoiding harmful substances, ensuring reliable performance across various surfaces.


Table of Contents:
- Page 1 – Product Setup, Operation, and Mounting Procedures
- Page 2 – Safety Precautions and Maintenance Procedures
- Page 3 – Technical Specifications and Radiation Warnings
- Page 4 – Operational Instructions and Maintenance Guidelines
OPERATOR’S MANUAL
MULTI SURFACE
LASER LEVEL
ELL1750
SAVE THIS MANUAL
FOR FUTURE REFERENCE
WARNING
:
To reduce the risk of injury, the user must read
and understand the operator’s manual before
using this product.
WARNING!
READ AND UNDERSTAND ALL INSTRUC-
TIONS.
Failure to follow all instructions listed
below, may result in electric shock, fire and/or
serious personal injury.
CAUTION:
Use of controls or adjustments or performance of
procedures other than those specified herein may
result in hazardous radiation exposure.
CAUTION:
The use of an optical instrument with this product
will increase eye hazard.
The laser guide radiation used in this laser level is
Class IIIa with < 5mW and 630-660 nm wavelengths.
These lasers do not normally present an optical
hazard although staring at the beam may cause
flash blindness.
Avoid
direct eye exposure when using the laser
and do not project the laser beam directly into
the eyes of others.
Serious eye injury could
result.
Do not remove or deface any product labels.
Removing product labels increases the risk of
exposure to laser radiation.
Do not place the laser level in a position that
may cause anyone to stare into the laser beam
intentionally or unintentionally.
Serious eye
injury could result.
Do not operate the laser level around children
or allow children to operate the tool.
Serious
eye injury could result.
Always turn the laser level off when not in use.
Leaving the tool on increases the risk of someone
inadvertently staring into the laser beam.
Do not operate the laser level in combustible
areas such as in the presence of flammable
liquids, gasses, or dust.
Always ensure the laser beam is aimed at a
surface without reflective properties.
Shiny
reflective materials are not suitable for laser use.
Handle the laser level with care.
Treat it as you
would any other optical device such as a camera
or binoculars.
Avoid exposing the laser level to shock,
continuous vibration or extreme hot or cold
temperatures.
Damage to the tool and/or serious
injury to the user could result.
Save these instructions.
Refer to them fre-
quently and use them to instruct others who may
use this laser level. If you loan someone this laser
level, loan them these instructions also.
IMPORTANT SAFETY INSTRUCTIONS
FEATURES
PRODUCT SPECIFICATIONS
Recommended Use....................................... Indoor
Length of Laser Line ............................. Up to 20 ft.,
Horizontal or Vertical
Laser ....................... Class IIIa, <5mW, 630-660 nm
ASSEMBLY
OPERATION
UNPACKING
If any parts are damaged or missing, please call 1-800-525-2579 for assistance.
OPERATION
TURNING ON/OFF
See Figure 1.
The on/off switch is located on the front of the laser
level. Depress the switch to turn the laser
ON
; Depress
the switch again to turn the laser
OFF
. Always wait for
at least 5 seconds between stopping and restarting
the laser level.
INSTALLING/REPLACING BATTERIES
See Figure 2.
Two AAA batteries are included.
Depress the ridged area on the back of the laser
level and remove the cover.
Install batteries according to polarity indicators
(+ or –) inside the battery compartment.
Position the battery cover over the compartment.
Slide and push the cover until it clicks into place.
WARNING
:
When turning on the laser level, ALWAYS protect
the eyes of yourself and those around you. NEVER
point the laser beam at anyone’s face, including
your own.
USING THE LASER LEVEL
See Figures 3 - 5.
Always turn the laser beam off when mounting
the laser level.
Two bubble levels allow for either horizontal or
vertical leveling.
The laser level and cradle are preinstalled onto
the protractor base.
To remove the protractor base for other applica-
tions, loosen the screw and knob that hold it in
place.
The cradle provides hands-free use, but the laser
level may be used alone.
The protractor base with push pins can be used
on either a smooth or non-smooth surface. The
magnet can be used with or without the protractor
base, only on a smooth metal surface without the
push pins.
USING THE PROTRACTOR BASE
For projecting the laser beam at an angle, from 0°
to 90°.
Remove the push pins from the storage area.
Place the protractor base flat against the desired
surface.
NOTE:
It may be helpful to place a push pin at
90° to hold the base steady while you level the
base at 0°.
Use the bubble levels to set the base horizontally
at 0°.
Push a pin into the lower hole at 0°.
Turn the laser on to project the laser beam.
Pivot the laser level to set the laser beam to the
desired angle.
MOUNTING WITH THE MAGNET
The magnet feature may be used with or without the
protractor base attached.
Attach the magnet to a clean metal surface.
Use the bubble levels to level the unit.
Turn the laser on to project the laser beam.
MOUNTING WITH THE SUCTION CUPS
For mounting to smooth surfaces.
Remove the protractor base.
Place the unit onto a smooth, nontextured surface
but do not press the suction cups into place.
Use the bubble levels to level the unit.
Hold the laser level in place and press the suction
cups onto a nontextured surface until they are
securely in place.
Turn the laser on to project the laser beam.
NOTICE:
To release suction cups from the surface, lift the
tabs on the sides of the suction cups. Pulling on
the unit without first loosening the suction cups
could damage the multisurface cradle.
MOUNTING WITH THE PUSH PINS
For securing the laser level on non-smooth surfaces.
Remove the protractor base.
Remove the push pins from the storage area.
Place the laser level onto the desired surface and
use the bubble levels to level the unit.
Insert a push pin into each hole on the sides of
the cradle and push the pins into the mounting
surface.
Turn the laser on to project the laser beam.
Fig. 2
Fig. 3
Fig. 4
Fig. 5
ALWAYS BE AWARE of the location where the laser
light is emitted when using the level. ALWAYS MAKE
SURE that any bystanders in the vicinity of use are
made aware of the dangers of looking directly into
the laser beam.
A - Battery cover
B - AAA batteries
A - Multi surface cradle
B - Suction cups
C - Magnet
D - Tabs
A - Multi surface cradle
B - Push pins
A
B
B
Power Supply .................. 2 AAA, 1.5 Volt Batteries*
Battery Life .........................1 Hour Continuous Use
Accuracy ....................................... ± 1/2 in. at 16 ft.
* Laser level performance is greatly enhanced when
using premium-branded alkaline batteries.
C
K
Fig. 1
A - Laser on/off switch
B - Bubble levels
C - Multi surface cradle
D - Suction cups
E - Magnet
F - Push pins
G - Protractor base
H - Screw
K - Knob
A
B
D
E
F
G
H
F
B
A
B
C
D
D
A
A - Protractor base
B - Push pins
C - Bubble levels
D - Knob
E - Laser line
A
B
E
B
C
D
LASER
APERTURE
"Loading the manual" means you need to wait until the file loads and becomes available for online reading. Some manuals are very large, and the time they take to appear depends on your internet speed.
Was this manual helpful?
About this manual
- Brand
- Ryobi
- Model
- ELL1750
- Document type
- User Manual
- Category
- Laser Level
- Language(s)
- English, Spanish, French
- Pages
- 4
- File size
- 3.9 MB
- Format
Summary
Instructions for turning the device on/off, installing batteries, using the laser level with or without a protractor base, mounting methods (magnet or suction cups), securing with push pins, and key specifications like laser class and accuracy.
Safety precautions regarding laser exposure and handling, proper battery care, assembly procedures, and general maintenance guidelines for the laser level.
Component identification diagrams, product specifications, warnings about laser radiation, usage precautions, and technical characteristics including class, wavelength, battery requirements, and operating temperature.
Ask a question
Related manuals
More Ryobi Laser Levels models


Other Ryobi appliances
 Ryobi 4-in-1 RLM53175S 5133002555 User Manual
 Ryobi 105r User Manual
 Ryobi 105r, 132r, 137r Manual
 Ryobi 150r Manual
 Ryobi 180r, 190r User Manual
 Ryobi 225L, 225LD, 227L, 227LD, 232L, 240L Manual
 Ryobi 227 L, 227 LD, 232 L, 240 L Manual
 Ryobi 280r Manual
 Ryobi 330B, 340BV Manual
 Ryobi 410r User Manual
 Ryobi 454 Manual
 Ryobi 500W User Manual
 Ryobi 700R User Manual
 Ryobi 704r Manual
 Ryobi 705r Manual
 Ryobi 720R User Manual
 Ryobi 725R User Manual
 Ryobi 767R User Manual