RELIABLE 140IS - User Manual
RELIABLE 140IS Iron – User Manual, read for free online in PDF format. We hope this helps you resolve any issues you may have. If you have further questions, please contact us through the contact form.


Table of Contents:
- Page 2 – ENGLISH
- Page 6 – DANGER TO CHILDREN
- Page 7 – DANGER FROM OTHER CAUSES; SCALDING DANGER
- Page 8 – RECOMMENDATIONS
- Page 9 – CAUTION
- Page 11 – MAVEN 140IS KEY FEATURES
- Page 14 – FILLING THE WATER TANK; CARRY LOCK
- Page 15 – PROGRAMMED TEMPERATURE; SETTING THE TEMPERATURE
- Page 16 – AUTO STEAM FUNCTION
- Page 18 – VERTICAL STEAMING; SAFETY AUTO SHUT-OFF
- Page 19 – DRAINING THE WATER TANK; ANTI-SCALE CARTRIDGE
- Page 20 – SELF CLEANING
- Page 21 – CLEANING AND MAINTENANCE; STORAGE; IRONING TIPS
- Page 22 – TROUBLESHOOTING
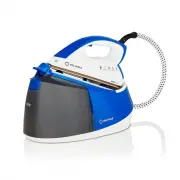
HOME IRONING STATION
LE SYSTÈME DE REPASSAGE POUR LA MAISON
EL SISTEMA HOGAREÑO DE PLANCHADO
INSTRUCTION MANUAL
GUIDE D’UTILISATION
MANUAL DE INSTRUCCIONES
MAVEN
140IS
"Loading the manual" means you need to wait until the file loads and becomes available for online reading. Some manuals are very large, and the time they take to appear depends on your internet speed.
Summary
04 IMPORTANT SAFEGUARDS – SAVE THESE INSTRUCTIONS IN A SAFE PLACE FOR FUTURE REFERENCE READ ALL INSTRUCTIONS BEFORE USE When using your Maven 140IS home ironing station, basic safety precautions should always be followed. Please read the following instructions carefully as they provide important inf...
05 DANGER FROM OTHER CAUSES • Never leave the appliance exposed to the elements (rain, sun, etc.). • Never place the appliance on or near sources of heat. • Make sure that the power cord does not come into contact with hot surfaces. • Never point steam jets in the direction of people, animals or pla...