Page 2 - NETWORK CD RECEIVER SYSTEM; Instruction
E N Before Start What's in the box .......................................................................... 2 Part Names Front Panel ................................................................................... 4 Rear Panel (X-HM76D, X-HM86D, XC-HM86D) .......................... 5 Rear Panel...
Page 5 - Front Panel
4 > Before Star t > Part Names > Install > Initial Setup > Playback Supplementary information | Advanced Setup | Others E N Front Panel Part Names 1. Í STANDBY/ON button: Turns the unit on or to standby mode. 2. INPUT button: Switches the input to be played. 3. Play button: :6 : Retur...
Page 6 - Rear Panel
> Before Star t > Part Names > Install > Initial Setup > Playback Supplementary information | Advanced Setup | Others 5 E N Rear Panel (X-HM76D, X-HM86D, XC-HM86D) 1. Power cord 2. Wireless antenna: Used for Wi-Fi connection or when using a BLUETOOTH enabled device. Adjust their angle...
Page 8 - Remote Controller
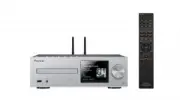
> Before Star t > Part Names > Install > Initial Setup > Playback Supplementary information | Advanced Setup | Others 7 E N Remote Controller 1. Í STANDBY/ON button: Turns the unit on or into standby mode. 2. TIMER button: Used to set the time and set the alarm. 3. SLEEP button: Set t...
Page 9 - Display; USB Front; Song
8 > Before Star t > Part Names > Install > Initial Setup > Playback Supplementary information | Advanced Setup | Others E N Display 1. The input mode is displayed. (USB Front / USB Rear / CD / Bluetooth / Network / Digital In / Line / Tuner DAB * / Tuner FM) * X-HM76D, X-HM86D, XC-HM8...
Page 10 - Speakers System
> Before Star t > Part Names > Install > Initial Setup > Playback Supplementary information | Advanced Setup | Others 9 E N Speakers System (X-HM76D, X-HM76) There is no distinction between left and right with the included speaker system. There will be no difference in sound quality w...
Page 12 - Connect the Speakers
11 > Before Star t > Part Names > Install > Initial Setup > Playback Supplementary information | Advanced Setup | Others E N Connect the Speakers Install 1 RED RED 3 2 4 RED RED b b a a a a X-HM86D only When connecting the speaker system for X-HM76D, X- HM76 or X-HM86D, connect the in...
Page 13 - Connecting the antennas and power cord, etc.; Antenna Hookup
12 > Before Star t > Part Names > Install > Initial Setup > Playback Supplementary information | Advanced Setup | Others E N Connecting the antennas and power cord, etc. c a b c 1 1 2 X-HM76D, X-HM86D, XC-HM86D X-HM76 Antenna Hookup Move the antenna around while playing the radio to f...
Page 14 - Power On & Initial Setup; Wi-Fi connection settings
13 > Before Star t > Part Names > Install > Initial Setup > Playback Supplementary information | Advanced Setup | Others E N Power On & Initial Setup Initial Setup 1 3 2 BLUE BLINKING Starting up: When you press Í STANDBY/ON, the power indicator on the main unit slowly blinks blue...
Page 17 - Time settings
16 > Before Star t > Part Names > Install > Initial Setup > Playback Supplementary information | Advanced Setup | Others E N Time settings By setting the time, you can use the alarm to start play ( Ä P33). 1. Press TIMER. 2. Press ENTER. 3. Set the day of the week with w / x , then pr...
Page 18 - Playing CDs; Playing music CDs
17 > Before Star t > Part Names > Install > Initial Setup > Playback Supplementary information | Advanced Setup | Others E N Playing CDs Playback a 1 2 b c This unit can also play CD-R recorded with MP3 or WMA format files, along with commercially available music CDs. 0 The supported ...
Page 19 - Playing MP3/WMA discs
18 > Before Star t > Part Names > Install > Initial Setup > Playback Supplementary information | Advanced Setup | Others E N Playing MP3/WMA discs 1. Turn the unit on. 2. Press CD to change input to CD. 3. Press < on the main unit to open the disc tray. 4. Put the disc on the tray,...
Page 20 - USB Storage Device/HDD; Basic operations
19 > Before Star t > Part Names > Install > Initial Setup > Playback Supplementary information | Advanced Setup | Others E N USB Storage Device/HDD 2 a b e d c 1 Basic operations You can play music files by connecting a USB storage device or HDD (hard disk drive) to the USB port on th...
Page 21 - USB Storage / HDD Device Requirements
20 > Before Star t > Part Names > Install > Initial Setup > Playback Supplementary information | Advanced Setup | Others E N DSD (DSF only) format music files. The formats for embedded images are JPEG and PNG. 0 Characters that cannot be displayed by this unit appear as " ¢ "....
Page 22 - Internet Radio
21 > Before Star t > Part Names > Install > Initial Setup > Playback Supplementary information | Advanced Setup | Others E N Internet Radio Basic operations When this unit is connected to a network, you can listen to TuneIn or other preregistered Internet radio services. Depending on ...
Page 23 - Spotify; Pioneer HMXX xxxxxx; Basic Operation
22 > Before Star t > Part Names > Install > Initial Setup > Playback Supplementary information | Advanced Setup | Others E N Spotify Wi-Fi Pioneer HMXX xxxxxx b a c d 1 4 3 2 Basic Operation Spotify Connect play is possible by connecting this unit to the same network as a smart phone ...
Page 24 - Listening to the FM Radio; Tuning Automatically; Tuning Manually
23 > Before Star t > Part Names > Install > Initial Setup > Playback Supplementary information | Advanced Setup | Others E N Listening to the FM Radio 1 d e f b e a c d h f g Tuning Automatically 1. Turn the unit on. 2. Repeatedly press TUNER to switch input to Tuner FM. 3. When you p...
Page 25 - Registering a station; Using RDS
24 > Before Star t > Part Names > Install > Initial Setup > Playback Supplementary information | Advanced Setup | Others E N 3. Select the station you want to listen to while pressing TUNE i / j (b) on the remote controller. 0 The frequency changes by 1 step each time you press the bu...
Page 27 - Listening to DAB Digital Radio; Tuning
26 > Before Star t > Part Names > Install > Initial Setup > Playback Supplementary information | Advanced Setup | Others E N Listening to DAB Digital Radio (X-HM76D, X-HM86D, XC-HM86D) Tuning 1. Turn the unit on. 2. Repeatedly press TUNER to switch input to Tuner DAB. 0 The very first...
Page 28 - BLUETOOTH; Playing Back; Pairing
27 > Before Star t > Part Names > Install > Initial Setup > Playback Supplementary information | Advanced Setup | Others E N BLUETOOTH ® 1 2 Pioneer HMXX xxxxxx 1 2 Pioneer HMXX xxxxxx Playing Back Pairing Pairing 1. Turn the unit on. 2. When you press the button on the remote control...
Page 30 - AirPlay; Pioneer HMXX
29 > Before Star t > Part Names > Install > Initial Setup > Playback Supplementary information | Advanced Setup | Others E N AirPlay ® 1 Wi-Fi 3 Pioneer HMXX iPhone 2 4 Basic Operation You can wirelessly enjoy the music files on an iPhone ® , iPod touch ® , or iPad ® connected to the ...
Page 31 - Playing audio from an external device; Connections
30 > Before Star t > Part Names > Install > Initial Setup > Playback Supplementary information | Advanced Setup | Others E N Playing audio from an external device Connections You can play the audio from external devices such as TVs and game consoles through this unit. If the external ...
Page 32 - Music Server; Configuring Windows Media; Windows Media; Playing
31 > Before Star t > Part Names > Install > Initial Setup > Playback Supplementary information | Advanced Setup | Others E N Music Server It is possible to stream music files stored on PCs or NAS devices connected to the same network as this unit. The network servers this unit is comp...
Page 33 - Supported Audio Formats
32 > Before Star t > Part Names > Install > Initial Setup > Playback Supplementary information | Advanced Setup | Others E N You can use this unit to play music files stored on your PC by operating the PC inside your home network. The unit supports remote playback with Windows Media ®...
Page 34 - Using the alarm to start play; Settings
33 > Before Star t > Part Names > Install > Initial Setup > Playback Supplementary information | Advanced Setup | Others E N Using the alarm to start play Settings At the set time, the unit switches on and starts play of the desired source. You can set two different timers, "TIMER...
Page 35 - Entering text
34 > Before Star t > Part Names > Install > Initial Setup > Playback Supplementary information | Advanced Setup | Others E N Entering text, adjusting sound quality, etc. Entering text Text entry, for passwords, etc., uses the following remote controller buttons. SHUFFLE/REPEAT button ...
Page 37 - Advanced Settings; Connection
36 > Before Star t > Part Names > Install > Initial Setup > Playback Supplementary information | Advanced Setup | Others E N Advanced Settings Advanced Setup The unit allows you to configure advanced settings to provide you with an even better experience. 1. Press SETUP on the remote ...
Page 38 - Option Setting
> Before Star t > Part Names > Install > Initial Setup > Playback Supplementary information | Advanced Setup | Others 37 E N Make Wi-Fi connection settings. ( Ä P13) This can be set only when "Wi-Fi" is selected in "Connection". 0 You can make Wi-Fi connection settings...
Page 39 - Tuner Setting; System Info
38 > Before Star t > Part Names > Install > Initial Setup > Playback Supplementary information | Advanced Setup | Others E N Select the language displayed on the display. English (Default Value), German, French, Spanish, Italian, Dutch, Swedish, Russian, Chinese ■ Tuner Setting * X-HM...
Page 40 - Factory Reset; Update; via Network; Web Setup
> Before Star t > Part Names > Install > Initial Setup > Playback Supplementary information | Advanced Setup | Others 39 E N Factory Reset Reset the settings of this unit to the status at the time of shipment. We recommend that you take a note of the settings you have changed before g...
Page 41 - The updating function on this unit
40 > Before Star t > Part Names > Install > Initial Setup > Playback Supplementary information | Advanced Setup | Others E N Firmware Update Firmware Update The updating function on this unit This unit has functionality to update the firmware (the system software) over a network or by...
Page 42 - Updating via USB
41 > Before Star t > Part Names > Install > Initial Setup > Playback Supplementary information | Advanced Setup | Others E N 0 * -01, * -10: Ethernet cable not found. Connect the Ethernet cable properly. 0 * -02, * -03, * -04, * -05, * -06, * -11, * -13, * -14, * - 16, * -17, * -18, *...
Page 43 - Troubleshooting; Before starting the procedure; There is no audio from external devices
42 > Before Star t > Part Names > Install > Initial Setup > Playback Supplementary information | Advanced Setup | Others E N Troubleshooting Others Before starting the procedure When operation is unstable, problems may be solved by simply turning the power on or to standby or disconne...
Page 44 - Cannot play discs
43 > Before Star t > Part Names > Install > Initial Setup > Playback Supplementary information | Advanced Setup | Others E N Cannot play discs 0 Place the disc in the disc tray so the label is facing up. 0 Play may not be possible if the disc is scratched or dirty. Cannot Play USB...
Page 46 - General Specifications
45 > Before Star t > Part Names > Install > Initial Setup > Playback Supplementary information | Advanced Setup | Others E N General Specifications Analog Audio Output Section RMS Output Power 0 X-HM76D, X-HM76 : 50 W + 50 W 0 X-HM86D, XC-HM86D : 65 W + 65 W (4 ohms, 1 kHz THD 10%) ...
Page 48 - License and Trademark Information
47 > Before Star t > Part Names > Install > Initial Setup > Playback Supplementary information | Advanced Setup | Others E N License and Trademark Information The Wi-Fi CERTIFIED Logo is a certification mark of Wi-Fi Alliance ® . AirPlay, iPad, iPhone, and iPod touch are trademarks of...
Page 50 - MICRO CHAÎNE CD ET RESEAU
F R Avant de Démarrer Ce que contient la boîte ................................................................ 2 Nom des pièces Panneau frontal ............................................................................ 4 Panneau arrière (X-HM76D, X-HM86D, XC-HM86D) ................... 5 Panneau a...
Page 51 - Ce que contient la boîte
2 > Avant de Démarrer > Nom des pièces > Installation > Initial Setup > Lecture Informations supplémentaires | Configuration avancée | Autres F R Ce que contient la boîte Avant de Démarrer X-HM76D : 12356 X-HM76 : 12456 X-HM86D : 123567 XC-HM86D : 123 Appareil principal (1) Télécomman...
Page 53 - Panneau frontal
4 > Avant de Démarrer > Nom des pièces > Installation > Initial Setup > Lecture Informations supplémentaires | Configuration avancée | Autres F R Panneau frontal Nom des pièces 1. Touche Í STANDBY/ON : Permet la mise en marche ou en veille de l'appareil. 2. Touche INPUT : Change l'ent...
Page 54 - Panneau arrière
> Avant de Démarrer > Nom des pièces > Installation > Initial Setup > Lecture Informations supplémentaires | Configuration avancée | Autres 5 F R Panneau arrière (X-HM76D, X-HM86D, XC-HM86D) 1. Cordon d’alimentation 2. Antenne sans fil : Utilisée pour la connexion Wi-Fi ou pour utilis...
Page 56 - Télécommande
> Avant de Démarrer > Nom des pièces > Installation > Initial Setup > Lecture Informations supplémentaires | Configuration avancée | Autres 7 F R Télécommande 1. Touche Í STANDBY/ON : Permet la mise en marche ou en veille de l'appareil. 2. Touche TIMER : Utilisé pour régler l'heure et...
Page 57 - Afficheur
8 > Avant de Démarrer > Nom des pièces > Installation > Initial Setup > Lecture Informations supplémentaires | Configuration avancée | Autres F R Afficheur 1. Le mode d'entrée s'affiche. (USB Front / USB Rear / CD / Bluetooth / Network / Digital In / Line / Tuner DAB * / Tuner FM) * X...
Page 60 - Raccordez les enceintes
11 > Avant de Démarrer > Nom des pièces > Installation > Initial Setup > Lecture Informations supplémentaires | Configuration avancée | Autres F R Raccordez les enceintes Installation 1 RED RED 3 2 4 RED RED b b a a a a X-HM86D uniquement Pour le raccordement du système d'enceintes de...
Page 61 - Raccordement de l'antenne
12 > Avant de Démarrer > Nom des pièces > Installation > Initial Setup > Lecture Informations supplémentaires | Configuration avancée | Autres F R Raccordement des câbles d'antenne et d'alimentation, etc. c a b c 1 1 2 X-HM76D, X-HM86D, XC-HM86D X-HM76 Raccordement de l'antenne Déplac...
Page 62 - Mise sous tension & Configuration initiale; Paramètres de connexion Wi-Fi
13 > Avant de Démarrer > Nom des pièces > Installation > Initial Setup > Lecture Informations supplémentaires | Configuration avancée | Autres F R Mise sous tension & Configuration initiale Initial Setup 1 3 2 BLUE BLINKING Démarrage : Lorsque vous appuyez sur Í STANDBY/ON, le tém...
Page 66 - Lecture de CD; Lecture de CD musicaux
17 > Avant de Démarrer > Nom des pièces > Installation > Initial Setup > Lecture Informations supplémentaires | Configuration avancée | Autres F R Lecture de CD Lecture a 1 2 b c Cet appareil peut également lire les CD-R enregistrés contenant des fichiers au format MP3 ou WMA, outre l...
Page 67 - Lecture de disques MP3/WMA
18 > Avant de Démarrer > Nom des pièces > Installation > Initial Setup > Lecture Informations supplémentaires | Configuration avancée | Autres F R Lecture de disques MP3/WMA 1. Mettez en marche l'appareil. 2. Appuyez sur CD pour modifier l'entrée sur CD. 3. Appuyez sur la touche < ...
Page 68 - Périphérique de stockage USB/DD; Commandes de base
19 > Avant de Démarrer > Nom des pièces > Installation > Initial Setup > Lecture Informations supplémentaires | Configuration avancée | Autres F R Périphérique de stockage USB/DD 2 a b e d c 1 Commandes de base Vous pouvez lire des fichiers musicaux en connectant un périphérique de st...
Page 69 - Répétition/Lecture aléatoire
20 > Avant de Démarrer > Nom des pièces > Installation > Initial Setup > Lecture Informations supplémentaires | Configuration avancée | Autres F R 6. Utilisez les touches de lecture (a) pour arrêter la lecture ou choisir les pistes à lire. 0 L'affichage du nom de l'album, du nom de l'...
Page 70 - Radio Internet
21 > Avant de Démarrer > Nom des pièces > Installation > Initial Setup > Lecture Informations supplémentaires | Configuration avancée | Autres F R Radio Internet Commandes de base Lorsque cet appareil est connecté au réseau, vous pouvez écouter TuneIn ou d'autres services de radio Int...
Page 72 - Écoute de la radio FM; Syntonisation automatique; Syntonisation manuelle
23 > Avant de Démarrer > Nom des pièces > Installation > Initial Setup > Lecture Informations supplémentaires | Configuration avancée | Autres F R Écoute de la radio FM 1 d e f b e a c d h f g Syntonisation automatique 1. Mettez en marche l'appareil. 2. Appuyez plusieurs fois sur TUNE...
Page 73 - Mémorisation d'une station; Utilisation du RDS
24 > Avant de Démarrer > Nom des pièces > Installation > Initial Setup > Lecture Informations supplémentaires | Configuration avancée | Autres F R 3. Sélectionnez la station à écouter en appuyant sur la touche TUNE i / j (b) de la télécommande. 0 La fréquence change d’1 pas à chaque f...
Page 75 - Écoute de la radio numérique DAB; Tuner; Le changement d’ordre des stations s’affiche; Affichage des informations de la radio DAB
26 > Avant de Démarrer > Nom des pièces > Installation > Initial Setup > Lecture Informations supplémentaires | Configuration avancée | Autres F R Écoute de la radio numérique DAB (X-HM76D, X-HM86D, XC-HM86D) Tuner 1. Mettez en marche l'appareil. 2. Appuyez plusieurs fois sur TUNER po...
Page 76 - Écouter; Jumelage
27 > Avant de Démarrer > Nom des pièces > Installation > Initial Setup > Lecture Informations supplémentaires | Configuration avancée | Autres F R BLUETOOTH ® 1 2 Pioneer HMXX xxxxxx 1 2 Pioneer HMXX xxxxxx Écouter Jumelage Jumelage 1. Mettez en marche l'appareil. 2. Lorsque vous appu...
Page 78 - Fonctionnement de base
29 > Avant de Démarrer > Nom des pièces > Installation > Initial Setup > Lecture Informations supplémentaires | Configuration avancée | Autres F R AirPlay ® 1 Wi-Fi 3 Pioneer HMXX iPhone 2 4 Fonctionnement de base Vous pouvez profiter à distance des fichiers musicaux présents sur un i...
Page 79 - Lecture du son provenant d'un périphérique externe; Connexions
30 > Avant de Démarrer > Nom des pièces > Installation > Initial Setup > Lecture Informations supplémentaires | Configuration avancée | Autres F R Lecture du son provenant d'un périphérique externe Connexions Vous pouvez écouter le son provenant de périphériques externes tels que des ...
Page 80 - Configuration de Windows Media; Lire
31 > Avant de Démarrer > Nom des pièces > Installation > Initial Setup > Lecture Informations supplémentaires | Configuration avancée | Autres F R Music Server Il est possible de diffuser en flux des fichiers de musique présents sur les ordinateurs ou dispositifs NAS connectés au même...
Page 81 - Contrôler la lecture distance à partir d'un PC
32 > Avant de Démarrer > Nom des pièces > Installation > Initial Setup > Lecture Informations supplémentaires | Configuration avancée | Autres F R 0 En fonction du serveur utilisé et des fichiers lus, le temps de lecture écoulé et le temps restant peuvent ne pas s'afficher. 0 Pour les...
Page 82 - Utilisation de l'alarme pour démarrer la lecture
33 > Avant de Démarrer > Nom des pièces > Installation > Initial Setup > Lecture Informations supplémentaires | Configuration avancée | Autres F R Utilisation de l'alarme pour démarrer la lecture À l'heure réglée, l'appareil se met sous tension et démarre la lecture de la source souha...
Page 83 - Ajustement de la qualité du son
34 > Avant de Démarrer > Nom des pièces > Installation > Initial Setup > Lecture Informations supplémentaires | Configuration avancée | Autres F R Saisie d'un texte, ajustement de la qualité du son, etc. Saisie d'un texte La saisie de texte, pour les mots de passe, etc. nécessite l'ut...
Page 87 - Digital Filter
38 > Avant de Démarrer > Nom des pièces > Installation > Initial Setup > Lecture Informations supplémentaires | Configuration avancée | Autres F R ■ Digital Filter "Slow" : son doux et fluide "Sharp" (Valeur par défaut) : son ayant davantage de structure et de fermeté ...
Page 89 - La fonction de mise à jour de cet appareil
40 > Avant de Démarrer > Nom des pièces > Installation > Initial Setup > Lecture Informations supplémentaires | Configuration avancée | Autres F R Mise à jour du micrologiciel Mise à jour du micrologiciel La fonction de mise à jour de cet appareil Cet appareil possède une fonctionnali...
Page 90 - Mise à jour via USB
41 > Avant de Démarrer > Nom des pièces > Installation > Initial Setup > Lecture Informations supplémentaires | Configuration avancée | Autres F R Si un message d'erreur s'affiche : Lorsqu'une erreur se produit, " * - ** Error!" apparait sur l'afficheur de cet appareil. ("...
Page 91 - Dépannage; Avant de démarrer la procédure; Aucun son n'est restitué à partir des
42 > Avant de Démarrer > Nom des pièces > Installation > Initial Setup > Lecture Informations supplémentaires | Configuration avancée | Autres F R Dépannage Autres Avant de démarrer la procédure Lorsque le fonctionnement est instable, les problèmes peuvent être résolus simplement en m...
Page 92 - Impossible de lire des disques
43 > Avant de Démarrer > Nom des pièces > Installation > Initial Setup > Lecture Informations supplémentaires | Configuration avancée | Autres F R La lecture est interrompue et la communication ne fonctionne pas 0 Réduisez la distance avec le point d'accès ou retirez tout obstacle pou...
Page 93 - Fonction BLUETOOTH
44 > Avant de Démarrer > Nom des pièces > Installation > Initial Setup > Lecture Informations supplémentaires | Configuration avancée | Autres F R 0 Les formats pris en charge dépendent du logiciel du serveur. 0 Pour plus de détails, contactez le fabricant du logiciel du serveur. Fo...
Page 94 - Caractéristiques générales
45 > Avant de Démarrer > Nom des pièces > Installation > Initial Setup > Lecture Informations supplémentaires | Configuration avancée | Autres F R Caractéristiques générales Section sortie audio analogique Puissance de sortie RMS 0 X-HM76D, X-HM76 : 50 W + 50 W 0 X-HM86D, XC-HM86D :...
Page 96 - Licence et Marque commerciale
47 > Avant de Démarrer > Nom des pièces > Installation > Initial Setup > Lecture Informations supplémentaires | Configuration avancée | Autres F R Licence et Marque commerciale The Wi-Fi CERTIFIED Logo is a certification mark of Wi-Fi Alliance ® . AirPlay, iPad, iPhone, and iPod touch...
Page 98 - > Nombres de las piezas; Manual de instrucciones
E S Antes de empezar Qué se encuentra en la caja ......................................................... 2 Nombres de las piezas Panel frontal .................................................................................. 4 Panel trasero (X-HM76D, X-HM86D, XC-HM86D) ....................... 5 P...
Page 99 - Qué se encuentra en la caja
2 > Antes de empezar > Nombres de las piezas > Instalación > Initial Setup > Reproducción Información complementaria | Configuración avanzada | Otros E S Qué se encuentra en la caja Antes de empezar X-HM76D : 12356 X-HM76 : 12456 X-HM86D : 123567 XC-HM86D : 123 Unidad principal (1) Ma...
Page 101 - Panel frontal
4 > Antes de empezar > Nombres de las piezas > Instalación > Initial Setup > Reproducción Información complementaria | Configuración avanzada | Otros E S Panel frontal Nombres de las piezas 1. Botón Í STANDBY/ON: Enciende la unidad o la pone en modo de espera. 2. Botón INPUT: Cambia l...
Page 102 - Panel trasero
> Antes de empezar > Nombres de las piezas > Instalación > Initial Setup > Reproducción Información complementaria | Configuración avanzada | Otros 5 E S Panel trasero (X-HM76D, X-HM86D, XC-HM86D) 1. Cable de alimentación 2. Antena inalámbrica: Se usa para la conexión Wi-Fi o al utili...
Page 104 - Mando a distancia
> Antes de empezar > Nombres de las piezas > Instalación > Initial Setup > Reproducción Información complementaria | Configuración avanzada | Otros 7 E S Mando a distancia 1. Botón Í STANDBY/ON: Enciende la unidad o la configura en modo de espera. 2. Botón TIMER: Se utiliza para estab...
Page 105 - Pantalla
8 > Antes de empezar > Nombres de las piezas > Instalación > Initial Setup > Reproducción Información complementaria | Configuración avanzada | Otros E S Pantalla 1. Se visualiza el modo de entrada. (USB Front / USB Rear / CD / Bluetooth / Network / Digital In / Line / Tuner DAB * / T...
Page 106 - Sistema de altavoces
> Antes de empezar > Nombres de las piezas > Instalación > Initial Setup > Reproducción Información complementaria | Configuración avanzada | Otros 9 E S Sistema de altavoces (X-HM76D, X-HM76) No existe distinción entre izquierda y derecha con el sistema de altavoces incluido. Indepen...
Page 108 - Conexión de los altavoces
11 > Antes de empezar > Nombres de las piezas > Instalación > Initial Setup > Reproducción Información complementaria | Configuración avanzada | Otros E S Conexión de los altavoces Instalación 1 RED RED 3 2 4 RED RED b b a a a a Solo X-HM86D Cuando conecte el sistema de altavoces para...
Page 109 - Conexión de antenas
12 > Antes de empezar > Nombres de las piezas > Instalación > Initial Setup > Reproducción Información complementaria | Configuración avanzada | Otros E S Conexión de las antenas, el cable de alimentación, etc. c a b c 1 1 2 X-HM76D, X-HM86D, XC-HM86D X-HM76 Conexión de antenas Mueva ...
Page 110 - Encendido y configuración inicial; Configuración de la conexión Wi-Fi
13 > Antes de empezar > Nombres de las piezas > Instalación > Initial Setup > Reproducción Información complementaria | Configuración avanzada | Otros E S Encendido y configuración inicial Initial Setup 1 3 2 BLUE BLINKING Puesta en marcha: Cuando pulsa Í STANDBY/ON , el indicador de ...
Page 111 - Escaneo de redes
14 > Antes de empezar > Nombres de las piezas > Instalación > Initial Setup > Reproducción Información complementaria | Configuración avanzada | Otros E S Para realizar la configuración de Wi-Fi, seleccione "Wi-Fi". Si ha realizado la conexión con una cable LAN, seleccione �...
Page 113 - Ajustes de hora
16 > Antes de empezar > Nombres de las piezas > Instalación > Initial Setup > Reproducción Información complementaria | Configuración avanzada | Otros E S Ajustes de hora Ajustando la hora puede utilizar la alarma para iniciar la reproducción ( Ä P33). 1. Pulse TIMER. 2. Pulse ENTER. ...
Page 114 - Reproducción de CDs; Reproducción de CDs de música
17 > Antes de empezar > Nombres de las piezas > Instalación > Initial Setup > Reproducción Información complementaria | Configuración avanzada | Otros E S Reproducción de CDs Reproducción a 1 2 b c Esta unidad también puede reproducir CD-R grabados con archivos en formato MP3 o WMA, a...
Page 115 - Reproducción de discos MP3/WMA
18 > Antes de empezar > Nombres de las piezas > Instalación > Initial Setup > Reproducción Información complementaria | Configuración avanzada | Otros E S Reproducción de discos MP3/WMA 1. Encienda la unidad. 2. Pulse CD para cambiar la entrada a CD. 3. Pulse < en la unidad princip...
Page 116 - Dispositivo de almacenamiento USB/HDD; Operaciones básicas
19 > Antes de empezar > Nombres de las piezas > Instalación > Initial Setup > Reproducción Información complementaria | Configuración avanzada | Otros E S Dispositivo de almacenamiento USB/HDD 2 a b e d c 1 Operaciones básicas Puede reproducir archivos de música conectando un disposit...
Page 117 - Formatos de audio compatibles
20 > Antes de empezar > Nombres de las piezas > Instalación > Initial Setup > Reproducción Información complementaria | Configuración avanzada | Otros E S 0 La visualización del nombre del álbum, el nombre del artista y la portada es compatible con archivos de música en formato MP3/WM...
Page 118 - Radio por Internet
21 > Antes de empezar > Nombres de las piezas > Instalación > Initial Setup > Reproducción Información complementaria | Configuración avanzada | Otros E S Radio por Internet Operaciones básicas Cuando esta unidad está conectada a una red, puede escuchar TuneIn u otros servicios de rad...
Page 120 - Escuchar la radio FM; Sintonización automática; Sintonización manual
23 > Antes de empezar > Nombres de las piezas > Instalación > Initial Setup > Reproducción Información complementaria | Configuración avanzada | Otros E S Escuchar la radio FM 1 d e f b e a c d h f g Sintonización automática 1. Encienda la unidad. 2. Pulse repetidamente TUNER para cam...
Page 121 - Registrar una emisora; Uso de RDS
24 > Antes de empezar > Nombres de las piezas > Instalación > Initial Setup > Reproducción Información complementaria | Configuración avanzada | Otros E S 3. Seleccione la emisora que desea escuchar mientras pulsa TUNE i / j (b) en el mando a distancia. 0 La frecuencia cambia en 1 pas...
Page 123 - Escuchar la radio digital DAB; Sintonización
26 > Antes de empezar > Nombres de las piezas > Instalación > Initial Setup > Reproducción Información complementaria | Configuración avanzada | Otros E S Escuchar la radio digital DAB (X-HM76D, X-HM86D, XC-HM86D) Sintonización 1. Encienda la unidad. 2. Pulse repetidamente TUNER para ...
Page 124 - Emparejado
27 > Antes de empezar > Nombres de las piezas > Instalación > Initial Setup > Reproducción Información complementaria | Configuración avanzada | Otros E S BLUETOOTH ® 1 2 Pioneer HMXX xxxxxx 1 2 Pioneer HMXX xxxxxx Reproducción Emparejado Emparejado 1. Encienda la unidad. 2. Cuando se...
Page 126 - Funcionamiento básico
29 > Antes de empezar > Nombres de las piezas > Instalación > Initial Setup > Reproducción Información complementaria | Configuración avanzada | Otros E S AirPlay ® 1 Wi-Fi 3 Pioneer HMXX iPhone 2 4 Funcionamiento básico Puede disfrutar sin cables de los archivos de música almacenados...
Page 127 - Reproducir audio desde un dispositivo externo; Conexiones
30 > Antes de empezar > Nombres de las piezas > Instalación > Initial Setup > Reproducción Información complementaria | Configuración avanzada | Otros E S Reproducir audio desde un dispositivo externo Conexiones Puede reproducir el audio de dispositivos externos como televisores y vid...
Page 128 - Configuración de Windows Media
31 > Antes de empezar > Nombres de las piezas > Instalación > Initial Setup > Reproducción Información complementaria | Configuración avanzada | Otros E S Music Server Es posible transmitir archivos de música almacenados en PC o dispositivos NAS conectados a la misma red que esta unid...
Page 130 - Usar la alarma para iniciar la reproducción; Configuración
33 > Antes de empezar > Nombres de las piezas > Instalación > Initial Setup > Reproducción Información complementaria | Configuración avanzada | Otros E S Usar la alarma para iniciar la reproducción Configuración A la hora establecida, la unidad se enciende e inicia la reproducción de...
Page 131 - Introducción de texto; Ajuste de la calidad de sonido
34 > Antes de empezar > Nombres de las piezas > Instalación > Initial Setup > Reproducción Información complementaria | Configuración avanzada | Otros E S Introducción de texto, ajuste de la calidad del sonido, etc. Introducción de texto Para la introducción de texto, contraseñas, etc...
Page 137 - La función de actualización de esta unidad; Actualización del firmware a través de la red
40 > Antes de empezar > Nombres de las piezas > Instalación > Initial Setup > Reproducción Información complementaria | Configuración avanzada | Otros E S Actualización de Firmware Actualización de Firmware La función de actualización de esta unidad La unidad dispone de una función qu...
Page 138 - Actualización mediante USB
41 > Antes de empezar > Nombres de las piezas > Instalación > Initial Setup > Reproducción Información complementaria | Configuración avanzada | Otros E S 4. Pulse Í STANDBY/ON en la unidad principal para poner la unidad en modo de espera. El proceso se ha completado y su firmware se ...
Page 139 - Resolución de problemas; Antes de iniciar el procedimiento; Los dispositivos externos no emiten audio
42 > Antes de empezar > Nombres de las piezas > Instalación > Initial Setup > Reproducción Información complementaria | Configuración avanzada | Otros E S Resolución de problemas Otros Antes de iniciar el procedimiento Cuando el funcionamiento es inestable, se pueden resolver los prob...
Page 140 - No se pueden reproducir discos
43 > Antes de empezar > Nombres de las piezas > Instalación > Initial Setup > Reproducción Información complementaria | Configuración avanzada | Otros E S 0 Algunos puntos de acceso le permiten configurar múltiples SSID para una unidad. Si utiliza el botón de ajuste automático en un r...
Page 141 - BLUETOOTH función
44 > Antes de empezar > Nombres de las piezas > Instalación > Initial Setup > Reproducción Información complementaria | Configuración avanzada | Otros E S servidor. Las portadas de los álbumes de Music Server a veces se muestran pero otras no 0 Music Server depende de las especificaci...
Page 142 - Especificaciones generales
45 > Antes de empezar > Nombres de las piezas > Instalación > Initial Setup > Reproducción Información complementaria | Configuración avanzada | Otros E S Especificaciones generales Sección de salida de audio analógico Potencia de salida RMS 0 X-HM76D, X-HM76 : 50 W + 50 W 0 X-HM86D...
Page 144 - Información sobre licencias y marcas comerciales
47 > Antes de empezar > Nombres de las piezas > Instalación > Initial Setup > Reproducción Información complementaria | Configuración avanzada | Otros E S Información sobre licencias y marcas comerciales The Wi-Fi CERTIFIED Logo is a certification mark of Wi-Fi Alliance ® . AirPlay, i...
Page 146 - > Nome dei componenti; Manuale di
I T Prima di iniziare Contenuto della confezione .......................................................... 2 Nome dei componenti Pannello frontale ........................................................................... 4 Pannello posteriore (X-HM76D, X-HM86D, XC-HM86D) ............. 5 Pannello ...
Page 147 - Contenuto della confezione
2 > Prima di iniziare > Nome dei componenti > Installazione > Initial Setup > Riproduzione Informazioni aggiuntive | Impostazioni avanzate | Altri I T Contenuto della confezione Prima di iniziare X-HM76D : 12356 X-HM76 : 12456 X-HM86D : 123567 XC-HM86D : 123 Unità principale (1) Telec...
Page 149 - Pannello frontale
4 > Prima di iniziare > Nome dei componenti > Installazione > Initial Setup > Riproduzione Informazioni aggiuntive | Impostazioni avanzate | Altri I T Pannello frontale Nome dei componenti 1. Tasto Í STANDBY/ON: Accende l’unità o la mette in standby. 2. Pulsante INPUT: Consente di att...
Page 150 - Pannello posteriore
> Prima di iniziare > Nome dei componenti > Installazione > Initial Setup > Riproduzione Informazioni aggiuntive | Impostazioni avanzate | Altri 5 I T Pannello posteriore (X-HM76D, X-HM86D, XC-HM86D) 1. Cavo di alimentazione 2. Antenna wireless: Utilizzata per il collegamento Wi-Fi o ...
Page 152 - Telecomando
> Prima di iniziare > Nome dei componenti > Installazione > Initial Setup > Riproduzione Informazioni aggiuntive | Impostazioni avanzate | Altri 7 I T Telecomando 1. Tasto Í STANDBY/ON: Accende l’unità o la mette in standby. 2. Pulsante TIMER: Da usare per l'impostazione dell'ora e de...
Page 154 - Diffusori
> Prima di iniziare > Nome dei componenti > Installazione > Initial Setup > Riproduzione Informazioni aggiuntive | Impostazioni avanzate | Altri 9 I T Diffusori (X-HM76D, X-HM76) Per i diffusori in dotazione, non vi è alcuna distinzione tra sinistra e destra. La qualità audio sarà la ...
Page 156 - Collegamento dei diffusori
11 > Prima di iniziare > Nome dei componenti > Installazione > Initial Setup > Riproduzione Informazioni aggiuntive | Impostazioni avanzate | Altri I T Collegamento dei diffusori Installazione 1 RED RED 3 2 4 RED RED b b a a a a Solo X-HM86D Per collegare i diffusori di X-HM76D, X-HM7...
Page 157 - Collegamento delle antenne e del cavo di alimentazione, ecc.; Collegamento dell'antenna
12 > Prima di iniziare > Nome dei componenti > Installazione > Initial Setup > Riproduzione Informazioni aggiuntive | Impostazioni avanzate | Altri I T Collegamento delle antenne e del cavo di alimentazione, ecc. c a b c 1 1 2 X-HM76D, X-HM86D, XC-HM86D X-HM76 Collegamento dell'antenn...
Page 158 - Accensione e Initial Setup; Impostazioni per il collegamento Wi-Fi
13 > Prima di iniziare > Nome dei componenti > Installazione > Initial Setup > Riproduzione Informazioni aggiuntive | Impostazioni avanzate | Altri I T Accensione e Initial Setup Initial Setup 1 3 2 BLUE BLINKING Avvio: Quando si preme Í STANDBY/ON, l'indicatore di accensione sull'uni...
Page 161 - Impostazione dell'ora
16 > Prima di iniziare > Nome dei componenti > Installazione > Initial Setup > Riproduzione Informazioni aggiuntive | Impostazioni avanzate | Altri I T Impostazione dell'ora Impostando l'ora, è possibile usare la sveglia per avviare la riproduzione ( Ä P33). 1. Premere TIMER. 2. Preme...
Page 162 - Riproduzione di CD; Riproduzione di CD musicali
17 > Prima di iniziare > Nome dei componenti > Installazione > Initial Setup > Riproduzione Informazioni aggiuntive | Impostazioni avanzate | Altri I T Riproduzione di CD Riproduzione a 1 2 b c Questa unità può anche riprodurre CD-R contenenti file in formato MP3 o WMA, oltre ai CD mu...
Page 163 - Riproduzione di dischi MP3/WMA
18 > Prima di iniziare > Nome dei componenti > Installazione > Initial Setup > Riproduzione Informazioni aggiuntive | Impostazioni avanzate | Altri I T Riproduzione di dischi MP3/WMA 1. Accendere l'unità. 2. Premere CD per modificare l'ingresso in CD. 3. Premere < sull’unità princi...
Page 164 - Dispositivo di archiviazione USB/HDD; Operazioni base
19 > Prima di iniziare > Nome dei componenti > Installazione > Initial Setup > Riproduzione Informazioni aggiuntive | Impostazioni avanzate | Altri I T Dispositivo di archiviazione USB/HDD 2 a b e d c 1 Operazioni base I file musicali possono essere riprodotti anche collegando un disp...
Page 165 - Riproduzione ripetuta/Ripetizione casuale
20 > Prima di iniziare > Nome dei componenti > Installazione > Initial Setup > Riproduzione Informazioni aggiuntive | Impostazioni avanzate | Altri I T 6. Usare i tasti di riproduzione (a) per arrestare la riproduzione o scegliere i brani da riprodurre. 0 La visualizzazione del nome d...
Page 166 - Internet radio
21 > Prima di iniziare > Nome dei componenti > Installazione > Initial Setup > Riproduzione Informazioni aggiuntive | Impostazioni avanzate | Altri I T Internet radio Operazioni base Quando questa unità è connessa a una rete, è possibile ascoltare TuneIn o altri servizi di Internet ra...
Page 168 - Ascolto della radio FM; Sintonizzazione automatica
23 > Prima di iniziare > Nome dei componenti > Installazione > Initial Setup > Riproduzione Informazioni aggiuntive | Impostazioni avanzate | Altri I T Ascolto della radio FM 1 d e f b e a c d h f g Sintonizzazione automatica 1. Accendere l'unità. 2. Premere ripetutamente TUNER per mo...
Page 169 - Registrazione di una stazione; Utilizzo di RDS
24 > Prima di iniziare > Nome dei componenti > Installazione > Initial Setup > Riproduzione Informazioni aggiuntive | Impostazioni avanzate | Altri I T 3. Selezionare la stazione che si desidera ascoltare e tenere premuto TUNE i / j (b) sul telecomando. 0 La frequenza cambia di 1 incr...
Page 171 - Ascolto della radio digitale DAB; Sintonizzazione
26 > Prima di iniziare > Nome dei componenti > Installazione > Initial Setup > Riproduzione Informazioni aggiuntive | Impostazioni avanzate | Altri I T Ascolto della radio digitale DAB (X-HM76D, X-HM86D, XC-HM86D) Sintonizzazione 1. Accendere l'unità. 2. Premere ripetutamente TUNER pe...
Page 172 - In riproduzione; Abbinamento
27 > Prima di iniziare > Nome dei componenti > Installazione > Initial Setup > Riproduzione Informazioni aggiuntive | Impostazioni avanzate | Altri I T BLUETOOTH ® 1 2 Pioneer HMXX xxxxxx 1 2 Pioneer HMXX xxxxxx In riproduzione Abbinamento Abbinamento 1. Accendere l'unità. 2. Quando s...
Page 174 - Operazione base
29 > Prima di iniziare > Nome dei componenti > Installazione > Initial Setup > Riproduzione Informazioni aggiuntive | Impostazioni avanzate | Altri I T AirPlay ® 1 Wi-Fi 3 Pioneer HMXX iPhone 2 4 Operazione base È possibile ascoltare in modalità wireless i file musicali su un iPhone ®...
Page 175 - Riproduzione dell'audio proveniente da un dispositivo esterno; Connessioni
30 > Prima di iniziare > Nome dei componenti > Installazione > Initial Setup > Riproduzione Informazioni aggiuntive | Impostazioni avanzate | Altri I T Riproduzione dell'audio proveniente da un dispositivo esterno Connessioni È possibile riprodurre l'audio proveniente da un dispositiv...
Page 176 - Configurazione di Windows Media
31 > Prima di iniziare > Nome dei componenti > Installazione > Initial Setup > Riproduzione Informazioni aggiuntive | Impostazioni avanzate | Altri I T Music Server È possibile eseguire lo streaming di file musicali memorizzati su PC o dispositivi NAS collegati alla stessa rete di que...
Page 177 - Formati audio supportati
32 > Prima di iniziare > Nome dei componenti > Installazione > Initial Setup > Riproduzione Informazioni aggiuntive | Impostazioni avanzate | Altri I T Controllo della riproduzione in remoto da PC È possibile utilizzare questa unità per riprodurre i file musicali salvati sul proprio P...
Page 178 - Utilizzo della sveglia per l'avvio della riproduzione; Impostazioni
33 > Prima di iniziare > Nome dei componenti > Installazione > Initial Setup > Riproduzione Informazioni aggiuntive | Impostazioni avanzate | Altri I T Utilizzo della sveglia per l'avvio della riproduzione Impostazioni All'ora impostata, l'unità si accende e avvia la riproduzione dell...
Page 179 - Immissione di testo; Regolazione della qualità audio
34 > Prima di iniziare > Nome dei componenti > Installazione > Initial Setup > Riproduzione Informazioni aggiuntive | Impostazioni avanzate | Altri I T Immissione di testo, regolazione della qualità audio, ecc. Immissione di testo Per immettere del testo, ad esempio per le password ec...
Page 181 - Impostazioni Avanzate
36 > Prima di iniziare > Nome dei componenti > Installazione > Initial Setup > Riproduzione Informazioni aggiuntive | Impostazioni avanzate | Altri I T Impostazioni Avanzate Impostazioni avanzate Questa unità consente di configurare le impostazioni avanzate in modo da fornire un'esper...
Page 185 - Funzione di aggiornamento su questa unità; Aggiornamento del firmware tramite rete
40 > Prima di iniziare > Nome dei componenti > Installazione > Initial Setup > Riproduzione Informazioni aggiuntive | Impostazioni avanzate | Altri I T Aggiornamento del firmware Aggiornamento del firmware Funzione di aggiornamento su questa unità Questa unità dispone di una funzione ...
Page 186 - Aggiornamento tramite USB
41 > Prima di iniziare > Nome dei componenti > Installazione > Initial Setup > Riproduzione Informazioni aggiuntive | Impostazioni avanzate | Altri I T 4. Premere Í STANDBY/ON sull'unità principale per mettere l'unità in standby. Il processo è completato e il firmware è aggiornato all...
Page 187 - Risoluzione dei problemi; Prima di iniziare la procedura; Nessuna emissione del suono proveniente
42 > Prima di iniziare > Nome dei componenti > Installazione > Initial Setup > Riproduzione Informazioni aggiuntive | Impostazioni avanzate | Altri I T Risoluzione dei problemi Altri Prima di iniziare la procedura In caso di funzionamento instabile, i problemi potrebbero essere risolt...
Page 190 - Caratteristiche generali; Impedenza dei diffusori supportata
45 > Prima di iniziare > Nome dei componenti > Installazione > Initial Setup > Riproduzione Informazioni aggiuntive | Impostazioni avanzate | Altri I T Caratteristiche generali Sezione uscita audio analogica Potenza uscita RMS 0 X-HM76D, X-HM76 : 50 W + 50 W 0 X-HM86D, XC-HM86D : 65...
Page 192 - Informazioni di licenza e dei marchi
47 > Prima di iniziare > Nome dei componenti > Installazione > Initial Setup > Riproduzione Informazioni aggiuntive | Impostazioni avanzate | Altri I T Informazioni di licenza e dei marchi The Wi-Fi CERTIFIED Logo is a certification mark of Wi-Fi Alliance ® . AirPlay, iPad, iPhone, an...
Page 194 - Bedienungsanleitung
D E Vor dem Start Lieferumfang ................................................................................. 2 Teilenamen Bedienfeld ..................................................................................... 4 Rückseite (X-HM76D, X-HM86D, XC-HM86D) ............................. 5 Rück...
Page 195 - Lieferumfang
2 > Vor dem Start > Teilenamen > Installation > Initial Setup > Wiedergabe Ergänzende Informationen | Erweiterte Einrichtung | Andere D E Lieferumfang Vor dem Start X-HM76D : 12356 X-HM76 : 12456 X-HM86D : 123567 XC-HM86D : 123 Hauptgerät (1) Fernbedienung (RC-945S) (1), Batterien (AA...
Page 197 - Bedienfeld
4 > Vor dem Start > Teilenamen > Installation > Initial Setup > Wiedergabe Ergänzende Informationen | Erweiterte Einrichtung | Andere D E Bedienfeld Teilenamen 1. Í STANDBY/ON-Taste: Schalten Sie das Gerät ein bzw. in den Standby-Modus. 2. INPUT-Taste: Wechselt den Eingang, der wieder...
Page 198 - Rückseite
> Vor dem Start > Teilenamen > Installation > Initial Setup > Wiedergabe Ergänzende Informationen | Erweiterte Einrichtung | Andere 5 D E Rückseite (X-HM76D, X-HM86D, XC-HM86D) 1. Netzkabel 2. Kabellose Antenne: Wird für WLAN-Verbindungen oder BLUETOOTH fähige Geräte verwendet. Stelle...
Page 200 - Fernbedienung
> Vor dem Start > Teilenamen > Installation > Initial Setup > Wiedergabe Ergänzende Informationen | Erweiterte Einrichtung | Andere 7 D E Fernbedienung 1. Í STANDBY/ON-Taste: Schalten Sie das Gerät ein bzw. in den Standby-Modus. 2. TIMER-Taste: Stellen Sie die Uhrzeit sowie Alarmzeite...
Page 202 - Lautsprechersystem
> Vor dem Start > Teilenamen > Installation > Initial Setup > Wiedergabe Ergänzende Informationen | Erweiterte Einrichtung | Andere 9 D E Lautsprechersystem (X-HM76D, X-HM76) Beim mitgelieferten Lautsprechersystem wird nicht zwischen links und rechts unterschieden. Egal, auf welcher S...
Page 204 - Anschließen der Lautsprecher
11 > Vor dem Start > Teilenamen > Installation > Initial Setup > Wiedergabe Ergänzende Informationen | Erweiterte Einrichtung | Andere D E Anschließen der Lautsprecher Installation 1 RED RED 3 2 4 RED RED b b a a a a Nur X-HM86D Beim Anschließen des Lautsprechersystems bei X-HM76D, X-...
Page 205 - Anschließen der Antennen, des Netzkabels usw.; Antennenanschluss
12 > Vor dem Start > Teilenamen > Installation > Initial Setup > Wiedergabe Ergänzende Informationen | Erweiterte Einrichtung | Andere D E Anschließen der Antennen, des Netzkabels usw. c a b c 1 1 2 X-HM76D, X-HM86D, XC-HM86D X-HM76 Antennenanschluss Während das Radio eingeschaltet is...
Page 206 - Einschalten und erste Einrichtung
13 > Vor dem Start > Teilenamen > Installation > Initial Setup > Wiedergabe Ergänzende Informationen | Erweiterte Einrichtung | Andere D E Einschalten und erste Einrichtung Initial Setup 1 3 2 BLUE BLINKING Gerätestart: Wenn Sie Í STANDBY/ON drücken, blinkt die Netzanzeige am Hauptger...
Page 207 - Verwenden eines iOS-Geräts
14 > Vor dem Start > Teilenamen > Installation > Initial Setup > Wiedergabe Ergänzende Informationen | Erweiterte Einrichtung | Andere D E Wählen Sie "Wi-Fi" aus, um Wi-Fi-Einstellungen vorzunehmen. Wenn Sie zum Anschließen ein LAN-Kabel verwenden, wählen Sie "Wired(Exit)&...
Page 209 - Zeiteinstellungen
16 > Vor dem Start > Teilenamen > Installation > Initial Setup > Wiedergabe Ergänzende Informationen | Erweiterte Einrichtung | Andere D E Zeiteinstellungen Durch Einstellen der Zeit können Sie die Wiedergabe mit dem Alarm starten ( Ä P33). 1. Drücken Sie TIMER. 2. Drücken Sie ENTER. ...
Page 210 - Wiedergabe von CDs; Wiedergabe von Musik-CDs
17 > Vor dem Start > Teilenamen > Installation > Initial Setup > Wiedergabe Ergänzende Informationen | Erweiterte Einrichtung | Andere D E Wiedergabe von CDs Wiedergabe a 1 2 b c Von diesem Gerät können im Handel erhältliche Musik-CDs sowie CD-R mit Dateien im MP3- oder WMA-Format wie...
Page 211 - Wiederholung/Zufallswiedergabe
18 > Vor dem Start > Teilenamen > Installation > Initial Setup > Wiedergabe Ergänzende Informationen | Erweiterte Einrichtung | Andere D E Wiedergabe von MP3/WMA-Discs 1. Schalten Sie das Gerät ein. 2. Drücken Sie CD, um den Eingang zu CD zu ändern. 3. Drücken Sie < am Hauptgerät, ...
Page 212 - Grundlegende Funktionen
19 > Vor dem Start > Teilenamen > Installation > Initial Setup > Wiedergabe Ergänzende Informationen | Erweiterte Einrichtung | Andere D E USB-Speichergerät/HDD 2 a b e d c 1 Grundlegende Funktionen Sie können Musikdateien wiedergeben, indem Sie ein USB- Speichergerät oder HDD (Hard D...
Page 214 - Internetradio
21 > Vor dem Start > Teilenamen > Installation > Initial Setup > Wiedergabe Ergänzende Informationen | Erweiterte Einrichtung | Andere D E Internetradio Grundlegende Funktionen Wenn dieses Gerät mit einem Netzwerk verbunden ist, können Sie TuneIn und weitere voreingestellte Internetra...
Page 215 - Grundlegender Betrieb
22 > Vor dem Start > Teilenamen > Installation > Initial Setup > Wiedergabe Ergänzende Informationen | Erweiterte Einrichtung | Andere D E Spotify Wi-Fi Pioneer HMXX xxxxxx b a c d 1 4 3 2 Grundlegender Betrieb Die Wiedergabe von Spotify Connect ist möglich, wenn Sie dieses Gerät mit ...
Page 216 - Wiedergabe von FM-Radio; Automatische Sendersuche
23 > Vor dem Start > Teilenamen > Installation > Initial Setup > Wiedergabe Ergänzende Informationen | Erweiterte Einrichtung | Andere D E Wiedergabe von FM-Radio 1 d e f b e a c d h f g Automatische Sendersuche 1. Schalten Sie das Gerät ein. 2. Drücken Sie mehrfach TUNER, um den Eing...
Page 217 - Registrieren von Sendern; Verwenden von RDS
24 > Vor dem Start > Teilenamen > Installation > Initial Setup > Wiedergabe Ergänzende Informationen | Erweiterte Einrichtung | Andere D E 3. Wählen Sie den Sender aus, der wiedergegeben werden soll, und drücken Sie dabei TUNE i / j (b) auf der Fernbedienung. 0 Die Frequenz ändert sic...
Page 219 - Wiedergabe von DAB-Digitalradio; Sendersuche
26 > Vor dem Start > Teilenamen > Installation > Initial Setup > Wiedergabe Ergänzende Informationen | Erweiterte Einrichtung | Andere D E Wiedergabe von DAB-Digitalradio (X-HM76D, X-HM86D, XC-HM86D) Sendersuche 1. Schalten Sie das Gerät ein. 2. Drücken Sie mehrfach TUNER, um den Eing...
Page 223 - Audiowiedergabe von einem externen Gerät; Anschlüsse
30 > Vor dem Start > Teilenamen > Installation > Initial Setup > Wiedergabe Ergänzende Informationen | Erweiterte Einrichtung | Andere D E Audiowiedergabe von einem externen Gerät Anschlüsse Sie können Audiosignale von externen Geräten wie Fernsehern oder Spielkonsolen über dieses Ger...
Page 224 - Konfigurieren von Windows Media
31 > Vor dem Start > Teilenamen > Installation > Initial Setup > Wiedergabe Ergänzende Informationen | Erweiterte Einrichtung | Andere D E Music Server Das Streaming von Musikdateien, die auf PCs oder NAS- Geräten gespeichert sind, welche mit demselben Netzwerk wie dieses Gerät verbun...
Page 225 - Ferngesteuerte Wiedergabe von einem PC
32 > Vor dem Start > Teilenamen > Installation > Initial Setup > Wiedergabe Ergänzende Informationen | Erweiterte Einrichtung | Andere D E Ferngesteuerte Wiedergabe von einem PC Sie können dieses Gerät verwenden, um Musikdateien abzuspielen, die auf Ihrem PC gespeichert sind, indem Si...
Page 226 - Starten der Wiedergabe mit dem Alarm; Einstellungen
33 > Vor dem Start > Teilenamen > Installation > Initial Setup > Wiedergabe Ergänzende Informationen | Erweiterte Einrichtung | Andere D E Starten der Wiedergabe mit dem Alarm Einstellungen Zur eingestellten Zeit wird das Gerät eingeschaltet, und die Wiedergabe der gewünschten Quelle ...
Page 227 - Eingeben von Text, Anpassen der Klangqualität usw.; Eingeben von Text
34 > Vor dem Start > Teilenamen > Installation > Initial Setup > Wiedergabe Ergänzende Informationen | Erweiterte Einrichtung | Andere D E Eingeben von Text, Anpassen der Klangqualität usw. Eingeben von Text Texteingabe bei Passwörtern usw. erfolgt über die Tasten der Fernbedienung. S...
Page 228 - Ergänzende Informationen zu den Funktionen des Players
35 > Vor dem Start > Teilenamen > Installation > Initial Setup > Wiedergabe Ergänzende Informationen | Erweiterte Einrichtung | Andere D E Ergänzende Informationen zu den Funktionen des Players Ergänzende Informationen Aufgrund von Updates an der Firmware (System-Software) nach dem Ka...
Page 229 - Erweiterte Einstellungen
36 > Vor dem Start > Teilenamen > Installation > Initial Setup > Wiedergabe Ergänzende Informationen | Erweiterte Einrichtung | Andere D E Erweiterte Einstellungen Erweiterte Einrichtung Mit den erweiterten Einstellungen dieses Geräts können Sie Leistung und Bedienfreundlichkeit indiv...
Page 233 - Update-Funktion dieses Geräts
40 > Vor dem Start > Teilenamen > Installation > Initial Setup > Wiedergabe Ergänzende Informationen | Erweiterte Einrichtung | Andere D E Firmware-Update Firmware-Update Update-Funktion dieses Geräts Bei diesem Gerät kann die Firmware (Systemsoftware) über ein Netzwerk oder den USB-P...
Page 234 - Update über USB
41 > Vor dem Start > Teilenamen > Installation > Initial Setup > Wiedergabe Ergänzende Informationen | Erweiterte Einrichtung | Andere D E 4. Drücken Sie Í STANDBY/ON am Hauptgerät, um das Gerät in den Standby-Modus zu schalten. Der Vorgang ist abgeschlossen und Ihre Firmware ist auf ...
Page 235 - Fehlerbehebung; Bevor Sie den Vorgang starten; Von externen Geräten werden keine
42 > Vor dem Start > Teilenamen > Installation > Initial Setup > Wiedergabe Ergänzende Informationen | Erweiterte Einrichtung | Andere D E Fehlerbehebung Andere Bevor Sie den Vorgang starten Bei instabilem Betrieb können Probleme möglicherweise durch einfaches Aus-/Einschalten, Schalt...
Page 237 - BLUETOOTH Funktion
44 > Vor dem Start > Teilenamen > Installation > Initial Setup > Wiedergabe Ergänzende Informationen | Erweiterte Einrichtung | Andere D E Die Wiedergabe stoppt beim Hören der Musikdateien auf dem Netzwerkserver 0 Wenn der PC als Netzwerkserver verwendet wird, schließen Sie alle Anwen...
Page 238 - Allgemeine technische Daten; Analoger Audioausgangsbereich
45 > Vor dem Start > Teilenamen > Installation > Initial Setup > Wiedergabe Ergänzende Informationen | Erweiterte Einrichtung | Andere D E Allgemeine technische Daten Analoger Audioausgangsbereich RMS-Ausgangsleistung 0 X-HM76D, X-HM76 : 50 W + 50 W 0 X-HM86D, XC-HM86D : 65 W + 65 W...
Page 240 - Lizenz- und Warenzeicheninformationen
47 > Vor dem Start > Teilenamen > Installation > Initial Setup > Wiedergabe Ergänzende Informationen | Erweiterte Einrichtung | Andere D E Lizenz- und Warenzeicheninformationen The Wi-Fi CERTIFIED Logo is a certification mark of Wi-Fi Alliance ® . AirPlay, iPad, iPhone, and iPod touch...
Page 242 - > Namen van de onderdelen; Gebruikers handleiding
N L Vóór het Starten Wat zit er in de doos ..................................................................... 2 Namen van de onderdelen Voorpaneel .................................................................................... 4 Achterpaneel (X-HM76D, X-HM86D, XC-HM86D) ........................
Page 243 - Wat zit er in de doos
2 > Vóór het Star ten > Namen van de onderdelen > Installeren > Initial Setup > Afspelen Extra informatie | Geavanceerde Setup | Overige N L Wat zit er in de doos Vóór het Starten X-HM76D : 12356 X-HM76 : 12456 X-HM86D : 123567 XC-HM86D : 123 Hoofdtoestel (1) Afstandsbediening (RC-945...
Page 245 - Voorpaneel
4 > Vóór het Star ten > Namen van de onderdelen > Installeren > Initial Setup > Afspelen Extra informatie | Geavanceerde Setup | Overige N L Voorpaneel Namen van de onderdelen 1. Í STANDBY/ON-knop: Schakelt het toestel in of schakelt het naar de stand-by-modus. 2. INPUT-knop: Schakelt...
Page 246 - Achterpaneel
> Vóór het Star ten > Namen van de onderdelen > Installeren > Initial Setup > Afspelen Extra informatie | Geavanceerde Setup | Overige 5 N L Achterpaneel (X-HM76D, X-HM86D, XC-HM86D) 1. Netsnoer 2. Draadloze antenne: Gebruikt voor de Wi-Fi-verbinding of wanneer een BLUETOOTH geactivee...
Page 248 - Afstandsbediening
> Vóór het Star ten > Namen van de onderdelen > Installeren > Initial Setup > Afspelen Extra informatie | Geavanceerde Setup | Overige 7 N L Afstandsbediening 1. Í STANDBY/ON-knop: Schakelt het toestel in of schakelt het naar de stand-by-modus. 2. TIMER-knop: Gebruikt om de tijd en he...
Page 250 - Luidsprekers Systeem
> Vóór het Star ten > Namen van de onderdelen > Installeren > Initial Setup > Afspelen Extra informatie | Geavanceerde Setup | Overige 9 N L Luidsprekers Systeem (X-HM76D, X-HM76) Er is geen verschil tussen links en recht met het luidsprekersysteem. Er zal geen verschil zijn in geluid...
Page 252 - De luidsprekers verbinden
11 > Vóór het Star ten > Namen van de onderdelen > Installeren > Initial Setup > Afspelen Extra informatie | Geavanceerde Setup | Overige N L De luidsprekers verbinden Installeren 1 RED RED 3 2 4 RED RED b b a a a a Alleen X-HM86D Wanneer u het luidsprekersysteem voor X-HM76D, X-HM76 ...
Page 253 - De antennes en het netsnoer, enz. verbinden; De antenne aansluiten
12 > Vóór het Star ten > Namen van de onderdelen > Installeren > Initial Setup > Afspelen Extra informatie | Geavanceerde Setup | Overige N L De antennes en het netsnoer, enz. verbinden c a b c 1 1 2 X-HM76D, X-HM86D, XC-HM86D X-HM76 De antenne aansluiten Beweeg de antenne in het rond...
Page 254 - Inschakeling & Begininstelling
13 > Vóór het Star ten > Namen van de onderdelen > Installeren > Initial Setup > Afspelen Extra informatie | Geavanceerde Setup | Overige N L Inschakeling & Begininstelling Initial Setup 1 3 2 BLUE BLINKING Opstarten: Wanneer u op Í STANDBY/ON drukt, knippert de power-controlelamp...
Page 255 - Scan Netwerken
14 > Vóór het Star ten > Namen van de onderdelen > Installeren > Initial Setup > Afspelen Extra informatie | Geavanceerde Setup | Overige N L Om Wi-Fi-instellingen te maken, selecteer "Wi-Fi". Als er een ethernet-kabel verbonden is, selecteer "Wired(Exit)" en bevestig....
Page 257 - Tijdinstellingen
16 > Vóór het Star ten > Namen van de onderdelen > Installeren > Initial Setup > Afspelen Extra informatie | Geavanceerde Setup | Overige N L Tijdinstellingen Door de tijd in te stellen, kunt u het alarm gebruiken om afspelen ( Ä P33) te beginnen. 1. Druk op TIMER. 2. Druk op ENTER. 3...
Page 260 - Basisbedieningen
19 > Vóór het Star ten > Namen van de onderdelen > Installeren > Initial Setup > Afspelen Extra informatie | Geavanceerde Setup | Overige N L USB-opslagapparaat/HDD 2 a b e d c 1 Basisbedieningen U kunt muziekbestanden afspelen door een USB- opslagapparaat te of HDD (hard disk drive) ...
Page 261 - Ondersteunde audioformaten
20 > Vóór het Star ten > Namen van de onderdelen > Installeren > Initial Setup > Afspelen Extra informatie | Geavanceerde Setup | Overige N L 0 Het display van albumnaam, artiestnaam en album art wordt ondersteund met MP3/WMA/Apple Lossless/ FLAC/AAC/DSD (alleen DSF) formaat muziekbes...
Page 264 - Naar de FM-radio luisteren; Automatisch tunen; Handmatig tunen
23 > Vóór het Star ten > Namen van de onderdelen > Installeren > Initial Setup > Afspelen Extra informatie | Geavanceerde Setup | Overige N L Naar de FM-radio luisteren 1 d f b e g a c d i f h Automatisch tunen 1. Schakel het toestel in. 2. Druk op TUNER om invoer te veranderen naar T...
Page 265 - Een zender registreren; RDS gebruiken
24 > Vóór het Star ten > Namen van de onderdelen > Installeren > Initial Setup > Afspelen Extra informatie | Geavanceerde Setup | Overige N L 3. Selecteer de zender waarnaar u wilt luisteren terwijl u op TUNE i / j (b) op de afstandsbediening drukt. 0 De frequentie verandert met 1 sta...
Page 267 - Luisteren naar DAB Digitale Radio
26 > Vóór het Star ten > Namen van de onderdelen > Installeren > Initial Setup > Afspelen Extra informatie | Geavanceerde Setup | Overige N L Luisteren naar DAB Digitale Radio (X-HM76D, X-HM86D, XC-HM86D) Tuning 1. Schakel het toestel in. 2. Druk op TUNER om invoer te veranderen naar ...
Page 268 - Koppelen
27 > Vóór het Star ten > Namen van de onderdelen > Installeren > Initial Setup > Afspelen Extra informatie | Geavanceerde Setup | Overige N L BLUETOOTH ® 1 2 Pioneer HMXX xxxxxx 1 2 Pioneer HMXX xxxxxx Afspelen Koppelen Koppelen 1. Schakel het toestel in. 2. Als u op de afstandsbedien...
Page 270 - Basisbediening
29 > Vóór het Star ten > Namen van de onderdelen > Installeren > Initial Setup > Afspelen Extra informatie | Geavanceerde Setup | Overige N L AirPlay ® 1 Wi-Fi 3 Pioneer HMXX iPhone 2 4 Basisbediening U kunt draadloos van de muziekbestanden op een iPhone ® , iPod touch ® , of iPad ® g...
Page 271 - Afspelen van geluid vanaf een extern apparaat; Aansluitingen
30 > Vóór het Star ten > Namen van de onderdelen > Installeren > Initial Setup > Afspelen Extra informatie | Geavanceerde Setup | Overige N L Afspelen van geluid vanaf een extern apparaat Aansluitingen U kunt het geluid afspelen vanaf externe apparaten zoals TV's en spelconsoles d.m.v...
Page 272 - Configureren Windows Media
31 > Vóór het Star ten > Namen van de onderdelen > Installeren > Initial Setup > Afspelen Extra informatie | Geavanceerde Setup | Overige N L Music Server Het is mogelijk muziekbestanden te streamen die opgeslagen zijn op PC's of NAS-apparaten die met hetzelfde netwerk verbonden zijn ...
Page 273 - Afspelen op afstand bedienen vanaf een PC
32 > Vóór het Star ten > Namen van de onderdelen > Installeren > Initial Setup > Afspelen Extra informatie | Geavanceerde Setup | Overige N L Afspelen op afstand bedienen vanaf een PC U kunt deze unit gebruiken om muziekbestanden opgeslagen op uw PC af te spelen door de PC in uw thuis...
Page 274 - Gebruiken van het alarm om afspelen te starten; Instellingen
33 > Vóór het Star ten > Namen van de onderdelen > Installeren > Initial Setup > Afspelen Extra informatie | Geavanceerde Setup | Overige N L Gebruiken van het alarm om afspelen te starten Instellingen Op een ingestelde tijd, gaat het toestel aan en start het afspelen van de gewenste ...
Page 275 - Invoeren tekst
34 > Vóór het Star ten > Namen van de onderdelen > Installeren > Initial Setup > Afspelen Extra informatie | Geavanceerde Setup | Overige N L Invoeren tekst, afstellen geluidskwaliteit, enz. Invoeren tekst Tekstinvoer, voor wachtwoorden, enz., de volgende afstandsbedieningsknoppen geb...
Page 277 - Geavanceerde instellingen
36 > Vóór het Star ten > Namen van de onderdelen > Installeren > Initial Setup > Afspelen Extra informatie | Geavanceerde Setup | Overige N L Geavanceerde instellingen Geavanceerde Setup Het toestel stelt u in staat geavanceerde instellingen te configureren om u een nog betere ervarin...
Page 279 - Language
38 > Vóór het Star ten > Namen van de onderdelen > Installeren > Initial Setup > Afspelen Extra informatie | Geavanceerde Setup | Overige N L "Sharp" (Fabrieksinstelling): Geluid met meer structuur en stevigheid "Short": Geluid dat snel begint en vooruit lijkt te beweg...
Page 281 - De bijwerkfunctie op dit toestel
40 > Vóór het Star ten > Namen van de onderdelen > Installeren > Initial Setup > Afspelen Extra informatie | Geavanceerde Setup | Overige N L Firmware-update Firmware-update De bijwerkfunctie op dit toestel Dit toestel heeft een functie voor het updaten van de firmware (de systeemsoft...
Page 282 - Update via USB
41 > Vóór het Star ten > Namen van de onderdelen > Installeren > Initial Setup > Afspelen Extra informatie | Geavanceerde Setup | Overige N L Als een foutbericht wordt weergegeven: Wanneer zich een fout voordoet, wordt " * - ** Error!" op het display van het toestel getoond. (...
Page 283 - Problemen oplossen; Alvorens de procedure te starten; Er komt geen geluid uit de externe
42 > Vóór het Star ten > Namen van de onderdelen > Installeren > Initial Setup > Afspelen Extra informatie | Geavanceerde Setup | Overige N L Problemen oplossen Overige Alvorens de procedure te starten Wanneer bediening onstabiel is, kunnen problemen opgelost worden door simpelweg de ...
Page 284 - Kan geen discs afspelen
43 > Vóór het Star ten > Namen van de onderdelen > Installeren > Initial Setup > Afspelen Extra informatie | Geavanceerde Setup | Overige N L 0 Sommige toegangspunten stellen u in staat meerdere SSID's voor één toestel in te stellen. Als u de automatisch instelknop op zo'n router gebr...
Page 285 - BLUETOOTH functie
44 > Vóór het Star ten > Namen van de onderdelen > Installeren > Initial Setup > Afspelen Extra informatie | Geavanceerde Setup | Overige N L Album art in Music Server wordt soms wel soms niet weergegeven 0 Music Server hangt af van de specificaties van de serversoftware. 0 De formate...
Page 286 - Algemene specificaties
45 > Vóór het Star ten > Namen van de onderdelen > Installeren > Initial Setup > Afspelen Extra informatie | Geavanceerde Setup | Overige N L Algemene specificaties Analoge audio-uitgangssectie RMS-uitgangsvermogen 0 X-HM76D, X-HM76 : 50 W + 50 W 0 X-HM86D, XC-HM86D : 65 W + 65 W (4...
Page 288 - Licentie en handelsm
47 > Vóór het Star ten > Namen van de onderdelen > Installeren > Initial Setup > Afspelen Extra informatie | Geavanceerde Setup | Overige N L Licentie en handelsm The Wi-Fi CERTIFIED Logo is a certification mark of Wi-Fi Alliance ® . AirPlay, iPad, iPhone, and iPod touch are trademark...
Page 290 - СИСТЕМА; Руководство по эксплуатации
R U Перед началом Содержимое упаковки ................................................................ 2 Названия частей Передняя панель ........................................................................ 4 Задняя панель (X-HM76D, X-HM86D, XC-HM86D) ................... 5 Задняя панель (X-HM76) ...
Page 291 - Содержимое упаковки
2 > Перед началом > Названия частей > Установка > Начальная настройка > Воспроизведение Дополнительная информация | Расширенная настройка | Другие функции R U Содержимое упаковки Перед началом X-HM76D : 12356 X-HM76 : 12456 X-HM86D : 123567 XC-HM86D : 123 Основной аппарат (1) Пульт ДУ...
Page 293 - Передняя панель
4 > Перед началом > Названия частей > Установка > Начальная настройка > Воспроизведение Дополнительная информация | Расширенная настройка | Другие функции R U Передняя панель Названия частей 1. Кнопка Í STANDBY/ON: включение аппарата или его переключение в режим ожидания. 2. Кнопка IN...
Page 294 - Задняя панель
> Перед началом > Названия частей > Установка > Начальная настройка > Воспроизведение Дополнительная информация | Расширенная настройка | Другие функции 5 R U Задняя панель (X-HM76D, X-HM86D, XC-HM86D) 1. Шнур питания 2. Беспроводная антенна: используется для соединения Wi-Fi или при ...
Page 296 - Пульт дистанционного управления
> Перед началом > Названия частей > Установка > Начальная настройка > Воспроизведение Дополнительная информация | Расширенная настройка | Другие функции 7 R U Пульт дистанционного управления 1. Кнопка Í STANDBY/ON: включение аппарата или его переключение в режим ожидания. 2. Кнопка TI...
Page 297 - Дисплей
8 > Перед началом > Названия частей > Установка > Начальная настройка > Воспроизведение Дополнительная информация | Расширенная настройка | Другие функции R U Дисплей 1. Отображается входной режим. (USB Front / USB Rear / CD / Bluetooth / Network / Digital In / Line / Tuner DAB * / Tu...
Page 298 - Акустическая система
> Перед началом > Названия частей > Установка > Начальная настройка > Воспроизведение Дополнительная информация | Расширенная настройка | Другие функции 9 R U Акустическая система (X-HM76D, X-HM76) Поставляемые в комплекте аппарата АС левой и правой сторон не отличаются. Качество звук...
Page 300 - Подключение АС; Только
11 > Перед началом > Названия частей > Установка > Начальная настройка > Воспроизведение Дополнительная информация | Расширенная настройка | Другие функции R U Подключение АС Установка 1 RED RED 3 2 4 RED RED b b a a a a Только X-HM86D При подключении АС для X-HM76D, X-HM76 или X- HM8...
Page 301 - Подключение
12 > Перед началом > Названия частей > Установка > Начальная настройка > Воспроизведение Дополнительная информация | Расширенная настройка | Другие функции R U Подключение антенн, шнура питания и т. п. c a b c 1 1 2 X-HM76D, X-HM86D, XC-HM86D X-HM76 Подключение антенны Прослушивая рад...
Page 302 - Включение питания и начальная настройка; Настройки
13 > Перед началом > Названия частей > Установка > Начальная настройка > Воспроизведение Дополнительная информация | Расширенная настройка | Другие функции R U Включение питания и начальная настройка Начальная настройка 1 3 2 BLUE BLINKING Запуск : после нажатия кнопки Í STANDBY/ON ин...
Page 303 - iOS
14 > Перед началом > Названия частей > Установка > Начальная настройка > Воспроизведение Дополнительная информация | Расширенная настройка | Другие функции R U Для выполнения настроек Wi-Fi выберите "Wi-Fi". В случае подключения с помощью кабеля LAN выберите "Wired(Exit)&#...
Page 305 - Настройки времени
16 > Перед началом > Названия частей > Установка > Начальная настройка > Воспроизведение Дополнительная информация | Расширенная настройка | Другие функции R U Настройки времени Установив время, можно использовать будильник для запуска воспроизведения ( Ä P33). 1. Нажмите TIMER. 2. На...
Page 306 - Воспроизведение компакт-дисков; Воспроизведение
17 > Перед началом > Названия частей > Установка > Начальная настройка > Воспроизведение Дополнительная информация | Расширенная настройка | Другие функции R U Воспроизведение компакт-дисков Воспроизведение a 1 2 b c Помимо имеющихся в продаже музыкальных компакт- дисков, аппарат такж...
Page 308 - Устройство памяти USB/HDD; Основные
19 > Перед началом > Названия частей > Установка > Начальная настройка > Воспроизведение Дополнительная информация | Расширенная настройка | Другие функции R U Устройство памяти USB/HDD 2 a b e d c 1 Основные операции Музыкальные файлы можно воспроизводить, подключив устройство памяти...
Page 312 - Прослушивание радио FM; Автоматическая; Ручная
23 > Перед началом > Названия частей > Установка > Начальная настройка > Воспроизведение Дополнительная информация | Расширенная настройка | Другие функции R U Прослушивание радио FM 1 d f b e g a c d i f h Автоматическая настройка 1. Включите аппарат. 2. Несколько раз нажмите TUNER, ...
Page 313 - Регистрация
24 > Перед началом > Названия частей > Установка > Начальная настройка > Воспроизведение Дополнительная информация | Расширенная настройка | Другие функции R U 3. Выберите для прослушивания нужную радиостанцию, нажимая TUNE i / j (b) на пульте ДУ. 0 При каждом нажатии этой кнопки част...
Page 315 - Прослушивание цифрового радио DAB
26 > Перед началом > Названия частей > Установка > Начальная настройка > Воспроизведение Дополнительная информация | Расширенная настройка | Другие функции R U Прослушивание цифрового радио DAB (X-HM76D, X-HM86D, XC-HM86D) Настройка 1. Включите аппарат. 2. Несколько раз нажмите TUNER,...
Page 316 - Сопряжение
27 > Перед началом > Названия частей > Установка > Начальная настройка > Воспроизведение Дополнительная информация | Расширенная настройка | Другие функции R U BLUETOOTH ® 1 2 Pioneer HMXX xxxxxx 1 2 Pioneer HMXX xxxxxx Воспроизведение Сопряжение аппарата с другими устройствами Сопряж...
Page 319 - Воспроизведение звука с внешнего источника; Соединения
30 > Перед началом > Названия частей > Установка > Начальная настройка > Воспроизведение Дополнительная информация | Расширенная настройка | Другие функции R U Воспроизведение звука с внешнего источника Соединения На данном аппарате можно воспроизводить звук с внешних устройств, напри...
Page 320 - Настройка
31 > Перед началом > Названия частей > Установка > Начальная настройка > Воспроизведение Дополнительная информация | Расширенная настройка | Другие функции R U Music Server Ресивер поддерживает потоковое воспроизведение музыкальных файлов с ПК или NAS-устройств, подключенных к той же ...
Page 322 - Использование будильника для запуска воспроизведения
33 > Перед началом > Названия частей > Установка > Начальная настройка > Воспроизведение Дополнительная информация | Расширенная настройка | Другие функции R U Использование будильника для запуска воспроизведения Настройки В заданное время аппарат включается и запускает воспроизведени...
Page 323 - Ввод
34 > Перед началом > Названия частей > Установка > Начальная настройка > Воспроизведение Дополнительная информация | Расширенная настройка | Другие функции R U Ввод текста, регулировка качества звука и т. п. Ввод текста Для ввода текста, например паролей и т. п., используются указанны...
Page 324 - Дополнительная информация о функциях проигрывателя
35 > Перед началом > Названия частей > Установка > Начальная настройка > Воспроизведение Дополнительная информация | Расширенная настройка | Другие функции R U Дополнительная информация о функциях проигрывателя Дополнительная информация Вследствие обновлений встроенного программного о...
Page 325 - Расширенные настройки
36 > Перед началом > Названия частей > Установка > Начальная настройка > Воспроизведение Дополнительная информация | Расширенная настройка | Другие функции R U Расширенные настройки Расширенная настройка В аппарате предусмотрены расширенные настройки, открывающие дополнительные возмож...
Page 330 - Обновление
41 > Перед началом > Названия частей > Установка > Начальная настройка > Воспроизведение Дополнительная информация | Расширенная настройка | Другие функции R U 4. Нажмите кнопку Í STANDBY/ON на аппарате, чтобы перевести его в режим ожидания. Процесс завершен, и встроенное программное ...
Page 331 - Поиск и устранение неисправностей; Сброс
42 > Перед началом > Названия частей > Установка > Начальная настройка > Воспроизведение Дополнительная информация | Расширенная настройка | Другие функции R U Поиск и устранение неисправностей Другие функции Перед началом процедуры При нестабильной работе проблемы можно разрешить про...
Page 333 - Функция
44 > Перед началом > Названия частей > Установка > Начальная настройка > Воспроизведение Дополнительная информация | Расширенная настройка | Другие функции R U обеспечения NAS-устройства или сервера. Не всегда отображается художественное оформление альбома в Music Server 0 Music Serve...
Page 334 - Общие характеристики
45 > Перед началом > Названия частей > Установка > Начальная настройка > Воспроизведение Дополнительная информация | Расширенная настройка | Другие функции R U Общие характеристики Аналоговый аудиовыход Среднеквадратичная выходная мощность 0 X-HM76D, X-HM76 : 50 Вт + 50 Вт 0 X-HM86D...
Page 335 - АС
46 > Перед началом > Названия частей > Установка > Начальная настройка > Воспроизведение Дополнительная информация | Расширенная настройка | Другие функции R U Размеры ( Ш В Г ) 0 290 мм 98 мм 333 мм Масса 0 3,5 кг АС (X-HM76D, X-HM76, X-HM86D) Тип 0 Фазоинвертор полочного типа Конф...
Page 336 - Лицензии и товарные знаки
47 > Перед началом > Названия частей > Установка > Начальная настройка > Воспроизведение Дополнительная информация | Расширенная настройка | Другие функции R U Лицензии и товарные знаки The Wi-Fi CERTIFIED Logo is a certification mark of Wi-Fi Alliance ® . AirPlay, iPad, iPhone, and i...