Page 4 - empty page before TOC
Page 6 - Contents; Read all instructions before using this product.
English 6 English Contents IMPORTANT SAFETY INSTRUCTIONS ______________________ 6 General description ____________________________________ 12 Introduction __________________________________________ 13 What do the icons on my product handle mean?___________ 13 What does the icon on my Quick Clean Pod...
Page 7 - DANGER; To reduce the risk of electric shock:; WARNING
7 English DANGER To reduce the risk of electric shock: - To charge the product, only use a USB power source on a certified product with output rating 5 V, ≥ 1 A. For safe chargingin a moist environment (e.g. in a bathroom), only use an IPX4(splash-proof) power source. A suitable power source (e.g. P...
Page 10 - Philips Norelco Quick Clean Pod Cartridge fluid; - The frequency band in which the appliance
10 English - To avoid accidental short-circuiting of batteries after removal, do not let battery terminals come into contact with metal objects(e.g. coins, hairpins, rings). Do not wrap batteries in aluminumfoil. Tape battery terminals or put batteries in a plastic bagbefore you discard them. Philip...
Page 11 - equipment and receiver.
11 English interference received, including interference thatmay cause undesired operation. This equipment has been tested and found tocomply with the limits for a Class B digital device,pursuant to Part 15 of the FCC Rules. These limitsare designed to provide reasonable protectionagainst harmful in...
Page 12 - SAVE THESE INSTRUCTIONS; General description; USB cable
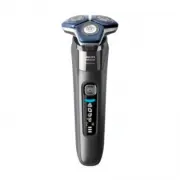
12 English Inc. and any use of such marks by KoninklijkePhilips N.V. is under license. SAVE THESE INSTRUCTIONS General description 1 Pop-up trimmer2 Trimmer release slide3 Shaving unit4 Shaving unit release button5 On/off button6 Handle7 Socket for small plug8 Charging stand (S7885, S7887/92, S7889/...
Page 13 - Introduction; Icon Behavior; Pulsing
13 English Introduction Congratulations on your purchase and welcometo Philips! To fully benefit from the support thatPhilips offers, register your product at www.philips.com/welcome or via the app. What do the icons on my product handlemean? Icon Behavior Meaning Pulsing The cleaning program is in ...
Page 15 - The product is charging.; Icon; How do I charge my product?
15 English Icon Behavior Meaning Bottom lightflashing orange The battery is almost empty (see 'Howdo I charge my product?'). Lights flashing insequence The product is charging. Lights upcontinuously The product is fully charged. What does the icon on my Quick Clean Podmean? Icon Behavior Meaning Bec...
Page 16 - Make sure that the product is switched off.
16 English Danger: Keep the USB cable and the USBpower source dry. 1 Make sure that the product is switched off. 2 Insert the small plug of the USB cable into thesocket in the bottom of the product. 3 Insert the USB plug into the USB power source(not included). 4 Insert the USB power source into the...
Page 17 - How do I use my product?
17 English 5 After charging, remove the USB power sourcefrom the power outlet and pull the small plugout of the product. 'Unplug for use' symbol The 'unplug for use' symbol flashes to remind youto disconnect the USB power source from thepower outlet and remove the small plug from theproduct before y...
Page 18 - SenseIQ technology; contribute to the best shaving results.; Shaving
18 English Note: This product is waterproof. It is suitable foruse in the bath or shower and for cleaning underthe tap with water. For safety reasons, thisproduct can only be used without cord. Use this product for its intended householduse as described in this manual. For hygienic reasons, the prod...
Page 19 - Switch on the product.
19 English 1 Switch on the product. 2 Move the shaving heads over your skin incircular movements to catch all hairs growingin different directions. Make sure each shavinghead is fully in contact with the skin. Exertgentle pressure for a close, comfortable shave. Note: Do not press too hard, as this ...
Page 20 - 1-Day adaptation process
20 English - When you shave in the correct motion (circular movements), the Motion Controlsensor icon lights up green. - When your shaving motion can be improved, the Motion Control sensor iconlights up orange. See the app for detailsand advice. 21-Day adaptation process - 21 Day Trial and Conversio...
Page 21 - Cleaning reminder; - Clean the shaving heads thoroughly once a; Synchronize your shaves
21 English Cleaning reminder When you switch off the product, the cleaningreminder flashes to remind you to clean theproduct.- Clean the product and attachments after each use (see 'How do I clean my shaver?') toprevent clogging and damage. - Clean the shaving heads thoroughly once a month or when t...
Page 22 - You can also use the trimmer under your nose.; Trimming nose hair; Switch on the appliance.
22 English 3 Hold the trimmer perpendicular to the skinand move it downwards while exerting gentlepressure. 4 You can also use the trimmer under your nose. 5 Switch off the product and clean the trimmerafter each use to prevent clogging anddamage (see 'How do I clean my shaver?'). 6 Close the trimme...
Page 23 - Trimming ear hair
23 English 4 Slowly move the trimming head around insideeach nostril, making sure the side of the tip isheld firmly against the skin. This reduces thetickling effect that can occur. 5 Switch off the appliance and clean theattachment after use. Dried nasal mucus can block the cutting element,preventi...
Page 24 - Storage and travel; - Make sure the product is switched off. Remove; Travel lock
24 English Storage and travel - Make sure the product is switched off. Remove the USB power source from the power outletand the product before storing the product ina safe, dry location where it will not becrushed, banged, or subject to damage. - Do not wrap cord around the product when storing. - S...
Page 25 - Activating the travel lock; How do I clean my shaver?; Cleaning the shaver with water
25 English Activating the travel lock Press the on/off button for 3 seconds to use thetravel lock mode. When the travel lock has been activated, thetravel lock symbol flashes. Note: Bluetooth is switched off when the travellock is activated. Deactivating the travel lock Press the on/off button for 3...
Page 26 - Switch on the shaver.; Thorough cleaning
26 English 1 Switch on the shaver. 2 Rinse the shaving unit with warm water. 3 Switch off the shaver. Press the release buttonto open the shaving unit. 4 Rinse the hair chamber with warm water. 5 Rinse the shaving head holder warm water. 6 Carefully shake off excess water and let theshaving head hol...
Page 27 - Clean the cutter and guard with warm water.
27 English 1 Make sure that the appliance is switched offand disconnected from the wall socket. 2 Press the release button on the shaving unitand pull the shaving head holder off theshaving unit. 3 Rinse the hair chamber and shaving headholder with warm water. 4 Remove the shaving heads (see 'How do...
Page 28 - Cleaning the pop-up trimmer; After cleaning, switch off the appliance.
28 English Cleaning the pop-up trimmer Clean the trimmer after each use to preventclogging and damage. Caution: Never dry the trimmer teeth with atowel or tissue, as this may damage thetrimmer teeth. 1 Make sure that the appliance is switched offand disconnected from the wall socket. 2 Push the trim...
Page 29 - Preparing the Quick Clean Pod for use
29 English 2 Rinse the trimming head of the nose trimmerwith hot water. 3 Switch on the appliance and rinse thetrimming head once more to remove anyremaining hairs. Then switch off the applianceagain. If rinsing the trimming head under the tap isnot sufficient, immerse the trimming head in aglass wi...
Page 30 - Twist the lid off the Quick Clean Pod Cartridge.
30 English 2 Twist the lid off the Quick Clean Pod Cartridge. 3 Lift the tab on the seal and pull it by the cornerto remove the seal from the Quick Clean PodCartridge. 4 Press the small circular piece on the handle ofthe Quick Clean Pod Cartridge to break thesnap hook on the handle. 5 Place the Quic...
Page 31 - Using the Quick Clean Pod; Frequency of use
31 English Using the Quick Clean Pod Note: If you use the shaver with shaving foam,shaving gel or pre-shave products, thoroughlyrinse the shaving heads before you use the QuickClean Pod (see 'How do I clean my shaver?'). Always shake excess water off the shaverbefore you place it in the Quick Clean ...
Page 33 - Bluetooth®; Pair the shaver and smartphone
33 English How do I connect my shaver andsmartphone? Note: Make sure your smartphone is equippedwith Bluetooth® 4.1 or higher. This shaver is compatible with Bluetooth® 4.1 and higher to connect to the app. When youhave paired your shaver and smartphone,Bluetooth on your shaver is switched onautomat...
Page 34 - More information is available at; Notification symbol
34 English The app is compatible with a wide range ofiPhone and Android™ smartphones. More information is available at www.philips.com . 1 Download the app. 2 Make sure Bluetooth on your smartphone isswitched on. 3 Switch on the shaver. 4 Open the app and follow the instructions tostart the pairing ...
Page 35 - Unpair your smartphone:; How do I replace the shaving heads?; Replacing the shaving heads; Switch off the shaver.
35 English Unpair the shaver: press and hold the on/offbutton on the handle for approx. 10 seconds toremove the bond between shaver and app. Note: Unpairing is successful when thenotification symbol lights up 4 times briefly. Unpair your smartphone: 1 Go to the settings on your smartphone andselect ...
Page 36 - Place new shaving heads in the holder.
36 English 3 Turn the retaining rings counterclockwise andremove them. Place them aside in a safe place. 4 Remove the shaving heads from the shavinghead holder. Discard the used shaving heads immediatelyto avoid mixing them with the new shavingheads. 5 Place new shaving heads in the holder. 6 Place ...
Page 37 - Accessories
37 English 7 Insert the hinge of the shaving head holderinto the slot in the top of the shaving unit andclose the shaving unit. Accessories Replacement parts and accessories may bepurchased at a store near you or on our website www.philips.com/store . The following accessories and spare parts areava...
Page 38 - or call; Full Two-Year Warranty; IMPORTANT; : This warranty does not cover
38 English - For assistance, visit our website www.philips.com/support or call 1-800-243-3050 toll free. - Your product is designed and manufactured with high quality materials and components,which can be recycled and reused. Forrecycling information, please contact yourlocal waste management facili...
Page 39 - We cannot be responsible for lost mail.
39 English NOTE: No other warranty, written or oral, isauthorized by Philips North America LLC. This warranty gives you specific legal rights, andyou may also have other rights which vary fromstate to state. Some states do not allow theexclusion or limitation of incidental orconsequential damages, s...
Page 40 - Supplier's Declaration of Conformity; Responsible Party – U.S. Contact Information
40 English To obtain money-back guarantee service,please go to www.PhilipsMoneyBack.com. Delivery of refund check will occur 6–8 weeksafter receipt of returned product. Supplier's Declaration of Conformity This device complies with part 15 of the FCCRules. Operation is subject to the following twoco...
Page 41 - Trademarks
41 English Trademarks Apple, the Apple logo, iPad, and iPhone aretrademarks of Apple Inc., registered in the U.S.and other countries. App Store is a service markof Apple Inc. Android is a trademark of Google Inc. GooglePlay and the Google Play logo are trademarks ofGoogle Inc. The Bluetooth® word ma...
Page 42 - Contenido; Lea todas las instrucciones antes de usar este producto.
Español 42 Español Contenido INSTRUCCIONES IMPORTANTES DE SEGURIDAD ___________ 42 Información general ___________________________________ 48 Introducción __________________________________________ 50 ¿Qué significan los íconos que están en el mango delproducto? _ 50 ¿Qué significa el ícono que está...
Page 43 - PELIGRO; Para reducir el riesgo de descarga eléctrica:
43 Español PELIGRO Para reducir el riesgo de descarga eléctrica: - Para cargar el producto, use solo una fuente de alimentación USB en un producto certificado con valores de salida de 5 V, ≥1 A. Para la carga segura en ambientes húmedos (por ejemplo,en un baño), use solo una fuente de alimentación I...
Page 44 - ADVERTENCIA
44 Español ADVERTENCIA Para reducir el riesgo de quemaduras, incendio, descargaeléctrica o lesiones: - Este producto no está destinado a personas (adultos o niños) con capacidades física, sensorial o mental disminuidas, o que notengan los conocimientos o la experiencia necesarios, a menosque una per...
Page 46 - Líquido para cartucho del Quick Clean Pod de Philips Norelco
46 Español - No coloque los productos y sus baterías en hornos microondas ni en ollas de inducción. - No abra, modifique, perfore, dañe ni desarme el producto o la batería, para evitar que las baterías se calienten o liberensustancias tóxicas o peligrosas. No provoque un cortocircuito,sobrecargue ni...
Page 47 - - La potencia máxima de radiofrecuencia
47 Español - La potencia máxima de radiofrecuencia irradiada en la banda de frecuencia en la quefunciona el aparato es inferior a 20 dBm - Este dispositivo cumple con los límites de exposición a la radiación por radiofrecuenciade las reglas FCC y ha sido evaluado deacuerdo con la condición de exposi...
Page 48 - - Aumentar la distancia entre el equipo y el; Información general
48 Español este equipo causa interferencia perjudicial a larecepción de radio o televisión, lo cual puededeterminarse encendiendo y apagando elequipo, se le recomienda al usuario tratar decorregir la interferencia tomando una o más delas siguientes medidas:- Reorientar o cambiar de lugar la antena r...
Page 49 - Cable USB
49 Español 3 Unidad de afeitado4 Botón de liberación de la unidad de afeitado5 Botón de encendido/apagado6 Mango7 Toma para clavija pequeña8 Base de carga (S7885, S7887/92, S7889/91 solamente) 9 Cable USB Nota: Una unidad de alimentación adecuada(por ejemplo, Philips HQ87) se encuentradisponible en ...
Page 50 - Introducción; o a través de la; Íco; Pulsaciones
50 Español Introducción ¡Felicidades por su compra y bienvenido a Philips!Para aprovechar al máximo el soporte que leofrece Philips, registre su producto en www.philips.com/welcome o a través de la aplicación. ¿Qué significan los íconos que están en elmango del producto? Íco no Comportamien to Sig...
Page 51 - Se ilumina
51 Español Íco no Comportamien to Significado Parpadearápidamentecuando retira laafeitadora delQuick Clean Podo presiona elbotón deencendido/apagado durante elprograma delimpieza Se detuvo el programa de limpieza. Sidesea continuar, es necesario quereinicie el ciclo de limpieza; parahacerlo, colo...
Page 52 - Parpadeante
52 Español Íco no Comportamien to Significado Parpadearápidamente Ocurrió un error (p. ej., el motor estábloqueado). Revise la aplicación paraobtener más detalles. Parpadeante El producto se tiene que desconectardel tomacorriente antes de que sepueda encender. Parpadea alpresionar elbotón deencend...
Page 53 - ¿Cómo se carga el producto?; Asegúrese de que el producto esté apagado.
53 Español Se vuelve visible en elQuick Clean Pod. Se tiene que reemplazar elcartucho del Quick Clean Pod. ¿Cómo se carga el producto? Cargue el producto antes de usarlo por primeravez y cuando la luz inferior del indicador deestado de la batería empiece a parpadear decolor naranja, lo que indica qu...
Page 54 - - Cuando el producto se ha cargado
54 Español 4 Inserte la fuente de alimentación USB en eltomacorriente.- Mientras el producto está en modo de carga rápida, las luces del indicador deestado de la batería se van iluminando unatras otra. Después de aproximadamente 5minutos, empieza a parpadear la luzinferior del indicador de estado de...
Page 55 - ¿Cómo se usa el producto?
55 Español Símbolo de "Desconectar para usar" El símbolo de "Desconectar para usar" parpadeapara recordarle que debe desconectar la fuentede alimentación USB del tomacorriente y retirar laclavija pequeña del producto antes deencenderlo. Carga con base carga (S7885, S7887/92, S7889/91...
Page 56 - Tecnología SenseIQ; - Siga los consejos que se obtengan de las; Afeitado
56 Español Nota: Este producto es a prueba de agua. Elproducto es adecuado para su uso en el baño o laregadera y puede limpiarse colocándolo bajo elagua de la llave. Por razones de seguridad, esteproducto solamente se puede usar sin cable. Use este producto para su uso previsto en elhogar, según se ...
Page 57 - Encienda el producto.
57 Español de afeitar en la piel y enjuague los cabezales deafeitado con agua tibia de la llave antes de seguirlos pasos que se detallan a continuación. 1 Encienda el producto. 2 Mueva los cabezales de afeitado sobre la pielcon movimientos circulares para llegar a todoslos vellos en las diferentes d...
Page 58 - Al terminar de afeitarse, recibirá; Proceso de adaptación de 21 días; - Prueba de 21 días y proceso de adaptación. Es
58 Español 4 Use los lados estrechos de la unidad deafeitado para afeitarse en lugares difíciles dealcanzar, por ejemplo, a lo largo de la línea dela quijada y debajo de la nariz. SenseIQ: Al terminar de afeitarse, recibirá retroalimentación en el mango. El ícono delsensor de Control de movimiento s...
Page 59 - - Es posible que al principio no obtenga la; Recordatorio de limpieza; - Limpie los cabezales de afeitado a fondo una; Sincronice sus afeitadas
59 Español - Es posible que al principio no obtenga la afeitada al ras que espera e incluso es posibleque su rostro se irrite levemente. Esto esnormal, ya que la barba y la piel necesitantiempo para ajustarse. Invierta 3 semanas ypronto podrá disfrutar al máximo de su nuevaafeitadora. - Sea persever...
Page 60 - Recorte
60 Español Cuando el espacio de almacenamiento de datosestá casi lleno, parpadea el símbolo denotificación. Para evitar que se pierdan datos,sincronice la afeitadora con la aplicación (ver'¿Cómo conecto la afeitadora con mismartphone?'). 1 Asegúrese de que esté cerca de la afeitadora yabra la aplica...
Page 61 - Recorte del vello de la nariz
61 Español Uso del accesorio de la recortadora de vello denariz/oreja (S7887/92 solamente) Puede usar el accesorio cortador de vello denariz/oreja para recortar el vello de la nariz o delas orejas. Recorte del vello de la nariz Asegúrate de tanto el accesorio de la recortadorade vello de nariz/oreja...
Page 62 - Recorte del vello de la oreja; Almacenamiento y viaje; - Asegúrese de que el producto esté apagado.
62 Español Recorte del vello de la oreja Asegúrese de que los canales externos esténlimpios y libres de cera. 1 Encienda el aparato. 2 Mueva lentamente el cabezal de recorte a lolargo del borde del oído para eliminar losvellos salientes. 3 Inserte cuidadosamente el cabezal de recorteen el canal audi...
Page 63 - solamente) en la afeitadora para protegerla.; Bloqueo para viajes
63 Español Nota: Le recomendamos que deje que elproducto y los accesorios se sequencompletamente antes de guardarlos para elpróximo uso. - Coloque la tapa de protección (S7887/82 solamente) en la afeitadora para protegerla. - Guarde el producto en la funda (S7885, S7886, S7887/92, S7889/91 solamente...
Page 64 - ¿Cómo se limpia la afeitadora?; Limpieza de la afeitadora con agua; Encienda la afeitadora.
64 Español Nota: El producto se desbloqueaautomáticamente cuando se conecta a untomacorriente. ¿Cómo se limpia la afeitadora? Para un óptimo desempeño, limpie el producto ylos accesorios después de cada uso. Limpieza de la afeitadora con agua Limpie la afeitadora después de cada uso paraevitar que s...
Page 65 - Cierre la unidad de afeitado.; Limpieza a fondo
65 Español 4 Enjuague la cámara de acumulación de vellocon agua tibia. 5 Enjuague el portacabezales de afeitado conagua tibia. 6 Elimine cuidadosamente el exceso de agua ydeje que el soporte del cabezal de afeitado seseque al aire completamente. 7 Cierre la unidad de afeitado. Limpieza a fondo Le ac...
Page 66 - Sacuda el exceso de agua.; Limpieza de la cortadora emergente
66 Español 3 Enjuague la cámara de acumulación de vello yel portacabezales de afeitado con agua tibia. 4 Retire los cabezales de afeitado. Para consultarinstrucciones detalladas, vea "¿Cómo sereemplazan los cabezales de afeitado?" Nota: No limpie más de un cortador yprotector a la vez, ya qu...
Page 67 - Después de limpiarlo, apague el dispositivo.
67 Español 1 Asegúrese de que el dispositivo esté apagadoy de que lo haya desconectado deltomacorriente. 2 Empuje hacia abajo el botón deslizante deliberación de la cortadora emergente paraabrirla. 3 Encienda el dispositivo y enjuague lacortadora emergente con agua tibia. 4 Después de limpiarlo, apa...
Page 68 - Preparación del Quick Clean Pod para el uso
68 Español 3 Encienda el aparato y enjuague el cabezalrecortador una vez más para removercualquier vello restante. Luego apague elaparato nuevamente. Si enjuagar el cabezal de recorte bajo la llaveno es suficiente, sumerja el cabezal de recorteen un vaso de agua caliente por unos minutos.Luego encie...
Page 69 - Uso del Quick Clean Pod
69 Español 3 Levante la lengüeta del sello y jálela de laesquina para retirar el sello del cartucho delQuick Clean Pod. 4 Presione la pequeña pieza circular en elmango del cartucho del Quick Clean Pod pararomper el broche de presión del mango. 5 Coloque el cartucho del Quick Clean Pod en elQuick Cle...
Page 70 - Reemplazo del cartucho del Quick Clean Pod
70 Español afeitar, enjuague bien los cabezales de afeitadoantes de usar el Quick Clean Pod. Siempre sacuda la afeitadora para eliminar elexceso de agua antes de colocarla en el QuickClean Pod. 1 Coloque la afeitadora de cabeza en el QuickClean Pod. La afeitadora detectaautomáticamente que está en e...
Page 71 - Todos los días
71 Español Frecuencia de uso Ciclos Cuándo reemplazar el cartucho del Quick Clean Pod Todos los días Aproximadamente30 Cada mes Unas cuantas vecespor semana Aproximadamente20 Cada 2 meses Cada semana Aproximadamente13 Cada 3 meses 1 Gire y retire la parte superior del Quick CleanPod. 2 Levante el ca...
Page 72 - para
72 Español 4 Coloque un nuevo cartucho del Quick CleanPod en el Quick Clean Pod (ver 'Preparacióndel Quick Clean Pod para el uso'). Escanea el código QR que se encuentra a laizquierda o visita www.philips.com/cleaning-cartridge para pedir cartuchos de repuesto del Quick CleanPod. ¿Cómo conecto la af...
Page 73 - Empareja la afeitadora y el teléfono inteligente; Encontrará más información disponible en
73 Español Para apagar el Bluetooth de su afeitadora, activeel bloqueo de viaje (ver 'Almacenamiento yviaje'). Empareja la afeitadora y el teléfono inteligente Puede usar la aplicación para sincronizar susdatos de afeitado, cambiar su configuraciónpersonal y obtener entrenamiento basado en surutina....
Page 74 - Símbolo de notificación; Desaparee su smartphone:
74 Español Símbolo de notificación La afeitadora está equipada con un símbolo denotificación. El símbolo de notificación seenciende cuando hay un mensaje importantepara usted en la aplicación. Cuando se encienda,simplemente abra la aplicación en su smartphoney siga los consejos fáciles que le dé la ...
Page 75 - Reemplazo de los cabezales de afeitado; Apague la afeitadora.
75 Español Nota: El procedimiento para desemparejar eldispositivo puede variar según el teléfonointeligente. Para obtener más información,consulta el manual de su teléfono inteligente. ¿Cómo se reemplazan los cabezales deafeitado? Para un rendimiento de afeitado óptimo, leaconsejamos que reemplace l...
Page 76 - - Cada anillo de retención tiene dos ranuras que
76 Español 5 Coloque los nuevos cabezales de afeitado enel portacabezales. 6 Coloque los anillos de retención de nuevo enlos cabezales de afeitado y gírelos hacia laderecha para volver a colocar el anillo deretención. - Cada anillo de retención tiene dos ranuras que ajustan perfecto en los salientes...
Page 77 - Accesorios
77 Español Accesorios Puede adquirir los accesorios y partes dereemplazo en la tienda más cercana a sudomicilio o a través de nuestro sitio web www.philips.com/store . Están disponibles los siguientes accesorios ypiezas sueltas:- Cabezales de afeitado de repuesto Philips Norelco SH71. - Paquete de 2...
Page 78 - - Su producto está diseñado y fabricado con; Garantía Total de Dos Años; IMPORTANTE; : Esta garantía no cubre ningún
78 Español - Su producto está diseñado y fabricado con materiales y componentes de alta calidad, quepueden ser reciclados y reusados. Para obtenerinformación sobre el reciclaje, contacte a lasinstalaciones de manejo de residuos locales ovisite: www.recycle.philips.com . Garantía Total de Dos Años Ph...
Page 79 - *Lea las instrucciones adjuntas atentamente.
79 Español que ocurra durante el envío no será cubierto poresta garantía. NOTA: Philips North America LLC. no extiendeninguna otra garantía, ni escrita ni oral. Esta garantía le proporciona derechos legalesespecíficos; asimismo, es posible que goce deotros derechos que pueden variar de estado aestad...
Page 80 - Declaración de conformidad del proveedor
80 Español No asumimos ninguna responsabilidad por lospaquetes perdidos. El paquete del producto debe contar conmatasellos que no supere los 45 días a partir de lafecha de compra. Philips se reserva el derecho averificar el precio de compra del producto y limitalos reembolsos al precio de venta mino...
Page 81 - Philips North America LLC.; Marcas registradas
81 Español unidades de producción del mismo equipocontinuarán cumpliendo con los requerimientosde la Comisión. Identificador único: PHILIPS, NORELCO S7889,S7887, S7886, S7885 Parte responsable – Datos de contacto en losEstados Unidos Philips North America LLC. Apartado postal 10313 Stamford | CT 069...
Page 85 - Empty page before back cover


 Philips S7886/63 Quick Guide
 Philips S7886/78 Quick Guide
 Philips S7887/35 Quick Guide
 Philips S7887/55 Quick Guide
 Philips S7887/58 Quick Guide
 Philips S7887/78 Quick Guide
 Philips S8692/35 User Manual
 Philips S8696/35 User Manual
 Philips S8697/35 User Manual
 Philips S9311 Manual
 Philips S9321/89 User Manual
 Philips S9606/80 User Manual