Page 4 - Important; Only connect the appliance to an earthed wall socket.; Before first use; Remove the heat-resistant protective cover from the soleplate; E N G L I S H
Important Read these instructions for use carefully before using the appliance andsave them for future reference. ◗ Check if the voltage indicated on the type plate corresponds tothe local mains voltage before you connect the appliance. ◗ Only connect the appliance to an earthed wall socket. ◗ Do no...
Page 5 - Preparing for use; Filling the water tank; Never immerse the iron in water.; Setting the temperature
Preparing for use Filling the water tank Never immerse the iron in water. 1 Make sure the appliance is unplugged. C 2 Set the steam control to position 0 (= no steam). 3 Open the cap of the filling opening. 4 Tilt the iron backwards. C 5 Fill the water tank with tap water up to the maximum level by ...
Page 6 - Using the appliance; Steam ironing; to
C 3 Set the required ironing temperature by turning the temperature dial to the appropriate position. Check the laundr y care label for the required ironing temperature:- 1 Synthetic fabrics (e.g. acr ylic, nylon, polyamide, polyester) - 1 Silk - 2 Wool - 3 Cotton, linen If you do not know what kind...
Page 7 - Ironing without steam; Select the recommended ironing temperature (see chapter; Features; to MAX in combination; Spray function; Make sure that there is enough water in the water tank.; Concentrated shot of steam from the special Steam Tip
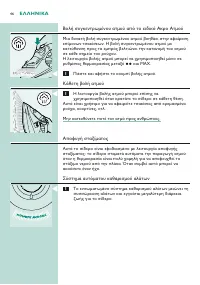
Ironing without steam C 1 Set the steam control to position 0 (= no steam). 2 Select the recommended ironing temperature (see chapter 'Preparing for use', section 'Setting the temperature'). Features Delicate fabric protector (GC4325 only) The delicate fabric protector protects delicate fabrics from...
Page 8 - Vertical shot of steam; The shot-of-steam function can also be used when you hold; Drip stop; The built-in anti-calc system reduces the build-up of scale and
C 1 Press and release the shot-of-steam button. Vertical shot of steam C 1 The shot-of-steam function can also be used when you hold the iron in vertical position. This is useful for removing creases from hanging clothes, cur tains etc. Never direct the steam at people. Drip stop This iron is equipp...
Page 9 - The blue alert light burns as long as the iron is plugged in.; Cleaning and maintenance; After ironing; Remove the mains plug from the wall socket and let the iron
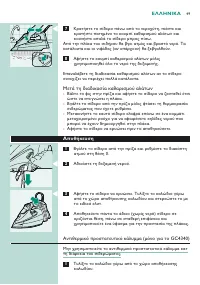
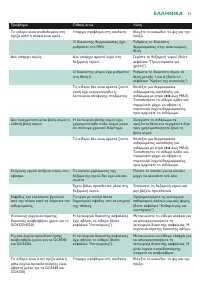
- If the temperature light goes on after you have moved the iron, wait for it to go out before you star t ironing. - If the temperature light does not go on after you move the iron, the soleplate still has the right temperature and the iron is ready for use. Alert light and electronic safety shut-of...
Page 10 - Do not put vinegar or other descaling agents in the water tank.; After the calc-clean process; - Put the plug in the wall socket and let the iron heat up to allow the; Storage
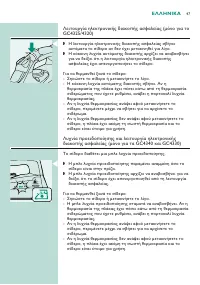
during ironing), the calc-clean function should be used morefrequently. 1 Make sure the appliance is unplugged. 2 Set the steam control to position 0. 3 Fill the water tank to the maximum level. Do not put vinegar or other descaling agents in the water tank. C 4 Select the maximum ironing temperatur...
Page 11 - Do not use the heat-resistant protective cover during ironing.; Environment; or contact the Philips Customer Care; Guarantee restrictions; Troubleshooting
C 3 Let the iron cool down. Wind the mains cord round the cord storage facility and fix it with the cord clip. 4 Always store the emptied iron horizontally on a stable surface and use a cloth to protect the soleplate. Heat-resistant protective cover (GC4340 only) Do not use the heat-resistant protec...
Page 13 - E S PA Ñ O L
Importante Antes de usar el aparato, lea atentamente estas instrucciones de uso yconsér velas por si necesitara consultarlas en el futuro. ◗ Antes de encender la plancha, compruebe si el voltaje indicado enla placa de modelo se corresponde con el voltaje de red local. ◗ Enchufe el aparato sólo a un ...
Page 14 - Preparación para su uso; Llenado del depósito de agua; No sumerja nunca la plancha en agua.; Ajuste de la temperatura
Preparación para su uso Llenado del depósito de agua No sumerja nunca la plancha en agua. 1 Asegúrese de que el aparato está desenchufado. C 2 Ajuste el control de vapor a la posición 0 (= sin vapor). 3 Abra la tapa de la abertura de llenado. 4 Incline la plancha hacia atrás. C 5 Llene el depósito c...
Page 15 - Uso del aparato; Planchado con vapor
C 3 Fije la temperatura de planchado adecuada girando el control de temperatura hasta la posición correspondiente. Compruebe en la etiqueta de la prenda la temperatura de planchadoapropiada:- 1 Fibras sintéticas (por ejemplo, acrílico, nylon, poliamida,poliéster) - 1 Seda - 2 Lana - 3 Algodón, lino ...
Page 16 - Planchado sin vapor; Seleccione la posición de temperatura de planchado; Características; Protector de tejidos delicados (sólo modelo GC4325); a MAX en; Pulverizador; Asegúrese de que haya suficiente agua en el depósito de agua.; Golpe de vapor concentrado de la Punta Activa especial
Planchado sin vapor C 1 Ponga el control de vapor en la posición 0 (= sin vapor). 2 Seleccione la posición de temperatura de planchado recomendada (consulte el capítulo "Preparación para su uso",apartado "Ajuste de la temperatura"). Características Protector de tejidos delicados (sól...
Page 17 - Presione y suelte el botón de golpe de vapor.; Golpe de vapor vertical; La función de golpe de vapor también se puede utilizar con la; Antigoteo; El sistema antical incorporado reduce la acumulación de
La función de golpe de vapor sólo se puede usar a temperaturas deplanchado entre 2 y MAX. C 1 Presione y suelte el botón de golpe de vapor. Golpe de vapor vertical C 1 La función de golpe de vapor también se puede utilizar con la plancha en posición vertical. Es muy útil para eliminar las arrugas de...
Page 18 - Limpieza y mantenimiento; Después del planchado; Desenchufe el aparato de la red y deje que se enfríe.
- El piloto rojo de apagado automático se apagará. Si la temperatura de la suela es inferior a la temperatura de planchado seleccionada, elpiloto ámbar de temperatura se encenderá. - Si el piloto de temperatura se ilumina después de haber movido la plancha, espere a que se apague antes de empezar a ...
Page 19 - Una vez realizado el proceso Calc-Clean; - Desenchufe la plancha cuando haya alcanzado la temperatura de
Función Calc-Clean (autolimpieza) Puede utilizar la función Calc-Clean para eliminar las par tículas de cal ylas impurezas. ◗ Use la función Calc-Clean una vez cada dos semanas. Si el agua desu zona es muy dura (es decir, si durante el planchado salenpartículas de cal por la suela), debe utilizar la...
Page 20 - , o póngase en contacto con el Ser vicio de
Almacenamiento 1 Desenchufe la plancha y ajuste el control de vapor a la posición 0. C 2 Vacíe el depósito de agua. C 3 Deje que la plancha se enfríe. Enrolle el cable de red alrededor del recogecable y sujételo con el clip. 4 Guarde siempre la plancha vacía en posición horizontal y sobre una superf...
Page 21 - Restricciones de la garantía; Guía de resolución de problemas
de Philips en su país, diríjase a su distribuidor local Philips o póngase encontacto con el Ser vice Depar tment de Philips Domestic Appliancesand Personal Care BV. Restricciones de la garantía El protector de tejidos delicados no está cubier to por las condicionesde la garantía internacional. Guía ...
Page 23 - Importante; Non immergete mai il ferro e l'eventuale supporto nell'acqua.; Prima di utilizzare l'apparecchio per la prima volta; Rimuovete il coperchio di protezione termoresistente dalla; I TA L I A N O
Importante Prima di utilizzare l'apparecchio, leggete attentamente le istruzioni econser vatele per eventuali riferimenti futuri. ◗ Prima di collegare l'apparecchio, controllate che la tensioneindicata sulla placchetta corrisponda a quella della rete locale. ◗ Collegate l'apparecchio esclusivamente ...
Page 24 - Seta
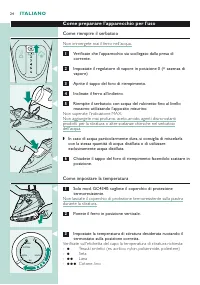
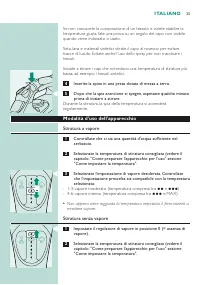
Come preparare l'apparecchio per l'uso Come riempire il serbatoio Non immergete mai il ferro nell'acqua. 1 Verificate che l'apparecchio sia scollegato dalla presa di corrente. C 2 Impostate il regolatore di vapore in posizione 0 (= assenza di vapore). 3 Aprite il tappo del foro di riempimento. 4 Inc...
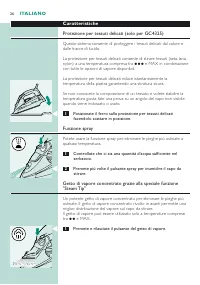
Page 26 - Caratteristiche; Protezione per tessuti delicati (solo per GC4325); e MAX in combinazione; Funzione spray; Controllate che ci sia una quantità d'acqua sufficiente nel
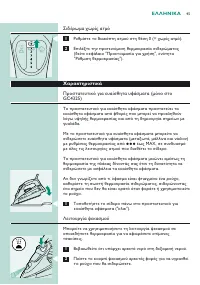
Caratteristiche Protezione per tessuti delicati (solo per GC4325) Questo sistema consente di proteggere i tessuti delicati dal calore edalle tracce di lucido. La protezione per tessuti delicati consente di stirare tessuti (seta, lana,nylon) a una temperatura compresa tra 3 e MAX in combinazione con ...
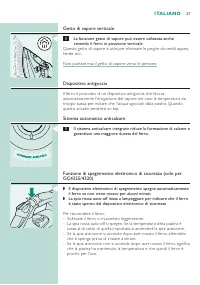
Page 27 - Getto di vapore verticale; La funzione getto di vapore può essere utilizzata anche; Dispositivo antigoccia; garantisce una maggiore durata del ferro.
Getto di vapore verticale C 1 La funzione getto di vapore può essere utilizzata anche tenendo il ferro in posizione verticale Questo getto di vapore è utile per eliminare le pieghe da vestiti appesi,tende, ecc. Non puntate mai il getto di vapore verso le persone. Dispositivo antigoccia Il ferro è pr...
Page 28 - Pulizia e manutenzione; Al termine della stiratura
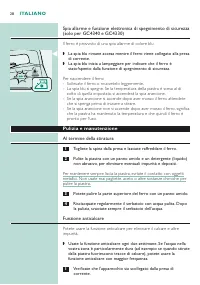
Spia allarme e funzione elettronica di spegnimento di sicurezza(solo per GC4340 e GC4330) Il ferro è provvisto di una spia allarme di colore blu C ◗ La spia blu rimane accesa mentre il ferro viene collegato alla presadi corrente. ◗ La spia blu inizia a lampeggiare per indicare che il ferro èstato?sp...
Page 29 - Al termine del processo anticalcare; piastra si asciughi completamente.; Come riporre il ferro
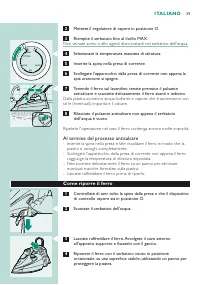
2 Mettete il regolatore di vapore in posizione O. 3 Riempite il serbatoio fino al livello MAX. Non versate aceto o altri agenti disincrostanti nel serbatoio dell'acqua. C 4 Selezionate la temperatura massima di stiratura. 5 Inserite la spina nella presa di corrente. 6 Scollegate l'apparecchio dalla ...
Page 30 - Coperchio di protezione termoresistente (solo per GC4340); Avvolgete il cavo attorno all'apposito supporto.; Garanzia e assistenza; oppure contattate il Centro Assistenza; Limitazioni della garanzia; Localizzazione guasti
Coperchio di protezione termoresistente (solo per GC4340) Non utilizzate il coperchio di protezione termoresistente durante lastiratura. 1 Avvolgete il cavo attorno all'apposito supporto. C 2 Mettete il ferro sul coperchio di protezione termoresistente. 3 Riponete il ferro con il coperchio di protez...
Page 32 - P O RT U G U Ê S
Importante Leia estas instruções com atenção antes de utilizar o aparelho eguarde-as para uma eventual consulta futura. ◗ Verifique se a voltagem indicada na sinalética corresponde àvoltagem eléctrica local, antes de ligar o aparelho. ◗ Ligue sempre o aparelho a uma tomada com terra. ◗ Não utilize o...
Page 33 - Preparação; Encher o reservatório da água; Nunca mergulhe o ferro dentro de água.; Regulação da temperatura
Preparação Encher o reservatório da água Nunca mergulhe o ferro dentro de água. 1 Certifique-se de que o aparelho está desligado da tomada. C 2 Regule o controlo do vapor para a posição 0 (= sem vapor). 3 Abra a tampa da abertura de enchimento. 4 Incline o ferro para trás. C 5 Encha o reservatório c...
Page 34 - Utilização do aparelho; Passar com vapor
C 3 Regule o ferro para a temperatura pretendida rodando o botão da temperatura para a posição apropriada. Verifique a etiqueta da peça de roupa para saber qual a temperaturaque deve seleccionar :- 1 Tecidos sintéticos (p. ex.: acrílico, nylon, poliamida, poliéster) - 1 Seda - 2 Lã - 3 Algodão, linh...
Page 35 - Passar sem vapor; Seleccione a temperatura recomendada (consulte o capítulo; Protector de tecidos delicados (apenas GC4325); Certifique-se de que o reservatório tem água suficiente.; Jacto de vapor concentrado da função especial Steam Tip
Passar sem vapor C 1 Regule o controlo do vapor para a posição 0 (= sem vapor). 2 Seleccione a temperatura recomendada (consulte o capítulo 'Preparação', secção 'Selecção da temperatura'). Características Protector de tecidos delicados (apenas GC4325) O protector de tecidos delicados protege este ti...
Page 36 - Prima e solte o botão do jacto de vapor.; Jacto de vapor vertical; A função 'jacto de vapor' também pode ser utilizada segurando; Sistema anti-calcário automático; O sistema integrado anti-calcário reduz a acumulação de
C 1 Prima e solte o botão do jacto de vapor. Jacto de vapor vertical C 1 A função 'jacto de vapor' também pode ser utilizada segurando o ferro na posição vertical. Este procedimento é útil para a remoção de vincos quando a roupaestá pendurada nos cabides, para cor tinas, etc. Nunca direccione o jact...
Page 37 - Limpeza e manutenção; Quando terminar; Retire a ficha da tomada eléctrica e deixe o ferro arrefecer.
- A luz vermelha 'auto-off' apaga-se. Se a temperatura da base do ferro descer abaixo da temperatura seleccionada para passar aroupa, a luz âmbar da temperatura acende-se. - Se a luz da temperatura se acender depois de movimentar o ferro, aguarde que ela se apague antes de começar a passar. - Se a l...
Page 38 - Após o processo Calc-clean; - Ligue a ficha à tomada eléctrica e deixe o ferro aquecer para
Função Calc-clean (limpeza do calcário) Pode utilizar a função Calc-clean para remover o calcário e asimpurezas. ◗ Utilize a função Calc-clean uma vez a cada duas semanas. Se aágua da sua zona de residência for muito dura (p. ex., se saíremresíduos de calcário da base quando estiver a passar), a fun...
Page 39 - Arrumação; Capa de protecção resistente ao calor (apenas GC4340); Ambiente; ou contacte o Centro de Atendimento ao
Arrumação 1 Desligue o ferro e regule o controlo de vapor para a posição 0. C 2 Esvazie o reservatório da água. C 3 Deixe o ferro arrefecer. Enrole o fio do ferro no compartimento respectivo e fixe-o com a mola. 4 Guarde sempre o ferro vazio na posição horizontal, sobre uma superfície estável, e uti...
Page 40 - Restrições à garantia; Resolução de problemas
o Depar tamento de Assistência da Philips Domestic Appliances andPersonal Care BV. Restrições à garantia O protector de tecidos delicados não está abrangido pelos termos dagarantia internacional. Resolução de problemas Este capítulo resume alguns dos problemas mais comuns que podeencontrar no seu fe...
Page 52 - Su haznesinin doldurulması; Ütüyü asla suya batırmayın.; T Ü R K Ç E
Önemli Lütfen cihazı kullanmadan önce verilen talimatları okuyun. İleridebaşvurmak için bu talimatları saklayın. ◗ Cihazı bağlamadan önce, model plakasında belirtilen voltajın anaşebeke voltajıyla aynı olduğunu kontrol edin. ◗ Bu cihazı sadece toprak hatlı bir prize takılı kullanın. ◗ Priz, kablo ve...
Page 53 - İpekli
T Ü R K Ç E 5 3 C 2 Buhar kontrolünü 0 konumuna getirin (= buharsız). 3 Doldurma deliğinin kapağını açın. 4 Ütüyü arkaya doğru yatırın. C 5 Su haznesini doldurma kabının yardımıyla maksimum seviyeye kadar musluk suyuyla doldurun. Hazneyi MAX (MAKS) göstergesinin üzerinde bir seviyededoldurmayın.Su h...
Page 54 - Isı düğmesi ütüleme esnasında zaman zaman yanacaktır.; Cihazın Kullanımı; Buharlı ütüleme; Özellikler; Hassas kumaş koruyucu (sadece GC4325 için); Hassas kumaş koruyucuyla,
T Ü R K Ç E 5 4 İpek, yünlü ve sentetik malzemeler : parlak lekeler oluşmasını engellemekiçin, kumaşın ters yüzünü ütüleyin. Leke oluşumunu engellemek içinsprey özelliğini kullanmaktan kaçının. Ütüleme işlemine, sentetik ürünler gibi en az ütüleme sıcaklığı isteyenelbiseleri ütüleyerek başlayın. 4 C...
Page 55 - Su haznesinde yeterince su olduğundan emin olun.; Özel Buhar uçlu konsantre kuvvetli şok buhar sistemi; Şok buhar düğmesine basın ve bırakın.; Dikey şok buhar; Şok buhar özelliği ütüyü dik olarak tuttuğunuzda da; Damlama durdurucu
T Ü R K Ç E 5 5 Hassas kumaş koruyucu, ütü tabanı sıcaklığını anlık olarak azaltır vehassas kumaşları güvenle ütülemenizi sağlar. Elbisenin ne tür kumaştan yapıldığını bilmiyorsanız, elbiseyi giydiğinizdegörünmeyen bir bölümünü ütüleyerek doğru ütüleme sıcaklığınıbelirleyin. C 1 Ütüde hassas kumaş k...
Page 56 - Dahili anti-calc sistemi kireç oluşumunu azaltır ve ütünün daha
T Ü R K Ç E 5 6 Otomatik anti-calc sistemi C 1 Dahili anti-calc sistemi kireç oluşumunu azaltır ve ütünün daha uzun ömürlü olmasını sağlar. Elektronik emniyetli kapanma özelliği (sadece GC4325/4320için) C ◗ Elektronik emniyetli kapanma özelliği, ütü bir süre boyuncahareketsiz kaldıysa cihazı otomati...
Page 57 - Temizlik ve bakım; Ütülemeden sonra; Su haznesine sirke veya diğer kireç çözücü maddeler koymayın.
Temizlik ve bakım Ütülemeden sonra 1 Elektrik fişini prizden çıkarın ve ütüyü soğumaya bırakın. 2 Tortuları ve tabandan çıkan diğer artıkları nemli bir bez ve aşındırıcı olmayan (sıvı) bir temizlik maddesiyle silin. Ütü tabanının düzlüğünü koruması için, metal cisimlerle ser t temasındankaçının. Ütü...
Page 58 - Calc-clean işleminden sonra; Isıya dayanıklı koruyucu kapak (sadece GC4340 için); Çevre
T Ü R K Ç E 5 8 Calc-clean işleminden sonra - Fişi prize takın ve ütü tabanının kuruması için ütünün ısınmasını sağlayın. - Ayarlanan ütüleme sıcaklığına ulaştığında, ütüyü prizden çekin.- Ütünüzü yavaşça eski bir bez üzerinde gezdirin. Kalan su lekeleri ütü tabanından çıkar. - Saklamadan önce, ütüy...
Page 59 - Garanti ve Servis; adresinden ziyaret ediniz; Garanti sınırlamaları; Sorun giderme
Garanti ve Servis Eğer daha fazla bilgiye ihtiyaç duyarsanız veya bir problem yaşarsanız,lütfen Philips Web sitesini www.philips.com.tr adresinden ziyaret ediniz veya ülkenizde bulunan Philips Müşteri Danışma Merkezi ile iletişimegeçiniz (dünya genelindeki telefon numaraları verilen garanti belgeler...