Page 3 - Contents
1 English EN Contents 1 Important 2 Safety 2 Notice 3 2 Your Mini Hi-Fi System 5 Introduction 5 What's in the box 5 Over view of the main unit 6 Over view of the remote control 7 3 Get started 8 Connect antennas 8 Connect speakers 8 Connect power 8 Prepare the remote control 9 Install radio stations...
Page 4 - Important; Safety; Know these safety symbols
2 EN 1 Important Safety Know these safety symbols This 'bolt of lightning' indicates uninsulated material within your unit may cause an electrical shock. For the safety of ever yone in your household, please do not remove product covering. The 'exclamation mark' calls attention to features for which...
Page 5 - Mains fuse; Notice
3 English EN • Do not mix batteries (old and new or carbon and alkaline, etc.). • Remove batteries when the unit is not used for a long time. o Apparatus shall not be exposed to dripping or splashing. p Do not place any sources of danger on the apparatus (e.g. liquid filled objects, lighted candles)...
Page 7 - System; Introduction
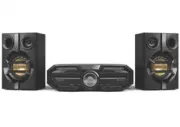
5 English EN 2 Your Mini Hi-Fi System Congratulations on your purchase, and welcome to Philips! To fully benefit from the suppor t that Philips offers, register your product at www.philips.com/suppor t. Introduction With this Hi-Fi system, you can: • enjoy audio from discs, USB storage devices, Blue...
Page 8 - Overview of the main unit
6 EN Overview of the main unit a • Turn on the unit.• Switch to normal standby or Eco Power standby mode. b SOURCE • Select a sound source: DISC, BT, USB, FM, AUDIO IN, or AUX IN. c MODE • Select repeat or random play. d MAX SOUND • Turn on or off instant power boost for sound. e BASS BOOST • Select...
Page 9 - Overview of the remote
7 English EN u Speaker connection sockets • Connect the supplied loudspeakers. v AC power connection Overview of the remote control a • Turn on the unit.• Switch to normal standby or Eco Power standby mode. b • Open or close the disc compar tment. c SOURCE • Select a sound source: DISC, USB, FM, AUD...
Page 10 - Get started; Connect antennas; Connect speakers; FM; Connect power
8 EN 3 Get started Caution • Use of controls or adjustments or performance of procedures other than herein may result in hazardous radiation exposure or other unsafe operation. Always follow the instructions in this chapter in sequence.If you contact Philips, you will be asked for the model and seri...
Page 11 - Prepare the remote control; Install radio stations
9 English EN Prepare the remote control Note • Risk of explosion! Keep batteries away from heat, sunshine or fire. Never discard batteries in fire. • Danger of explosion if the batter y is incorrectly replaced. Replace only with the same or equivalent type. 1 Open the batter y compar tment. 2 Inser ...
Page 12 - Turn on; Switch to standby mode
10 EN Turn on • Press . » The unit switches to the last selected source. Switch to standby mode • Press again to switch the unit to normal standby mode. » The clock (if set) is displayed on the panel. To switch to ECO Power standby mode: • Press and hold for more than two seconds. » The display pane...
Page 13 - Play from a Bluetooth-; Pair and connect
11 English EN 4 Play Play from a Bluetooth- enabled device Note • The effective operation range between the unit and your Bluetooth enabled device is approximately 10 meters (30 feet). • Any obstacle between the unit and the Bluetooth enabled device can reduce the operational range. • Compatibility ...
Page 14 - Stream music through Bluetooth; Play a disc; Play from USB
12 EN Option 2: Pair and connect manually 1 On the Bluetooth enabled device, search for Bluetooth devices that can be paired (see the user manual of the device). 2 Select ' Philips FX15 ' on your Bluetooth enabled device and if necessar y input '0000' as the pairing password. » After successful pair...
Page 16 - Listen to an MP3 player; Listen to an external audio
14 EN 5 Listen to an external device You can listen to an external audio device through the speakers of this unit. Listen to an MP3 player 1 Press SOURCE repeatedly to select the AUDIO IN source. 2 Connect a 3.5mm audio cable (not supplied) to: • the 3.5mm audio input socket on the front of the unit...
Page 17 - Play options; Repeat and shuffle play; Display play information
15 English EN 6 Play options Repeat and shuffle play • During disc play, press MODE repeatedly to select: • REPEAT ONE: the current track is played repeatedly. • REPEAT ALL: all tracks are played repeatedly. • SHUFFLE: all tracks in the current folder are played randomly. • REPEAT OFF: normal play i...
Page 18 - Adjust volume level; Mute sound; Select a preset sound effect; Enhance bass
16 EN 7 Adjust volume level and sound effect Note • MAX sound and bass boost cannot be activated at the same time. Adjust volume level Caution • For your hearing health and being consideration of other people, it is not recommended to listen at high volume levels for a long time. • During play, pres...
Page 19 - Listen to radio
17 English EN 8 Listen to radio Tune to a radio station 1 Press SOURCE repeatedly to select FM. 2 Press and hold / for more than two seconds. » [SEARCH] (search) is displayed. » The radio tunes to a station with strong reception automatically. 3 Repeat step 2 to tune to more stations. • To tune to a...
Page 20 - Other features; Set the alarm timer; Set the sleep timer; Restore default settings
18 EN 9 Other features Set the alarm timer This unit can be used as an alarm clock. You can select disc, radio or USB as alarm source. 1 Make sure that you have set the clock correctly. 2 Press and hold SLEEP/TIMER for more than two seconds. » 'TIMER SET' is displayed. Then, a prompt to select the s...
Page 21 - information; Specifications; Amplifier; USB playability information
19 English EN 10 Product information Note • Product information is subject to change without prior notice. Specifications Amplifier Total output power 240W RMS (30%THD) Frequency response 60Hz -20KHz, ±3dB Signal-to- noise ratio >70 dBA Aux input 2000mV RMS 22kohm Audio input 1000mV RMS 22kohm Di...
Page 23 - 1 Troubleshooting
21 English EN 11 Troubleshooting Warning • Never remove the casing of this apparatus. To keep the warranty valid, never tr y to repair the system yourself. If you encounter problems when using this apparatus, check the following points before requesting ser vice. If the problem remains unsolved, go ...