Page 2 - Canada
Canada English: This digital apparatus does not exceed the Class B limits for r adio noise emissions from digital appar atus as set out in the Radio Interference R e g u l a t i o n s o f t h e C a n a d i a n D e p a r t m e n t o f Communications.This Class B digital appar atus complies with Canad...
Page 3 - *Product Safety Notification; safety
3 EN English Register online at www.philips.com/welcome today to get the very most from your purchase. Visit our World Wide Web Site at http://www.philips.com/welcome Registering your model with PHILIPS makes you eligible for all of the valuable benefits listed below,so don't miss out. Register onlin...
Page 5 - Contents
5 English EN 8 Adjust sound 18 Adjust volume level 18 Mute sound 18 Select a preset sound effect 18 Enhance bass 18 9 Product information 18 Specifications 18USB playability information 19 Suppor ted MP3 disc formats 19 Maintenance 19 10 Troubleshooting 20 Contents 1 Important 6 Safety 6Notice 8 2 Yo...
Page 6 - Important; Safety; Important Safety Instructions
6 g Do not block any ventilation openings. Install in accordance with the manufacturer’s instructions. h Do not install near any heat sources such as radiators, heat registers, stoves, or other apparatus (including amplifiers) that produce heat . i Do not defeat the safety purpose of the polarized or...
Page 7 - Hearing safety
7 Hearing safety Listen at a moderate volume. Using headphones at a high volume can • impair your hearing. This product can produce sounds in decibel ranges that may cause hearing loss for a normal person, even for exposure less than a minute. The higher decibel ranges are offered for those that may...
Page 8 - Fi System; Introduction
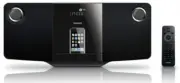
8 2 Your Micro Hi- Fi System Congratulations on your purchase, and welcome to Philips! To fully benefit from the suppor t that Philips offers, register your product at www.philips.com/welcome. Introduction With this unit, you can enjoy audio from discs, USB devices, iPod players, iPhone and other ext...
Page 9 - Overview of the main unit
9 f VOLUME + / - Adjust volume. • g Open/close the disc compar tment. • h Display panel Show current status. • i Dock for iPod/iPhone j Jack for the headphone. • k MP3 LINK Audio input jack (3. 5mm ) for an • ex ternal audio device. l FM antenna Improve FM reception. • Overview of the main unit a Tu...
Page 11 - started; Placement; Mount on a wall; Prepare the remote control
11 3 Get started Caution Use of controls or adjustments or • per for mance of procedures other than herein may result in ha zardous r adiation exposure or other unsafe oper ation. Always follow the instructions in this chapter in sequence.If you contact Philips, you will be asked for the model and s...
Page 12 - Connect power
12 Auto install radio stations When you connect power and no radio stations are stored, the unit automatically begins to store radio stations. 1 Connect the unit to the power supply. [ » AUTO INSTALL - PRESS PLAY KEY ](auto install - press play key) is displayed. 2 Press on the main unit to star t i...
Page 13 - Play a disc; Play from USB; Turn on; Switch to standby
13 4 Play Play a disc 1 Press CD to select the disc source. 2 Press to open the disc compar tment. 3 Inser t a disc with the printed side facing outward. 4 Press to close the disc compar tment. Play star ts automatically. If not, press » . Play from USB Note Ensure that the USB device contains playa...
Page 14 - Program tracks; Play options; Skip to a track
14 Program tracks Note You can progr am tr ack s only when the play • stops. You can program a maximum of 40 tracks. 1 Press PROG / CLOCK SET to activate the program mode. [ » PROG ] (program) is displayed. 2 For MP3/ WMA tracks, press / to select an album. 3 Press / to select a track , then press P...
Page 15 - Charge the iPod/iPhone; Play; Compatible iPod/iPhone
15 2 Press iPod to select iPod source. The connected iPod/iPhone plays » automatically. To pause/resume play, press • . To skip to a track , press • / . To search during play, press and • hold / , then release to resume normal play. Charge the iPod/iPhone When the unit is connected to power, the doc...
Page 16 - Select a preset radio station; Listen to radio; Tune to a radio station
16 Program radio stations manually You can program a maximum of 20 preset radio stations (FM). 1 Tune to a radio station. 2 Press PROG / CLOCK SET to activate program mode. [ » PROG ] (program) is displayed. 3 Press / to allocate a number to this radio station, then press PROG / CLOCK SET to confirm....
Page 17 - Other; Set the alarm timer
17 Set the sleep timer This unit can switch to standby automatically after a set period of time. 1 When the unit is turned on, press SLEEP / TIMER repeatedly to select a set period of time (in minutes). When sleep timer is activated, » is displayed. To deactivate sleep timer 1 Press SLEEP / TIMER re...
Page 18 - Specifications; Amplifier; Adjust; Adjust volume level
18 9 Product information Note Produc t infor mation is subjec t to change • without prior notice. Specifications Amplifier Total output power 2 x 5 W RMSFrequency response 80 Hz - 16 kHz, ± 3 dB Signal to noise ratio > 60 dBMP3 link input 0. 5 V RMS 20 k Disc Laser type Semiconductor Disc diameter ...
Page 19 - General information; USB playability information
19 A AC , WAV, PCM audio files • DRM protected WMA files (.wav, .m4a, • .m4p, .mp4, .aac)WMA files in Lossless format • Supported MP3 disc formats ISO9660, Joliet • Maximum title number : 999 (depending • on file name leng th)Maximum album number : 99 • Suppor ted sampling frequencies: 32 kHz, • 44.1kHz...
Page 20 - 0 Troubleshooting
20 Inser t the bat ter y with its polarities • (+/– signs) aligned as indicated.Replace the bat ter y. • Aim the remote control directly at the • sensor on the front of the unit. Cannot display some files in USB device The number of folders or files in the USB • device has exceeded a cer tain limit. T...