Page 2 - Contents
3 English EN 8 Listen to the radio 15 Tune to a radio station 15 Program radio stations automatically 15 Program radio stations manually 15 Select a preset radio station 15 9 Adjust sound 16 Adjust volume 16 Select a preset sound effect 16 Enhance bass 16 Immerse music over a wider spot 16 Mute soun...
Page 3 - Important Safety Instructions; Important; Safety
4 Important Safety Instructions a Read these instructions. b Keep these instructions. c Heed all warnings. d Follow all instructions. e Do not use this apparatus near water. f Clean only with dry cloth. g Do not block any ventilation openings. Install in accordance with the manufacturer’s instructio...
Page 4 - Recycling; Notice
5 Recycling Your product is designed and manufactured with high quality materials and components, which can be recycled and reused. When you see the crossed-out wheel bin symbol at tached to a product, it means the product is covered by the European Directive 20 02 /96/EC: Never dispose of your prod...
Page 5 - Introduction; Norge
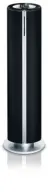
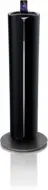
6 2 Your Docking Entertainment System Congratulations on your purchase, and welcome to Philips! To fully benefi t from the suppor t that Philips offers, register your product at www.philips.com/welcome. Introduction With this unit, you can enjoy audio from audio discs, USB devices, iPod players, iPho...
Page 6 - Overview of the main unit
7 h VOLUME +/- Adjust volume. • i Turn on the apparatus, or switch to • standby mode. j Dock for iPod/iPhone k SOURCE Select a source: CD, FM TUNER , • iPod/iPhone, USB or MP3 LINK . l PROG Program tracks. • Program radio stations. • Set the clock . • Overview of the main unit a Display panel Show c...
Page 8 - started; Connect FM antenna
9 3 Get started Caution Use of controls or adjustments or • per for mance of procedures other than herein may result in ha zardous r adiation exposure or other unsafe oper ation. Always follow the instructions in this chapter in sequence.If you contact Philips, you will be asked for the model and se...
Page 9 - Prepare the remote control; Set clock
10 Prepare the remote control Caution Risk of explosion! Keep bat teries away from • heat, sunshine or fi re. Never discard bat teries in fi re. For fi rst-time use: 1 Remove the protective tab to activate the remote control bat ter y. To replace the remote control batteries: 1 Open the bat ter y compa...
Page 10 - Turn on; Switch to standby
11 4 Play disc 1 Press CD to select the disc source. 2 Inser t a disc into the disc compar tment with the printed side facing right. Play star ts automatically. » To pause/resume play, press • . To stop play, press • . For MP3/ WMA disc: to select an • album, press / .To skip to a track /fi le/chapte...
Page 11 - Skip to a track; Search within a track; Repeat play; Play from USB
12 6 Play options Skip to a track For CD: 1 Press / to select another track . To select a track directly, you can • also press a key on the numerical keypad. For MP3 disc and USB: 1 Press to select an album or folder. 2 Press / to select a track or fi le. Pause/resume play 1 During play, press to pau...
Page 12 - Play; Compatible iPod/iPhone; Random play; Program tracks
13 7 Play iPhone/iPod You can enjoy audio from iPhone/iPod through this unit. Compatible iPod/iPhone Apple iPod and iPhone models with a 30-pin dock connector : iPod classic, iPod touch, iPod nano, iPod • 5th generation (video).iPhone, iPhone 3G . • Load the iPhone/iPod 1 Place the iPhone/iPod in th...
Page 13 - Charge the iPhone/iPod
14 Remove the iPhone/iPod 1 Press the two but tons on the bot tom of the dock to eject the iPhone/iPod. 2 Pull the iPhone/iPod out of the dock . Listen to the iPhone/iPod 1 Ensure that the iPhone/iPod is loaded correctly. 2 Press iPhone/iPod to select iPhone/iPod source. The connected iPhone/iPod pl...
Page 14 - Select a preset radio station; Listen to the; Tune to a radio station
15 Program radio stations manually Note You can progr am a maximum of 20 preset • r adio stations. 1 Tune to a radio station. 2 Press PROG/CLOCK to activate program mode. [PROG] (program) blinks on the » display. 3 Press / to allocate a number (1 to 20) to this radio station, then press PROG/ CLOCK ...
Page 15 - Adjust subwoofer volume
16 10 Other features Set the sleep timer This unit can switch to standby automatically after a set period of time. 1 When the unit is turned on, press SLEEP repeatedly to select a set period of time (in minutes). When sleep timer is activated, the » display shows [SLEEP](sleep) . To deactivate sleep...
Page 16 - information; Specifi cations; Amplifi er; Listen to an external device; Turn on or off the light effect
17 11 Product information Note Produc t infor mation is subjec t to change • without prior notice. Specifi cations Amplifi er Rated Output Power 140 W RMS Frequency Response 10 0 Hz - 16 kHz, ±3 dB Signal to Noise Ratio >70dB Aux Input 0. 5 V RMS 20kohm Disc Laser Type Semiconductor Disc Diameter 1...
Page 17 - USB playability information; Tuner
18 USB playability information Compatible USB devices: USB fl ash memor y (USB 2.0 or USB1.1) • USB fl ash players (USB 2.0 or USB1.1) • memor y cards (requires an additional • card reader to work with this unit) Supported formats: USB or memor y fi le format FAT12, • FAT16, FAT32 (sector size: 512 by ...
Page 18 - 2 Troubleshooting; Supported MP3 disc formats
19 12 Troubleshooting Warning Never remove the casing of this appar atus. • To keep the warranty valid, never tr y to repair the system yourself. If you encounter problems when using this apparatus, check the following points before requesting ser vice. If the problem remains unsolved, go to the Phi...