Philips BRE700/04 - User Manual
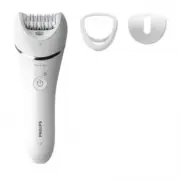
Philips BRE700/04 – User Manual, read for free online in PDF format. We hope this helps you resolve any issues you may have. If you have further questions, please contact us through the contact form.


In US manufactured for: Philips Personal Health, a division of Philips
North America LLC, P.O. Box 10313, Stamford, CT 06904 / En EUA
manufacturado para: Philips Personal Health, una división de Philips
North America LLC, P.O. postal 10313, Stanford, CT 06904
In Canada imported by: Philips Electronics Ltd, 1875 Buckhorn Gate,
5th Floor, Mississauga, Ontario, L4W 5P1 / Au Canada importé par:
Philips Electronics Ltd., 1875 Buckhorn Gate, 5th Floor, Mississauga,
Ontario, L4W 5P1
This symbol on the product’s nameplate means it is
listed by Underwriters’ Laboratories, Inc.
Ce symbole apparaissant sur la plaque nominale du
produit signifie qu’il est enregistré par Underwriter’s
Laboratories, Inc.
Este símbolo en la placa de características del
producto significa que está registrado por
Underwriters Laboratories, Inc.
PHILIPS and Philips shield are registered trademarks of Koninklijke
Philips N.V / PHILIPS et le blason Philips sont des marques déposées
de Koninklijke Philips N.V. / PHILIPS y Philips Shield son marcas
registradas de Koninklijke Philips N.V.
©2023 Philips North America LLC. All rights reserved / Tout droits
réservés / Todos los derechos reservados.
3000.051.7427.2 (05/08/2023)
BRE740-BRE700
1
2
1
2
75°
1
2
14
6
22
2
18
10
26
30
15
7
23
3
19
11
27
31
16
8
24
4
20
12
28
32
17
9
25
5
21
13
29
33
Introduction
Congratulations on your purchase and welcome to Philips! To fully
benefit from the support that Philips offers, register your product at
www.philips.com/welcome
.
Features (Fig. 1)
1 Handle
2 Speed lights (I and II)
3 On/off button
4 Battery indicator
5 Socket for small plug
6 Release button
7 Epilating head
8 Built-in light
9 Epilating discs
10 Efficiency cap
11 Delicate area cap
12 Trimmer head
13 Trimmer comb
14 Shaving head
15 Shaving head comb
16 Coupling unit
17 Body exfoliation brush
18 Protection cap for body exfoliation brush
19 Callus removal head
20 Callus removal disk
21 Protection cap for callus removal head
22 Exfoliation glove
23 Power plug
24 Small plug
Not shown: Cleaning brush, Pouch
Note: The heads and accessories supplied vary for different model numbers.
Consult the overview illustration for the heads and accessories supplied with your
particular model.
Charging
- Fully charge product before using for the first time or after non-use for a long
period of time.
- Charging or using the product at temperatures below 50 °F (10 °C) or higher
than 95 °F (35 °C) adversely affects the lifespan of the battery.
Note: This product can only be used without cord (Fig. 4).
1 Be certain the product is OFF.
2 Insert the small plug into the product and put the power plug into any 120V
AC outlet. Use only the cord provided.
-
When the battery indicator flashes white (Fig. 5), the product is charging.
-
After 1.5 hours of charging, the product has a cordless operating time of
up to 40 minutes.
-
When the battery indicator lights up white continuously (Fig. 6), the
product is fully charged.
-
The battery indicator does not light up when the product is switched on:
the product contains enough energy to be used.
-
When the battery indicator flashes orange (Fig. 5), the battery is almost
empty and needs to be charged. Charge the product when you have
finished using it.
NOTE: If the product is fully charged and connected to the electrical outlet, the
battery indicator flashes a few times when you press the on/off button. This
reminds you to disconnect the product from the electrical outlet before using.
Quick charge
- When the battery is completely empty and you start charging it, the battery
indicator flashes white quickly.
- After approximately 15 minutes, the battery indicator starts flashing white
slowly. At this point, the battery contains enough energy for up to 10 minutes
of use.
Using the product
Switching the product on and off
1 To turn on the product, press the on/off button once (Fig. 7).
2 If you want to select the low speed setting, press the on/off button again
(Fig. 8).
3 To turn off the product, press the on/off button once more.
Attaching and detaching the epilating head
1 To attach the epilating head, press it onto the handle ('click') (Fig. 9).
2 To detach the epilating head, press the release button on the back of the
product (Fig. 10).
Note: You can attach and detach the callus removal head, the trimmer head, the
shaving head and the body exfoliation brush in the same way.
Attaching and detaching the callus removal disk
1 To attach the disk, push it onto the coupling in the head (Fig. 11).
Look at the appliance from the side to check if the disk is level with the outer
rim of the head.
If the disk wobbles when you switch on the appliance, the disk is not placed
correctly. Remove the disk and attach it properly.
2 To remove the disk, put your thumb in the indent behind the disk and push it
forward until the disk detaches from the head (Fig. 12).
Attaching and detaching the trimmer comb
To attach the trimmer comb onto the trimmer head:
1 Place the notch on one side of the comb in the indent in the trimmer head.
2 Press the comb onto the trimmer head until the notch on the other side of the
comb snaps into the indent on the other side of the trimmer head (Fig. 13).
To detach the trimmer comb from the trimmer head:
3 On one side of the comb, place a fingernail between the comb and the
trimmer head.
4 Pull with your nail until the comb comes off the trimmer head (Fig. 14).
Do not pull at the back or teeth of the comb to remove it.
How to use your epilator
- Use this epilator for its intended household use as described in this manual.
- For hygienic reasons, the epilator and attachments should only be used by
one person.
- Epilation is easier and more comfortable when the hair has the optimum
length of 1/8 - 5/32 in/3-4 mm. If the hairs are longer, pretrim them first or
shave and epilate after 1 to 2 weeks.
- Make sure you hold the epilator handle at a 75° angle on the skin and move it
slowly against the direction of hair growth (Fig. 15).
- It is normal to experience slight skin irritation (red skin or red dots) after
epilating. In this case, it is best to epilate in the evening as most skin irritation
disappears overnight. This effect will gradually lessen with each use.
- After each use, you may want to apply a non-alcohol based mild cream or
body lotion which will help reduce the possibility of skin irritation. Be certain it
does not contain alcohol as it may cause discomfort.
- Make sure the epilator is fully charged before using. This epilator will not
operate while the cord is connected to an electrical outlet.
Epilating
- Only use the epilator attachment to epilate areas below the neck such as your
legs, underarms and bikini line.
- Attach the delicate area cap if you want to epilate facial hair.
- For gentle, less painful epilation, epilate in the shower or bath on wet skin
with or without shower gel or soap.
- For dry epilating, make sure your skin is clean, and free from grease and
creams. Do not apply any cream before using. Hairs are easier to remove after
a bath or shower, but your skin should be completely dry before using your
epilator.
1 Before first use, clean the epilating head (see 'Cleaning').
2 Press the epilating head onto the handle (Fig. 9).
3 If desired, put an attachment on the epilating head (Fig. 16).
NOTE: The attachment will only fit onto the product in one direction.
4 Press the on/off button once to turn on the epilator (Fig. 7).
- The epilator starts running at speed II which is the most efficient speed for
epilating. The speed II light lights up.
- If you want to use speed I, press the on/off button a second time. Speed I light
lights up (Fig. 8).
- Select speed I for areas with little hair growth, for hard-to-reach places and
for areas with bones close to the skin's surface, such as knees and ankles.
- When you press the on/off button a third time, the epilator turns off.
Tip: For greater visibility of fine hairs, the built-in light goes on automatically
when epilating (Fig. 17). To turn off, press the on/off button for 3 seconds
after turning on the product.
5 Hold the epilator perpendicular to your leg at a 75° angle with the on/off
button pointing in the direction you are going to move the product (Fig. 15).
6 Gently press and move the epilator slowly over the skin against the direction
of hair growth. If you press too lightly or too hard, the epilator will not be able
to grasp and remove the hairs. Experiment until you find the right settings
and right amount of pressure for your type of skin and hair.
Tip: When epilating sensitive areas, stretch the skin with your free hand. For
epilating underarms, put your hand on the back of your head to stretch the
skin (Fig. 18).
7 Press the on/off button to turn the epilator OFF.
8 Pull the attachment off the epilating head and clean epilator and attachment
(see 'Cleaning').
IMPORTANT:
- After using the epilator, some redness or irritation may occur. This is normal
and should disappear quickly.
- Clean the product and attachments after each use (see 'Cleaning').
Using epilator attachments
- When using epilator attachments, always be sure you place the heads flat
onto the skin at a 75° angle (Fig. 15).
- Simply snap each attachment onto the epilator head ('click') (Fig. 16).
- To remove an attachment, grasp its front and back and pull it up off the
epilator head (Fig. 19).
Delicate area cap
- Attach the delicate area cap onto the epilating head for more comfortable
epilating of delicate areas such as underarms and bikini area.
- You can also use the delicate area cap for precise epilating of facial hair such
as upper lip.
Do not use the appliance to epilate eyelashes, eyebrows or scalp hair.
Efficiency cap
- Attach the efficiency cap onto the epilating head to keep skin tight and help
reduce pain while epilating.
Body exfoliation brush
- Remove the epilator head by pressing the release button on the back of the
appliance (Fig. 10).
- Attach the body exfoliation brush to the coupling unit and then attach to the
appliance handle. (Fig. 20) The body exfoliation brush helps remove dead skin
cells.
Do not use the body exfoliation brush on your face.
Callus removal
Note: The callus removal head is only intended for use on feet.
You can use the callus removal disk in 3 different ways, depending on the area or
callus you want to treat.
1 To treat a large, flat area, use the entire disk (Fig. 21). Make sure you place the
disk flat onto the skin for good control during use.
2 For precision treatment of smaller areas and good visibility of the treated area
(Fig. 22), use the top part of the disk that sticks out beyond the top of the
head (Fig. 23).
3 For precision treatment and for buffing away hard skin very quickly, use the
narrow edge of the protruding top part of the disk (Fig. 24).
Move the disk back and forth gently over the skin you want to treat. Do not push
too hard. When you push too hard, the disk might stop rotating.
Shaving
Do not use the shaving head if the foil damaged or broken, as injury may
occur.
- Use the shaving head to shave your legs, underarms and bikini line.
- Attach the shaving head comb onto the shaving head to shave hairs to a
length of 1/8in/3mm (Fig. 25). When you remove the comb, always grasp the
comb on the sides (Fig. 26).
- To shave legs and bikini line, always move the appliance gently over the skin
against the direction of hair growth.
- To shave underarms, place one arm behind your head and move the
appliance up and down and from left to right.
Trimming
- Use the trimmer head to trim hard-to-reach areas in the bikini zone.
- Attach the trimmer head comb onto the trimmer head to trim hairs in the
bikini zone to a length of 1/8in/3mm (Fig. 27).
- To create precise lines, place the trimmer head perpendicular onto the skin
(Fig. 28).
Caution: Do not use the trimmer head without the comb on intimate areas
other than the bikini line as this could cause injury.
Overheat protection
Note: To avoid overheating of the product, do not press the product too hard
onto your skin. The product works best when you move it over your skin without
exerting any pressure.
1 If the overheat protection is activated, the product turns off automatically.
The speed lights start flashing.
2 Let the product cool down. The lights stop flashing after 4 seconds.
3 When the product has cooled down, you can turn it on again.
If the lights start flashing again, the product has not yet cooled down
completely.
Cleaning
IMPORTANT:
- Always clean the handle, heads and attachments after each use.
- Always turn the product OFF and remove power cord from electrical outlet
and product before cleaning.
- Never use compressed air, scouring pads, abrasive cleaning agents or
aggressive liquids such as gasoline or acetone to clean the product.
- Keep the power cord dry (Fig. 2).
Cleaning the epilating head and epilating attachments
- It is essential for hygienic reasons and optimum performance that the
epilating head, attachments and rotating disks are cleaned after each use.
- It is strongly recommended to always rinse the epilating head with cold water
to help prevent bacterial growth.
- Never clean, remove, or replace epilating head or attachments while motor is
ON. The rotating disks are not removable from the epilating head.
- Do not apply pressure or touch rotating disks with hard objects as this may
dent or damage the disks. If damage occurs, discontinue use immediately.
1 Be certain the product is OFF.
2 Pull any attachment off the epilating head (Fig. 19).
3 Remove loose hairs from the epilating disks and attachment with the brush.
Never try to detach the epilating disks from the product.
4 Rinse attachments thoroughly under warm tap water while turning.
5 Turn the product on and rinse the epilating head under cold tap water for 15
seconds (Fig. 29).
6 Shake off excess water and dry the epilating head and attachments
completely with a soft towel or tissue, or allow to air-dry thoroughly.
7 To attach the epilating head, press it onto the handle ('click') (Fig. 9).
Cleaning the callus removal head
To clean the callus removal head and disk (if supplied): clean the outside of the
head and disk with the cleaning brush supplied (Fig. 30). Then remove the disk
off the head and clean the inside of the head with the cleaning brush supplied
(Fig. 31).
If you prefer, you can rinse the callus removal head and disk under a running tap.
Let all parts dry completely.
Cleaning the shaving head
- Never clean or remove the shaving head or cutting unit while the motor is ON.
- Do not apply pressure to the shaving head. Do not touch the foil with hard
objects as this may dent or damage foil or cutters.
- Do not use the shaving head if the foil is damaged or broken, as this may
cause facial injury.
1 Be certain the product is OFF.
2 Press the release button and remove the shaving head from the handle.
3 Pull the cutting unit out of the shaving head (Fig. 32).
4 Clean the cutting unit, foil, cutters and inside the shaving head with the
cleaning brush. Also brush away any hairs that have collected under the
trimmers.
To avoid damage, never use a brush to clean the shaving foil.
5 You can also rinse the cutting unit, inside the shaving head and accessories
under warm tap water.
6 Allow all parts to air-dry thoroughly.
7 Put the cutting unit back into the shaving head ('click').
For the best shaving performance, it is suggested to lightly oil shaving head every
six weeks by spreading a drop of mineral oil over the foil and cutters.
Replacing the shaving head cutting unit
If the foil and/or trimmers of the cutting are worn or damaged, do not
continue to use the shaving head.
A worn or damaged cutting unit should only be replaced with an original Philips
cutting unit which is available at
www.philips.com/parts-and-accessories
. You
can also call 1-800-243-7884 (in US only) or 1-866-800-9311 (in Canada only) for
assistance.
The cutting unit is a precision part. Handle with care.
1 Always turn the product OFF and remove power cord from the electrical
outlet and product before replacing the cutting unit.
2 Press the release button and remove the shaving head from the handle.
3 Pull the cutting unit out of the shaving head (Fig. 32).
4 Place a new cutting unit into the shaving head ('click').
5 Reattach the shaving head to the handle.
6 After replacing the cutting unit, check to make sure the cutting unit and
shaving head are firmly attached before using the epilator.
Storage
- Be sure epilator is turned OFF. Remove power cord from the electrical outlet
and handle before storing product in a safe, dry location where it will not be
crushed, banged, or subject to damage.
- Do not wrap cord around epilator when storing.
- Store cord in a safe location where it will not be cut or damaged.
- Do not place or store epilator where it can fall or be pulled into a tub or sink,
water or other liquid while plugged in.
- Put the body exfoliation brush protective cap on the body exfoliation brush
after use.
- Store the epilator and attachments in the pouch provided.
Accessories
For maximum shaving performance, replace the shaving head
cutting unit once a year. This replacement part can be purchased
on
www.philips.com/parts-and-accessories
.
If you use the body exfoliation brush 2-3 times a week, replace it every 3 months.
This replacement parts can be purchased on
www.philips.com/store
.
Callus removal head (if supplied): Replace the callus removal disk with one of the
original type when its effectiveness decreases.
Assistance
For assistance, visit our website: www.philips.com/support or call toll free
1-800-243-7884 (in US only) or 1-866-800-9311 (in Canada only).
Disposal
- This product contains a rechargeable lithium-ion battery which must be
disposed of properly.
- Contact your local town or city officials for battery disposal information. In
the US, you can also call 1-800-822-8837 or visit
www.call2recycle.org
for battery drop-off locations (Fig. 33). In Canada, you can also call
1-888-224-9764 or visit
www.call2recycle.ca
for battery drop-off locations.
- For assistance, visit our website
www.philips.com/support
or call toll-free
1-800-243-7884 (in US only) or 1-866-800-9311 (in Canada only).
- Your product is designed and manufactured with high quality materials
and components, which can be recycled and reused. For recycling
information, please contact your local waste management facilities or visit
www.recycle.philips.com
.
Full Two-Year Warranty
Philips North America LLC (USA) and Philips Electronics Ltd (Canada) warrant this
new product against defects in materials or workmanship for a period of two
years from the date of purchase, and agree to repair or replace any defective
product without charge.
Cutting units, combs, the body exfoliation brush and the callus removal disk are
not covered by the terms of this warranty because they are subject to wear and
tear.
IMPORTANT
: This warranty does not cover damage resulting from accident,
misuse or abuse, lack of reasonable care, the affixing of any attachment not
provided with the product or loss of parts or subjecting the product to any but
the specified voltage.*
NO RESPONSIBILITY IS ASSUMED FOR ANY SPECIAL, INCIDENTAL OR
CONSEQUENTIAL DAMAGES.
In order to obtain warranty service, simply go to
www.philips.com/support
for assistance. It is suggested that for your protection you return shipments of
product by insured mail, insurance prepaid. Damage occurring during shipment
is not covered by this warranty. NOTE: No other warranty, written or oral, is
authorized by Philips North America LLC and Philips Electronics Ltd (Canada).
This warranty gives you specific legal rights, and you may also have other rights
which vary from state to state, province to province or country to country. Some
states do not allow the exclusion or limitation of incidental or consequential
damages, so the above exclusion and limitations may not apply to you.
*Read enclosed instructions carefully.
45-Day Money-Back Guarantee
If you are not fully satisfied with your product send the product back and we’ll
refund you the full purchase price.
The product must be shipped prepaid by insured mail, insurance prepaid,
have the original sales receipt, indicating purchase price and date of purchase.
We cannot be responsible for lost mail.
The product must be postmarked no later than 45 days after the date of
purchase. Philips reserves the right to verify the purchase price of the
product and limit refunds not to exceed suggested retail price.
To obtain the money-back guarantee service, please go to
www.PhilipsMoneyBack.com and follow the simple 3-step process.
Delivery of refund check will occur 6–8 weeks after receipt of returned product.
Español
INSTRUCCIONES IMPORTANTES DE SEGURIDAD
Cuando utilice un producto eléctrico, siempre debe seguir las precauciones
básicas, incluidas las siguientes:
Lea todas las instrucciones antes de usar este producto.
PELIGRO
Para reducir el riesgo de descarga eléctrica:
- No intente agarrar un producto con cable que haya caído al agua.
Desconéctelo inmediatamente del enchufe de la pared.
- Mantenga el cable de alimentación seco (Fig. 2).
- No coloque ni guarde el producto en un lugar desde donde pueda caerse a
una bañera o fregadero. No coloque el producto en un lugar desde donde
pueda caerse al agua o a cualquier otro líquido ni sumerja el producto en
ningún tipo de líquido.
- Este producto no funciona mientras está conectado al enchufe de pared.
Excepto cuando se esté cargando, siempre desenchufe este producto del
enchufe de pared.
- Desconecte el cable de alimentación del enchufe de pared y del producto
antes de limpiarlo.
ADVERTENCIA
Para reducir el riesgo de quemaduras, incendio, descarga eléctrica o
lesiones:
- Este producto no está destinado a personas (adultos o niños) con capacidades
física, sensorial o mental disminuidas, o que no tengan los conocimientos
o la experiencia necesarios, a menos que una persona responsable de su
seguridad los supervise o los instruya sobre el uso del producto. Evite que los
niños jueguen con este producto.
- Use este producto solo para el uso doméstico previsto como se describe en
este manual. El uso inadecuado puede causar posibles riesgos o lesiones
graves. No use accesorios que no estén recomendados por la corporación
Philips North America LLC. Los accesorios incluidos pueden variar según el
producto.
- Nunca utilice este producto si el cable o el enchufe de carga están dañados, si
no funciona correctamente, si se cayó, si está dañado o si se sumergió en agua
mientras estaba conectado a la alimentación eléctrica. Para solicitar asistencia,
llame al 1-800-243-7884 (EE. UU.) o 1-866-800-9311 (Canadá).
- Mantenga el cable de alimentación lejos de superficies calientes.
- No deje caer ni introduzca ningún objeto en ninguna abertura.
- No utilice el adaptador dentro o cerca de una salida de corriente que
contenga un ventilador de aire eléctrico para prevenir daño al adaptador.
- No use el producto a la intemperie ni lo use donde se estén usando productos
de aerosol (atomizador) o donde se esté administrando oxígeno.
- Antes de usar el producto, revise siempre los discos giratorios, la lámina
y los accesorios. No use el producto si los discos giratorios, la lámina y los
accesorios están dañados, ya que puede producirse una lesión.
- Siempre conecte la clavija al producto primero y, luego, al tomacorriente.
Para desconectar, gire el interruptor de encendido/apagado a la posición de
"APAGADO" y, luego, desenchufe la clavija del tomacorriente.
- Enchufe el cable de alimentación directamente en el toma corriente. No use
un cable de extensión.
- Desconecte el cable de alimentación antes de conectar o desconectar el
producto.
- Las baterías que se emplean en este producto pueden representar un riesgo
de incendio o de quemadura química si no se manipulan correctamente. No
desarme, incinere ni permita que la temperatura de las baterías supere los
100 °C (212 °F).
¡IMPORTANTE!
: El enchufe eléctrico contiene un transformador. No corte el
enchufe eléctrico para reemplazarlo con otro ya que esto puede producir una
condición de peligro.
- Use únicamente accesorios o productos consumibles originales de Philips. Use
únicamente el cable de alimentación desmontable HQ8505.
- Cargue, utilice y guarde el producto a una temperatura entre 10 °C y 35 °C.
- Mantenga el producto y las baterías lejos del fuego y no los exponga a la luz
solar directa ni a altas temperaturas.
- Si el producto se pone anormalmente caliente, despide un olor extraño,
cambia de color o tarda más tiempo de lo normal en cargarse, deje de usarlo y
de cargarlo, y comuníquese con Philips.
- No coloque los productos y sus baterías en hornos microondas ni en ollas de
inducción.
- No abra, modifique, perfore, dañe ni desarme el producto o la batería, para
evitar que las baterías se calienten o liberen sustancias tóxicas o peligrosas. No
provoque un cortocircuito, sobrecargue ni invierta la posición de las baterías.
- Si las baterías se dañan o tienen fugas, evite el contacto con la piel o los ojos.
Si esto sucede, enjuague bien inmediatamente con agua y busque atención
médica.
- Cuando manipule las baterías, asegúrese de que sus manos, el producto y las
baterías estén secas.
- Para evitar un cortocircuito en las baterías después de la extracción, no
permita que las terminales de las baterías entren en contacto con objetos
metálicos (p. ej., monedas, horquillas, anillos). No envuelva las baterías en
papel de aluminio. Cubra las terminales de las baterías con cinta o colóquelas
en una bolsa de plástico antes de desecharlas.
CONSERVE ESTAS INSTRUCCIONES
INFORMACIÓN IMPORTANTE
PRECAUCIÓN
- Por motivos de higiene, se recomienda que solo una persona utilice el
producto.
- Nunca use aire comprimido, fibras, agentes de limpieza abrasivos ni líquidos
agresivos como gasolina o acetona para limpiar el producto.
- Apague el producto antes de retirar o colocar los accesorios y antes de
limpiarlo.
- Cuando enjuague el producto o los accesorios, asegúrese siempre de
revisar que el agua no esté demasiado caliente (100 °F máximo) para evitar
quemarse las manos.
- Los métodos que eliminan el vello de raíz pueden causar vellos encarnados
y lesiones menores en la piel. Consulte a su médico si tiene alguna duda
respecto del uso de una depiladora.
- No use la depiladora si tiene venas varicosas, erupciones, manchas, así como
tampoco si la piel está irritada, si tiene vellos encarnados o una tendencia a
sufrir de vellos encarnados. Consulte primero a su médico.
- Cualquier lesión pequeña que se origine por la eliminación del vello puede
permitir que las bacterias penetren en el lugar de la lesión y, potencialmente,
causen pequeñas cicatrices o un cambio en la pigmentación de la piel. Se
puede minimizar el riesgo de infección al limpiar cuidadosamente los discos
giratorios antes o después de cada uso (ver 'Limpieza').
- La depiladora solo debe utilizarse después de una consulta previa con su
médico si tiene o si sufre:
-
Heridas abiertas
-
Eczema, psoriasis (eczema con escamas), reacciones cutáneas inflamatorias
como foliculitis, erupciones cutáneas o la tendencia a alergias o a
reacciones alérgicas cutáneas
-
Inmunodeficiencia o trastornos inmunitarios
-
Rosácea o venas varicosas
-
Está embarazada
-
Inmunidad cutánea reducida como consecuencia de diabetes, embarazo,
enfermedad de Raynaud, etc.
-
Hemofilia
-
Lunares, protuberancias en la piel, etc.
- Si ha ingerido medicamentos hormonales o comenzará a hacerlo, o si ha
estado embarazada recientemente, el cambio en sus niveles de hormonas
puede afectar el grosor, el color o la cantidad de crecimiento de vello. Esto se
debe a cambios hormonales, no a este método de eliminación del vello.
- No utilice aceites de baño o ducha cuando depile piel húmeda, ya que esto
puede provocar irritación cutánea grave.
- Limpie el cabezal de depilación después de cada uso (ver 'Limpieza').
GENERAL
- Este producto es a prueba de agua (Fig. 3). Es apropiado para su uso en el
baño o la ducha y puede lavarse en la llave.
- Limpie el producto después de cada uso (ver 'Limpieza').
- Este producto no contiene otras piezas que requieran mantenimiento. Para
solicitar asistencia, llame al 1-800-243-7884 (solo EE. UU.) o 1-866-800-9311
(solo Canadá).
Introducción
Enhorabuena por la adquisición de este producto, y bienvenido a Philips. Para
sacar el mayor partido a la asistencia que Philips le ofrece, registre el producto en
www.philips.com/welcome
.
Características (Fig. 1)
1 Mango
2 Luces indicadoras de velocidad (I y II)
3 Botón de encendido/apagado
4 Indicador de batería
5 Toma para clavija pequeña
6 Botón de liberación
7 Cabezal depilador
8 Luz incorporada
9 Discos depiladores
10 Cabezal para sistema de estiramiento de la piel
11 Cabezal para zonas delicadas
12 Cabezal recortador
13 Peine del cabezal recortador
14 Cabezal de afeitado
15 Peine para el cabezal de afeitado
16 Unidad de acoplamiento
17 Cepillo de exfoliación corporal
18 Tapa de protección del cepillo de exfoliación corporal
19 Cabezal de eliminación de callos
20 Disco de eliminación de callos
21 Tapa de protección del cabezal de eliminación de callos
22 Guante de exfoliación
23 Cable de alimentación
24 Conector pequeño
No se muestra: Cepillo de limpieza, Funda
Nota: Los cabezales y los accesorios suministrados pueden variar según los
diferentes números de modelos. Consulte la ilustración de descripción general
para ver los cabezales y los accesorios suministrados con este modelo en
particular.
Carga
- Cargue el producto completamente antes de usarlo por primera vez y después
de un largo periodo de no usarlo.
- La carga o el uso del producto a temperaturas por debajo de los 50 °F (10 °C)
o superiores a los de 95 °F (35 °C) afecta la vida útil de la batería.
Nota: Este producto solo se puede utilizar sin cable (Fig. 4).
1 Asegúrese de que el producto esté APAGADO.
2 Inserte la clavija pequeña en el producto y conecte la clavija de alimentación
en cualquier toma de corriente de pared de 120 V CA. Use solo el cable
provisto.
-
Cuando la luz del indicador de carga destelle en color blanco (Fig. 5),
significa que el producto se está cargando.
-
Después de cargarse durante 1.5 horas, el producto puede funcionar en
forma inalámbrica por hasta 40 minutos.
-
Cuando el indicador de carga de la batería muestra una luz blanca
continua (Fig. 6), el producto está totalmente cargado.
-
El indicador de batería no se ilumina cuando el producto está encendido:
el producto contiene suficiente energía para ser usado.
-
Cuando la luz del indicador de carga de la batería destelle en color naranja
(Fig. 5), significa que la batería casi no tiene energía y necesita recargarse.
Cargue el producto cuando termine de usarlo.
NOTA: Si el producto está completamente cargado y conectado a una toma de
corriente eléctrica, el indicador de la batería destella unas cuantas veces cuando
se presiona el botón de encendido/apagado. Esto le recuerda desconectar el
producto de la toma de corriente eléctrica antes de usarlo.
Carga rápida
- Cuando la batería está casi agotada y se empieza a cargar, el indicador de
batería parpadea en color blanco rápidamente.
- Después de aproximadamente 15 minutos, el indicador de la batería
comienza a parpadear en blanco lentamente. A este punto, la batería tiene
suficiente energía para hasta 10 minutos de uso.
Uso del producto
Siempre revise el producto y todos los accesorios antes de usarlo. No
use el producto ni ningún accesorio si está dañado, ya que esto puede
causar alguna lesión. Siempre reemplace una pieza dañada con una del
tipo original.
Encendido y apagado del producto
1 Para encender el producto, presione el botón de encendido/apagado una vez
(Fig. 7).
2 Si desea seleccionar el ajuste de baja velocidad, vuelva a presionar el botón de
encendido/apagado (Fig. 8).
3 Para apagar el producto, presione el botón de encendido/apagado
una vez más.
Cómo poner y quitar el cabezal depilador
1 Para colocar el cabezal depilador, presiónelo contra el mango ("clic") (Fig. 9).
2 Para quitar el cabezal depilador, presione el botón de liberación en la parte
posterior del producto (Fig. 10).
Nota: Puede poner y quitar el cabezal de eliminación de callos, el cabezal de
recorte, el cabezal de afeitado y el cepillo de exfoliación corporal de la misma
manera.
Poner y quitar el disco de eliminación de callos
1 Para colocar el disco, acóplelo en el cabezal (Fig. 11).
Vea el electrodoméstico de lado para verificar que el disco esté nivelado con
el borde exterior del cabezal.
Si el disco se mueve cuando se enciende el electrodoméstico, este no está
bien colocado. Retire el disco y ajústelo correctamente.
2 Para quitar el disco, ponga el dedo pulgar en la ranura de atrás y empújelo
hacia delante hasta que se separe del cabezal (Fig. 12).
Colocación y extracción del peine recortador
Para colocar el peine recortador en el cabezal de corte, siga los pasos a
continuación:
1 Coloque la muesca en un lado del peine en la hendidura en el cabezal de
corte.
2 Presione el peine en el cabezal de corte hasta que la muesca en el otro lado
del peine encaje en la hendidura del cabezal de corte (Fig. 13).
Para quitar el peine recortador del cabezal de corte, siga los pasos a continuación:
3 En un lado del peine, coloque una uña entre el peine y el cabezal de corte.
4 Tire con la uña hasta que el peine se desprenda del cabezal de corte (Fig. 14).
No tire de la parte posterior o de los dientes del peine para retirarlo.
Cómo utilizar la depiladora
- Use esta depiladora para su uso previsto en el hogar, según se describe en
este manual.
- Por motivos de higiene, solo una persona debe utilizar la depiladora y los
accesorios.
- La depilación es más fácil y más confortable cuando el vello tiene un largo
óptimo de 1/8 - 5/32 in./3 - 4 mm. Si el vello está más largo, recórtelo primero
o rasúrelo y, luego, depílese en 1 o 2 semanas.
- Asegúrese de sostener el mango de la depiladora en un ángulo de 75° sobre
la piel y muévala lentamente a contrapelo (Fig. 15).
- Después de la depilación, es normal tener una irritación leve de la piel
(enrojecimiento o puntos rojos sobre la piel). En este caso, es mejor depilarse
por la noche, para que la mayor parte de la irritación de la piel desaparezca
durante la noche. Este efecto se reducirá gradualmente con cada uso.
- Después de cada uso, se aconseja aplicar una crema o loción corporal suave,
sin alcohol, que ayudará a reducir la posibilidad de irritación de la piel.
Asegúrese de que no contenga alcohol ya que este podría provocar molestias.
- Asegúrese de que la depiladora esté completamente cargada antes de
utilizarla. La depiladora no funcionará mientras el cable está conectado a una
toma de corriente eléctrica.
Depilar
- Use el accesorio de depilación únicamente para las zonas que se encuentran
del cuello para abajo tal y como las piernas, las axilas o la línea del bikini.
- Coloque la protección para áreas delicadas si desea depilar el vello facial.
- Para una depilación más suave y menos dolorosa, depílese en la ducha o en la
tina con la piel mojada con gel para ducha o jabón o sin nada.
English
IMPORTANT SAFETY INSTRUCTIONS
When using an electric product, basic precautions should always be followed,
including the following:
Read all instructions before using this product.
DANGER
To reduce the risk of electric shock:
- Do not reach for a corded product that has fallen into water. Unplug
immediately from the power outlet.
- Keep the power cord dry (Fig. 2).
- Do not place or store the product where it can fall or be pulled into a tub or
sink. Do not place or drop the product into water or other liquid.
- This product does not work while it is connected to the power outlet. Except
when charging, always unplug this product from the power outlet.
- Remove power cord from power outlet and product before cleaning.
WARNING
To reduce the risk of burns, fire, electric shock, or injury to persons:
- This product is not intended for use by persons (including children) with
reduced physical, sensory or mental capabilities, or lack of experience and
knowledge, unless they have been given supervision or instruction concerning
use of the product by a person responsible for their safety. Children should be
supervised to ensure that they do not play with the product.
- Use this product only for its intended household use as described in
this manual. Misuse can lead to hazards or serious injuries. Do not use
attachments not recommended by Philips North America LLC. Accessories
supplied may vary for different products.
- Never operate this product if it has a damaged power cord, if it is not working
properly, after it has been dropped or damaged, or after the product or
power cord has been dropped into water. For assistance call 1-800-243-7884
(US) or 1-866-800-9311 (Canada).
- Keep the power cord away from heated surfaces.
- Never drop or insert any object into any opening.
- Do not use the power cord in or near a power outlet that contains an electric
air freshener to prevent damage to the power cord.
- Do not use product outdoors or operate where aerosol (spray) products are
being used or where oxygen is being administered.
- Always check rotating discs, foil and attachments before using the product.
Do not use the product if rotating discs, foil and attachments are damaged, as
injury may occur.
- Always attach power cord to product first, then to power outlet. To
disconnect, set all controls to 'off' position. Then remove power cord from
power outlet.
- Plug power cord directly into power outlet. Do not use an extension cord.
- Unplug power cord before plugging in or unplugging the product.
- The batteries used in this product may present a fire or chemical burn hazard
if mistreated. Do not disassemble, heat above 100 °C (212 °F) or incinerate.
IMPORTANT
: The power plug contains a transformer. Do not cut off the power
plug to replace it with another plug as this will cause a hazardous condition.
- Only use original Philips accessories or consumables. Only use detachable
power cord HQ8505.
- Charge, use and store the product at a temperature between 10 °C and 35 °C.
- Keep product and batteries away from fire and do not expose them to direct
sunlight or high temperatures.
- If the product becomes abnormally hot or smelly, changes color or if charging
takes longer than usual, stop using and charging the product and contact
Philips.
- Do not place products and their batteries in microwave ovens or on induction
cookers.
- Do not open, modify, pierce, damage or dismantle the product or battery to
prevent batteries from heating up or releasing toxic or hazardous substances.
Do not short-circuit, overcharge or reverse charge batteries.
- If batteries are damaged or leaking, avoid contact with the skin or eyes. If this
occurs, immediately rinse well with water and seek medical care.
- When you handle batteries, make sure that your hands, the product and the
batteries are dry.
- To avoid accidental short-circuiting of batteries after removal, do not let
battery terminals come into contact with metal objects (e.g. coins, hairpins,
rings). Do not wrap batteries in aluminum foil. Tape battery terminals or put
batteries in a plastic bag before you discard them.
SAVE THESE INSTRUCTIONS
IMPORTANT INFORMATION
CAUTION
- For hygienic reasons, it is recommended that the product be used by only one
person.
- Never use compressed air, scouring pads, abrasive cleaning agents or
aggressive liquids such as gasoline or acetone to clean the product.
- Turn the product off before removing or attaching attachments and before
cleaning.
- When rinsing the product or attachments, always check to make sure the
water is not too hot (maximum 100 °F) to prevent your hands from getting
burnt.
- Methods of removing hair by the root can cause ingrown hairs and minor skin
injuries. Please consult your doctor if you have any questions about the use of
an epilator.
- Do not use the epilator if you suffer from varicose veins, rashes, spots or
blemishes, or when the skin is irritated or if you have ingrown hairs or a
tendency to produce ingrown hairs. Consult your doctor first.
- Any minor injury resulting from hair removal may allow bacteria to penetrate
the injury site, potentially causing small scars or a change in pigmentation of
the skin. The risk of infection may be minimized by thoroughly cleaning the
rotating discs before and/or after each use (see 'Cleaning').
- The epilator should only be used after prior consultation with your doctor if
you have or experience:
-
Open wounds
-
Eczema, psoriasis (scaly eczema), inflamed skin reactions such as folliculitis,
skin rashes or the tendency to allergy or allergic skin reactions
-
Immune deficiency or disorders
-
Couperose, rosacea, or varicose veins
-
Pregnancy
-
Reduced skin immunity as a result of diabetes, pregnancy, Raynaud’s
disease, etc.
-
Hemophilia
-
Moles, raised skin bumps, etc.
- If you have been or begin taking hormone medication, or if you have recently
been pregnant, a change in your hormone levels may influence the thickness,
color or amount of hair growth. This is caused by hormonal changes, not by
this method of hair removal.
- Do not use bath or shower oils when you epilate wet skin, as this may cause
serious skin irritation.
- Clean the epilating head after each use (see 'Cleaning').
GENERAL
- This product is waterproof (Fig. 3). It is suitable for use in the bath or shower
and for cleaning under the tap.
- Clean the product after each use (see 'Cleaning').
- This product has no other user-serviceable parts. For assistance call
1-800-243-7884 (US only) or 1-866-800-9311 (Canada only).
BRE700
BRE710
BRE715
BRE720
BRE730
BRE735
BRE740
BRE712
BRE715
BRE720
BRE730
BRE715
BRE720
BRE735
BRE740
11
10
12
14
16
15
13
7
6
3
2
8
9
BRE700
BRE710
BRE712
BRE715
BRE720
BRE730
BRE735
BRE740
BRE710
BRE712
BRE720
BRE730
BRE735
BRE740
4
5
24
1
17
18
19
22
23
20
21
BRE735
BRE740
BRE730
BRE740
1
"Loading the manual" means you need to wait until the file loads and becomes available for online reading. Some manuals are very large, and the time they take to appear depends on your internet speed.
Was this manual helpful?
About this manual
- Brand
- Philips
- Model
- BRE700/04
- Document type
- User Manual
- Language(s)
- English, Spanish, French
- Pages
- 2
- File size
- 1.2 MB
- Format
Ask a question
Related manuals
Popular Philips Other


More Philips Other models
 Philips BHS752/00 User Manual
 Philips Blu-ray Player Manual
 Philips BRE224/00 User Manual
 Philips BRE285/00 User Manual
 Philips BRE625/00 User Manual
 Philips BRE635/00 User Manual
 Philips BRE740/90 Quick Guide
 Philips BRI920/00 User Manual
 Philips BRI921/00 User Manual
 Philips BRI923/00 User Manual
 Philips BRI924/00 User Manual
 Philips BRI940/00 User Manual