Page 3 - ENGLISH 4; Congratulations on your purchase and
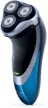
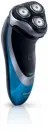
ENGLISH 4 AT815/A T814/A T810 Congratulations on your purchase and welcome to Philips Norelco!To fully benefit from the support that Philips Norelco offers, register your product at www.norelco.com/register
Page 4 - Read all instructions before using this appliance.; DANGER; To reduce the risk of electric shock:; WARNING; To reduce the risk of burns, fire, electric shock, or injury; ENGLISH
IMPORTANT SAFETY INSTRUCTIONS When using an electric appliance, basic precautions should always be followed, including the following: Read all instructions before using this appliance. DANGER To reduce the risk of electric shock: 1. Do not reach for a corded charging stand that has fallen into water...
Page 5 - IMPORTANT: The power plug contains a transformer. Do not
4. Keep the razor, cord, charging stand and charging plug away from heated surfaces. 5. Never drop or insert any object into any opening. 6. Do not charge or plug in razor/charging stand outdoors or operate where aerosol (spray) products are being used or where oxygen is being administered. 7. Do no...
Page 7 - Table of Contents
7 Table of Contents Features ........................................................ 8-9LED Multi-Purpose Display ....................... 10Before First Use ........................................... 11Charging ...................................................11-13Recharging .......................
Page 8 - Features
8 ENGLISH Features Lift and Cut System Razor Head Assembly Protective Cap Individually Floating Heads Razor Head Release Button • Hair Chamber captures shaven hair Electronic On/Off Button Razor Head Replacement Indicator LED Charge Indicators • Battery Charge, Full, Low & Quick Charge Indicator...
Page 9 - How the Unique Philips Norelco Lift and Cut
9 ENGLISH How the Unique Philips Norelco Lift and Cut Shaving System Makes Close Comfortable: Groove channels beard closer to cutting system Lifter raises hair Slots to cut long hairs Holes to cut short hairs even closer Pop-up Trimmer Automatic Worldwide Voltage 100V to 240V AC Cleaning Brush Trave...
Page 10 - LED Multi-Purpose Display; Charging Indicator
10 ENGLISH LED Multi-Purpose Display The display provides the following information: ◗ Charging Indicator C -When the razor is charging, the charging light blinks green. ◗ Full Charge Indicator C -When the batter y is fully charged, the charging light lights up green continuously. After approximatel...
Page 11 - Before First Use; Important; Charging
11 ENGLISH Before First Use w Charge the razor before you start using it (see ‘Charging’). Make sure the razor is switched off before you start charging it. Important w Only use the power cord provided to charge the razor. w The power plug transforms 100-240V AC to less than 24V DC. Charging w Charg...
Page 12 - Charging with a Cord; The charging plug will automatically conver t to
12 ENGLISH Charging with a Cord C 1 Connect cord directly to razor and connect the charging plug into any 100V to 240V AC outlet. Use only the power cord provided. w An adaptor plug may be necessary for charging plug usage in some foreign countries. Use an attachment plug adaptor of the proper confi...
Page 13 - Charging in Charging Stand
13 ENGLISH Charging in Charging Stand (AT815/AT814) C w Always place razor in stand in an upright position making sure charging contacts in bottom of stand fit into recess in bottom of razor. w Always remove razor from stand by lifting straight up. Do not tilt razor. 1 Place razor in charging stand ...
Page 14 - Recharging
14 ENGLISH Recharging 1 Recharging requires 1 hour. Recharge when the charging light on the razor display blinks orange. Quick Charge When you charge the empty battery, the charging light alternately blinks orange and green. After approximately 3 minutes, the charging light continues to blink green....
Page 15 - How To Shave With An Electric Razor
15 ENGLISH w If you are still not convinced after 21 days, Philips Norelco will refund you the full purchase price as long as the request is received within 45 days of purchase. How To Shave With An Electric Razor C w This symbol on the razor indicates that the razor can be used in both the bath and...
Page 16 - Wet Shaving; You can also use the razor on a wet face with
16 ENGLISH 4 Clean the razor after each use (see chapter ‘Cleaning’). C 5 Put the Protective Cap on the razor to protect razor heads. Wet Shaving You can also use the razor on a wet face with shaving foam or gel. C 1 Apply some water to your skin. C 2 Apply shaving foam or gel to your skin. 3 Rinse ...
Page 17 - NOTE: Make sure you rinse all foam or gel off the; Trimming; To groom sideburns and moustache:
17 6 Turn razor OFF, dry your face and thoroughly clean the razor after each use (see chapter ‘Cleaning’). NOTE: Make sure you rinse all foam or gel off the razor. C 7 When razor is thoroughly dry, put the Protective Cap on the razor to protect heads. Trimming To groom sideburns and moustache: 1 Tur...
Page 18 - Cleaning
ENGLISH Cleaning w Always clean your razor after each use. w Always switch razor OFF, unplug and remove power cord before cleaning. w Never clean, remove or replace head assembly while motor is on. w Do not apply pressure to combs. Do not touch razor heads with hard objects as this may dent or damag...
Page 19 - Be careful not to hit the shaving unit against
ENGLISH C 2 Press the Razor Head Release Button to open the Razor Head Assembly. C 3 Clean inside razor heads and hair chamber by running under hot water. C 4 Clean outside of Razor Head Assembly by running under hot water. 5 Close the Razor Head Assembly and shake off excess water. Be careful not t...
Page 20 - Extra-thorough Cleaning Method; Do not mix up the cutters and combs as the
ENGLISH 20 A B Extra-thorough Cleaning Method Do not mix up the cutters and combs as the shaving performance may be adversely affected for several weeks before optimal shaving performance is restored. 1 Turn razor OFF, remove the charging plug from the outlet and power cord from the razor. C 2 Press...
Page 22 - NOTE: If the shaving unit does not close smoothly,; After Each Use: Trimmer
ENGLISH C 11 Insert the notch of the shaving unit into the slot in the top of the razor (1) and then close the shaving unit (2). NOTE: If the shaving unit does not close smoothly, make sure you inser ted the shaving heads properly and that the retaining frame is locked. After Each Use: Trimmer 1 Tur...
Page 23 - Replacing the Razor Heads
ENGLISH Replacing the Razor Heads w Replace the razor heads once a year for optimal shaving results. w Replace damaged or worn razor heads with model HQ8 Philips Norelco razor heads only. Razor Head Replacement Indicator C w The razor head replacement indicator symbol will light up orange continuous...
Page 24 - Storage
ENGLISH C 5 Remove the razor heads and place the new razor heads in the shaving unit. Make sure that the two pointy edges of the head fit exactly into the recesses. 6 Replace the frame and turn the lock clockwise until it locks into place. C 7 Insert the notch of the shaving unit into the slot in th...
Page 25 - Assistance
ENGLISH 25 w Store cord in a safe location where it will not be cut or damaged. w Do not place or store razor where it can fall or be pulled into a tub or sink, water or other liquid while plugged in. C w Put the Protective Cap on razor to protect heads. Assistance w For assistance, visit our websit...
Page 26 - Battery Removal; Be careful, the batter y strips are ver y sharp.
ENGLISH Battery Removal C w This Philips Norelco razor contains a rechargeable Lithium-Ion battery which must be disposed of properly. w Battery should only be removed when razor is to be discarded. w For assistance, visit our website, www.philips.com/support or call toll free: 1-800-243-3050. 1 Tur...
Page 28 - Accessories; Replacement Heads
ENGLISH Accessories C w Replacement Heads Model HQ8 - For maximum razor performance, replace your Philips Norelco razor heads once a year. w Shaving Head Cleaning Spray HQ110 - Philips Norelco Shaving Head Cleaning Spray w Philips Norelco Razor Accessories may be purchased at a store near you, or on...