Page 2 - Contents
Contents 1 TV Tour 3 1.1 Professional Mode 3 2 Setting Up 4 2.1 Read Safety 4 2.2 TV Stand and Wall Mounting 4 2.3 Tips on Placement 4 2.4 Power Cable 4 2.5 Antenna Cable 4 3 Switching On and Off 6 3.1 On or Standby 6 3.2 Keys on TV 6 4 Remote Control 7 4.1 Key overview 7 4.2 IR Sensor 8 4.3 Batteri...
Page 3 - TV Tour; Professional Mode; What you can do
1 TV Tour 1.1 Professional Mode What you can do In Professional Mode ON, you can have access to alarge number of expert settings that enable advancedcontrol of the TV’s state or to add additionalfunctions. This mode is intended for installations of TV’s inplaces such as hotels, cruise ships, stadia ...
Page 4 - Setting Up; Read Safety; TV Stand; Wall Mounting; Tips on Placement; Power Cable
2 Setting Up 2.1 Read Safety Read the safety instructions first before you use theTV. 2.2 TV Stand and Wall Mounting TV Stand You can find the instructions for mounting the TVstand in the Quick Start Guide that came with the TV.In case you lost this guide, you can download itfrom www.philips.com . U...
Page 5 - Antenna Cable
2.5 Antenna Cable Insert the antenna plug firmly intothe Antenna socket at the back of the TV. You can connect your own antenna or an antennasignal from an antenna distribution system. Use anIEC Coax 75 Ohm RF antenna connector. Use this antenna connection for DVB-T and DVB-Cinput signals. 5
Page 7 - Remote Control; Key overview; Top
4 Remote Control 4.1 Key overview Top 1 - Standby / On To switch the TV on or back to Standby. 2 - Youtube To open Youtube. 3 - SMART INFO (Only in Professional Mode ON) To show information provided by the Hotel. 4 - To open the Netflix App directly. With the TV switchedon or from standby.) • ...
Page 8 - Bottom
4.3 Batteries If the TV does not react on a key press on the remote control, the batteries might be empty. To replace the batteries, open the batterycompartment on the keyboard side of the remote control. 1 - Slide the battery door in the direction shown by the arrow. 2 - Replace the old batteries w...
Page 9 - Specifications; Environmental; Product Information sheet; End of Use; Operating System; Reception
5 Specifications 5.1 Environmental Product Information sheet EPREL registration number 43HFL5214U/12 : 935954 50HFL5214U/12 : 935974 55HFL5214U/12 : 936014 End of Use Disposal of your old product and batteries Your product is designed and manufactured with highquality materials and components, which...
Page 10 - Connectivity; Sound
• 576p - 50 Hz• 720p - 50 Hz, 60 Hz• 1080i - 50 Hz, 60 Hz• 1080p - 24 Hz, 25 Hz, 30 Hz, 50 Hz, 60 Hz Computer formats Resolutions (amongst others) • 640 x 480 - 60 Hz• 800 x 600 - 60 Hz• 1024 x 768 - 60 Hz• 1280 x 800 - 60 Hz• 1280 x 960 - 60 Hz• 1280 x 1024 - 60 Hz• 1400 x 900 - 60 Hz• 1400 x 1050 ...
Page 11 - Connect Devices; Connectivity Guide
6 Connect Devices 6.1 Connect Devices Connectivity Guide Always connect a device to the TV with the highestquality connection available. Also, use good qualitycables to ensure a good transfer of picture andsound. When you connect a device, the TV recognizes itstype and gives each device a correct ty...
Page 12 - Smart Card
Note : • EasyLink might not work with devices from otherbrands.• The HDMI CEC functionality has different names ondifferent brands. Some examples are: Anynet, AquosLink, Bravia Theatre Sync, Kuro Link, Simplink andViera Link. Not all brands are fully compatible withEasyLink. Example HDMI CEC brandin...
Page 13 - Home Theatre System - HTS; Connect with HDMI ARC; Headphones
The CAM and smart card are exclusively for your TV. Ifyou remove the CAM, you will no longer be able towatch the scrambled channels supported by theCAM. 6.3 Receiver - Set-Top Box Use 2 antenna cables to connect the antenna to theSet-top box (a digital receiver) and the TV. Next to the antenna conne...
Page 14 - Game Console; HDMI; USB Flash Drive; Connect
6.7 Game Console HDMI For best quality, connect the game console with aHigh speed HDMI cable to the TV. 6.8 USB Flash Drive You can view photos or play your music and videosfrom a connected USB flash drive. Insert a USB flash drive in one ofthe USB connections on the TV while the TV is switched on. ...
Page 15 - Play Videos
7 Videos, Photos andMusic 7.1 From a USB Connection You can view your photos or play your music andvideos from a connected USB flash drive or USB HardDrive. With the TV switched on, plug in a USB flash drive or aUSB Hard Drive to one of the USB connections. TheTV detects the device and will list you...
Page 16 - Play your Music; Play Music; View your Photos
View Photos Open photo folder 1 - Press CHANNELS, select Sources. 2 - Select Media Browser, select Photos and press OK. View a photo 1 - Press CHANNELS, select Sources. 2 - Select Media Browser, select Photos and press OK. 3 - Select Photos and select one of photos, you can press S...
Page 17 - Music Options
3 - Mark as favourites 4 - Play all music 5 - Shuffle: play your files in a random order 6 - Repeat: plays all music in this folder once or continuously Music Options During playing the music, press OPTIONS, select Info and press OK to... • Mark as favourites• Play all music• Shuffle: play your fi...
Page 18 - TV Guide; Using the TV Guide; Open the TV Guide
8 TV Guide 8.1 Using the TV Guide Open the TV Guide To open the TV Guide, press TV GUIDE . The TV Guide shows the channels of the selected tuner. Press TV GUIDE again to close. The first time you open the TV Guide, the TV scans allTV channels for programme information. This maytake several minut...
Page 19 - Games; Play a Game; From a Game Console
9 Games 9.1 Play a Game From a Game Console To start a game from a Game Console… Switch on the Game Console. Professional Mode OFF Press / / Home, select Apps. Choose Sources and press OK. Start the game. Press BACK repeatedly or press EXIT or stop the app with its dedicated exit/stop ...
Page 20 - Google Cast; What You Need
10 Professional MenuApp 10.1 About the Professional MenuApp From the Professional Menu App, you can start anyactivity you can do with the TV. The left part of the Professional Menu App isorganised in rows… • Recommended • TV Channels • Cast • Apps • Games • More The upper right part of t...
Page 21 - Cast to Your TV
Cast to Your TV To cast an app to the TV screen… To open the Professional Menu App and open Cast… 1 - Open the Professional Menu App. 2 - Select Cast and press OK to open or start it. 3 - Connect Smart Phone to TV by using Wi-Fi Direct (Scan the QR code or use the WiFi SSID and thepassword). Open ...
Page 22 - Professional Settings; Picture Style
• Manage Account : While signing in to Google account by using phone orlaptop, make sure that the phone or laptop isconnected to the same network as the TV, then enterthe code shown on TV to complete signin process. Guest can also use Google accountemail address and password to sign in. • Clear Hi...
Page 23 - Sign In
do not use the remote control of the TV, you shoulddeactivate this automatic switch off, to set the valueto 0 . 10.8 Google Account Sign In To enjoy the full capabilities of your Philips AndroidTV, you can sign in to Google with your GoogleAccount. By signing in you'll be able to play your favourite...
Page 24 - Android TV Settings; Picture
11 Android TV HomeScreen 11.1 About the Android TV HomeScreen To enjoy the benefits of your Android TV, connect theTV to the Internet. Like on your Android smartphone or tablet, the Homescreen is the centre of your TV. From the Home sreenyou can decide what to watch by browsingentertainment options ...
Page 27 - Connect your Android TV; Network and Internet
audio language in broadcasts.• Secondary Audio - Set your next preference foraudio language in broadcasts.• Primary Subtitles - Set your highest preference forsubtitles language in broadcasts.• Secondary Subtitles - Set your next preference forsubtitles language in broadcasts.• Primary Text - Set yo...
Page 30 - Channels; Channel Lists
With the on-screen keyboard, enter your emailaddress and password, press the same OK key to sign in. Android Settings You can set or view several Android specific settingsor information. You can find the list of apps installedon your TV and the storage space they need. You canset the language you li...
Page 31 - Channel Installation; Install Channels
Select a Subtitle Language If none of the preferred subtitle languages areavailable, you can select another subtitle language ifavailable. If no subtitle languages are available, youcannot select this option. To select a subtitle language when none of yourpreferred languages are available… 1 - Press...
Page 32 - Internet; Start Internet
Automatic Channel Update If you receive digital channels, you can set the TV toautomatically update these channels. Once a day, at 6 AM, the TV updates the channelsand stores new channels. New channels are stored inthe Channels List and are marked with a . Channels without a signal are removed. Th...
Page 33 - Options on Internet; Smartphones and Tablets; Philips TV Remote App; Software; Update Software
To start the Internet browser… 1 - Press / / HOME . 2 - Scroll down and select Apps > Internet and press OK . 3 - Enter an Internet address and select , press OK . 4 - To close Internet, press / HOME or . Options on Internet Some extras are available for the Internet. To open th...
Page 35 - Help and Support; Troubleshooting; Switch On and Remote Control
12 Help and Support 12.1 Troubleshooting Switch On and Remote Control The TV does not switch on • Disconnect the power cable from the power outlet.Wait for one minute then reconnect it.• Make sure that the power cable is securelyconnected. Creaking sound at startup or switch off When you are switchi...
Page 37 - Online Help; Support and Repair
12.2 Online Help To solve any Philips TV related problem, you canconsult our online support. You can select yourlanguage and enter your product model number. Go to www.philips.com/support On the support site you can find your country'stelephone number to contact us as well as answers tofrequently as...
Page 38 - Safety and Care; Safety; Important; Stability Hazards
13 Safety and Care 13.1 Safety Important Read and understand all safety instructions beforeyou use the TV. If damage is caused by failure tofollow instructions, the warranty does not apply. No modify this equipment without authorization ofthe manufacturer. Risk of Electric Shock or Fire • Never expo...
Page 40 - Terms of Use
14 Terms of Use 14.1 Terms of Use - TV 2021 © TP Vision Europe B.V. All rights reserved. This product was brought to the market by TP VisionEurope B.V. or one of its affiliates, hereinafter referredto as TP Vision, which is the manufacturer of theproduct. TP Vision is the warrantor in relation to th...
Page 41 - Copyrights; Dolby Audio; Other Trademarks
15 Copyrights 15.1 HDMI HDMI The terms HDMI, HDMI High-Definition MultimediaInterface, and the HDMI Logo are trademarks orregistered trademarks of HDMI LicensingAdministrator, Inc. 15.2 Dolby Audio Dolby, Dolby Audio, and the double-D symbol aretrademarks of Dolby Laboratories LicensingCorporation. ...
Page 43 - Open Source; Open Source Software
17 Open Source 17.1 Open Source Software This television contains open source software. TPVision Europe B.V. hereby offers to deliver, uponrequest, a copy of the complete correspondingsource code for the copyrighted open sourcesoftware packages used in this product for which suchoffer is requested b...
Page 44 - Index
Index A Android Settings 30 Announcements 43 Audio Language 31 Audio Language, Primary 31 Audio Language, Secondary 31 B Blu-ray Disc player, connect 13 C CAM, Conditional Access Module 12 Channel 30 Channel List 30 Channel List, about 30 Channel List, open 30 Channel, Antenna Installation 31 Channe...
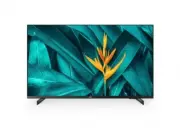


 Philips 43BDL4650D/00 User Manual
 Philips 43BFL2214/12 User Manual
 Philips 43HFL3014/12 User Manual
 Philips 43HFL4518U/12 User Manual
 Philips 43HFL5011T/12 User Manual
 Philips 43HFL5114/12 User Manual
 Philips 43HFL6214U/12 User Manual
 Philips 43PFL4609 Manual
 Philips 43PFL4902/F7 User Manual
 Philips 43PFL5604/F7 User Manual
 Philips 43PFL5703/F7 User Manual
 Philips 43PFL5766/F7 User Manual