Page 2 - Contents
Contents 1 TV Tour 3 1.1 Bluetooth Connection 3 2 Setting Up 4 2.1 Read Safety 4 2.2 TV Stand and Wall Mounting 4 2.3 Tips on Placement 4 2.4 Power Cable 4 2.5 Antenna Cable 4 3 Connect your Android TV 6 3.1 Network and Internet 6 4 Connect Devices 10 4.1 About Connections 10 4.2 CAM with Smart Card...
Page 3 - TV Tour; Bluetooth Connection
1 TV Tour 1.1 Bluetooth Connection Your TV has Bluetooth technology inside. You can connect extra wireless speakers or a wirelessheadphone. Forget connecting cables, pairing yourdevice with the TV is enough. 3
Page 4 - Setting Up; Read Safety; TV Stand; Wall Mounting; Tips on Placement
2 Setting Up 2.1 Read Safety Read the safety instructions first before you use theTV. 2.2 TV Stand and Wall Mounting TV Stand You can find the instructions for mounting the TVstand in the Quick Start Guide. The Quick Start Guide can be downloaded from www.philips.com . Use the product type number of...
Page 5 - Antenna Cable
2.5 Antenna Cable Insert the antenna plug firmly intothe Antenna socket at the back of the TV. You can connect your own antenna or an antennasignal from an antenna distribution system. Use anIEC Coax 75 Ohm RF antenna connector. Use this antenna connection for DVB-T and DVB-Cinput signals. 5
Page 6 - Network and Internet; Home Network
3 Connect yourAndroid TV 3.1 Network and Internet Home Network To enjoy the full capabilities of your Philips AndroidTV, your TV must be connected to the Internet. Connect the TV to a home network with a high-speedInternet connection. You can connect your TVwirelessly or wired to your network router...
Page 7 - Network Settings
code in the router software. 5 - Select Connect to make the connection. 6 - A message will be shown when the connection is successful. Problems Wireless network not found or distorted • Microwave ovens, DECT phones or other Wi-Fi802.11b/g/n devices in your proximity might disturbthe wireless network...
Page 10 - Connect Devices; About Connections; Connectivity Guide
4 Connect Devices 4.1 About Connections Connectivity Guide Always connect a device to the TV with the highestquality connection available. Also, use good qualitycables to ensure a good transfer of picture andsound. When you connect a device, the TV recognizes itstype and gives each device a correct ...
Page 12 - Scart
Copy protection DVI and HDMI cables support HDCP (High-bandwidthDigital Content Protection). HDCP is a copy protectionsignal that prevents copying content from a DVD discor Blu-ray Disc. Also referred to as DRM (DigitalRights Management). Y Pb Pr - Component Y Pb Pr - Component Video is a high quali...
Page 13 - Home Theatre System - HTS; Connect with HDMI ARC
Smart Card Digital TV operators provide a CI+ module(Conditional Access Module - CAM) and anaccompanying smart card, when you subscribe totheir premium programmes. Insert the smart card into the CAM module. See theinstruction you received from the operator. To insert the CAM in the TV… 1 - Look on t...
Page 15 - Problems with HTS sound; Smartphones and Tablets
1 - Consumer Mode: On Press HOME and select Features and press OK . Guest Mode: On Guest Menu: Not available in this mode.(For professional mode information, please refer toInstallation manual) 2 - Select Sound > Advanced > Audio out format . 3 - Select Multichannel or Stereo . 4 - Press...
Page 16 - HDMI
If the Blu-ray Disc player has EasyLink HDMI CEC,you can operate the player with the TV remotecontrol. 4.7 DVD Player Use an HDMI cable to connect the DVD player to theTV.Alternatively, you can use a SCART cable, if thedevice has no HDMI connection. If the DVD player is connected with HDMI and hasEa...
Page 17 - Audio Video LR / Scart; Computer; Connect
Audio Video LR / Scart You can use an HDMI, YPbPr or SCART connection toconnect your camcorder. If your camcorder only hasVideo (CVBS) and Audio L/R output, use a VideoAudio L/R to SCART adapter (sold separately) toconnect to the SCART connection. 4.12 Computer Connect You can connect your computer ...
Page 19 - Remote Control; Key overview; Top
6 Remote Control 6.1 Key overview Top 1 - Standby / On To switch the TV on or back to Standby. 2 - ALARM To set the alarm. 3 - PICTURE STYLE To select one of the picture style. 4 - LIST To open the channel list. 5 - SOURCES To open or close the Sources menu. 6 - SLEEP To open the Sleep Tim...
Page 21 - Channels; Watching TV channels; Switch channels
7 Channels 7.1 Watching TV channels Switch channels To watch TV channels, press TV . The TV tunes to the TV channel you last watched. Alternatively, press HOME to open the Home menu and press to select the desired channel. To switch channels, press or . If you know the channel number, ty...
Page 23 - Interactive TV; About iTV
Text Options In Text/Teletext, press OPTIONS to select the following… • Freeze page To stop the automatic rotation of subpages.• Dual screen / Full screen To show the TV channel and Text alongside eachother.• T.O.P. overview To open T.O.P. Text.• Enlarge To enlarge the Text page for comfortable re...
Page 24 - Use iTV
Use iTV Open iTV pages Most channels that offer HbbTV or iTV invite you topress the colour key (red) or OK key to open their interactive programme. Navigate iTV pages You can use the arrow and colour keys, the numberkeys and the BACK key to navigate the iTV pages. Digital Text (UK only) To open ...
Page 25 - TV Guide; What You Need; Open the TV Guide
8 TV Guide 8.1 What You Need With the TV Guide you can view a list of the currentand scheduled TV programmes of your channels.Depending on where the TV guide information (data)is coming from, analogue and digital channels or onlydigital channels are shown. Not all channels offer TVGuide information....
Page 26 - Home Menu; About the Home Menu; Open the Home Menu
9 Home Menu 9.1 About the Home Menu To enjoy the benefits of your Android TV, connect theTV to the Internet. Like on your Android smartphone or tablet, the Homemenu is the centre of your TV. From the Home menuyou can start any application, switch to a TV channel,open a website or switch to a connect...
Page 27 - Sources; Switch to a device
10 Sources 10.1 Switch to a device From the list of Sources, you can switch to any of theconnected devices. You can switch to a tuner towatch TV, open the content of a connected USB FlashDrive or see the recordings you made on a connectedUSB Hard Drive. You can switch to your connecteddevices to wat...
Page 28 - Rescan Connections
settings for gaming. Or alternatively, switch to theideal settings for a connected computer. You can only use the setting Game or Computer when you switch to a connected device in the Sources menu. The Game or Computer setting isstored for the selected device. To switch to the ideal settings for gam...
Page 29 - Apps; About Apps
11 Apps 11.1 About Apps All the apps can be found by pressing Apps on your remote control. These TV apps offerentertainments to enrich your hotel stay experience.Apps can also be accessed in Apps section in the Apps menu. 11.2 Start or Stop an App You can start an app from the Home menu. To start ...
Page 30 - Internet; Start Internet
12 Internet 12.1 Start Internet You can browse the Internet on your TV. You canview any Internet website but most of them are notprepared for a TV screen. • Some plug-ins (e.g. to view pages or videos) are notavailable on your TV.• You cannot send or download files.• Internet pages are shown one pag...
Page 31 - Play Videos; View your Photos; View Photos
13 Videos, Photos andMusic 13.1 From a USB Connection You can view your photos or play your music andvideos from a connected USB flash drive or USB HardDrive. With the TV switched on, plug in a USB flash drive or aUSB Hard Drive to one of the USB connections. TheTV detects the device and will list y...
Page 32 - Play your Music; Play Music
Slideshow with Music You can watch a slideshow of your photos and listento your music at the same time. You must start theusic before you start the photo slideshow. To play music with the slide show… 1 - Select a song or a folder with songs and press OK . 2 - Press INFO to hide file info and progr...
Page 33 - Miracast; Share a Screen on TV
14 Smartphones andTablets 14.1 Miracast About Wi-Fi Miracast You can view your photos or play your music andvideos from a mobile device on your TV with Wi-FiMiracast™. The mobile device and the TV should bewithin range, which usually means being in the sameroom. Check if your mobile device is ready ...
Page 34 - Screen Delay; MHL
connections list first. If you clear this list, you will haveto confirm or block the connection for every deviceagain. Screen Delay The normal delay when sharing a screen withMiracast is about 1 second. The delay might be longerif you are using older devices with less processingpower. 14.2 MHL This ...
Page 35 - Settings; Picture; Picture Style
15 Settings 15.1 Picture Picture Style Select a Style For easy picture adjustment, you can select a presetPicture Style. 1 - Consumer Mode: On Press HOME and select Features and press OK . Guest Mode: On Guest Menu: Press HOME and select Features and press OK . (For professional mode informa...
Page 36 - Advanced Picture Settings
Sharpness With Sharpness , you can adjust the contrast of the picture. To adjust the contrast… 1 - Consumer Mode: On Press HOME and select Features and press OK . Guest Mode: On Guest Menu: Press HOME and select Features and press OK . (For professional mode information, please refer toInsta...
Page 39 - Sound; Sound Style
Reduction and press OK . 4 - Select Maximum , Medium , Minimum or Off . 5 - Press BACK repeatedly if necessary, to close the menu. Motion Settings Perfect Natural Motion With Perfect Natural Motion , you can reduce the motion judder, visible in movies on TV. Perfect NaturalMotion makes any movemen...
Page 41 - Speakers
Installation manual) 2 - Select Sound > Advanced press OK . 3 - Select Audio Out Format and press OK . 4 - Select Multichannel or Stereo . 5 - Press BACK repeatedly if necessary, to close the menu. Audio Out Levelling 1 - Consumer Mode: On Press HOME and select Features and press OK . Guest...
Page 42 - Eco Settings; Screen Off
Remove a Speaker To remove a wireless speaker… 1 - Consumer Mode: On Press HOME and select Features and press OK . Guest Mode: On Guest Menu: Press HOME and select Features and press OK . (For professional mode information, please refer toInstallation manual) 2 - Select Sound > Bluetooth ...
Page 43 - General Settings; EasyLink
15.4 General Settings EasyLink EasyLink To switch off EasyLink completely… 1 - Consumer Mode: On Press HOME and select Features and press OK . Guest Mode: On Guest Menu: Not available in this mode.(For professional mode information, please refer toInstallation manual) 2 - Select Sources > A...
Page 44 - Clock, Region and Language; Menu Language
TV Placement As part of the first installation, this setting is set toeither On a TV stand or Hang on the Wall . If you have changed the placement of the TV since then,adjust this setting accordingly for best soundreproduction. 1 - Consumer Mode: On Press HOME and select Features and press OK . ...
Page 46 - Clock
press OK . 2 - While watching a channel on the device, press OPTIONS , select Show device keys and select the key and press OK . 3 - Press BACK to hide the device keys. 4 - To close Text, press BACK again. Digital Text (UK only) Some digital broadcasters offer dedicated Digital Textor intera...
Page 47 - Universal Access; Switch On
the menu. Time Zone To set the time zone… 1 - Consumer Mode: On Press HOME and select Features and press OK . Guest Mode: On Guest Menu: Not available in this mode.(For professional mode information, please refer toInstallation manual) 2 - Select Date and Time > Time Zone Settings and press...
Page 49 - Channel Installation; Antenna/Cable Installation; Update Channels
16 Channel Installation 16.1 Antenna/Cable Installation Update Channels Automatic Channel Update If you receive digital channels, you can set the TV toautomatically update these channels. Once a day, at 4 AM, the TV updates the channelsand stores new channels. New channels are stored inthe Channels ...
Page 50 - Manual Installation
Reinstall TV You can redo a full TV installation. The TV iscompletely reinstalled. To redo a full TV installation… 1 - Consumer Mode: On Press HOME and select Features and press OK . Guest Mode: On Guest Menu: Not available in this mode.(For professional mode information, please refer toInstal...
Page 51 - Software; Update Software; Update from USB; Open Source Software
17 Software 17.1 Update Software Update from USB It might be necessary to update the TV software. Youneed a computer with an high-speed Internetconnection and a USB flash drive to upload thesoftware on the TV. Use a USB flash drive with at least500MB free space. Make sure that write protection isswi...
Page 85 - Specifications; Environmental; European Energy Label; Product Fiche
18 Specifications 18.1 Environmental European Energy Label The European Energy Label informs you on the energy efficiency class of this product. The greenerthe energy efficiency class of this product is, thelower the energy it consumes.On the label, you can find the energy efficiency class,the avera...
Page 89 - Help and Support; Register your TV; Switch On and Remote Control
19 Help and Support 19.1 Register your TV Register your TV and enjoy a range of benefitsincluding full support (including downloads),privileged access to information about new products,exclusive offers and discounts, the chance to winprizes and even participate in special surveys aboutnew releases. ...
Page 91 - Online Help; Support and Repair
19.3 Online Help To solve any Philips TV related problem, you canconsult our online support. You can select yourlanguage and enter your product model number. Go to www.philips.com/support . On the support site you can find your country'stelephone number to contact us as well as answers tofrequently ...
Page 92 - Safety and Care; Safety
20 Safety and Care 20.1 Safety Important Read and understand all safety instructions beforeyou use the TV. If damage is caused by failure tofollow instructions, the warranty does not apply. Secure the TV from Falling Over You can find the mounting instructions in the QuickStart Guide that came with ...
Page 93 - Screen Care
Lightning Storms Disconnect the TV from the power outlet and antennabefore lightning storms. During lightning storms, never touch any part of theTV, power cord or antenna cable. Risk of Hearing Damage Avoid using earphones or headphones at highvolumes or for prolonged periods of time. Low Temperatur...
Page 94 - Terms of Use; Terms of Use - Smart TV
21 Terms of Use 21.1 Terms of Use - TV 2016 © TP Vision Europe B.V. All rights reserved. This product was brought to the market by TP VisionEurope B.V. or one of its affiliates, hereinafter referredto as TP Vision, which is the manufacturer of theproduct. TP Vision is the warrantor in relation to th...
Page 95 - Copyrights
22 Copyrights 22.1 MHL MHL, Mobile High-Definition Link and the MHL Logoare trademarks or registered trademarks of the MHL,LLC. 22.2 Ultra HD The DIGITALEUROPE UHD Display Logo is a trademark of DIGITALEUROPE. 22.3 HDMI HDMI® The terms HDMI and HDMI High-DefinitionMultimedia Interface, and the HDMI ...
Page 96 - Kensington
Windows Media is either a registered trademark ortrademark of Microsoft Corporation in the UnitedStates and/or other countries. Microsoft PlayReady Content owners use Microsoft PlayReady™ contentaccess technology to protect their intellectualproperty, including copyrighted content.This device uses P...
Page 97 - Index
Index A Antenna connection 5 Antenna, Manual Installation 50 Apps 29 Audio commentary 47 Audio Description 47 Audio Out - Optical, tips 12 Audio Out Delay 14 Audio Out Format 14 Audio Out Levelling 15 Audio Out Offset 14 Audio Out Settings 14 Audio to Video Sync 14 Auto Volume Levelling 40 Automatic...
Page 99 - Contact information
Contact information Belgium/België/Belgique 02 7007360 Armenia 0-800-01-004 Belarus/Беларусь 8 10 800 2000 00 04 Bulgaria/България 0 0800 1154426 +359 2 4916273 Austria/Österreich 0150 2842133 Croatia/Hrvatska 0800 222 782 Czech Republic/Česká republika 800 142100 Denmark/Danmark 352 587 61 Estonia/...
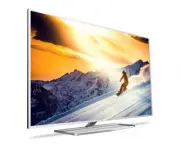


 Philips 43BDL3650Q/00 User Manual
 Philips 43BDL4650D/00 User Manual
 Philips 43BFL2214/12 User Manual
 Philips 43HFL3014/12 User Manual
 Philips 43HFL4518U/12 User Manual
 Philips 43HFL5114/12 User Manual
 Philips 43HFL5214U/12 User Manual
 Philips 43HFL6214U/12 User Manual
 Philips 43PFL4609 Manual
 Philips 43PFL4902/F7 User Manual
 Philips 43PFL5604/F7 User Manual
 Philips 43PFL5703/F7 User Manual