Page 2 - Thank you for introducing our family to yours; omegaappliances
Thank you for introducing our family to yours At Omega, we understand that cooking, cleaning and washing may not be your favourite things in the world. That's why we created a range of no-nonsense, reliable products that always get the job done for you. With the features you need and nothing you don...
Page 3 - TABLE OF CONTENTS; SECTION; Important Safety Instructions
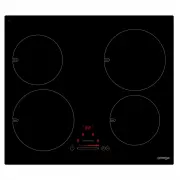
TABLE OF CONTENTS SECTION PAGE NO. Important Safety Instructions .... ………… 1-2 Cooktop Details ... .. ....................................2 Operating Instructions .......................... 5-10 Cleaning …………………………………......... 11 Electrical Connections .............................1 2 Installation ....
Page 5 - OOKTOP; Cooktop
21. All cabinetry and materials used in the installation must be able to withstand a minimum temperature of 100 °C above ambient temperature whilst in use. Certain types of vinyl or laminate kitchen furniture are particularly prone to heat damage or discolouration at temperatures below the guideline...
Page 6 - INSTALLATION; PREPARATION FOR INSTALLATION AND USE
INSTALLATION The adjacent furniture must be able to withstand a minimum temperature rise of 100°C above the ambient temperature of the room it is located in, during periods of use. The power supply to the Cooktop must be cut off before any adjustments or maintenance work is done on it. The Cooktop m...
Page 7 - INSTALLATION OF BUILT IN COOKTOP
INSTALLATION OF BUILT IN COOKTOP In order to prevent leakage of any liquids on the work bench and fix the Cooktop to the bench, a special sealing tape is supplied together with your oven. Place the cooktop glass down on a clean cloth on a stable flat surface & apply this seal around the bottom e...
Page 8 - OPERATING INSTRUCTIONS; The induction
OPERATING INSTRUCTIONS The basic layout of the induction cooktop is shown in the diagrams below. 11 12 12 07 09 08 10 01 03 05 06 04 02 DESCRIPTION DESCRIPTION 01 On/off Power touch control 07 Cooking Zone Select touch control & Power LED display (LHR) 02 Stop N Go/Recall Function touch control ...
Page 9 - Turning On and Turning Off the Cooktop; Selecting A Cooking Zone; waiting for the previous one to become inactive.; Turning Off Individual Cooking Zones
Turning On and Turning Off the Cooktop NOTE: Do not operate the C ooktop without first placing a suitably sized cookware on the appropriate cooking zone. If the correct sized cookware is not placed on the cooking zone, the Cooking Zone Select touch control & Power LED display will indicate pan n...
Page 10 - Activating The Key Lock; The key lock is used to set the; Minute Minder Function
Activating The Key Lock The key lock is used to set the Cooktop up so that it cannot be operated without disabling the lock. This is a useful feature when cleaning down the glass, or to stop children playing with the controls. 1. Put into Operating-Mode by pressing the On/Off touch control for at le...
Page 11 - Timer Function; Auto Cooking Function
Timer Function The timer function differs from the Minute Minder function in that it will turn off a cooking zone at the end of the time. It can be set for one or more cooking zones (each working independently). The Cooking Zone Select touch control & Power LED display always shows the shortest ...
Page 12 - Keep Warm Function; disabling the function.; Stop N Go Function; The Stop N Go Function allows you to stop all activity on the; Recall Function; (within 6 seconds of the; TOUCH CONTROL SAFETY FUNCTIONS
Keep Warm Function The Keep Warm Function can be used to keep food warm for long periods of time (up to 2 hours). The cookware can be removed from the element for up to 10 minutes without disabling the function. 1. The Cooktop must be set to Operating-Mode . 2. Select one of the cooking zones. Press...
Page 14 - CLEANING; CLEANING THE COOKTOP
CLEANING NOTE: Cleaning and maintenance operations must only be carried out when the cooktop is cool (all residual heat indicators are off). The Cooktop should be disconnected from the power outlet or turned off at your isolation switch before commencing any cleaning process. Do not use plastic, pla...
Page 15 - ELECTRICAL CONNECTIONS; LOCAL AUTHORITY REQUIREMENTS
ELECTRICAL CONNECTIONS LOCAL AUTHORITY REQUIREMENTS Installation is only permitted by a licensed electrician, and carried out according to instructions provided by the manufacturer. Incorrect installation might cause harm and damage, for which the manufacturer accepts no responsibility. ELECTRICAL I...
Page 16 - TROUBLESHOOTING AND ERROR CODES
TROUBLESHOOTING AND ERROR CODES The Cooktop or a cooking zone doesn’t start: • The electrical connection to the power is faulty – Call an electrician. • A fuse has blown – Check fuse box. • The Key Lock function is active – reset as per the manual. • The control panel buttons are coated in grease or...
Page 17 - RESETTING THE INTERNAL SOFTWARE SYSTEM; If the error codes EC or E4 appear, please do the following:
RESETTING THE INTERNAL SOFTWARE SYSTEM If the error codes EC or E4 appear, please do the following: a) Remove all cookware from the cooktop. Have an inductive pot or pan with a bottom diameter of at least 16cm close by for use during the procedure. b) Remove the Cooktop from the power supply for a f...