NordicTrack NETL24717 - User Manual
NordicTrack NETL24717 Treadmill – User Manual, read for free online in PDF format. We hope this helps you resolve any issues you may have. If you have further questions, please contact us through the contact form.


Table of Contents:
- Page 2 – WARNING DECAL PLACEMENT
- Page 3 – IMPORTANT PRECAUTIONS
- Page 5 – SAVE THESE INSTRUCTIONS
- Page 7 – STANDARD SERVICE PLANS
- Page 8 – BEFORE YOU BEGIN
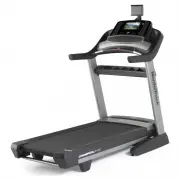
- Page 9 – PART IDENTIFICATION CHART
- Page 10 – ASSEMBLY
- Page 15 – THE CHEST HEART RATE MONITOR
- Page 16 – OPERATION AND ADJUSTMENT
- Page 36 – HOW TO FOLD AND MOVE THE TREADMILL
- Page 37 – TROUBLESHOOTING
- Page 40 – EXERCISE GUIDELINES
- Page 42 – PART LIST
- Page 44 – EXPLODED DRAWING A
- Page 45 – EXPLODED DRAWING B
- Page 46 – EXPLODED DRAWING C
- Page 47 – EXPLODED DRAWING D
- Page 48 – LIMITED WARRANTY; ORDERING REPLACEMENT PARTS
Serial Number
Decal
Model No. NTL19112.0
Serial No.
Write the serial number in the space
above for reference.
CAUTION
Read all precautions and instruc-
tions in this manual before using
this equipment. Save this manual
for future reference.
www.nordictrack.com
USER’S MANUAL
ACTIVATE YOUR
WARRANTY
To register your product and
activate your warranty today, go
to www.nordictrackservice.com/
registration.
CUSTOMER CARE
For service at any time, go to
www.nordictrackservice.com.
Or call 1-800-TO-BE-FIT
(1-800- 862-3348)
Mon.–Fri. 6 a.m.–6 p.m. MT
Sat. 8 a.m.–4 p.m. MT
Please do not contact the store.
"Loading the manual" means you need to wait until the file loads and becomes available for online reading. Some manuals are very large, and the time they take to appear depends on your internet speed.
Summary
2 NORDICTRACK is a registered trademark of ICON IP, Inc. This drawing shows the locations of the warning decals. If a decal is missing or illegible, call the telephone number on the front cover of this manual and request a free replacement decal. Apply the decal in the location shown. Note: The deca...
3 1. It is the responsibility of the owner to ensure that all users of this treadmill are adequately informed of all warnings and precautions. 2. Before beginning any exercise program, consult your physician. This is especially important for persons over age 35 or persons with pre-existing health pr...
5 34. Upon completion of any service or repairs to the treadmill or the television, ask the ser-vice technician to perform safety checks to confirm that the unit is in proper operating condition. 35. Use No. 10 AWG (5.3 mm 2 ) copper, No. 8 AWG (8.4 mm 2 ) aluminum, No. 17 AWG (1.0 mm 2 ) copper-cla...