Page 2 - Contents; Warning and Safety instructions
Contents 2 Warning and Safety instructions ............................................................................... 6 Sustainability and environmental protection .......................................................... 15 Familiarisation ........................................................
Page 3 - Operation
Contents 3 Establishing a direct connection with the cooker hood............................................ 37 Operation ........................................................................................................................ 39 Safety notes for operation...............................
Page 7 - Correct application; This hob is intended for domestic use and use in other similar en-
Warning and Safety instructions 7 Correct application This hob is intended for domestic use and use in other similar en- vironments. This hob is not intended for outdoor use. It is intended for domestic use only to cook food and keep it warm. Any other use is not supported by the manufacturer ...
Page 8 - Safety with children
Warning and Safety instructions 8 Safety with children Children under 8 years of age must be kept away from the hob un- less they are constantly supervised. Children over 8 years of age may use the hob without supervision if its operation has been clearly explained to them and they are ableto us...
Page 9 - Technical safety
Warning and Safety instructions 9 Technical safety Unauthorised installation, maintenance and repairs can cause con- siderable danger for the user. Installation, maintenance and repairsmust only be carried out by a Miele authorised technician. Damage to the hob can compromise your safety. Check ...
Page 11 - Correct use
Warning and Safety instructions 11 Correct use The hob gets hot when in use and remains hot for a while after be- ing switched off. There is a danger of burning until the residual heatindicators go out. Oil and fat can overheat and catch fire. Do not leave the hob unat- tended when cooking with ...
Page 14 - Cleaning and care; Do not use a steam cleaning appliance to clean this hob.
Warning and Safety instructions 14 Cleaning and care Do not use a steam cleaning appliance to clean this hob. The steam could reach electrical components and cause a short cir-cuit. If the hob is installed above a pyrolytic oven or cooker, do not use the hob during a pyrolytic cleaning programme...
Page 15 - Sustainability and environmental protection; Energy saving tips; - Use a pressure cooker to reduce; Disposing of your old appliance
Sustainability and environmental protection 15 Energy saving tips - Cook in covered pots and pans if pos- sible. This prevents heat escaping un-necessarily. - Cook with as little water as possible.- Once food has come to the boil or the pan is hot for frying, reduce the heatto a lower power level. -...
Page 16 - Familiarisation; Your hob; Cooking zone with Booster function
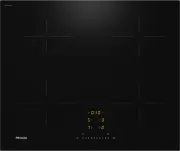
Familiarisation 16 Your hob KM 7360 FR, KM 7360 FL a Cooking zone with Booster function b Cooking zone with Booster function c Cooking zone with Booster function d Controls and indicators
Page 20 - Controls and display; Hob On/Off sensor control
Familiarisation 20 Controls and display g b d e a b f h i k j c l m p o n a Hob On/Off sensor control b Numerical display sensor controls– To set the power level– To set the times c Flex cooking zones sensor control (depending on model)For manual connection/disconnection of Flex cooking zones d St...
Page 22 - Cooking zones; Total
Familiarisation 22 Cooking zones KM 7360 FR, KM 7360 FL Cooking zone Ø in cm 1 Max. rating in watts for 230 V 2 Linked cooking zone 3 14–28 NormalBooster 2300 3000 - 11–22 NormalBooster 2300 3000 9–16 NormalBooster 13501850 Total 6600 1 Cookware with a base diameter within the given range...
Page 26 - Power management; Total power; If you wish to cook a large quantity
Familiarisation 26 Power management Total power The hob has a maximum total permittedpower consumption which cannot beexceeded for safety reasons. You can re-duce the maximum total permittedpower consumption (see “Adjusting set-tings”).The higher the total permitted powerconsumption of the hob, the ...
Page 27 - Operating principles; Hob when switched off; Sensor controls and indicators; Selecting a cooking zone; : if only one of the cooking
Familiarisation 27 Operating principles Hob when switched off When the hob is switched off, you canonly see the printed symbols for thesensor controls and the numerical dis-play. More sensor controls light upwhen the hob is switched on. Operation a Sensor controls and indicators This ceramic glass h...
Page 28 - Networking
Familiarisation 28 Networking Your hob is equipped with an integratedWiFi module. The hob can be connectedto your home WiFi network or simply toyour Miele cooker hood. Miele@home After installing the Miele app on a mo-bile device, you can do the following: - Call up information on the operating stat...
Page 29 - Functions; Use this function when the control
Familiarisation 29 Functions Con@ctivity 3.0 Con@ctivity 3.0 is the direct commu-nication system between your hob and aMiele cooker hood. Communication isachieved by means of networking.Con@ctivity 3.0 enables the cookerhood to operate automatically depend-ing on the operating status of your hob.Fur...
Page 31 - Sensor controls are covered; will appear in the timer display for a; Excessive operating time
Familiarisation 31 Safety switch-off Sensor controls are covered Your hob will switch off automatically ifone or several of the sensor controls re-main covered for longer than10 seconds, for example, by finger con-tact, food boiling over or by an object. will appear in the timer display for a few...
Page 32 - Overheating protection; - If the Booster function is switched on,; Hob data
Familiarisation 32 Overheating protection In order to prevent the hob from beingdamaged by excessive temperatures,the overheating protection mechanismintervenes in one of the following ways: Overheating protection measures - If the Booster function is switched on, it will stop. - The set power level...
Page 33 - Commissioning; Unpacking the hob
Commissioning 33 Unpacking the hob Please stick the data plate for the ap-pliance, supplied with this document-ation, in the space provided in the“Customer Service Department” sec-tion of this booklet. Remove any protective foil and stick-ers. Cleaning the hob for the firsttime Before using fo...
Page 34 - Installing the Miele app; or from the; Setting up Miele@home
Commissioning 34 Miele@home Installing the Miele app The ability to use the Miele app de-pends on the availability of theMiele@home service in your country.For information about availability, pleasevisit www.miele.com.The Miele app is available free of chargefrom the Apple App Store ® or from the Go...
Page 35 - Connecting via the Miele app
Commissioning 35 Connecting via the Miele app - A home WiFi network is available.- The signal of your WiFi network is sufficiently strong in the placewhere your hob is installed. - There is no direct WiFi connection between the hob and a Mielecooker hood (Con@ctivity 3.0). - The Miele app is install...
Page 36 - Cancelling the process; Touch any sensor control.; Resetting settings; is displayed in the timer dis-
Commissioning 36 Cancelling the process Touch any sensor control. Resetting settings Reset the settings if you are disposingof your hob, selling it or putting a usedhob into operation. This is the only wayto ensure that all personal data hasbeen removed and the previous ownerwill no longer be able...
Page 37 - Availability of the WiFi connection; - The hob is not connected to your
Commissioning 37 Establishing a direct connectionwith the cooker hood The hob requires max. 2 W in networkedstandby. Availability of the WiFi connection The WiFi connection shares a frequencyrange with other appliances (includingmicrowave ovens and remote controltoys). This can give rise to sporadic...
Page 39 - Safety notes for operation; Risk of fire with overheated food.
Operation 39 Safety notes for operation Risk of fire with overheated food. Unattended food can overheat and catch alight.Do not leave the hob unattended whilst it is being used. Risk of burning due to hot cooking zones. The cooking zones will be hot after use.Do not touch the cooking zones while...
Page 40 - Switching the hob on; Touch the; Switching the hob off; Positioning cookware
Operation 40 Switching the hob on Touch the sensor control. Further sensor controls will light up. If no further entry is made, the hob willswitch itself off after a few seconds forsafety reasons. Switching off a cooking zone/the hob Switching the hob off To switch off the hob and all the coo...
Page 41 - Power level; Setting the power level
Operation 41 Power level Setting the power level Permanent pan recognition is activatedas standard (see “Adjusting settings”).When the hob is switched on and youplace an item of cookware on a cookingzone, the cooking zone indicator startsto flash. Place the cookware on the cookingzone you want to ...
Page 42 - Booster; Activating the Booster
Operation 42 Booster Activating the Booster When the Booster function is activated,the settings for the linked cooking zonemay be changed, see “Familiarisation –Power management”.The Booster function can be used on amaximum of two cooking zones at thesame time.The Booster function is active for a ma...
Page 43 - Activating auto heat-up
Operation 43 Auto heat-up The heat-up time depends on whichcontinued cooking setting has beenchosen: Continued cook- ing setting* Heat-up time [min:sec] 1 Approx. 0:15 1. Approx. 0:15 2 Approx. 0:15 2. Approx. 0:15 3 Approx. 0:25 3. Approx. 0:25 4 Approx. 0:50 4. Approx. 0:50 5 Approx. 2:00 5. Appro...
Page 44 - Timer; Setting timer durations
Operation 44 Timer Setting timer durations A duration of between 1 minute ( : ) and 9 hours 59 minutes ( : ) can be set.Durations of up to 59 minutes areshown in minutes (00:59) and durationsof more than 60 minutes are shown inhours and minutes.Durations are entered using the numer-ical displa...
Page 46 - System lock; Activating the system lock; Safety lock; Activating the safety lock
Operation 46 System lock Activating the system lock All sensor controls are locked. A setminute minder time will continue tocount down. Touch the sensor control for 6 seconds. The seconds can be seen countingdown in the timer display. When thistime has elapsed, will appear in the timer dis...
Page 47 - Activating the Recall function; Switch the hob on again.; Tips for keeping food warm; - Nutrients are lost when food is; Displaying the software version; numbers appear in the timer display:
Operation 47 Activating the Recall function Switch the hob on again. Immediately after switching the hobon, touch one of the flashing cookingzone sensor controls. Activating /deactivating theKeeping warm function The Keeping warm function cannot beused to reheat food that has gone cold. Touch ...
Page 48 - alternating with
Operation 48 Activating /deactivating demomode Switch the hob on. Press the 0 and 2 sensor controls onthe numerical display at the sametime for 6 seconds. The following will flash in the timer dis-play for a few seconds: - alternating with (demo mode activated) or - alternating with ...
Page 49 - Setting ranges for the power levels
Setting ranges for the power levels 49 The hob is programmed with 9 power levels at the factory. If you wish to fine-tune asetting, you can extend the power level range to 17 power levels (see “Adjustingsettings”). Setting range Factory set- ting (9 power levels) Extended set- ting (17 power levels)...
Page 50 - Good to know; How induction hobs work
Good to know 50 How induction hobs work An induction coil is located under eachinduction cooking zone. The coil createsa magnetic field that reacts directly withthe base of the pan and heats it up. Thecooking zone itself is heated up indir-ectly by the heat given off by the pan.An induction cooking ...
Page 51 - Pans; Suitable cookware
Good to know 51 Pans Suitable cookware - Stainless steel cookware with a mag- netic base - Enamelled steel cookware- Cast iron Please be aware that the properties ofthe cookware base can affect the even-ness with which the food heats up (e.g.when making pancakes). The base ofthe pan must be able to ...
Page 52 - Adjusting settings; Accessing programming mode
Adjusting settings 52 Accessing programming mode The hob is switched off. Touch and hold the and sensor controls until the + sensor control lights up and appears in the timer display. After a few seconds : (Programme 01) will flash alternately with : (Code) in the timer display. S...
Page 55 - Safety notes on cleaning and care; Risk of burns due to hot surfaces.
Cleaning and care 55 Safety notes on cleaning and care Risk of burns due to hot surfaces. All parts of the hob may be hot after use.Switch the hob off.Allow the hob to cool down before cleaning it. All surfaces could be discoloured or damaged if unsuitable cleaningagents are used or if residues fr...
Page 56 - When to clean; Clean the hob after every use.; Removing light soiling; cleaners and cream cleaners
Cleaning and care 56 When to clean Clean the hob after every use. Removing light soiling Clean the entire ceramic surface ofthe hob with a damp, soft cloth and asolution of water and a little washing-up liquid. Please follow the cleaningagent manufacturer ’s instructions. Removing stubborn soili...
Page 57 - Troubleshooting; Messages in the display
Troubleshooting 57 Messages in the display Problem Cause and remedy The symbol lights up or flashes alternately withthe set power level or in one of the cookingzone indicators. No cookware is present on the cooking zone. Unsuitable cookware is present on the cooking zone. The diameter of the bas...
Page 58 - The fan is blocked or defective.
Troubleshooting 58 Problem Cause and remedy will flash alternately with , or in the timer display. The fan is blocked or defective. Make sure it has not been blocked by an object. Remove the obstruction. If this fault message continues to appear in the dis-play, contact the ...
Page 59 - Unexpected behaviour; Problem
Troubleshooting 59 Unexpected behaviour Problem Cause and remedy Power level 9 is auto-matically reduced if youalso set power level 9 forthe connected cookingzone. Operating both zones at power level 9 exceeds thepermitted maximum power for the two zones. Use a different cooking zone. A cooking zo...
Page 60 - Unsatisfactory results; General problems or technical faults
Troubleshooting 60 Unsatisfactory results Problem Cause and remedy The food in the pan doesnot heat up when theAuto heat-up function isswitched on. A large amount of food is being heated up. Start cooking at the highest power level and thenturn down to a lower one manually later on. The pan is not...
Page 61 - After sales service; Contact in the event of a fault
After sales service 61 Information to help you rectify faults yourself and about Miele spare parts can befound at www.miele.com/service. Contact in the event of a fault In the event of a fault which you cannot remedy yourself, please contact your Mieledealer or Miele Customer Service. You can book a...
Page 62 - Note for test institutes
After sales service 62 Note for test institutes Test food acc. to EN 60350-2 9 power levels are programmed at the factory.For testing in accordance with the above standard, programme the hob to the ex-tended power level setting (see “Adjusting settings”). Test food Pan base (mm) Lid Power level Pr...
Page 63 - Optional accessories; Cookware; Microfibre cloth
Optional accessories 63 Cookware Miele offers a wide range of cookware.These have all been optimised for Mieleappliances in terms of functionality anddimensions. Detailed information isprovided on the Miele website. Cleaning and care products Ceramic and stainless steel hobcleaner 250 ml Removes hea...
Page 64 - Installation; Safety notes for installation
Installation *INSTALLATION* 64 Safety notes for installation Risk of damage from incorrect installation. Incorrect installation can cause damage to the hob.The hob must only be installed by a qualified specialist. Risk of electric shock from mains voltage. Incorrect connection to the mains suppl...
Page 65 - Additional safety notes for surface-mounted installation; Damage caused by incorrect installation.
Installation *INSTALLATION* 65 Additional safety notes for surface-mounted installation Damage caused by incorrect installation. Using sealant under the hob could result in damage to the hob andthe worktop if the hob ever needs to be removed.Do not use sealant between the hob and the worktop.The s...
Page 66 - Additional safety notes for flush-fit installation; Damage from unsuitable sealant.
Installation *INSTALLATION* 66 Additional safety notes for flush-fit installation Damage from unsuitable sealant. Unsuitable sealant can damage natural stone.For natural stone worktops and natural stone tiles, only use siliconesealant that is specially formulated for natural stone. Follow themanuf...
Page 67 - Safety distances; Safety distance above the hob; - The safety distance specified by the
Installation *INSTALLATION* 67 Safety distances Safety distance above the hob The following must be ensured betweenthe hob and the cooker hood above it: - The safety distance specified by the manufacturer of the cooker hood mustbe maintained. - When two or more appliances which have different safety...
Page 68 - back
Installation *INSTALLATION* 68 Safety distance behind and to the sideof the hob The minimum safety distances shownbelow must be maintained between theappliance and a tall unit or wall: - Between the back of the worktop cut-out and the rear edge of the work-top:50 mm and - On the right side b...
Page 69 - Safety distance underneath the hob; Without intermediate shelf or base; accommodating the
Installation *INSTALLATION* 69 Safety distance underneath the hob To install the hob while maintaining thesafety distances, you can choose from3 variants: 1. Without intermediate shelf or base panel 2. With intermediate shelf3. With an air intake-optimised base panel Further instructions are describ...
Page 70 - Without intermediate shelf or base panel; The dimensions in brackets are recommendations.; Front
Installation *INSTALLATION* 70 1. Without intermediate shelf or base panel To ensure sufficient ventilation to the hob, a minimum safety distance must be leftbetween the underside of the hob and any drawer or oven.The minimum safety distance between the underside 1 of the hob and: - Upper edge of dr...
Page 71 - underside
Installation *INSTALLATION* 71 3. Air intake-optimised base panel The performance of the hob depends on the ventilation.The air intake-optimised base panel has openings where the fans are positioned.This section contains instructions for creating an air intake-optimised base panel. ≤ 40 mm ≥ 45 mm ≥...
Page 72 - Positions and cut-outs of the ventilation openings; Middle of the cut-out height; Distance from the middle of the cut-out in mm
Installation *INSTALLATION* 72 Positions and cut-outs of the ventilation openings Y1.1 X1.1 X2.1 Y2.1 Not to scale. View from above. Surface-mounted cut-out shown.Also applies to flush-fit installation. a Middle of the cut-out height b Middle of the cut-out width c Cut-out for fan, round (Ø 55–70 mm...
Page 73 - Safety distance from the niche cladding; Masonry; combustible; 0 mm – dimension x
Installation *INSTALLATION* 73 Safety distance from the niche cladding If niche cladding is installed, a minimum safety distance must be maintainedbetween the worktop cut-out and the cladding. High temperatures can alter ordamage these materials. Flush-fit installation Surface-mounted installation a...
Page 74 - Building-in dimensions for surface-mounted installation
Installation *INSTALLATION* 74 Building-in dimensions for surface-mounted installation KM 7360 FR, KM 7361 FR All dimensions are given in mm. a Front b Mains connection boxThe mains connection cable (L = 1440 mm) is supplied loose
Page 80 - Installation dimensions for flush-fit installation
Installation *INSTALLATION* 80 Installation dimensions for flush-fit installation KM 7360 FL, KM 7361 FL All dimensions are given in mm. a Front b Mains connection boxThe mains connection cable (L = 1440 mm) is supplied loose c Stepped cut-out, natural stone worktop d Wooden batten 12 mm (not suppli...
Page 83 - Seal any cut surfaces on; wooden; Risk of damage from incorrect
Installation *INSTALLATION* 83 Installing a surface-mountedhob Create the worktop cut-out. Remem-ber to maintain the minimum safetydistances (see “Installation – Safetydistances”). Seal any cut surfaces on wooden worktops with a special varnish, silic- one sealant or resin to prevent thewood fro...
Page 85 - Electrical connection; Total power rating; See data plate; Connection data
Installation *INSTALLATION* 85 Electrical connection Risk of damage from incorrect connection.Unauthorised installation, mainten-ance and repairs can cause consider-able danger for the user.Miele cannot be held liable for dam-age or injury caused by unauthorisedinstallation, maintenance or repairw...
Page 86 - Risk of electric shock.
Installation *INSTALLATION* 86 Disconnecting from the mains Risk of electric shock. There is a risk of electric shock if theappliance is connected to the mainssupply during repair or service work.After disconnection, ensure the appli-ance cannot be switched back on bymistake. To disconnect the app...
Page 87 - Wiring diagram; a b c d e
Installation *INSTALLATION* 87 Wiring diagram Some connection methods are notpermitted in all installation locations.Ensure compliance with national reg-ulations and any additional regula-tions issued by the local electricityprovider. The maximum load per connected liveconductor is 3650 W.The first ...
Page 88 - Product data sheets
Installation *INSTALLATION* 88 Product data sheets The following data sheets apply to the models described in this operating instruc-tion manual. Information for domestic electric hobs In acc. with regulation (EU) No. 66/2014 MIELE Model name/identifier KM 7360 FR, KM 7360 FL Number of cooking zones...
Page 90 - EU Conformity declaration; UK Conformity declaration; manuals and enter the name of the product or the serial number; Statement of Compliance; Paul Wright
Installation *INSTALLATION* 90 EU Conformity declaration Miele hereby declares that this ceramic induction hob complies with Directive2014/53/EU. The complete text of the EU declaration of conformity is available from one of thefollowing internet addresses: - Products, Download from www.miele.ie- Fo...
Page 91 - United Kingdom
United Kingdom Miele Co. Ltd., Fairacres, Marcham Road, Abingdon, Oxon, OX14 1TWTel: 0330 160 6600, Internet: www.miele.co.uk, E-mail: [email protected] Australia Miele Australia Pty. Ltd.ACN 005 635 398ABN 96 005 635 398Level 4, 141 Camberwell RoadHawthorn East, VIC 3123Tel: 1300 464 353E-mail: [em...


 Miele WWD380 WCS PWash&Steam&9kg User Manual
 Miele W 1614 Manual
 Miele G 5266 SCVi SFP Active Plus User Manual
 Miele Classic C1 Turbo Team PowerLine - SBAN0 User Manual
![Miele PDR 307 [EL]](https://manualsarea.com/img/product/thumbs/48/ba/fd/bafde84806e8abc8b420f34eaf8fcd6e.webp) Miele PDR 307 [EL] User Manual
Miele PDR 307 [EL] User Manual Miele F 1911 Vi Manual
![Miele PDR 908 [EL MAR 3N AC 400V 50-60Hz]](https://manualsarea.com/img/product/thumbs/48/05/b7/05b705998b251f92b271e908423e1ecb.webp) Miele PDR 908 [EL MAR 3N AC 400V 50-60Hz] Installation Manual
Miele PDR 908 [EL MAR 3N AC 400V 50-60Hz] Installation Manual Miele K 9757 iD Manual


