Page 2 - Contents; Warning and Safety instructions; Settings mode
Contents 2 Warning and Safety instructions ............................................................................... 6 Caring for the environment ......................................................................................... 15 Installation .............................................
Page 3 - Switching on and off
Contents 3 Adjusting the interior fittings ........................................................................................ 33 Using the door shelf fine adjustment..................................................................... 33 Repositioning the door shelf with fine adjustment .........
Page 5 - Information
Contents 5 Warranty .......................................................................................................................... 80 Information ..................................................................................................................... 81 EU Conformity declara...
Page 7 - Correct application
Warning and Safety instructions 7 Correct application This refrigeration appliance is intended for use in the home and in similar environments, for example– in shops, offices and similar work settings – by the guests in hotels, motels, bed & breakfasts and other typicalhome settings.This refri...
Page 8 - Technical safety; The coolant circuit has been checked for leaks. The refrigeration
Warning and Safety instructions 8 Technical safety The coolant circuit has been checked for leaks. The refrigeration appliance complies with statutory safety requirements and theappropriate EU directives. If the cooling circuit is damaged, refrigerant and oil can escape and ignite. Warning: fire...
Page 10 - Proper installation
Warning and Safety instructions 10 For safety reasons, this appliance may only be used after it has been built in. The appliance must be isolated from the electricity supply during installation, maintenance and repair work. Unauthorised installation, maintenance and repairs can cause considera...
Page 11 - Correct use; Do not cover or block the air vents as this could impair the; Accessories and spare parts; Only use original Miele accessories. If other parts are used,
Warning and Safety instructions 11 Correct use This refrigeration appliance is designed for use within specific ambient temperatures (climate range). Do not use in ambienttemperatures for which it is not designed. The climate range is statedon the data plate in the interior cabinet of the refriger...
Page 12 - Cleaning and care
Warning and Safety instructions 12 Cleaning and care Do not use any oils or grease on the door seals, as these will cause the seals to deteriorate and become porous with time. Do not use a steam cleaning appliance to clean or defrost this appliance. Steam could reach electrical components and ca...
Page 13 - Disposal of your old appliance; Symbol on the compressor (depending on model)
Warning and Safety instructions 13 Disposal of your old appliance Children playing could become trapped in the appliance and could suffocate. - Remove the appliance doors.- Remove the drawers.- Leave the adjustable shelves in the refrigeration appliance so children cannot climb inside. - If your o...
Page 14 - The oil in the compressor can be fatal if swallowed or if it
Warning and Safety instructions 14 The oil in the compressor can be fatal if swallowed or if it penetrates the airways.
Page 15 - Caring for the environment; Disposing of your old appliance
Caring for the environment 15 Disposing of the packagingmaterial The packaging material is used forhandling and protects the appliancefrom transport damage. The packagingmaterial used is selected from materialswhich are environmentally friendly fordisposal and can generally be recycled.Recycling the...
Page 16 - Installation; Installation site
Installation *INSTALLATION* 16 Installation site Risk of damage and danger of injury due to the refrigerationappliance tipping over.This refrigeration appliance is veryheavy and can tip forwards when theappliance door is open.Keep the appliance door(s) closeduntil the refrigeration appliance hasbe...
Page 17 - - Other appliances must also not be; Climate range; SN
Installation *INSTALLATION* 17 - Other appliances must also not be plugged into a socket located directlybehind the refrigeration appliance. - When installing the refrigeration appliance, make sure that the mainsconnection cable does not gettrapped or damaged. - Do not position or operate multi- soc...
Page 18 - Ventilation; Risk of fire and damage due to; not; possible to change the door
Installation *INSTALLATION* 18 Ventilation Risk of fire and damage due to insufficient ventilation.If the refrigeration appliance is notventilated sufficiently, thecompressor will run more frequentlyand for longer periods. This will resultin increased energy consumption anda higher operating tempe...
Page 19 - Knock sensor; - Gluing the knock sensor to the; Spacer plates; Risk of damage caused by the
Installation *INSTALLATION* 19 Installation When installing the refrigerationappliance, it is a mandatoryrequirement to follow the installationinstructions supplied with it. Knock sensor - When installing the knock sensor, ensure that the connecting cable isnot damaged. - Gluing the knock sensor to ...
Page 20 - Aligning the refrigeration appliance; Connecting to the power supply; Risk of damage due to
Installation *INSTALLATION* 20 Aligning the refrigeration appliance The refrigeration appliance must bealigned exactly vertically in the niche.This is the only way to ensure that theappliance door ’s automatic openingmotion is smooth. Levelling rails These are enclosed from a nicheheight of 1400 mm....
Page 21 - - When installing the refrigeration; Cover strip; Furniture door panel; Weight of the furniture door; If the furniture door panel is too
Installation *INSTALLATION* 21 - When installing the refrigeration appliance, make sure that the mainsconnection cable does not gettrapped or damaged. - Do not position or operate multi- socket adapters, distributor strips orother electronic devices (e.g. halogentransformers) at the rear of theappli...
Page 22 - Building-in dimensions; Installation in a tall unit/side view; All dimensions are given in mm.
Installation *INSTALLATION* 22 Building-in dimensions Installation in a tall unit/side view All dimensions are given in mm. * The declared energy consumption was calculated in a 560 mm deep niche. Therefrigeration appliance is fully functional in a 550 mm niche but the energyconsumption will be slig...
Page 23 - Connections and ventilation
Installation *INSTALLATION* 23 Connections and ventilation All dimensions are given in mm. The specified ventilation cross-sections must be adhered to in order to ensure thecorrect functioning of the refrigeration appliance. a View from the front b Mains connection cable, length = 2200 mm c Ventilat...
Page 24 - Electrical connection; Risk of fire from overheating.; Connecting the refrigeration appliance
Installation *INSTALLATION* 24 Electrical connection The refrigeration appliance must only beconnected to an earthed socket usingthe mains connection cable supplied.The socket must be easily accessibleafter the refrigeration appliance hasbeen installed. If the socket is not easilyaccessible, ensure ...
Page 25 - Saving energy
Saving energy 25 How to save energy: Installation site The refrigeration appliance has to cool more often at higherambient temperatures and consumes more energy in theprocess. Therefore, you should: - Install the refrigeration appliance in a well-ventilated room. - Do not install the refrigeration a...
Page 26 - Guide to the appliance
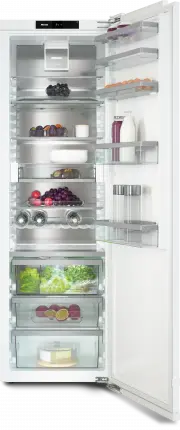
Guide to the appliance 26 This image shows an example of an appliance model with right-hand hinging.
Page 28 - Start display; Using the appliance; OK
Guide to the appliance 28 Start display The display can be scratched by pointed or sharp objects, e.g. pens.Only touch the display with your fingertips. It is possible that the display will not react to finger contact if your fingers arecold. 5 °C 1 2 3 4 a Temperature display for fridge zone ...
Page 29 - Off
Guide to the appliance 29 Settings mode In Settings mode, you can select the following appliance functions and alter theirsettings to some extent: Symbol Function Factorydefault Switch the Party mode function on or off(see “Selecting further settings”) Off Switch the Holiday mode function on ...
Page 31 - Risk of injury during automatic
Guide to the appliance 31 Automatic door opening(ActiveDoor) Risk of injury during automatic opening and closing of the appliancedoorBody parts such as fingers canbecome jammed in the area of thedoor opening range and in the doorhinge area.Leave the area of the door openingrange clear.Do not reach...
Page 32 - Sensitivity of the knock sensor; Meaning; depending on model
Guide to the appliance 32 Sensitivity of the knock sensor A sliding switch is used to set thesensitivity of the knock sensor. Thissliding switch is located on the hinge-side outer edge in the lower third of thedoor (see “Guide to the appliance”). Settings Switchsetting Meaning Top(3 dots) High sensi...
Page 33 - Adjusting the interior fittings; Using the door shelf fine adjustment
Guide to the appliance 33 Adjusting the interior fittings Using the door shelf fine adjustment Use the fine adjustment if you needgreater height clearance on the doorshelf/bottle shelf.You can change the height of the doorshelf while it is loaded. Hold the door shelf in both hands,press the grey b...
Page 34 - Moving the door shelf/bottle shelf; pull the bottle holder up to remove it.
Guide to the appliance 34 Moving the door shelf/bottle shelf Only move the door/bottle shelves inthe appliance door when they areempty. Push the door/bottle shelvesupwards, then remove them by pullingthem forwards. Replace the door/bottle shelves atthe required height. Clipping the egg trays on ...
Page 36 - Risk of damage caused by; Moving the bottle rack
Guide to the appliance 36 Adjustable shelf with pivotable glassshelf (FlexiTray) Risk of damage caused by loading too much food and notdistributing items evenly.Loading too much food and notdistributing items evenly can damagethe pivotable glass shelf.Do not exceed the maximum loadsize of 8 kg. Ar...
Page 37 - If the bottles hang over the edge of
Guide to the appliance 37 Place the bottles as far back aspossible with the bases at the back ofthe appliance. Tip: If the bottles hang over the edge of the bottle rack, adjust the bottom bottleshelf by moving it upwards. Removing and reinserting theorganisation box The additional organisation box...
Page 38 - - Place the holder with the charcoal; Accessories supplied
Guide to the appliance 38 Moving the charcoal filters KKF-FS charcoal filters with holder(Active AirClean) are available asoptional accessories (see “Optionalaccessories”). When storing very strong smellingfood (e.g. very ripe cheese): - Place the holder with the charcoal filters on the shelf where ...
Page 39 - MicroCloth HyClean
Guide to the appliance 39 MicroCloth HyClean The MicroCloth HyClean is a multi-purpose antibacterial cloth and isparticularly tear resistant and durable. Itcan be used wet or dry, with or withoutcleaning agent. KKF-FS charcoal filter with holder(Active AirClean) Charcoal filters neutralise unpleasan...
Page 40 - Before using for the first time
Switching on and off 40 Before using for the first time Remove all packaging material andprotective film. Clean the inside of the appliance andthe accessories (see “Cleaning andcare”). Connecting the refrigeration appliance Connect the refrigeration appliance tothe electricity supply as descri...
Page 41 - Switch the refrigeration appliance off.
Switching on and off 41 To note when switching off for longerperiods of time If, during a long absence, therefrigeration appliance is switched offbut not cleaned and the door is leftshut, there is a danger of mouldbuilding up inside the appliance.It is essential to clean therefrigeration appliance b...
Page 42 - The correct temperature; Temperature display; current average; Setting the temperature; Possible temperature settings
The correct temperature 42 It is very important to set the correcttemperature to ensure the shelf life offood. Reducing the temperature reducesthe growth rate of microorganisms.Food does not spoil as quickly.The temperature in the refrigerationappliance will rise: - The more often the appliance door...
Page 43 - to
The correct temperature 43 Swipe left or right until the setting youwant (1: lowest temperature; 9:highest temperature) is shown in themiddle. Tap on the setting you want toconfirm. The factory default setting for thetemperature level is 5 . Under certain circumstances, asetting from 1 to 4 c...
Page 44 - Using Super cool; SuperCool
Using Super cool 44 SuperCool When switched on, the SuperCoolfunction can be used to rapidly reduce the temperature in the fridge zone to its lowest setting (depending on the ambient temperature). Therefrigeration appliance will work at fullpower and lower the temperature.Select this function ...
Page 45 - Selecting further settings; Party mode
Selecting further settings 45 Explanation of the differentsettings Only the settings that require furtherexplanation are described below. The door alarm and other warnings areautomatically suppressed when youare in Settings mode . Party mode The Party mode function is particularly recommend...
Page 47 - Activating ActiveDoor; Setting the door opening angle
Selecting further settings 47 Automatic door opening(ActiveDoor) A The following settings can beconfigured: 1. Activate and configure ActiveDoor when commissioning therefrigeration appliance or at a laterpoint 2. Deactivate ActiveDoor3. Activate ActiveDoor if the function has already been configu...
Page 50 - when the door is
Selecting further settings 50 Change the time until the door alarmis triggered when the door is opened manually You can set how quickly the door alarmshould sound after the appliance doorhas been opened manually. Tap . Swipe left or right until is shown in the middle. Tap . ...
Page 51 - Miele@home availability
Selecting further settings 51 Miele@home availability The ability to use the Miele appdepends on the availability of theMiele@home service in your country.The Miele@home service is notavailable in every country.For information about availability, pleasevisit www.miele.com. Miele App The Miele App is...
Page 52 - Adjusting the display brightness
Selecting further settings 52 Alternatively, you can switch the alarmsand buzzers off if you find themannoying. Tap . Swipe left or right until is shown in the middle. Tap . Select the volume you want byswiping the segment bar to the left orright. Confirm the volume you want bytap...
Page 53 - Charcoal filter change indicator
Selecting further settings 53 Charcoal filter change indicator After inserting the charcoal filter(optional accessory), you must activatethe charcoal filter change indicator in Settings mode . The charcoal filter change indicator on the start display will remind you toreplace the charcoa...
Page 54 - Door alarm; Switching the door alarm off early
Door alarm 54 Door alarm with manual dooropening The appliance door is left open for anextended period. The refrigeration appliance is fittedwith a door alarm to avoid increasedenergy consumption and foodbecoming warm if the door is leftopen. If the appliance door is left open for anextended period,...
Page 55 - Storing food in the fridge zone; Risk of explosion due to; Different storage zones; Warmest area; eggs or cream
Storing food in the fridge zone 55 Risk of explosion due to flammable mixes of gases.Electrical components can causeflammable mixes of gases to ignite.Do not store explosive materials inthe refrigeration appliance or anyproducts containing propellants (e.g.spray cans). The spray cans inquestion ca...
Page 56 - - Raw milk cheese and other raw milk; Notes on buying food
Storing food in the fridge zone 56 - Raw milk cheese and other raw milk products - Hummus, vegetable spreads, plant- based cream cheese substitutes - Pre-packed vegetables- Other fresh food (with a label stating it should be kept at a temperature ofapprox. 4 °C) Food which is not suitable forstorage...
Page 57 - Storing food in the PerfectFresh Active zone; PerfectFresh Active zone; compartment
Storing food in the PerfectFresh Active zone 57 PerfectFresh Active zone The PerfectFresh Active zone satisfiesthe requirements of a chillcompartment toDIN EN 62552:2020. The PerfectFresh Active zone providesideal storage conditions for fruit,vegetables, fish, meat and dairyproducts. Food stays fres...
Page 58 - Selecting increased humidity
Storing food in the PerfectFresh Active zone 58 Selecting increased humidity When the setting is used, the humidifier should be switched on. The energy consumption doesincrease slightly when the humidifier is switched on. The appliance may also make more noise than usual. Tap . Swipe...
Page 59 - Humidifier; When the humidifier
Storing food in the PerfectFresh Active zone 59 Humidifier When the humidifier is switched on, water vapour is supplied to the fruitand vegetables stored in the humidity-controlled compartment each time theappliance door is opened andapproximately every 90 minutes. Thewater vapour provides add...
Page 60 - Dry compartment; dry compartment
Storing food in the PerfectFresh Active zone 60 Filling the water container for thehumidifier Press on the outer corners at the backof the glass shelf . The glass shelf will lift up at the front. Lift up the shelf and fold it back. The glass shelf will stand upright. Push the slider to t...
Page 62 - Defrosting; do not use the following:
Cleaning and care 62 The data plate located inside theinterior cabinet of the refrigerationappliance must not be removed. Itcontains information which is requiredin the event of a fault. Do not let water get into theelectronic unit or the lighting. Risk of damage due to moisture ingress.The steam ...
Page 63 - interior
Cleaning and care 63 To leave this Settings level, tap . If Cleaning mode is switched on, this will be indicated on the startdisplay. Take any food out of the applianceand store it in a cool place. Take out any removable accessoriesfor cleaning (see “Removing,dismantling and cleaningacce...
Page 64 - Dismantling the door shelf/bottle shelf
Cleaning and care 64 - Shelves and bottle shelves in the appliance door (without stainlesssteel trim) - The guide rails for the door shelf with fine adjustment - Adjustable shelves (without the trim or printing) - The 2 pieces that make up the water container for the humidifier - The adapters for th...
Page 65 - Risk of damage as a result of
Cleaning and care 65 Place the adjustable shelf on aworktop covered with a soft material(e.g. a tea towel) with the top sidefacing downward. Risk of damage as a result of incorrect handling.When you remove the stainless steeltrim with LED lighting, the metalcontacts can be damaged.These contacts...
Page 66 - on the outer edge of the
Cleaning and care 66 Bring the tray to the front. Use theopening to lift the glass shelf fromunderneath and remove it. Move the tray back to its originalposition resting on the adjustableshelf. The tray can only be detached fromthe adjustable shelf once it has beenreturned to its original positi...
Page 67 - Place the glass shelf in the grooves
Cleaning and care 67 Place the glass shelf in the grooves and then secure it in the retainers . Turn over the shelf so that the plasticsurface is facing upwards. Place the frame on the adjustableshelf so that the arrows on theadjustable shelf line up with therecesses on the frame. Take...
Page 68 - Slide the shelf back as far as it will go.
Cleaning and care 68 Pull the shelf slightly forwards 2.) andremove it by lifting it either up or outat an angle, making sure that thenotches on the left and right are inline with the shelf supports. Place the shelf and support on aworktop covered with a soft material(e.g. a tea towel). Pull t...
Page 69 - Replacing the drawers
Cleaning and care 69 1. Lift the left clip and, at the sametime, pull the drawer forwards tounclip it. 2. Do the same on the opposite side. The drawer is no longer clipped intoplace. 3. Now pull out the drawer firmly fromthe front. Push the telescopic rails back inagain to avoid damaging them....
Page 70 - Reinsert the water container.; Removing the compartment cover; symbol on the start display
Cleaning and care 70 Separate the water container into its2 pieces and clean them by hand or inthe dishwasher. Reinsert the water container. Fold the glass shelf back down. Removing the dividing plate and bottlerack Remove the glass shelves at the frontand back of the dividing plate. Li...
Page 71 - Cleaning the door seal
Cleaning and care 71 Place the holder in the middle of theprotective strip at the back of theadjustable shelf so that it clicks intoposition. Touch the symbol on the display to confirm that the filters have beenreplaced. The “Replace charcoal filter ” reminderwill go out on the display and th...
Page 72 - Troubleshooting; Problem
Troubleshooting 72 Many malfunctions and faults can be easily remedied. You can save time andmoney in many cases, as you do not need to contact Customer Service. More information to help you remedy faults yourself can be found atwww.miele.co.uk/support/customer-assistance . To prevent unnecessary lo...
Page 73 - Other problems; orange; Display warnings
Troubleshooting 73 Problem Cause and remedy Switch off the SuperCool function earlier to save energy. Other problems Problem Cause and remedy There is no audible alarmeven though the appli-ance door has beenopen for a long time. This is not a fault. The alarm has been switched off inSettings mo...
Page 75 - Problems with automatic door opening
Troubleshooting 75 Message Cause and remedy will light up yellow in the display, an alarm willalso sound and the in-terior lighting will flash. The door alarm has been activated. ActiveDoor is not activated. Touch in the display. The alarm will stop, the symbol will go out and the i...
Page 77 - Problems with the humidifier; Interior lighting
Troubleshooting 77 Problems with the humidifier Problem Cause and remedy The humidifier is notsupplying moisture tothe food in thePerfectFresh Activezone. The humidifier is not switched on. Tap on the symbol in Settings mode . The compartment cover has been pulled forwards tothe “Humidity no...
Page 79 - Push the shelf in until it clicks into position.
Troubleshooting 79 Problem Cause and remedy The LED lighting is notworking on any of theshelves. Liquid has been spilt onto the LED lighting on one ofthe shelves or into the contact openings on the left-hand shelf supports. The safety switch-off mechanism has switched off theLED lighting on all the ...
Page 80 - Service; Contact in the event of a fault; Warranty
Service 80 Information to help you rectify faultsyourself and about Miele spare partscan be found at www.miele.com/service. Contact in the event of a fault In the event of a fault which you cannotremedy yourself, please contact yourMiele dealer or Miele Customer Service. You can book a Miele Custome...
Page 81 - EU Conformity declaration; UK Conformity declaration; manuals and enter the name of the product or the serial number
Information 81 EU Conformity declaration Miele hereby declares that this fridge-freezer complies with Directive 2014/53/EU. The complete text of the EU declaration of conformity is available from one of thefollowing internet addresses: - Products, Download from www.miele.ie- For service, information...
Page 82 - Statement of Compliance; Paul Wright; Copyrights and licences
Information 82 This Statement of Compliance confirms this Miele product fully complies with the Product Security and Telecommunications Infrastructure (Security Requirementsfor Relevant Connectable Products) Regulations 2023. 1) Household Appliance – 2) Manufactured by: Miele & Cie KG, Carl Miel...
Page 83 - United Kingdom
United Kingdom Miele Co. Ltd., Fairacres, Marcham Road, Abingdon, Oxon, OX14 1TWTel: 0330 160 6600, Internet: www.miele.co.uk, E-mail: [email protected] Australia Miele Australia Pty. Ltd.ACN 005 635 398ABN 96 005 635 398Level 4, 141 Camberwell RoadHawthorn East, VIC 3123Tel: 1300 464 353E-mail: [em...


 Miele WWD380 WCS PWash&Steam&9kg User Manual
 Miele W 1614 Manual
 Miele G 5266 SCVi SFP Active Plus User Manual
 Miele Classic C1 Turbo Team PowerLine - SBAN0 User Manual
![Miele PDR 307 [EL]](https://manualsarea.com/img/product/thumbs/48/ba/fd/bafde84806e8abc8b420f34eaf8fcd6e.webp) Miele PDR 307 [EL] User Manual
Miele PDR 307 [EL] User Manual Miele F 1911 Vi Manual
![Miele PDR 908 [EL MAR 3N AC 400V 50-60Hz]](https://manualsarea.com/img/product/thumbs/48/05/b7/05b705998b251f92b271e908423e1ecb.webp) Miele PDR 908 [EL MAR 3N AC 400V 50-60Hz] Installation Manual
Miele PDR 908 [EL MAR 3N AC 400V 50-60Hz] Installation Manual Miele K 9757 iD Manual