Page 3 - Contents
Contents 3 IMPORTANT SAFETY INSTRUCTIONS ................................................................... 5 Notes on the operating instructions ......................................................................... 14 Notes on the layout............................................................
Page 5 - IMPORTANT SAFETY INSTRUCTIONS
IMPORTANT SAFETY INSTRUCTIONS 5 This dishwasher complies with all current local and national safetyrequirements. Inappropriate use can, however, lead to personal in-jury and material damage.Please observe the installation sheet and read the operating in-structions carefully before setting up the dis...
Page 6 - Appropriate use
IMPORTANT SAFETY INSTRUCTIONS 6 Appropriate use This dishwasher is intended for use in the home and in similar en- vironments, for example– in shops, offices, and similar work settings– on agricultural estates– by guests in hotels, motels, bed and breakfasts, and other typicalhome settings. This...
Page 7 - Safety with children
IMPORTANT SAFETY INSTRUCTIONS 7 Safety with children Children must be kept away from the dishwasher unless they are constantly supervised. Children may only use the dishwasher without supervision if they have been shown how to use it in a safe manner. Children must beable to understand and recog...
Page 8 - Technical safety
IMPORTANT SAFETY INSTRUCTIONS 8 Technical safety Unauthorized installation, maintenance, and repairs can cause considerable danger for the user. Installation, maintenance, and re-pairs should only be carried out by a Miele authorized technician. Damage to the dishwasher can compromise your safet...
Page 10 - Correct installation
IMPORTANT SAFETY INSTRUCTIONS 10 The Waterproof system will work even when the dishwasher isswitched off. However, the dishwasher must remain connected to theelectricity supply. The water-connection pressure needs to be between 7.25 and 145 psi (50 and 1,000 kPa). A damaged dishwasher could be d...
Page 11 - Correct use
IMPORTANT SAFETY INSTRUCTIONS 11 Be careful before and while installing the dishwasher. Some metal parts pose a risk of injury/being cut. Wear pro-tective gloves. The dishwasher must be correctly aligned horizontally to ensure problem-free operation. In order to ensure stability, built-under a...
Page 12 - Accessories and parts
IMPORTANT SAFETY INSTRUCTIONS 12 Dishes may be very hot at the end of the program. Allow the dishes to cool until they are comfortable enough to handle before un-loading them. Only use detergent and rinse aid formulated for domestic dish- washers. Do not use liquid dish soap. Do not use any co...
Page 13 - Disposal of your old dishwasher
IMPORTANT SAFETY INSTRUCTIONS 13 If you wish to transport the dishwasher, empty it and securely fas- ten all loose parts such as baskets, hoses, and power cords. Disposal of your old dishwasher Remove the door of the dishwasher so that children cannot be- come trapped inside. California Proposit...
Page 14 - Notes on the operating instructions; Notes on the layout; Warnings; Warnings important for safety are; Notes; Select the setting you want and press
Notes on the operating instructions 14 These operating instructions apply toseveral different dishwasher models ofdifferent heights. The specific dishwasher models are re-ferred to as follows: Standard = 32 1/16" (81.5 cm) highdishwashers (integrated) and 33 11/16" (85.5 cm) high dishwash-er...
Page 15 - Scope of delivery
Scope of delivery 15 The following items are supplied: - dishwasher- operating instructions for using the dishwasher - installation sheet for installing the dishwasher - other installation accessories for in- stalling the dishwasher (see installa-tion sheet) - funnel for filling the reactivation sal...
Page 16 - Guide to the appliance; Appliance overview
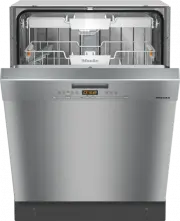
Guide to the appliance 16 Appliance overview a Top spray arm b Cutlery tray (depending on model) c Upper basket (depending on model) d Middle spray arm e Aeration valve f Bottom spray arm g Filter combination h Data plate i Rinse aid reservoir j Detergent compartment
Page 17 - Control field; Start
Guide to the appliance 17 Control field a Program selection Normal = Normal Pots = Pots & Pans Quick = QuickIntenseWash Sani = SaniWash Rinse = Rinse & Hold b Time display c Indicator lights/refill reminders / = Intake/Drain = Rinse aid d Start button with indicator li...
Page 18 - Caring for the environment; Disposal of the packing material
Caring for the environment 18 Disposal of the packing material The cardboard box and packing materi-als protect the appliance during ship-ping. They have been designed to bebiodegradable and recyclable.Ensure that any plastic wrappings, bags,etc. are disposed of safely and kept outof the reach of ch...
Page 19 - Before using for the first time; Opening the door; Risk of scalding due to hot water.; Closing the door; Risk of crushing due to the door; Activating the safety lock
Before using for the first time 19 Every dishwasher is tested at the fac-tory. There will be residual water in themachine from this test. It is not an in-dication that the dishwasher has beenused previously. Opening the door To open the door, reach under the re-cessed grip and pull the handle. If ...
Page 20 - Rinse aid; Liquid dish soap or detergent can
Before using for the first time 20 Rinse aid Rinse aid is necessary to ensure thatwater does not cling and leave marks ondishes during the drying phase, andhelps dishes dry faster after they havebeen washed. Rinse aid is poured into the reservoirand the amount set is dispensed auto-matically. Liqu...
Page 21 - Adding rinse aid
Before using for the first time 21 Adding rinse aid Press the yellow button on the lid of the rinse-aid reservoir. The lid will spring open. Fill with rinse aid until the filling levelindicator (arrow) changes to a darkcolor while the door is horizontallyopen. The rinse-aid reservoir holds ap...
Page 22 - Setting the rinse-aid dosage; while
Before using for the first time 22 Setting the rinse-aid dosage You can adjust the rinse-aid dosage forbest results. The rinse-aid dosage can be set from 0to 6 ml. 3 ml is the factory default setting.The rinse-aid dosage can turn out to behigher than the set value due to the au-tomatic adjustment of...
Page 23 - Energy-saving dishwashing; Normal
Caring for the environment 23 Energy-saving dishwashing This dishwasher is exceptionally eco-nomical in its use of water and electric-ity. You can make the most of your machineby following these tips: - Washing in a dishwasher generally uses less water and energy thanwashing by hand. - There is no n...
Page 24 - Loading the dishwasher; General information; Damage can be caused by ash,
Loading the dishwasher 24 General information Remove coarse food residues fromdishes.There is no need to pre-rinse items un-der running water. Damage can be caused by ash, sand, wax, lubricating grease, orpaint.These substances will contaminatethe dishwasher and can then nolonger be removed.Do not...
Page 25 - Silver
Loading the dishwasher 25 Wash items not suitable for dishwash-ers: - Wooden cutlery and dishes or items with wooden parts. These may dis-color and fade. Additionally, the glueused in these items is not dishwashersafe and wooden handles may comeloose after being washed in a dish-washer. - Craft item...
Page 26 - Loading examples; Loading for 16 standard place settings with cutlery tray
Loading the dishwasher 26 Loading examples Loading for 16 standard place settings with cutlery tray Upper basket Lower basket Cutlery tray
Page 27 - Loading for 13 standard place settings with cutlery basket
Loading the dishwasher 27 Loading for 13 standard place settings with cutlery basket Upper basket Lower basket Cutlery basket
Page 28 - Loading the upper basket; Risk of damage due to water; Loading the FlexCare cup rack; Lower the cup rack to do so.
Loading the dishwasher 28 Upper basket See “Loading examples” under “Load-ing the dishwasher ” for examples ofhow to load dishware and utensils. Loading the upper basket Risk of damage due to water leakage.If you run the dishwasher without theupper basket, water can leak out ofthe dishwasher.Only ...
Page 29 - Adjusting the FlexCare cup rack
Loading the dishwasher 29 Adjusting the FlexCare cup rack You can set the height and depth of thecup rack at 2 different levels so that itcan accommodate larger cups and sothat taller items can be placed under-neath it. Pull the cup rack upward and click itinto the desired position (see arrows).
Page 30 - Adjusting the upper basket; Pull out the upper basket.; Raise the upper basket:; Lift the basket until it clicks into place.; Lower the upper basket:
Loading the dishwasher 30 Adjusting the upper basket In order to gain more space for talleritems in the lower basket or upper bas-ket, the upper basket can be adjustedon 3 levels with 3/4" (2 cm) betweeneach level.The upper basket can also be set at anangle so that water can run off freelyfrom r...
Page 31 - Lower basket; Loading the lower basket; Press the yellow lever downward
Loading the dishwasher 31 Lower basket See “Loading examples” under “Load-ing the dishwasher ” for examples ofhow to load dishware and utensils. Loading the lower basket Place larger and heavier items such asplates, serving platters, saucepans,bowls, etc., in the lower basket. Glasses, cups, and s...
Page 32 - Cutlery tray/cutlery basket; Loading the cutlery tray
Loading the dishwasher 32 Cutlery tray/cutlery basket (de- pending on model) See “Loading examples” under “Load-ing the dishwasher ” for examples ofhow to load dishware and utensils. Load the utensils into the cutlery trayor into the cutlery basket (dependingon model). Loading the cutlery tray To ...
Page 33 - Loading the cutlery basket
Loading the dishwasher 33 Loading the cutlery basket The cutlery basket can be placed any-where on the front rows of spikes in theleft or right corner of the lower basket. To avoid the risk of injury, knives andforks should be placed with the han-dles upward in the cutlery basket. Place small ut...
Page 34 - Detergents; Active ingredients; Damage caused by using unsuit-
Detergents 34 Active ingredients Damage caused by using unsuit- able cleaning agents.Cleaning agents that are not suitablefor domestic dishwashers can causedamage to the dishwasher or to thewash items.Only use cleaning agents formulatedfor domestic dishwashers. Modern cleaning agents contain vario...
Page 35 - Risk of chemical burns from de-; Detergent dispensing; QuickIntenseWash
Detergents 35 Risk of chemical burns from de- tergent.Dishwasher detergents can causeburning on the skin and in the eyes,nose, mouth, and throat.Avoid contact with detergents. Do not inhale or ingest powder deter-gents. Do not swallow dishwasherdetergents. Seek medical attentionimmediately if dete...
Page 36 - Adding detergent; Press the yellow button
Detergents 36 Adding detergent Press the yellow button on the lid of the detergent compartment. The lid will spring open. The lid will also open at the end of aprogram. Add the detergent to the detergentcompartment. Push the lid shut until you hear it clickinto place. The detergent must not...
Page 37 - Operation; Turning on the dishwasher; Press the; Selecting a program; Program overview; Use the
Operation 37 Turning on the dishwasher Make sure the spray arms can rotatefreely. Close the door. Turn on the water supply if it is turnedoff. Press the button. The Start indicator light flashes and the indicator light comes on next to the pro-gram selected. Selecting a program Choose you...
Page 38 - Display of program duration
Operation 38 Display of program duration The duration of the program selectedappears in hours and minutes in the dis-play before the program begins. Duringthe program, the time left until the endof the program is displayed.The displayed duration may vary for thesame program. It is influenced by, for...
Page 39 - End of program; The program has ended when; Energy management
Operation 39 End of program The program has ended when : shows in the display.The dishwasher can now be opened andunloaded. Risk of damage due to steam. Steam from the dishwasher coulddamage the edges of delicate coun-tertops when you open the door atthe end of the program.At the end of a progr...
Page 40 - Turning off the dishwasher; Risk of damage from leaking wa-; Unloading the dishwasher
Operation 40 Turning off the dishwasher The dishwasher can be turned off atany time using the button. Turning the dishwasher off during a pro-gram stops the program.You can also do this to stop an ongoingtimer. Risk of damage from leaking wa- ter.Leaking water can cause damage.If the dishwash...
Page 41 - Interrupting a program; Close the door and press the
Operation 41 Interrupting a program A program will be interrupted as soon asthe door is opened. Close the door and press the Start button. The program will continue from thepoint at which it was interrupted. Risk of scalding due to hot water. During operation, water in the dish-washer may be ver...
Page 42 - Options; Timer; Activating the timer
Options 42 Timer You can set the start time of a program.The program start time can be delayedfor between 30 minutes and 24 hours. With start-time delays between30 minutes and 3 hours, the delay canbe set in 30 minute stages. It is set inhours for periods longer than this. During manual detergent di...
Page 44 - Program When to use
Program overview 44 Program When to use Program sequence Pre- wash Main wash Interim rinse Final rinse Drying °F/°C °F/°C Normal 1 Program for regular use to completelywash a full load of normally soiled disheswith the ability to adjust energy and wa-ter consumption based on the soil loadof the dish...
Page 45 - Consumption
Program overview 45 Consumption 2 Duration 2 Energy Water Cold water Hot water Gallons/Liters Cold water Hot water 50°F/10°C 120°F/49°C 50°F/10°C 120°F/49°C kWh kWh h:min h:min 1.06 1.20 3.2/12.1 3:11 2:49 1.55 1.70 3.4/13.0 3:26 3:03 1.15 1.20 2.9/11.0 1:18 0:58 1.50 1.55 2.4/9.0 2:50 2:30 0.01 0.1...
Page 46 - Program options; Express
Program options 46 Express The Express program option reduces the program cycle time.In order to achieve optimum cleaningresults, the temperature, and thereforethe energy consumption, will increasewith this option.The time by which the program cycletime is shortened varies according tothe sel...
Page 47 - Turning off the refill reminders
Program options 47 Turning off the refill reminders If you only ever use combination deter-gent products containing salt and rinseaid in your dishwasher, you can turn offboth refill reminders if you wish. Turn the dishwasher off with the button, if it is turned on. Press the Start button in ...
Page 48 - Extra clean
Program options 48 Extra clean You can choose this program option toincrease the cleaning performance ofthe programs.If you activate this program option, theprogram cycle times and the main washtemperatures will increase. The waterand energy consumption may increase. Turn the dishwasher off with t...
Page 49 - Extra Dry
Program options 49 Extra Dry You can select this program option in or-der to increase the program drying per-formance.If you activate this program option, theprogram cycle times and final rinse tem-peratures will increase. The energy con-sumption may increase. Turn the dishwasher off with the b...
Page 50 - Second interim rinse
Program options 50 Second interim rinse You can choose this program option toincrease the cleaning performance ofthe programs with a second interimrinse.If you activate this program option, theprogram cycle times and the water con-sumption will increase. Turn the dishwasher off with the button,...
Page 51 - Operating hours display; Factory defaults
Program options 51 Operating hours display You can display how many hours thedishwasher has been in operation so far. Turn the dishwasher off with the button, if it is turned on. Press the Start button in and, while holding it in , turn the dishwasher on using the button. Keep the Start ...
Page 52 - Cleaning and care; Damage due to unsuitable clean-; Cleaning the wash cabinet
Cleaning and care 52 Check the condition of your dish-washer regularly (approx. every 4–6 months). This helps to avoid faultsand problems. Damage due to unsuitable clean- ing agents.All surfaces are susceptible toscratching. Contact with unsuitablecleaning agents can alter or discolorall surfaces....
Page 53 - Cleaning the control field; The control field should; only; be wiped; Cleaning the appliance front; Damage due to soiling.
Cleaning and care 53 Cleaning the door and the doorseal The door seal and the sides of the dish-washer door are not accessed andcleaned by the spray arm jets. As a re-sult, mold can develop here. Wipe the door seals regularly with adamp cloth to remove food deposits. Wipe off any food or drink r...
Page 54 - Cleaning the spray arms
Cleaning and care 54 Cleaning the spray arms Particles of food can get stuck in thespray arm jets and bearings. The sprayarms should therefore be inspected reg-ularly (approx. every 2–4 months). Never run a wash program withoutusing the spray arms. Damage due to soiling entering the circulation sy...
Page 55 - Removing the upper spray arm; Push the upper spray arm upward; Removing the middle spray arm; above) and remove the spray arm; Removing the lower spray arm; Remove the lower basket.
Cleaning and care 55 Removing the upper spray arm 2 1 Push the upper spray arm upward to engage the inner ratchet. Then un-screw the spray arm by rotating thescrew thread counterclockwise (view from below). Removing the middle spray arm 2 1 Rotate the screw thread of the middlespray arm cl...
Page 57 - Inserting the lower spray arm; Damage due to soiling entering
Cleaning and care 57 Inserting the lower spray arm Reinstall the lower spray arm and en-sure that the filter combination liesflat in the base of the wash cabinet. Rotate the screw thread of the lowerspray arm clockwise (view fromabove) until the arrow in the viewingwindow points to the lock symb...
Page 58 - Cleaning the filters; Turn off the dishwasher.
Cleaning and care 58 Checking the filters in the washcabinet The filter combination in the base of thewash cabinet retains coarse soil fromthe suds solution. This prevents soilinggetting into the circulation system andre-entering the wash cabinet throughthe spray arms. Damage due to soiling enteri...
Page 60 - Cleaning the drain pump
Cleaning and care 60 Cleaning the drain pump If water remains in the wash cabinet af-ter the end of a program, the water hasnot been pumped away. The drain pumpmay be blocked by foreign objects.These foreign objects are easy to re-move. Disconnect the dishwasher from thepower supply. To do this, t...
Page 61 - Risk of injury from glass splinters.
Cleaning and care 61 The drain pump (see arrow) is under-neath the cover. Risk of injury from glass splinters. It is especially difficult to see glasssplinters in the drain pump.Take care when cleaning the drainpump. Carefully remove all foreign objectsfrom the drain pump. Check the drainpump im...
Page 62 - Frequently asked questions; Technical faults; Problem; The dishwasher is not plugged in.; The; Then press the
Frequently asked questions 62 Many malfunctions and faults that can occur in daily operation can be easily reme-died. You can save time and money in many cases, as you do not need to contactMiele Customer Service.Information to help you rectify faults yourself can be found at www.miele.com/ser-vice....
Page 63 - Fault messages
Frequently asked questions 63 Fault messages Problem Possible cause and solution The display shows afault number that is notlisted below. There may be a technical fault. Turn the dishwasher off with the button. Turn the dishwasher back on after a few seconds. Restart the desired program. If...
Page 64 - Water intake fault
Frequently asked questions 64 Water intake fault Problem Possible cause and solution The / indicator light flashes on and off. and appear alter- nately on the time dis-play. The faucet is turned off. Open the faucet all the way. The dishwasher stopsduring a program. The / indicator l...
Page 65 - Water drainage fault; Before remedying the fault:
Frequently asked questions 65 Water drainage fault Problem Possible cause and solution The dishwasher stopsduring a program. The / indicator light is flashing. Fault number appears in the time display. Before remedying the fault: Turn off the dishwasher. Water-drainage fault.There might b...
Page 66 - General dishwasher problems
Frequently asked questions 66 General dishwasher problems Problem Possible cause and solution The indicator lights andtime display are dark. The dishwasher has turned off automatically to saveenergy. Turn the dishwasher on again with the button. Detergent residue is leftin the detergent com-par...
Page 67 - Noises; A spray arm is knocking against a wash item.
Frequently asked questions 67 Noises Problem Possible cause and solution There is a knockingnoise in the wash cabi-net. A spray arm is knocking against a wash item. Carefully open the door and rearrange the washitems that are obstructing the spray arm. There is a rattling noisein the wash cabinet....
Page 68 - Poor cleaning results; The dishware was not loaded correctly.
Frequently asked questions 68 Poor cleaning results Problem Possible cause and solution The dishware is notclean. The dishware was not loaded correctly. See notes under “Loading the dishwasher ”. The program was not powerful enough. Select a more powerful program (see “Programoverview”). Activ...
Page 69 - Ingredients from the detergent have formed a deposit.
Frequently asked questions 69 Problem Possible cause and solution The dishware is not dryor utensils and glassesare flecked. The rinse-aid dosage is set too low or the rinse-aidreservoir is empty. Replenish the reservoir, increase the dosage, orchange the brand of rinse aid (see “Rinse aid” under“...
Page 70 - Unsuitable combination detergents were used.
Frequently asked questions 70 Problem Possible cause and solution White residue is visibleon the dishes. Cloudinghas occurred on glass-ware and utensils. Thefilm can be wiped off. The rinse-aid dosage is set too low. Increase the dosage (see “Rinse aid” under “Beforeusing for the first time”). Uns...
Page 71 - Customer Service; Contact in the event of a fault
Customer Service 71 Information to help you rectify faultsyourself and about Miele spare partscan be found at www.miele.com/ser-vice. Contact in the event of a fault In the event of a fault which you cannotremedy yourself, please contact yourMiele dealer or Miele Customer Service. You can book a Mie...
Page 72 - Optional accessories; Appliance care
Optional accessories 72 Dishwasher detergent, rinse aid, andcleaning and care products are availablefor this dishwasher, as are optional ac-cessories. All the products have been designed forMiele appliances.These and many other useful productscan be ordered directly from Miele’s on-line store, Miele...
Page 73 - Installation; Water inlet; Risk to health due to wash water.
Installation *INSTALLATION* 73 Water inlet Risk to health due to wash water. Water in the dishwasher must not beused as drinking water.Do not drink any water from the dish-washer. Risk to health and risk of damage due to contaminated incoming water.The quality of the incoming watermust correspon...
Page 75 - Water drainage; Venting the water drain; Open the dishwasher door fully.
Installation *INSTALLATION* 75 Water drainage The appliance drainage system has anon-return valve, which prevents dirtywater from flowing back into the dish-washer via the drain hose.The dishwasher is supplied with approx.5 ft (1.5 m) of flexible drain hose with aninternal diameter of 7/8" (22 m...
Page 76 - Electrical connection; Installation, repairs and other; Grounding instructions; Improper connection of the; Specifications
Installation *INSTALLATION* 76 Electrical connection Installation, repairs and other work by unqualified persons could bedangerous.Check that the voltage, frequencyand fuse rating shown on the dataplate match the household powersupply.The power outlet must be accessibleafter installation. Do not u...
Page 77 - Hardwired electrical connection; Prior to making a hardwire con-
Installation *INSTALLATION* 77 Hardwired electrical connection It is possible to hardwire this applianceto an existing power cable. CAUTION: Before servicing, dis- connect the power supply by eitherremoving the fuse, shutting off thepower main or manually “tripping”the circuit breaker.Installation...
Page 78 - Sound emission testing; Prerequisites for sound emission tests; Load the dishwasher with; 6 standard place settings; and use the; Setup for sound emission tests; Install the dishwasher into an analyzing unit.
Sound emission testing 78 Prerequisites for sound emission tests Load the dishwasher with 16 standard place settings and use the Normal pro- gram. Setup for sound emission tests The dishwasher must be set up according to the following specifications. Install the dishwasher into an analyzing unit. ...
Page 83 - National Headquarters; Canada; Headquarters and Miele Centre; International Headquarters
9 Independence WayPrinceton, NJ 08540www.mieleusa.com U.S.A. Miele, Inc. National Headquarters Please have the model and serial numberof your appliance available whencontacting Customer Service. Canada ImporterMiele Limited Headquarters and Miele Centre Customer Support Phone: 888-99-MIELE (64353)[e...


 Miele WWD380 WCS PWash&Steam&9kg User Manual
 Miele W 1614 Manual
 Miele G 5266 SCVi SFP Active Plus User Manual
 Miele Classic C1 Turbo Team PowerLine - SBAN0 User Manual
![Miele PDR 307 [EL]](https://manualsarea.com/img/product/thumbs/48/ba/fd/bafde84806e8abc8b420f34eaf8fcd6e.webp) Miele PDR 307 [EL] User Manual
Miele PDR 307 [EL] User Manual Miele F 1911 Vi Manual
![Miele PDR 908 [EL MAR 3N AC 400V 50-60Hz]](https://manualsarea.com/img/product/thumbs/48/05/b7/05b705998b251f92b271e908423e1ecb.webp) Miele PDR 908 [EL MAR 3N AC 400V 50-60Hz] Installation Manual
Miele PDR 908 [EL MAR 3N AC 400V 50-60Hz] Installation Manual Miele K 9757 iD Manual
 Miele G2470 Manual
 Miele G 2472 Manual
 Miele G 2670 SC Manual
 Miele G 2830 SCi Manual
 Miele G 4220 Manual
 Miele G4286 Manual
 Miele G 5050 SCVi Active User Manual
 Miele G 5056 SCVi Active User Manual
 Miele G 5056 SCVi SFP Active User Manual
 Miele G 5058 SCVi SFP Active Installation Manual
 Miele G 5110 SC Active User Manual
 Miele G 5150 SCVi Active User Manual