Page 3 - Contents
Contents 3 Warning and safety instructions ................................................................................ 6 Notes on the operating instructions ......................................................................... 13 Notes on the layout.............................................
Page 4 - Express
Contents 4 Selecting a programme ................................................................................................. 43 Display of programme running time ............................................................................ 44 Starting the programme ................................
Page 5 - Service
Contents 5 Service ............................................................................................................................. 79 Contact in the event of a fault ...................................................................................... 79 EPREL database ..................
Page 6 - Warning and safety instructions; Appropriate use
Warning and safety instructions 6 This dishwasher conforms to current safety requirements. Inappro-priate use can, however, lead to personal injury and material dam-age.Please observe the installation sheet and read the operating in-structions carefully before setting up the dishwasher and using itf...
Page 7 - Technical safety
Warning and safety instructions 7 Children aged 8 and older may only use the dishwasher without supervision if they have been shown how to use it in a safe manner.Children must be able to understand and recognise the possibledangers caused by incorrect operation. Children must not be allowed to ...
Page 8 - Temporary or permanent operation on an autonomous power sup-
Warning and safety instructions 8 Temporary or permanent operation on an autonomous power sup- ply system or a power supply system that is not synchronised withthe mains power supply (e.g. island networks, back-up systems) ispossible. A prerequisite for operation is that the power supply systemcom...
Page 10 - Correct installation
Warning and safety instructions 10 The water-connection pressure needs to be between 50 and 1,000 kPa. A damaged dishwasher could be dangerous. If the dishwasher gets damaged, switch it off at the mains immediately and call your Mieledealer or Miele Service. While the appliance is under warran...
Page 11 - Correct use
Warning and safety instructions 11 The door springs must be evenly adjusted on both sides. They are correctly adjusted when the door remains stationary when left halfopen (approx. 45° opening angle). It is also important that the doorcannot fall open. The appliance must only be operated with prope...
Page 12 - Accessories and spare parts
Warning and safety instructions 12 Only use special coarse-grained dishwasher salt or other pure kit- chen salt for reactivation. Other salts may contain insoluble additivesthat can impair the functioning of the water softener. In dishwashers with a cutlery basket (depending on model), knives an...
Page 13 - Notes on the operating instructions; Notes on the layout; Warnings; Information which is important; Notes; Select the desired setting and press
Notes on the operating instructions 13 These operating instructions apply toseveral different dishwasher models ofdifferent heights. The different dishwasher models will benamed as follows: normal = dishwasher measuring80.5 cm high (built-in appliance) or84.5 cm high (freestanding appliance) XXL = d...
Page 14 - Scope; The appliance is supplied with:
Scope 14 The appliance is supplied with: - Dishwasher- Operating instructions for operating the dishwasher - Installation sheet for installing the dishwasher - Other installation accessories for in- stalling the dishwasher (see installa-tion sheet) - Funnel for filling the dishwasher salt- Additiona...
Page 15 - Guide to the appliance; Appliance overview
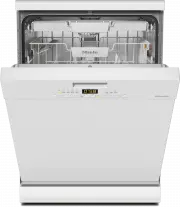
Guide to the appliance 15 Appliance overview a Top spray arm b Cutlery tray (depending on model) c Upper basket (depending on model) d Middle spray arm e Aeration valve f Bottom spray arm g Filter combination h Salt reservoir i Data plate j Rinse aid reservoir k Detergent compartment
Page 16 - Control field; Start
Guide to the appliance 16 Control field a Programme selection ECO = ECO Auto = Auto 45–65 °C 45 °C = Gentle 45 °C 65 °C = QuickPowerWash 65 °C 75 °C = Intensive 75 °C b Time display c Indicator lights/Refill reminders / = Inlet / Drain = Rinse aid = Salt d Start button with in...
Page 17 - Caring for the environment; Disposing of your old appliance
Caring for the environment 17 Disposing of the packaging ma-terial The packaging material is used for hand-ling and protects the appliance fromtransport damage. The packaging ma-terial used is selected from materialswhich are environmentally friendly fordisposal and can generally be recycled.Recycli...
Page 18 - Before using for the first time; Opening the door; Risk of scalding due to hot water.; Closing the door; Push the baskets right in.; Activating the safety lock
Before using for the first time 18 Every dishwasher is tested at the fact-ory. There will be residual water in theappliance from this test. It is not an in-dication that the dishwasher has beenused previously. Opening the door To open the door, reach under the re-cessed grip and pull the handle. I...
Page 19 - Water softener; - Your local water authority will be able
Before using for the first time 19 Water softener In order to achieve good cleaning res-ults, the dishwasher needs to operatewith soft water. Hard water results inthe build-up of calcium deposits oncrockery and on the inner surfaces ofthe appliance. Mains water with a water hardness levelhigher than...
Page 20 - whilst
Before using for the first time 20 Displaying and setting the water hard-ness Switch the dishwasher off with the button, if it is switched on. Press the Start button in and, whilst holding it in , switch the dishwasher on using the button. Keep the Start button pressed in for at least 4 ...
Page 21 - Dishwasher salt; not; Damage to the water softener
Before using for the first time 21 Dishwasher salt In order to maintain the functions ofthe water softener, it must be reactiv-ated regularly. Reactivation occursautomatically every ninth programmesequence. At the start of the next pro-gramme, an additional 4.4 l of water isrequired for this process...
Page 22 - Filling the salt reservoir; Danger of corrosion due to saline
Before using for the first time 22 Filling the salt reservoir Before filling the salt reservoir for thefirst time, you must fill it with approx.2 l of water to enable the salt to dis-solve.Once the dishwasher has been usedonce, there is always sufficient waterin the salt reservoir. Remove the lowe...
Page 23 - Refilling the salt; When the
Before using for the first time 23 Refilling the salt When the Salt indicator lights up, wait until the end of the programmeand then refill the salt reservoir. Risk of corrosion due to saline solution.Saline solution that runs out cancause corrosion in the wash cabinetand to the load items.E...
Page 24 - Rinse aid; Washing-up liquid or detergent
Before using for the first time 24 Rinse aid Rinse aid is necessary to ensure thatwater does not cling and leave marks oncrockery during the drying phase, andhelps crockery dry faster after it hasbeen washed. Rinse aid is poured into the containerand the amount set is dispensed auto-matically. Was...
Page 25 - Adding rinse aid
Before using for the first time 25 Adding rinse aid Press the yellow button on the lid of the rinse aid container. The lid will spring open. Fill with rinse aid until the filling levelindicator (arrow) changes to a darkcolour while the door is horizontallyopen. The rinse aid container holds a...
Page 26 - Setting the rinse aid dosage
Before using for the first time 26 Setting the rinse aid dosage You can adjust the rinse aid dosage forbest results. The rinse aid dosage can be set from 0to 6 ml. 3 ml is the factory default setting.The rinse aid dosage can turn out to behigher than the set value due to theautomatic adjustment of t...
Page 27 - Economical dishwashing; ECO
Caring for the environment 27 Economical dishwashing This dishwasher is exceptionally eco-nomical in its use of water and electri-city. You can make the most of your appli-ance by following these tips: - Washing in a dishwasher generally uses less water and energy thanwashing by hand. - There is no ...
Page 28 - Loading the dishwasher; General information
Loading the dishwasher 28 General information Remove coarse food residues fromcrockery.There is no need to pre-wash items un-der running water. Damage can be caused by ash, sand, wax, lubricating grease or paint.These substances will contaminatethe dishwasher and can then nolonger be removed.Do no...
Page 29 - Items not suitable for dishwashers:
Loading the dishwasher 29 Items not suitable for dishwashers: - Wooden cutlery and crockery or items with wooden parts: these may discol-our and fade. The glue used in theseitems is not dishwasher-proof andwooden handles may come looseafter being washed in a dishwasher. - Craft items, antiques, valu...
Page 30 - Upper basket; Loading the upper basket; Damage due to leaking water.; Loading the FlexCare cup rack; Lower the cup rack to do so.
Loading the dishwasher 30 Upper basket See the “Loading the dishwasher ”chapter, “Loading examples” sectionfor examples of how to load crockeryand cutlery. Loading the upper basket Damage due to leaking water. If you run the dishwasher without theupper basket, water can leak out ofthe dishwasher.O...
Page 31 - Adjusting the FlexCare cup rack
Loading the dishwasher 31 Adjusting the FlexCare cup rack You can set the height and depth of thecup rack at 2 different levels so that itcan accommodate larger cups and sothat taller crockery can be placed under-neath it. Pull the cup rack upwards and click itinto the desired position (see arrow)...
Page 32 - Adjusting the upper basket; Pull out the upper basket.; Raise the upper basket:
Loading the dishwasher 32 Adjusting the upper basket In order to gain more space for tallerpieces of crockery in the lower basket orupper basket, the upper basket can beadjusted on 3 levels with 2 cm betweeneach level.The upper basket can also be set at anangle so that water can run off freelyfrom r...
Page 33 - Lower basket; Loading the lower basket; When tilted, plates up to 35 cm in; Lowering the spikes; Press the yellow lever downwards
Loading the dishwasher 33 Lower basket See the “Loading the dishwasher ”chapter, “Loading examples” sectionfor examples of how to load crockeryand cutlery. Loading the lower basket Place larger and heavier items such asplates, serving platters, saucepans,bowls etc., in the lower basket. Glasses, c...
Page 34 - Cutlery tray/cutlery basket; Loading the cutlery tray
Loading the dishwasher 34 Cutlery tray/cutlery basket (de- pending on model) See “Loading the dishwasher – Load-ing examples” for examples of how toload crockery and cutlery. Load the cutlery into the cutlery trayor into the cutlery basket (dependingon the model). Loading the cutlery tray To make ...
Page 35 - Arrange them evenly along the insert.
Loading the dishwasher 35 Loading the cutlery basket (if present) The cutlery basket can be placed any-where on the front rows of spikes in theleft or right corner of the lower basket. To avoid the risk of injury, knives andforks should be placed with thehandles upwards in the cutlery bas-ket. P...
Page 36 - Loading examples; Dishwashers with cutlery tray
Loading the dishwasher 36 Loading examples Dishwashers with cutlery tray Upper basket Lower basket
Page 37 - Cutlery tray
Loading the dishwasher 37 Cutlery tray Heavily soiled crockery
Page 38 - Dishwashers with cutlery basket
Loading the dishwasher 38 Dishwashers with cutlery basket Upper basket Lower basket
Page 39 - Cutlery basket
Loading the dishwasher 39 Cutlery basket Heavily soiled crockery
Page 40 - Detergent; Active ingredients; Risk of damage due to unsuitable
Detergent 40 Active ingredients Risk of damage due to unsuitable detergents.Detergents that are not suitable fordomestic dishwashers can causedamage to the dishwasher or to theload items.Only use detergents formulated fordomestic dishwashers. Modern detergents contain various act-ive ingredients, ...
Page 41 - Risk of chemical burns from de-; Detergent dispensing; QuickPowerWash
Detergent 41 Risk of chemical burns from de- tergent.Dishwasher detergents can causeburning on the skin and in the eyes,nose, mouth and throat.Avoid contact with detergents. Do not inhale powder detergents. Donot swallow dishwasher detergents.Seek medical attention immediatelyif detergent has been...
Page 42 - Adding detergent; Press the yellow button
Detergent 42 Adding detergent Press the yellow button on the lid of the detergent compartment. The lid will spring open. The lid will also open at the end of aprogramme sequence. Add the detergent to the detergentcompartment. Push the lid shut until you hear it clickinto place. The detergent...
Page 43 - Operation; Switching on the dishwasher; Press the; Selecting a programme; “Programme; to select the programme you
Operation 43 Switching on the dishwasher Make sure the spray arms can rotatefreely. Close the door. Open the stopcock, if it is closed. Press the button. The Start indicator light flashes and the indicator light comes on next to the pro-gramme selected. Selecting a programme Choose your p...
Page 44 - Starting the programme
Operation 44 Display of programme runningtime The duration of the programme selectedappears in hours and minutes in the dis-play before the programme begins. Dur-ing the programme sequence, the timeleft until the end of the programme isdisplayed.The displayed duration may vary for thesame programme....
Page 45 - End of programme; The programme has ended when; Energy management
Operation 45 End of programme The programme has ended when : shows in the display.You can now open the dishwasher andunload the crockery. Risk of damage due to steam. Steam from the dishwasher coulddamage the edges of delicate work-tops when you open the door at theend of the programme.At the e...
Page 46 - Switching off the dishwasher; Risk of damage from leaking wa-; Unloading the crockery
Operation 46 Switching off the dishwasher The dishwasher can be switched offat any time using the button. Switching the dishwasher off during aprogramme stops the programme.You can also do this to stop an ongoingtimer. Risk of damage from leaking wa- ter.Water leakage can cause damage.If the ...
Page 47 - Interrupting a programme
Operation 47 Interrupting a programme A programme will be interrupted assoon as the door is opened. If the door is closed again, the pro-gramme will continue from the point itwas at before the door was opened. Risk of scalding due to hot water. During operation, water in the dish-washer may be ver...
Page 48 - Options; Timer; Activating the timer
Options 48 Timer You can set the start time of a pro-gramme. The programme start time canbe delayed for between 30 minutes and24 hours. With start time delays between30 minutes and 3 hours, the delay canbe set in 30 minute stages. It is set inhours for periods longer than this. With manual detergent...
Page 50 - Guide for selecting a programme; Crockery
Guide for selecting a programme 50 Pots, pans, everyday crockery and cutlery Standard dried-on normal food deposits Stubborn dried-on, burnt-on food deposits containing starch or protein 1 Water and energy saving programme Maximum cleaning performance Crockery Food deposits Programme features Temper...
Page 52 - Programme overview; Programme
Programme overview 52 Programme Programme sequence Pre-wash Main wash Interim rinse Final rinse Drying °C °C ECO 1 - 43 61 Auto 45–65 °C Variable programme sequence, sensor-controlled adjustment according to load size and level of soiling As required 45–65 As required 65 Gentle 45 °C 45 70...
Page 53 - Consumption
Programme overview 53 Consumption 2 Electrical energy Water Time Cold water Hot water Litres Cold water Hot water 15 °C 60 °C 15 °C 60 °C kWh kWh h:min h:min 0.84/0.83 3 0.57/0.56 3 8.5 4:25 3 4:14 0.70–1.20 4,5 0.50–0.70 4,5 6.0–15.5 4,5 1:58–3:11 1:52–2:57 1.10 0.65 12.5 2:34 2:12 1.20 0.75 10.5 0...
Page 54 - Programme options
Programme options 54 Express The Express programme option re- duces the programme running time.In order to achieve optimum cleaningresults, the temperature, and thereforethe energy consumption, will increasewith this option.The time by which the programme run-ning time is shortened varies acc...
Page 56 - Extra clean
Programme options 56 Extra clean You can choose this programme optionto increase the cleaning performance ofthe programmes.If you activate this programme option,the programme running times and themain wash temperatures will increase.The water and energy consumption mayincrease. Switch the dishwash...
Page 57 - Extra dry
Programme options 57 Extra dry You can select this programme option inorder to increase the programme dryingperformance.If you activate this programme option,the programme running times and finalrinse temperatures will increase. Theenergy consumption may increase. Switch the dishwasher off with th...
Page 58 - nd interim rinse
Programme options 58 2nd interim rinse You can choose this programme opera-tion to increase the cleaning perform-ance of the programmes with a secondinterim rinse.If you activate this programme option,the programme running times and thewater consumption will increase. Switch the dishwasher off wit...
Page 59 - Operating hours display; Factory defaults
Programme options 59 Operating hours display You can display how many hours thedishwasher has been in operation so far. Switch the dishwasher off with the button, if it is switched on. Press the Start button in and, whilst holding it in , switch the dishwasher on using the button. Keep th...
Page 60 - Cleaning and care; Damage due to unsuitable clean-; Cleaning the wash cabinet; programme once per month to
Cleaning and care 60 Check the condition of your dish-washer regularly (approx. every 4–6months). In this way, faults and prob-lems can be avoided. Damage due to unsuitable clean- ing agents.All surfaces are susceptible toscratching. Contact with unsuitablecleaning agents can alter or discolourthe...
Page 61 - Cleaning the control field; The control field should; only; be wiped; Cleaning the appliance front; Damage due to soiling.
Cleaning and care 61 Cleaning the control field The control field should only be wiped with a clean, damp cloth. Cleaning the appliance front Damage due to soiling. Soiling that is left too long might be-come impossible to remove andcould cause the external surfaces toalter or discolour.It is th...
Page 62 - Cleaning the spray arms
Cleaning and care 62 Cleaning the spray arms Particles of food can get stuck in thespray arm nozzles and bearings. Thespray arms should therefore be inspec-ted regularly (approx. every 2–4 months). Never run a wash programmewithout using the spray arms. Damage due to soiling entering the circulati...
Page 63 - Removing the top spray arm; Push the upper spray arm upwards; Removing the middle spray arm; above) and remove the spray arm; Removing the lower spray arm; Remove the lower basket.
Cleaning and care 63 Removing the top spray arm 2 1 Push the upper spray arm upwards to engage the inner ratchet. Then un-screw the spray arm by rotating thescrew thread anti-clockwise (view from below). Removing the middle spray arm 2 1 Rotate the screw thread of the middlespray arm clock...
Page 65 - Inserting the lower spray arm; Damage due to soiling entering
Cleaning and care 65 Inserting the lower spray arm Refit the lower spray arm and ensurethat the filter combination lies flat inthe base of the wash cabinet. Rotate the screw thread of the lowerspray arm clockwise (view fromabove) until the arrow in the viewingwindow points to the lock symbol ...
Page 66 - Cleaning the filters; Switch the dishwasher off.
Cleaning and care 66 Checking the filters in the washcabinet The filter combination in the base of thewash cabinet retains coarse soiling fromthe suds solution. This prevents soilinggetting into the circulation system andre-entering the wash cabinet throughthe spray arms. Damage due to soiling ent...
Page 68 - Cleaning the water inlet filter; Never
Cleaning and care 68 Cleaning the water inlet filter A filter is incorporated in the screwthread to protect the water inlet valve. Ifthe filter is soiled, insufficient waterflows into the wash cabinet. Risk of electric shock from mains voltage.The plastic housing of the water con-nection contains ...
Page 69 - Cleaning the drain pump
Cleaning and care 69 Cleaning the drain pump If water remains in the wash cabinetafter the end of a programme, the waterhas not been pumped away. The drainpump may be blocked by foreign ob-jects. These are easy to remove. Disconnect the dishwasher from themains. To do this, turn off the dishwasher...
Page 70 - Risk of injury from glass splinters.
Cleaning and care 70 The drain pump (see arrow) is under-neath the cover. Risk of injury from glass splinters. It is especially difficult to see glasssplinters in the drain pump.Take care when cleaning the drainpump. Carefully remove all foreign objectsfrom the drain pump. Check the drainpump im...
Page 71 - Problem solving guide; Technical problems; Problem; The dishwasher is not plugged in.; The; Then press the
Problem solving guide 71 Many malfunctions and faults that can occur in daily operation can be easilyremedied. You can save time and money in many cases, as you do not need to callthe Miele Customer Service Department.Information to help you rectify faults yourself can be found at www.miele.com/ser-...
Page 72 - Fault messages
Problem solving guide 72 Fault messages Problem Cause and remedy The display shows afault number that is notlisted below. There may be a technical fault. Switch the dishwasher off with the button. Switch the dishwasher back on after a few seconds. Restart the desired programme. If the indic...
Page 73 - Water drainage fault
Problem solving guide 73 Problem Cause and remedy The dishwasher stopsduring a programme. The / indicator light is flashing. The fault number or appears in the dis- play. Before rectifying the problem: Switch the dishwasher off with the button. The water inlet is restricted. Open ...
Page 74 - Noises
Problem solving guide 74 Problem Cause and remedy Detergent residue is leftin the detergent com-partment at the end of aprogramme. The detergent compartment was still damp when de-tergent was added. Only add the detergent when the detergent com-partment is dry. The detergent compart-ment lid canno...
Page 75 - Wash items are insecure in the wash cabinet.
Problem solving guide 75 Problem Cause and remedy Rattling noise in thewash cabinet Wash items are insecure in the wash cabinet. Carefully open the door and rearrange the washitems so that they sit securely. There is a foreign object (e.g. glass shard) in the drainpump. Remove the foreign object...
Page 76 - Unsatisfactory washing result
Problem solving guide 76 Unsatisfactory washing result Problem Cause and remedy The wash items are notclean. The wash items were not loaded correctly. See notes in the “Loading the dishwasher ” chapter. The programme was not powerful enough. Select a more powerful programme (see “Pro-gramme over...
Page 77 - Ingredients from the detergent have formed a deposit.
Problem solving guide 77 Problem Cause and remedy The crockery is not dryor cutlery and glassesare flecked. The rinse aid dosage is too low or the rinse aid con-tainer is empty. Replenish the rinse aid container, increase thedosage or change the brand of rinse aid (see “Beforeusing for the first t...
Page 79 - Contact in the event of a fault
Service 79 Information to help you rectify faultsyourself and about Miele spare partscan be found at www.miele.com/ser-vice. Contact in the event of a fault In the event of any faults which you can-not remedy yourself, please contactyour Miele dealer or the Miele Cus-tomer Service Department. You ca...
Page 80 - Warranty; “Comparison
Service 80 Warranty For information on the appliance war-ranty specific to your country pleasecontact Miele. See back cover for ad-dress.In the UK, your appliance warranty isvalid for 2 years from the date of pur-chase. However, you must activate yourcover by calling 0330 160 6640 or re-gistering on...
Page 81 - Optional accessories; Detergent tabs
Optional accessories 81 Dishwasher detergent, rinse aid andcleaning and care products are availablefor this dishwasher, as are optional ac-cessories. All the products have been designed forMiele appliances.These and many other products can beordered from the Miele webshop, theMiele Customer Service ...
Page 82 - Appliance care; Dishwasher cleaner; Descaling agent
Optional accessories 82 Appliance care Miele cleaning and care productsprovide optimum care for your Mieledishwasher. Dishwasher cleaner - For use with the Maintenance pro- gramme without detergent dispensing - Cleans the dishwasher effectively and thoroughly - Removes grease, bacteria, and associ-...
Page 83 - Installation; The Miele Waterproof system; Health risk due to wash water.
Installation *INSTALLATION* 83 The Miele Waterproof system Provided that your dishwasher has beeninstalled correctly, the Miele Waterproofsystem will protect you from waterdamage throughout its lifetime. Water inlet Health risk due to wash water. Water in the dishwasher is not drink-ing water.Do n...
Page 84 - Regulation in Germany; Risk of damage due to excessive
Installation *INSTALLATION* 84 Risk of damage from leaking wa- ter.The connection point is subject tomains water pressure. Water leakingfrom it can cause damage.You should therefore open the stop-cock slowly and check for leaks. Cor-rect the position of the seal andscrew thread if appropriate. Reg...
Page 85 - Water drainage; Venting the water drain; Open the dishwasher door fully.
Installation *INSTALLATION* 85 Water drainage The dishwasher ’s drainage system is fit-ted with a non-return valve, which pre-vents dirty water from flowing back intothe appliance via the drain hose.The dishwasher is supplied with ap-prox. 1.5 m of flexible drain hose with aninternal diameter of 22 ...
Page 86 - Electrical connection; Risk of fire from overheating.
Installation *INSTALLATION* 86 Electrical connection The dishwasher is “connector-ready” asstandard for connection to an earthedsocket.The socket must be easily accessibleafter the dishwasher has been installed.If that is not possible, ensure that a suit-able means of disconnection is providedon the...
Page 87 - Technical data; Dishwasher model
Technical data 87 Technical data Dishwasher model Normal XXL Height of freestanding appli-ance 84.5 cm(adjustable by+3.5 cm) - Height of built-in appliance 80.5 cm(adjustable by+6.5 cm) 84.5 cm(adjustable by+6.5 cm) Height of building-in niche Min. 80.5 cm(+6.5 cm) Min. 84.5 cm(+6.5 cm) Width 59.8 c...
Page 91 - United Kingdom
United Kingdom Miele Co. Ltd., Fairacres, Marcham Road, Abingdon, Oxon, OX14 1TWTel: 0330 160 6600, Internet: www.miele.co.uk, E-mail: [email protected] Australia Miele Australia Pty. Ltd.ACN 005 635 398ABN 96 005 635 398Level 4, 141 Camberwell RoadHawthorn East, VIC 3123Tel: 1300 464 353E-mail: [em...


 Miele WWD380 WCS PWash&Steam&9kg User Manual
 Miele W 1614 Manual
 Miele G 5266 SCVi SFP Active Plus User Manual
 Miele Classic C1 Turbo Team PowerLine - SBAN0 User Manual
![Miele PDR 307 [EL]](https://manualsarea.com/img/product/thumbs/48/ba/fd/bafde84806e8abc8b420f34eaf8fcd6e.webp) Miele PDR 307 [EL] User Manual
Miele PDR 307 [EL] User Manual Miele F 1911 Vi Manual
![Miele PDR 908 [EL MAR 3N AC 400V 50-60Hz]](https://manualsarea.com/img/product/thumbs/48/05/b7/05b705998b251f92b271e908423e1ecb.webp) Miele PDR 908 [EL MAR 3N AC 400V 50-60Hz] Installation Manual
Miele PDR 908 [EL MAR 3N AC 400V 50-60Hz] Installation Manual Miele K 9757 iD Manual
 Miele G4286 Manual
 Miele G 5008 SCU Active User Manual
 Miele G 5050 SCVi Active User Manual
 Miele G 5056 SCVi Active User Manual
 Miele G 5056 SCVi SFP Active User Manual
 Miele G 5058 SCVi SFP Active Installation Manual
 Miele G 5150 SCVi Active User Manual
 Miele G 5150 Vi Active User Manual
 Miele G 5170 Manual
 Miele G 5280 Manual
 Miele G 5410 SC Active Plus User Manual
 Miele G 5450 SCVi Active Plus User Manual