Page 2 - Contents; Language
Contents 2 Warning and Safety instructions .............................................................................. 6 Caring for the environment ......................................................................................... 14 Guide to the appliance ....................................
Page 3 - Energy saving tips; Interrupting a cooking process in the Steam cooking; Steam cooking; Using Steam cooking; Moisture plus; Using Moisture plus; Automatic programmes
Contents 3 Safety ............................................................................................................................... 41 Miele@home .................................................................................................................. 41 Remote control ..........
Page 5 - Installation
Contents 5 Installation ...................................................................................................................... 90 Installation dimensions ................................................................................................. 90 Installation in a tall or hou...
Page 6 - Warning and Safety instructions; Appropriate use
Warning and Safety instructions 6 This combination steam oven complies with all current local andnational safety requirements. Inappropriate use can, however, leadto personal injury and material damage.Read the operating and installation instructions carefully beforeusing the combination steam oven....
Page 7 - Safety with children
Warning and Safety instructions 7 Safety with children Activate the system lock to ensure that children cannot switch the combination steam oven on by mistake. Children under 8 years of age must be kept away from the combination steam oven unless they are constantly supervised. Children aged 8...
Page 9 - Correct use
Warning and Safety instructions 9 Miele can only guarantee the safety of the oven when original Miele spare parts are used. Faulty components must only bereplaced by original spare parts. If the combination steam oven is delivered without a mains connection cable, a special cable must be install...
Page 12 - The following applies to stainless steel surfaces:; Cleaning and care
Warning and Safety instructions 12 Risk of injury from the open door. You could bang into the open door or trip over it. Avoid leaving the door open unnecessarily. The door can support a maximum load of 15 kg. Do not lean or sit on the door when open, or place heavy items on it. Make sure thatno...
Page 13 - Accessories; Only use original Miele accessories. If other parts are used,
Warning and Safety instructions 13 Accessories Only use original Miele accessories. If other parts are used, warranty, performance and product liability claims will be invalidated. Miele will guarantee to supply functional spare parts for a minimum of 10 years and up to 15 years following the di...
Page 14 - Caring for the environment; Disposing of your old appliance
Caring for the environment 14 Disposing of the packagingmaterial The packaging material is used forhandling and protects the appliancefrom transport damage. The packagingmaterial used is selected from materialswhich are environmentally friendly fordisposal and can generally be recycled.Recycling the...
Page 15 - Guide to the appliance; Combination steam oven
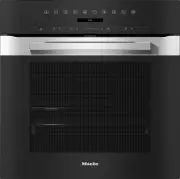
Guide to the appliance 15 Combination steam oven a Control elements b Door lock c Top heat/grill element d Steam inlet opening e Water intake pipe for the steam injection system f Air inlet for the fan with ring heating element behind it g Drip channel h Catalytic enamelled back panel i Side runners...
Page 16 - Controls; OK
Controls 16 a Recessed On/Off sensor control For switching the combination steamoven on and off b Optical interface(For Miele Service only) c sensor control For controlling the combinationsteam oven via your mobile device d sensor control For injecting the bursts of steam inthe Moisture plu...
Page 17 - On/Off sensor control; The; Display; will appear in the; Sensor controls; Sensor controls above the display
Controls 17 On/Off sensor control The On/Off sensor control is recessed and responds to touch.Use this sensor control to switch thecombination steam oven on and off. Display The display is used for showing the timeof day or information about operatingmodes, temperatures, cookingdurations, automat...
Page 18 - Sensor controls under the display; setting and touch this sensor control. The; function, you can use this sensor control to inject steam.
Controls 18 Sensor controls under the display Sensor control Function If you want to control the combination steam oven from yourmobile device, you must have the Miele@home system, switchon the Remote control setting and touch this sensor control. The sensor control then lights up and the MobileS...
Page 19 - Sensor control Function; Symbols; Symbol
Controls 19 Sensor control Function OK As soon as you reach a confirmable value, message or setting,the OK sensor control will light up orange. By selecting this sensor control you can access functions such asthe minute minder, save changes to values or settings or confirminstructions. If no cook...
Page 20 - Using the appliance; Selecting a menu option; Changing a setting in a list
Using the appliance 20 Use the and arrow buttons or the area between them in the navigation area to use the combinationsteam oven.As soon as you reach a confirmablevalue, message or setting, the OK sensor control will light up orange. Selecting a menu option Touch the or ...
Page 21 - Changing the function; Entering numbers; Activating MobileStart
Using the appliance 21 Changing the function You can change to another functionduring a cooking programme.The sensor control for the previouslyselected function lights up orange. Touch the sensor control of the newfunction or operating mode. The new function appears in the displaywith its correspo...
Page 22 - Drawing in water; In the; and; operating modes, you will be; Only use cold, fresh drinking water; Confirm with
Using the appliance 22 Drawing in water In the Steam cooking and Moisture plus operating modes, you will be prompted to add water for the cookingprocess. Fill a suitable container with therequired amount of fresh water. Distilled or carbonated water or otherliquids could damage thecombina...
Page 23 - Features; Data plate; Side runners
Features 23 A list of the models described in theseoperating and installation instructionscan be found on the back page of thisbooklet. Data plate The data plate is located on the frontframe, visible when the door is open.The data plate states the model number,the serial number as well as connection...
Page 24 - always
Features 24 Always place the rack with the loadingsurface in the lower position.These accessories have non-tip safetynotches fitted in the middle of theirshort sides. The non-tip safety notchesprevent the trays from being pulled outcompletely from the side runners whenyou only wish to pull accessori...
Page 25 - Fitting the FlexiClip runners; Risk of injury caused by hot; do not
Features 25 You can use more than one baking tray,universal tray or rack at a time. Place the baking tray, universal tray orrack on the FlexiClip runners. Leave at least one shelf level freebetween the FlexiClip runner and anybaking tray, universal tray or rackabove it. You can use the universal...
Page 26 - Removing the FlexiClip runners
Features 26 Then hold the FlexiClip runner at anangle towards the middle of the ovencompartment (2.). Slide the FlexiClip runner at an anglealong the top rail as far as it will go(3.). Then swing the FlexiClip runner backto the side of the oven compartmentand secure it to the top rail with ana...
Page 28 - Steam cooking containers; place the universal tray on shelf; Catalytic enamelled accessories
Features 28 HUB gourmet oven dishesHBD gourmet oven dish lids Unlike other oven dishes, Miele gourmetoven dishes can be placed in the ovendirectly on the shelf runners. They havenon-tip safety notches like the rack toprevent them from being pulled out toofar.The surface of the oven dish has a non-st...
Page 29 - Safety features; perforated
Features 29 Handle HEG The handle makes it easier to take theuniversal tray, baking tray and rack outof the oven. Accessories for cleaning and care - Descaling tablets, plastic tube with suction cup for descaling thecombination steam oven - Miele all-purpose microfibre cloth- Miele oven cleaner Safe...
Page 30 - Before using for the first time; Availability of the WiFi connection
Before using for the first time 30 Miele@home Your combination steam oven isequipped with an integrated WiFimodule. To use this feature, you will need: - A WiFi network- The Miele app- A Miele user account. You can create a user account via the Miele app The Miele app will guide you as youconnect yo...
Page 31 - Basic settings; Setting the language; Setting the time
Before using for the first time 31 Basic settings The following settings must be madebefore starting up for the first time. Youcan change these settings again at alater time (see “Settings”). Risk of injury caused by hot surfaces.The combination steam oven getshot during operation.For safety reaso...
Page 33 - Settings; Settings overview; Menu option; * Factory default setting
Settings 33 Settings overview Menu option Available settings Language ... | deutsch | english | ... Location Time Display On * | Off | Night dimming Clock format 12 h | 24 h * Set Lighting On“On” for 15 seconds * Off Display Brightness QuickTouch On | Off * Volume Buzzer tones...
Page 35 - Opening the “Settings” menu; Lighting
Settings 35 Opening the “Settings” menu In the Further | Settings menu, you can personalise your combination steamoven by adapting the factory defaultsettings to suit your requirements. Select Further . Select Settings . Select the desired setting. You can check settings or change ...
Page 37 - Units; Temperature; Booster
Settings 37 Units Temperature You can set the temperature in degreesCelsius ( °C ) or degrees Fahrenheit ( °F ). Booster The Booster function is used to quickly pre-heat the oven compartment. - On The Booster function is automatically switched on during the heating-upphase of a cooking programme. T...
Page 38 - Keeping warm
Settings 38 Keeping warm Using the Keeping warm function you can keep food warm after cooking withoutinadvertently cooking it further. The foodis kept warm at a pre-set temperature( Settings | Recommended temps. | Keeping warm ). It is only possible to use the Keeping warm function in combinatio...
Page 39 - Water hardness; l CaCO
Settings 39 Water hardness The combination steam oven must be adjusted to the local water hardness level toensure that it works correctly and to ensure that descaling is carried out at thecorrect interval. The harder the water is, the more frequently the combinationsteam oven needs to be descaled. C...
Page 41 - Altitude; Sensor lock; The sensor lock is activated. Touch the; System lock
Settings 41 Altitude The boiling temperature of water variesdepending on the altitude of where theappliance is located. This settingenables you to adjust the boilingtemperature for the water if you movehouse. You will need to do this if thenew altitude differs from the old one by300 m or more. Safet...
Page 42 - Activating /deactivating
Settings 42 Reset the network settings andimmediately set up a new networkconnection. - Reset This setting is only visible if a WiFinetwork has already been set up. TheWiFi function is deactivated and theWiFi network connection will be resetto the factory default. You must set upa new WiFi network c...
Page 43 - Running a RemoteUpdate; Software version; Demo mode; Factory default; Operating hours
Settings 43 Running a RemoteUpdate Information about the content andscope of an update is provided in theMiele app. A message will appear in yourcombination steam oven display if asoftware update is available.You can install the update immediatelyor postpone this until later. When thecombination ste...
Page 44 - Using the Min. minder function; Setting the minute minder; without
Min. minder 44 Using the Min. minder function The minute minder can be used to time other activities in the kitchen,e.g. boiling eggs.The minute minder can also be used atthe same time as a cooking programmefor which the cooking duration start andfinish times have been set (e.g. as areminder to s...
Page 46 - Cooking programmes
Energy saving tips 46 Cooking programmes - If possible, use the automatic programmes for cooking food. - Remove all accessories from the oven compartment that are not required forcooking. - In general, if a range of temperatures is given in a recipe or chart, it is bestto select the lower temperatur...
Page 47 - Residual heat utilisation
Energy saving tips 47 Residual heat utilisation - In cooking processes using temperatures greater than 140 °C andwith cooking durations longer than30 minutes, the temperature can beturned down to the lowest possiblelevel about 5 minutes before the endof the cooking process. The residualheat in the o...
Page 48 - Operation
Operation 48 Switch the combination steam ovenon. The main menu will appear. Select the relevant operating mode. The operating mode will appear first,followed by the recommendedtemperature. Change the recommendedtemperature and adjust the cookingduration if necessary. The recommended temperatu...
Page 49 - Refilling the water; Setting cooking durations
Operation 49 Refilling the water If there is not enough water in thecontainer while a cooking processinvolving moisture is in progress, abuzzer will sound and the display willprompt you to refill the container withfresh water. Risk of injury caused by hot steam. When using a cooking processinvolvi...
Page 50 - Changing the set cooking durations; operating mode
Operation 50 - Start at This function will only appear in themenu if you have set a Duration or Finish at time. With Start at , you have to specify when you want the cookingprocess to start. The oven heating willswitch on automatically at the timeyou have set. Select the sensor control. Se...
Page 52 - Rapid cooling
Operation 52 Switching off Booster for a cookingprocess Select the Booster | Off setting before selecting the desired operating mode. The Booster function is switched off during the heating-up phase. Only theheater elements for the selectedoperating mode are used to pre-heatthe oven compartment...
Page 54 - Notes on the cooking charts; Vegetables
Steam cooking 54 Cooking with liquid When cooking with liquid only fill thecooking container ²/₃ full to prevent theliquid spilling when the cookingcontainer is removed from the oven. Notes on the cooking charts You can find the cooking charts at theend of this book. Shelf level Always place the uni...
Page 55 - Fish
Steam cooking 55 Cooking containers When each piece of the food beingcooked only has a small diameter (e.g.peas, asparagus), there are no or veryfew gaps and the steam can hardlypenetrate the food. To ensure evencooking, use a flat cooking container forthese types of food and make sure thatthe food ...
Page 56 - . Place the fish scraps together; Meat; Prepare the meat in the usual way.
Steam cooking 56 Duration The cooking duration depends on thethickness and the texture of the fish,and not on the weight. The thicker thefish, the longer the cooking duration.A 3 cm thick piece of fish weighing500 g will take longer to cook than a2 cm thick piece of fish weighing 500 g.The longer fi...
Page 57 - Rice; Dry pasta; Fruit; You can use the juice which has
Steam cooking 57 Rice Rice swells when cooked and needs tobe cooked in liquid. The proportion ofrice to liquid will vary depending on thetype of rice.The rice absorbs all the liquid during thecooking process and so none of thenutrients are lost. Grains Grains swell when cooked and need tobe cooked i...
Page 58 - Suitable food items
Moisture plus 58 Using Moisture plus In the Moisture plus operating mode, you can bake, roast or cook food bycombining oven heating with moisture(see “Main and sub-menus” and“Operation – Drawing in water ”).The water drawn in is injected as 1 to3 bursts of steam into the ovencompartment duri...
Page 60 - Categories; Usage notes
Automatic programmes 60 The wide range of automaticprogrammes enables you to achieveexcellent results with ease. Categories The automatic programmes are sorted into categories to provide abetter overview. Simply select theappropriate programme for the type offood you are cooking and follow theins...
Page 61 - Further applications; Select; Risk of infection from bacteria.; Tips; - Remove the packaging and place the; Low temperature cooking
Further applications 61 This section provides information on thefollowing applications: - Defrost- Low temperature cooking- Drying- Frozen food/ready meals- Heating crockery Defrost Gentle defrosting of frozen goodsmeans that the vitamins and mineralsare generally retained. Select Further . ...
Page 62 - Using Conventional heat; Drying
Further applications 62 Using Conventional heat Follow the information in the cookingcharts at the end of this book. Use the universal tray with the rackplaced on top of it. Place the rack together with theuniversal tray on shelf level 2. Select the Conventional heat operating mode and a...
Page 63 - Removing the dried food; Frozen food/Ready meals; Tips for cakes, pizza and baguettes; Heat crockery
Further applications 63 Removing the dried food Risk of injury caused by hot surfaces.The combination steam oven getshot during operation. You could burnyourself on the heater elements, ovencompartment or accessories.Use oven gloves when removingdried food from the oven. Allow the dried fruit or...
Page 64 - Baking; Tips on baking; - Position rectangular tins with the; Using baking parchment; Selecting the
Baking 64 Handling food carefully will helpprotect your health.Cakes, pizzas and french fries shouldbe cooked until golden, not darkbrown. Tips on baking - Set a cooking duration. If used for baking, do not delay the start for toolong. Cake mixture or dough will dryout, and the raising agents will l...
Page 65 - Notes on the functions
Baking 65 Notes on the functions You can find an overview of all thefunctions with their recommendedvalues in “Main and sub-menus”. Using Automatic programmes Follow the instructions in the display. Using Fan plus Because the fan distributes the heataround the oven compartment straightaway, ...
Page 66 - Roasting; Tips for roasting
Roasting 66 Tips for roasting - You can use all crockery made from temperature-resistant materials, e.g.roasting dishes, roasting pans with lid,ovenproof glass dishes, roasting bags,dishes made from earthenware orcast iron, the universal tray, rack and/or anti-splash insert (if available) ontop of t...
Page 68 - Grilling; Tips for grilling
Grilling 68 Risk of injury caused by hot surfaces.If you grill with the door open, hot airwill escape from the oven instead ofbeing cooled by the cooling fan. Thecontrol elements will get hot.Grill with the oven door closed. Tips for grilling - Pre-heating is necessary when grilling. Pre-heat the ...
Page 69 - To
Grilling 69 Selecting the cooking duration Grill thinner cuts of meat/slices of fishfor approx. 6–8 minutes per side.It is best to grill food of a similarthickness at the same time so thatthe cooking durations do not vary toomuch. As a general rule, check whether thefood is cooked after the s...
Page 70 - Unsuitable cleaning agents
Cleaning and care 70 Risk of injury caused by hot surfaces.The combination steam oven getshot during operation. You could burnyourself on the heater elements, ovencompartment or accessories.Allow the heater elements, ovencompartment and accessories tocool before manual cleaning. Risk of injury d...
Page 71 - Cleaning the seal; It is easier to clean the appliance if; Using oven cleaners
Cleaning and care 71 Remove the condensate from theoven compartment and drip channelusing a sponge or absorbent cloth. Remove normal soiling immediatelywith warm water, washing-up liquidand a clean sponge or a clean, dampmicrofibre cloth. Remove all cleaning agent residuesthoroughly with clean...
Page 72 - Dry all surfaces with a soft cloth.
Cleaning and care 72 Follow the instructions on thepackaging. Oven cleaners from othermanufacturers must only be used in acold oven and for no longer than amaximum of 10 minutes. You can then also use the scouringpad on the back of a washing-upsponge to remove the soiling. Remove all cleaning ...
Page 73 - Rinse the back panel thoroughly.; Removing oil and grease; Select the; operating; Cleaning the ceiling of the oven
Cleaning and care 73 Removing soiling caused by spices,sugar and similar deposits Remove the back panel (see“Cleaning and care – Removing theback panel”). Clean the back panel by hand with asolution of hot water and washing-upliquid applied with a soft brush. Rinse the back panel thoroughly. ...
Page 74 - Evaporate res. moisture
Cleaning and care 74 Evaporate res. moisture When cooking with steam or moisture,residual water may remain in the steaminjection system, for example, if acooking process with moisture ismanually interrupted or if there is apower cut.The next time Steam cooking , Moisture plus or an automatic...
Page 75 - Skipping residual water evaporation; Maintenance; Soak
Cleaning and care 75 Skipping residual water evaporation Risk of infection due to contaminated water in the watercontainer.Skipping residual water evaporationcan cause germs to form in the watercontainer. This contaminated watercould be evaporated onto the foodduring the next cooking process.It is...
Page 76 - Descale
Cleaning and care 76 Drying You can use this maintenanceprogramme to dry any residual moisturein the oven compartment, including ininaccessible areas, and protect the ovenagainst corrosion.The Drying maintenance programme comprises up to 3 phases: residualwater evaporation in the empty ovencompartm...
Page 77 - Preparing the descaling process; activation phase
Cleaning and care 77 Preparing the descaling process You will need a container ofapprox. 1 litre capacity. A plastic tube (with suction cup) issupplied with your oven so that you donot have to hold the container with thedescaling agent underneath the waterintake pipe. We recommend using the descalin...
Page 78 - cold; Residual water evaporation
Cleaning and care 78 Leave the container with the tubeconnected to the water intake pipe inthe oven compartment. The system will take in liquid severaltimes during the activation phase. Youwill hear the noise of the pump.The oven interior lighting and cooling fanremain switched on for the wholedur...
Page 79 - Removing the door
Cleaning and care 79 Removing the door The door weighs approx. 9 kg. The oven door is connected to the doorhinges by retainers.Before removing the door from theretainers, the locking clamps on bothdoor hinges have to be released. Open the door fully. Release the locking clamps by turningthem as ...
Page 80 - Dismantling the door; Risk of injury caused by the door; Gently; lift the inner pane up and out
Cleaning and care 80 Dismantling the door The oven door is an open system with 3glass panes which have a heat-reflectivecoating on some of their surfaces.When the oven is operating, air isdirected through the door to keep theouter pane cool.If soiling has worked its way in betweenthe glass panes, th...
Page 81 - Lift the middle pane up; gently
Cleaning and care 81 Lift the middle pane up gently and pull it out. Clean the door panes and other partswith a clean sponge and a solution ofhot water and washing-up liquid or aclean, damp microfibre cloth. Dry all parts with a soft cloth. Then reassemble the door carefully: Refit the middl...
Page 82 - Fitting the door
Cleaning and care 82 Fitting the door Hold the door securely on both sidesand carefully fit it back into the hingeretainers.Make sure that you fit the doorstraight. Open the door fully. If the locking clamps are not locked,the door could become loose,resulting in damage.Always ensure that the lo...
Page 83 - Removing the back panel; Reassemble
Cleaning and care 83 Pull the side runners out of holder (1.)from the front and remove them (2.). Reassemble by following these instructions in reverse order. Insert the components carefully. Removing the back panel The back panel can be removed forcleaning purposes. Risk of injury caused by h...
Page 84 - Problem solving guide; Problem
Problem solving guide 84 Many malfunctions and faults that can occur in daily operation can be easilyremedied. You can save time and money in many cases, as you do not need to callthe Miele Customer Service Department.Information to help you rectify faults yourself can be found at www.miele.com/serv...
Page 87 - Select the temperature required for the recipe.; You have selected the
Problem solving guide 87 Problem Cause and remedy Cakes/biscuitsare not cookedproperly afterthe durationgiven in thecooking chart. A different temperature from the one given in the recipe wasused. Select the temperature required for the recipe. The ingredient quantities are different from those gi...
Page 88 - The halogen lamp is faulty.
Problem solving guide 88 Problem Cause and remedy The oven interiorlighting does notswitch on. The halogen lamp is faulty. Risk of injury caused by hot surfaces. The combination steam oven gets hot during operation. Youcould burn yourself on the heater elements, ovencompartment or accessories.Allo...
Page 89 - Service; Contact in the event of a fault
Service 89 Information to help you rectify faultsyourself and about Miele spare partscan be found at www.miele.com/service. Contact in the event of a fault In the event of any faults which youcannot remedy yourself, please contactyour Miele dealer or the MieleCustomer Service Department. You can boo...
Page 90 - Installation dimensions; Dimensions are given in mm.; Installation in a tall or housing unit
Installation *INSTALLATION* 90 Installation dimensions Dimensions are given in mm. Installation in a tall or housing unit When building the combination steam oven into a base unit underneath a hob,please also observe the installation instructions for the hob as well as the casingdepth required for t...
Page 91 - Side view
Installation *INSTALLATION* 91 Side view A DGC 715x: 43 mm DGC 725x: 47 mm
Page 92 - Connections and ventilation; Front view
Installation *INSTALLATION* 92 Connections and ventilation a Front view b Mains connection cable, length = 1500 mm c No connections permitted in this area d Ventilation cut-out, min. 150 cm ²
Page 94 - Electrical connection; or if the
Installation *INSTALLATION* 94 Electrical connection Danger of injury! Installation, repairs and othermaintenance work by unqualifiedpersons could be dangerous. Mielecannot be held liable forunauthorised work. The appliance may only beconnected to the mains electricitysupply by a qualified electri...
Page 95 - Electrical connection: Other countries
Installation *INSTALLATION* 95 Electrical connection: Other countries All electrical work should be carried outby a suitably qualified and competentMiele approved service technician instrict accordance with local and nationalsafety regulations.Connection should be made via a fusedconnection unit or ...
Page 96 - Cooking charts
Cooking charts 96 Vegetables Vegetables [°C] 1 [min] Cauliflower | whole 100 3 20–40 Cauliflower | florets 100 3 10 Beans, green 100 3 15 Broccoli | florets 100 3 6 Peas 100 3 4–6 Fennel | halved 100 3 20–28 Fennel | cut into strips 100 3 6–8 Kohlrabi | cut into batons 100...
Page 97 - Dumplings
Cooking charts 97 Fish Fish (fresh or frozen) [°C] 1 [min] Perch fillet 100 3 8–10 Trout 100 3 10–13 Salmon fillet, 3 cm thick 100 3 6–10 Salmon trout 100 3 17–20 Plaice 100 3 8–14 Plaice fillet 100 3 3–5 Meat Meat [°C] 1 [min] Chicken breast fillet 100 3 8–10 Tur...
Page 98 - Batter
Cooking charts 98 Batter Cakes/biscuits (accessories) [°C] [min] +HFC: -HFC: Muffins (1 tray) 150–160 – 1 2 25–35 Muffins (2 trays) 150–160 – 1+3 3 1+3 30–40 4 Small cakes* (1 tray) 150 – 1 2 28–38 160 2 – 2 3 22–32 Small cakes* (2 trays) 150 2 – 1+3 3 1+3 25–35 Madeira cake (bak...
Page 99 - Shortcrust pastry
Cooking charts 99 Shortcrust pastry Cakes/biscuits (accessories) [°C] [min] +HFC: -HFC: Biscuits (1 tray) 140–150 – 1 2 25–35 150–160 – 1 2 25–35 Biscuits (2 trays) 140–150 – 1+3 3 1+3 25–35 4 Drop cookies* (1 tray) 140 – 1 2 35–45 160 2 – 2 3 25–30 Drop cookies* (2 trays) 140 ...
Page 100 - Yeast dough
Cooking charts 100 Yeast dough Cakes/biscuits (accessories) [°C] [min] +HFC: -HFC: Bundt cake (baking and roasting rack,Bundt cake tin, 24 cm) 1 150–160 – 1 2 50–60 160–170 – 1 2 50–60 Stollen (1 tray) 150–160 – 1 2 55–65 160–170 1 2 55–65 Streusel cake with/without fruit(1 tr...
Page 101 - Quark dough; Sponge mixture
Cooking charts 101 Quark dough Cakes/biscuits (accessories) [°C] [min] +HFC: -HFC: Fresh fruit cake (1 tray) 160–170 1 2 40–50 170–180 2 3 50–60 Apple turnovers/raisin whirls (1 tray) 160–170 – 2 3 25–35 Apple turnovers/raisin whirls (2 trays) 150–160 1+3 1 1+3 25–35 2 Ope...
Page 103 - Savoury dishes; Food
Cooking charts 103 Savoury dishes Food (accessories) [°C] [min] +HFC: -HFC: Savoury flan (1 tray) 220–230 1 – 1 35–45 180–190 – – 1 30–40 Onion tart (1 tray) 180–190 1 1 2 25–35 170–180 – 1 2 30–40 Pizza, yeast dough (1 tray) 170–180 1 2 25–35 210–220 1 – 1 2 20–30 Pizza,...
Page 104 - Beef
Cooking charts 104 Beef Food (accessories) [°C] [min] 10 [°C] Braised beef, approx. 1 kg (oven dishwith lid) 2 150–160 3 2 6 120–130 7 – 2 170–180 3 2 6 120–130 7 – 2 180–190 – 2 6 160–180 8 – Fillet of beef, approx. 1 kg (universaltray) 2 180–190 3 2 6 25–60 45–75 Fillet o...
Page 105 - Veal
Cooking charts 105 Veal Food (accessories) [°C] [min] 7 [°C] Braised veal, approx. 1.5 kg (oven dishwith lid) 2 160–170 3 2 5 120–130 6 – 2 170–180 3 2 5 120–130 6 – Fillet of veal, approx. 1 kg (universaltray) 2 160–170 3 2 5 30–60 45–75 Fillet of veal (pink), approx. 1 kg 1...
Page 106 - Pork; Bacon
Cooking charts 106 Pork Food (accessories) [°C] [min] 11 [°C] Pork joint/pork neck roast,approx. 1 kg (oven dish with lid) 160–170 2 5 140–150 6 80–90 170–180 2 5 130–140 6 80–90 Pork joint with crackling,approx. 2 kg (oven dish) 180–190 2 5 140–160 7.8 80–90 190–200 2 5 ...
Page 109 - Notes for test institutes
Notes for test institutes 109 Test food in accordance with EN 60350-1 (Steamcooking operating mode) Test food Cookingcontainers Quantity [g] 1 2 [°C] [min] Steam replenishment Broccoli (8.1) 1 x DGGL 12 Max. 2 100 6 Steam distribution Broccoli (8.2) 1 x DGGL 20 300 2 100 6 Appliance ...
Page 110 - Menu cooking test food (Steam cooking
Notes for test institutes 110 Menu cooking test food (Steam cooking operating mode) Test food Cookingcontainers Quantity [g] 1 [°C] Height [cm] [min] 2 Potatoes, waxy,quartered 1 x DGGL 20 400 4 100 – 37 Salmon fillet, frozen, notdefrosted 1 x DGGL 20 2 x 150 2 100 ≥ 2.5 ≤ 3.0 (22) Br...
Page 111 - Test food in accordance with EN 60350-1 (oven operating modes)
Notes for test institutes 111 Test food in accordance with EN 60350-1 (oven operating modes) Test food (accessories) [°C] 6 [min] +HFC -HFC Small cakes (1 baking tray 1 ) 150 – 1 2 28–38 160 4 – 2 3 22–32 Small cakes (2 baking trays 1 ) 150 4 – 1+3 7 1+3 25–35 Drop cookies (1 baking ...
Page 112 - Energy efficiency class according to EN 60350-1; - Testing is undertaken using the; Data sheet for household ovens
Notes for test institutes 112 Energy efficiency class according to EN 60350-1 The energy efficiency class is determined in accordance with EN 60350-1. Energy efficiency class: A+Please observe the following when conducting testing: - Testing is undertaken using the Eco Fan heat function. - Selec...
Page 113 - Technical data; Frequency range of the WiFi module; EU Conformity declaration; UK Conformity declaration; manuals and enter the name of the product or the serial number; This; Statement of Compliance; confirms this Miele product fully complies with the; Paul Wright
Technical data 113 Frequency range of the WiFi module 2.4000–2.4835 GHz Maximum transmission power of the WiFi module < 100 mW EU Conformity declaration Miele hereby declares that this oven complies with Directive 2014/53/EU. The complete text of the EU declaration of conformity is available from...
Page 114 - Copyrights and licences for the communication module
Technical data 114 Copyrights and licences for the communication module For the purpose of operating and controlling the communication module, Mieleuses proprietary or third-party software that is not covered by open sourcelicensing terms. These items of software/software components are protected by...
Page 115 - United Kingdom
United Kingdom Miele Co. Ltd., Fairacres, Marcham Road, Abingdon, Oxon, OX14 1TWTel: 0330 160 6600, Internet: www.miele.co.uk, E-mail: [email protected] Australia Miele Australia Pty. Ltd.ACN 005 635 398ABN 96 005 635 398Level 4, 141 Camberwell RoadHawthorn East, VIC 3123Tel: 1300 464 353E-mail: [em...


 Miele WWD380 WCS PWash&Steam&9kg User Manual
 Miele W 1614 Manual
 Miele G 5266 SCVi SFP Active Plus User Manual
 Miele Classic C1 Turbo Team PowerLine - SBAN0 User Manual
![Miele PDR 307 [EL]](https://manualsarea.com/img/product/thumbs/48/ba/fd/bafde84806e8abc8b420f34eaf8fcd6e.webp) Miele PDR 307 [EL] User Manual
Miele PDR 307 [EL] User Manual Miele F 1911 Vi Manual
![Miele PDR 908 [EL MAR 3N AC 400V 50-60Hz]](https://manualsarea.com/img/product/thumbs/48/05/b7/05b705998b251f92b271e908423e1ecb.webp) Miele PDR 908 [EL MAR 3N AC 400V 50-60Hz] Installation Manual
Miele PDR 908 [EL MAR 3N AC 400V 50-60Hz] Installation Manual Miele K 9757 iD Manual
 Miele DG 7140 User Manual
 Miele DG 7240 User Manual
 Miele DG 7440 User Manual
 Miele DGC 4086 XL Manual
 Miele DGC 5080 Manual
 Miele DGC 5085 XL Manual
 Miele DGC 7350 User Manual
 Miele DGC 7370 User Manual
 Miele DGC 7440 AM User Manual
 Miele DGC 7440 HC Pro User Manual
 Miele DGC 7440 HCX Pro User Manual
 Miele DGC 7450 User Manual