Page 2 - SPECIFICATIONS; Applicable battery cartridge and charger; SAFETY WARNINGS; General power tool safety warnings; Save all warnings and instruc-
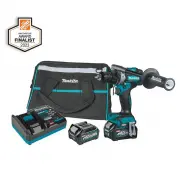
2 ENGLISH ENGLISH (Original instructions) SPECIFICATIONS Model: GFD01 Drilling capacities Steel 20 mm (13/16") Wood Auger bit: 50 mm (2") Self-feed bit: 76 mm (3”) Hole saw: 152 mm (6”) Fastening capacities Wood screw 10 mm x 90 mm (3/8" x 3-1/2") Machine screw M6 (1/4") No load ...
Page 4 - Cordless driver drill safety warnings; SAVE THESE INSTRUCTIONS.; Symbols; Important safety instructions for
4 ENGLISH Service 1. Have your power tool serviced by a qualified repair person using only identical replacement parts. This will ensure that the safety of the power tool is maintained. 2. Never service damaged battery packs. Service of battery packs should only be performed by the manufacturer or a...
Page 5 - FUNCTIONAL; Installing or removing battery
5 ENGLISH For preparation of the item being shipped, consult- ing an expert for hazardous material is required. Please also observe possibly more detailed national regulations. Tape or mask off open contacts and pack up the battery in such a manner that it cannot move around in the packaging. 11. Wh...
Page 6 - Indicating the remaining battery capacity; Tool / battery protection system; Electric brake
6 ENGLISH Indicating the remaining battery capacity Press the check button on the battery cartridge to indi - cate the remaining battery capacity. The indicator lamps light up for a few seconds. 1 2 ► 1. Indicator lamps 2. Check button Indicator lamps Remaining capacity Lighted Off Blinking 75% to 1...
Page 7 - Reversing switch action; Selecting the action mode
7 ENGLISH NOTE: When the tool is overheated, the tool stops automatically and the lamp starts flashing. In this case, release the switch trigger. The lamp turns off in one minute. NOTE: Use a dry cloth to wipe the dirt off the lens of the lamp. Be careful not to scratch the lens of lamp, or it may l...
Page 8 - Adjusting the fastening torque
8 ENGLISH Adjusting the fastening torque CAUTION: Make sure that the dial is clean. Depending on the work environment, foreign objects such as iron scraps or chips may adhere to the dial and cause the personal injury. 2 1 3 4 ► 1. Dial 2. Indicator 3. Button 4. Green light The fastening torque can b...
Page 9 - Electronic function; ASSEMBLY; Installing or removing driver bit/
9 ENGLISH Torque level 22 23 24 25 26 27 28 29 30 31 32 33 34 35 36 37 38 39 40 41 Machine screw – Wood screw Soft wood (e.g. pine) – ø9 x 75 – ø10 x 90 – Hard wood (e.g. lauan) – ø9 x 75 – ø10 x 90 – High speed Torque level 1 2 3 4 5 6 7 8 9 10 11 12 13 14 15 16 17 18 19 20 21 Machine screw M4 M5 M...
Page 10 - Installing hook; Installing driver bit holder; OPERATION; Screwdriving operation
10 ENGLISH Installing hook CAUTION: When installing the hook, always secure it with the screw firmly. If not, the hook may come off from the tool and result in the personal injury. 3 2 1 ► 1. Groove 2. Hook 3. Screw The hook is convenient for temporarily hanging the tool. This can be installed on ei...
Page 11 - MAINTENANCE; MAKITA LIMITED WARRANTY
11 ENGLISH Drilling operation First, turn the action mode changing ring so that the arrow points to the marking. Then proceed as follows. Drilling in wood When drilling in wood, the best results are obtained with wood drills equipped with a guide screw. The guide screw makes drilling easier by pulli...
Page 12 - ESPECIFICACIONES; Cartucho de batería y cargador aplicables; ADVERTENCIAS DE; Advertencias generales de seguridad; Conserve todas las advertencias
12 ESPAÑOL ESPAÑOL (Instrucciones originales) ESPECIFICACIONES Modelo: GFD01 Capacidades de taladrado Acero 20 mm (13/16") Madera Broca de barrena: 50 mm (2″) Broca de autoalimentación: 76 mm (3″) Sierra perforadora: 152 mm (6″) Capacidades de apriete Tornillo para madera 10 mm x 90 mm (3/8"...
Page 14 - GUARDE ESTAS
14 ESPAÑOL 8. Mantenga los mangos y superficies de asi - miento secos, limpios y libres de aceite o grasa. Los mangos y superficies de asimiento resbalosos no permiten una manipulación segura ni el control de la herramienta en situaciones inesperadas. 9. Cuando vaya a utilizar esta herramienta, evit...
Page 15 - GUARDE ESTAS INSTRUCCIONES.
15 ESPAÑOL Símbolos A continuación se muestran los símbolos utilizados para la herramienta. volts o voltios corriente directa o continua velocidad sin carga revoluciones o alternaciones por minuto, frecuencia de rotación diámetro Instrucciones importantes de seguridad para el cartucho de batería 1. ...
Page 16 - Instalación o extracción del; Indicación de la capacidad restante; Sistema de protección para la
16 ESPAÑOL DESCRIPCIÓN DEL FUNCIONAMIENTO PRECAUCIÓN: Asegúrese siempre de que la herramienta esté apagada y el cartucho de batería haya sido extraído antes de realizar cualquier ajuste o comprobación en la herramienta. Instalación o extracción del cartucho de batería PRECAUCIÓN: Apague siempre la h...
Page 18 - Cambio de velocidad; Selección del modo de
18 ESPAÑOL Esta herramienta tiene un conmutador de inversión para cambiar la dirección de rotación. Presione la palanca del conmutador de inversión desde el lado A para una rotación en sentido de las manecillas del reloj o desde el lado B, para una rotación en sentido inverso al de las manecillas de...
Page 19 - Ajuste de la torsión de apriete
19 ESPAÑOL Ajuste de la torsión de apriete PRECAUCIÓN: Asegúrese de que el selector esté limpio. Dependiendo del entorno de trabajo, los objetos extraños como restos de hierro o astillas pueden adherirse al selector y causar lesiones personales. 2 1 3 4 ► 1. Selector 2. Indicador 3. Botón 4. Luz ver...
Page 20 - Funcionamiento electrónico; MONTAJE; Instalación de la empuñadura lateral
20 ESPAÑOL Nivel de torsión 22 23 24 25 26 27 28 29 30 31 32 33 34 35 36 37 38 39 40 41 Tornillo de máquina – Tornillo para madera Madera blanda (Ej. pino) – ø9 x 75 – ø10 x 90 – Madera dura (Ej. lauan) – ø9 x 75 – ø10 x 90 – Alta velocidad Nivel de torsión 1 2 3 4 5 6 7 8 9 10 11 12 13 14 15 16 17 ...
Page 21 - Instalación del portabrocas; OPERACIÓN
21 ESPAÑOL Instalación o extracción de la punta de destornillador/broca de taladro 1 2 3 ► 1. Mandril 2. Cerrar 3. Abrir Gire el mandril en sentido inverso al de las manecillas del reloj para abrir las garras de la prensa de sujeción. Inserte la punta de destornillador/broca de taladro completamente...
Page 22 - MANTENIMIENTO
22 ESPAÑOL 1 ► 1. Aberturas de ventilación Operación de atornillado AVISO: Coloque el selector en el nivel de torsión apropiado para su trabajo. AVISO: Asegúrese de que la punta de destornillador se inserte exactamente en la cabeza del tornillo, de lo contrario el tornillo y/o la punta de destornill...
Page 23 - GARANTÍA LIMITADA DE MAKITA; Ésta Garantía no aplica para México
23 ESPAÑOL NOTA: Algunos de los artículos en la lista pueden incluirse en el paquete de la herramienta como acce- sorios estándar. Éstos pueden variar de país a país. GARANTÍA LIMITADA DE MAKITA Ésta Garantía no aplica para México Consulte la hoja de la garantía anexa para ver los términos más vigen...
Page 24 - Makita Corporation
Some dust created by power sanding, sawing, grinding, drilling, and other construction activities contains chemicals known to the State of California to cause cancer, birth defects or other reproductive harm. Some examples of these chemicals are: • lead from lead-based paints, • crystalline silica f...